You can buy ready covered cord, but with our simple guide you can learn how to make piping in any colour you want. Once you’ve made your piping, have a go at sewing our gorgeous envelope cushion cover with piped edging.
How to make piping
Materials
- Cushion pad measuring 45 x 45cm
- Fabric measuring 50 x 120cm
- Contrasting fabric for the piping measuring 150 x 150 cm
- Piping cord measuring 200cm in length
- Matching thread
- Contrasting thread
- Needle
- Tape measure
- Set square
- Ruler
- Dressmaker’s chalk
- Scissors
- Pins
- Sewing machine
- Zipper foot
Cutting out
For the piping: cut the fabric on the bias by folding your square of fabric in half diagonally and cutting along the fold so you have two triangles.
Bạn đang xem: How To Make A Pillow Cover With Piping? Step-By-Step Guide
Using dressmaker’s chalk, mark 5cm in from the raw edge and then cut along this line. Continue to cut strips until you have enough to go all the way around your cushion.
For the cushion cover: cut out a square measuring 48 x 48cm for the front panel and two rectangles measuring 27 x 48cm and 37 x 48 cm for the back panels.
If you’re using a different size cushion pad, measure the length and width of the cushion. For the width of the cushion add 3cm for a seam allowance and for the length, double this width and add 10cm to allow for the envelope overlap.
Transfer these measurements to your fabric using a ruler, dressmaker’s chalk and a setsquare to get an absolute right angle.
How to make piping
- To join the bias strips together, trim the short ends so they are all squared off. Take two strips and with right sides facing, pin where the short ends overlap at a right angle.
- Use some dressmaker’s chalk to mark a 45 degree angle across the overlapping fabric and machine straight stitch along this line. Trim the excess and press the seam open. Repeat with all the strips until you have one long piece.
- At one of the short ends, fold the fabric under by 3cm and pin in place.
- Insert the piping cord 3cm in from the strip’s folded end and begin folding and pinning the bias strip over the cord lengthways so that the raw edges meet and wrong sides are facing, sandwiching the cord.
- Using a zipper foot, sew along the raw edge of the strip, close to the cord to secure it in place.
How to make the cushion cover
- Take the two back panel pieces, sew a double hem along one of the long edges of each piece. Fold the fabric over by 1.5cm and press, then fold the fabric over the previous fold by another 1.5cm, press and pin in place.
- If you’re worried about using your sewing machine with the pins in, tack the hem before machine straight stitching on the right side of the fabric.
- Pin the piping to the front cushion panel by matching up the raw edges with right sides together. Where the piping overlaps, trim the cord back so that the ends meet and wrap the trimmed cord with the folded end of the fabric. Pin in place.
- Use your zipper foot to straight stitch around the edge of the piping. When you get to the corners, lower the needle and lift the foot to turn the cushion panel making it easier to sew in a curve. Snip into the piping cord’s seam allowance to help the piping cord lie flat.
- With right sides facing, pin and tack the cushion panels together so that the two back panels overlap by 10cm to create an envelope opening.
- Use the zipper foot and a straight stitch on your sewing machine to sew all four sides of the cushion together with a 1.5cm seam allowance.
- Clip the corners, turn right sides out and there you have it!
For a wider border, learn how to make an Oxford pillowcase cover
See our videos of all techniques for how to make a cushion cover
Will you be crafting?
CUSHION COVER WITH PIPING
Learn how to sew professional-looking cushion covers with piping on the edges with this step by step tutorial.
SUPPLIES
You will need
- Fabric – use decorator fabric or cotton quilting fabrics
- Piping – you can use store-bought or make your own piping
- Your square-shaped cushion insert. Purchase a new one or just recover one of your existing ones.
- Regular machine presser foot (All-purpose foot) and Zipper foot
- Ruler
- Scissors
- PinsSupplies to Make a Cushion Cover with Piping
CUSHION COVER WITH PIPING SIZING
Start by measuring your pillow insert’s dimensions. Measure around the curve of the pillow.
Measure your Insert to Make a Cushion Cover with Piping
Cut your fabric with the following dimensions
FRONT – Cut 1 piece of fabric this size
- HEIGHT – Add 1 inch to the height of your pillow for the seam allowance.
- WIDTH – Add 1 inch to the width of your pillow for the seam allowance.
BACK – Cut 2 pieces of fabric this size
- HEIGHT – Add 1 inch to the height of your pillow for the seam allowance.
- WIDTH – Divide the insert width by 2 and add 5 inches (12.7cm) to the width of your pillow
Xem thêm : How To Fluff A Memory Foam Pillow? Comprehensive Guide
Here are the cutting sizes for some common pillow inserts.
| PILLOW SIZE | 14 INCH (35.5CM) | 16 INCH (40.6CM) | 18 INCH (45.7CM) | 20 INCH (50.8CM) |
| FRONT Cut 1 | 15” x 15” (38 x 38 cm) | 17” x 17”
(43 x 43 cm) |
19” x 19”(48.2 x 48.2 cm) | 21” x 21”(53.3 x 53.3 cm) |
| BACK
Cut 2 |
H 15” x W 12” (H38 x W30.5 cm) | H 17” x 13”
(H43 x W33 cm) |
H 19” x W 14” (H48.2 x W35.5 cm) | H 21” x W 15” (H53.3 x W38 cm) |
Cushion Cover with Piping – Cutting Instructions
If you have a non standard sized insert, here is what you will be cutting:
CUSHION COVER WITH PIPING – SEWING
STEP 1 – BACKS
On the WRONG side of the back pieces press over the inner edges by ¼ inch (6mm). Press them over again by ¾ inch (2cm) and stitch across the hems.
If you have a fabric design that is one-directional, then make sure they are both facing up and that you are pressing in the edges that face each other.
Overlap the hemmed edges so the back becomes the same width as the front and baste the top and bottom edges to hold it in place.
STEP 2 – PIPING
Take the front of the pillow and start pinning the piping to the edge. Start at least a couple of inches from one corner or in the center of one side. If your fabric has a directional print the piping join will be the least noticeable at the bottom of the cover.
The stitching on the piping should be in line with our seam allowance which is ½ inch from the edge. The edge of my piping (tape edge to the stitching) was ⅜ inch (1cm) so my piping was pinned ⅛ inch (3mm) from the edge of the fabric.
Stop 1 inch before you get to the first corner. Piping won’t completely bend around a corner so we need to work it in. Carefully clip into the edge of the piping to help it bend.
Make sure you don’t clip into the stitching line of the piping. Notice how the inner edge of the piping wrinkles slightly. This is normal and it will straighten once you turn the finished cover the right way out.
Keep pinning until you get back to where you started. Bend the first end down and then the second end down and over it as shown. Try to keep the ends at a gentle angle to get the neatest finish.
Stitch around the piping with your zipper foot on top of the piping stitching. Use a small stitch length around the curves for greater control.
You will stitch straight across your beginning point where the ends overlap. Once you have finished you can trim the ends.
STEP 3 – JOIN THE FRONT AND BACKS
Put your back on top of your front with the RIGHT sides together and pin around the edges.
Sew the back to the front all the way around close to the piping edge. You will need to use your zipper foot again to get nice and close to the piping.
If you sew on the front of the cover you can just sew on top of your previous stitching line for greatest accuracy.
Xem thêm : How To Decorate A Pillow? Comprehensive Guide
Trim the corners and finish the raw edges with a zig-zag stitch or serger if you have a fabric that frays.
Turn your cushion cover with piping the RIGHT way out and give it a good press.
How To Put In A Zipper For Pillow With Cording
Do you struggle with how to put in a zipper for pillow with cording? Learn how with this detailed, step-by-step video tutorial. You won’t ever struggle with sewing a zipper in a pillow again!
Pillows are a great way to update any room in your home!
Pillows are a quick and easy way to update any room in your home! That’s why I love them! I also love making pillows. For our home and for my clients.
I also love to make pillows with cording around them. Cording adds such a nice custom touch to pillows. For years I made pillows with cording, (click here to see that tutorial), but I always hand-sewed them closed (click here to see that tutorial).
But, then I was stuck with that pillow cover on that pillow form. There was no easy way to change out the pillow cover.
That’s where this tutorial comes in. Today, I’m going to share how to put in a zipper for pillow with cording! Now you can have that custom corded pillow with a zipper!
HOW TO PUT IN A ZIPPER FOR PILLOW WITH CORDING
This post contains some affiliate links for your convenience. Click here to read my full disclosure policy.
MATERIALS NEEDED TO PUT IN A ZIPPER FOR PILLOW WITH CORDING:
Fabric of your choice for pillow and cording – amount needed depends on the size of pillow.
INSTRUCTIONS:
I’ve created a detailed video tutorial to show you how to put in a zipper for pillow with cording. I’ve also written out the steps below the video for you to follow along.
NOTE: It might be helpful to watch these video tutorials first if you’re not familiar with making pillows and cording.
- Cut out the front and back pieces of fabric for your pillow. Both pieces are cut the same size. I like to cut my fabric pieces the same size as my pillow form. For instance, if I’m making an 18″x18″ pillow, I would cut the fabric at 18″x18″. This makes for a pillow cover that’s not loose and baggy on the pillow form.
- Sew cording around all 4 sides of the front piece of fabric.
- Serge all 4 sides of the the front and back pieces of fabric. This will help to keep the fabric from fraying.
- Lay the front piece of fabric that you’ve just sewn the cording around face side up.
- Lay the back piece of fabric face side down on top of the front piece of fabric.
- Mark 2″ from each end of the bottom edge.
- Sew from end of fabric to the 2″ mark on each end of the bottom edges, using a 1/2″ seam allowance. Sewing the front and back sides together. Use a zipper foot, and a medium stitch length.
- Lay the zipper face side down on the cording. With the teeth of the zipper along the cording.
- Sew the zipper into place. Being sure to sew close to the zipper. The zipper needs to be partway open, and the zipper pull needs to be up.
- Pin the other side of the zipper to the back side of the pillow fabric, and then sew into place.
- To make the placket, pin the back side of the fabric next to the cording.
- Open the zipper.
- On the wrong side, sew along the zipper. Making sure to take the pins out as you sew.
- To finish the pillow: With right sides together, pin the other 3 sides of the pillow.
- Sew 3 sides together where pinned, using a 1/2″ seam allowance.
- Turn pillow right side out.
- Insert pillow form.
Yay! You’re done! That wasn’t so hard, was it?
Supplies you’ll need
- Cushion fabric (a medium or heavy cotton is perfect)
- Cushion insert
- Piping
- Concealed zip
- Sewing machine
- Thread
- Loads of pins
Tutorial
- Measure the height and width of your cushion insert, and make a note of these dimensions. Add a 2cm seam allowance, then cut out two pieces of fabric to this size. So for example, if your cushion insert measures 45cm by 45cm, you’ll want to cut out two squares of fabric, each measuring 47cm x 47cm.
- Cut out a long strip of fabric, approximately 5-6cm wide. Ideally, the strip should be long enough to go all around the edge of your cushion, with 20cm excess (so, using my example from step one, it would ideally measure 45cm + 45cm + 45cm + 45cm + 20cm = 200cm). However, this would require a very long piece of fabric! So, if you can’t cut out one continuous piece, it’s totally okay to sew together several smaller pieces until it’s long enough. To do so, use this method.
- With all the fabric pieces cut out, it’s time to pin. Star off by laying one of the large pieces of fabric right side up. Take your long strip of fabric and place it right side down, on top of the larger piece, with the top edges lined up (it’s easiest if you align the corner of the large piece to the corner of the long strip).
- Next, place your piping onto the long strip of fabric and fold over the strip (lengthways), so you basically sandwich the piping in the middle (at this stage, the piping should be pointing inwards to the centre of the cushion). Pin the fabric layers together, so that the piping is securely held in place.
- Move along the long strip and keep pinning it in place, with the piping in the middle, all around the edge of the cushion. When you get to a corner, simply curve the fabric/piping round as tightly as you can and keep pinning along the next edge.
- Eventually, you will get back to where you started. Trim the fabric strip and piping, so that it only leaves a 5cm overlap. Then, simply tuck the end of the fabric strip/piping into part you started at, so it creates a continuous loop. If there are raw edges, fold them inside to prevent fraying. Pin this securely in place.
- With the piping now assembled and pinned in position, you’ll need to sew it all in place. Using a sewing machine, run a stitch all around the edge (keeping it as close to the piping in the middle of the fabric as possible), removing the pins as you go. However – leave one side alone, as you need to add the zip before you sew it closed.
- To add the zip, lay it face down onto the piping that you’ve already pinned in place. Then, pin one side of the zip onto the edge of the cushion (along the same line that you have already pinned the piping down). Feel free to remove some of the original pins as you go, or you will quickly end up with more pins than fabric!
- Once the zip is pinned down, open it fully and sew it securely in place, removing the pins as you go. This line of sewing will secure one half of the zip in place, whilst also sewing the piping together.
- Open the zip and sew the other side of it to the edge of the second large square of cushion fabric. Close the zip.
- Place the two squares of fabric against each other (right sides facing in, so that the piping is sandwiched in the middle) and pin in place. Sew all around the edges (except for the side with the zip). Finally, open the zip and turn the whole cushion cover inside out, through the zip hole.
I’m really glad I decided to make my own piping for this cushion. It was a bit fiddly, but overall it really wasn’t as hard as it first seemed – yet it adds a nice, professional finish. I’ll definitely be trying a DIY cushion with piping detail again soon! – Mike.
CUSHION COVER WITH PIPING – IN CONCLUSION
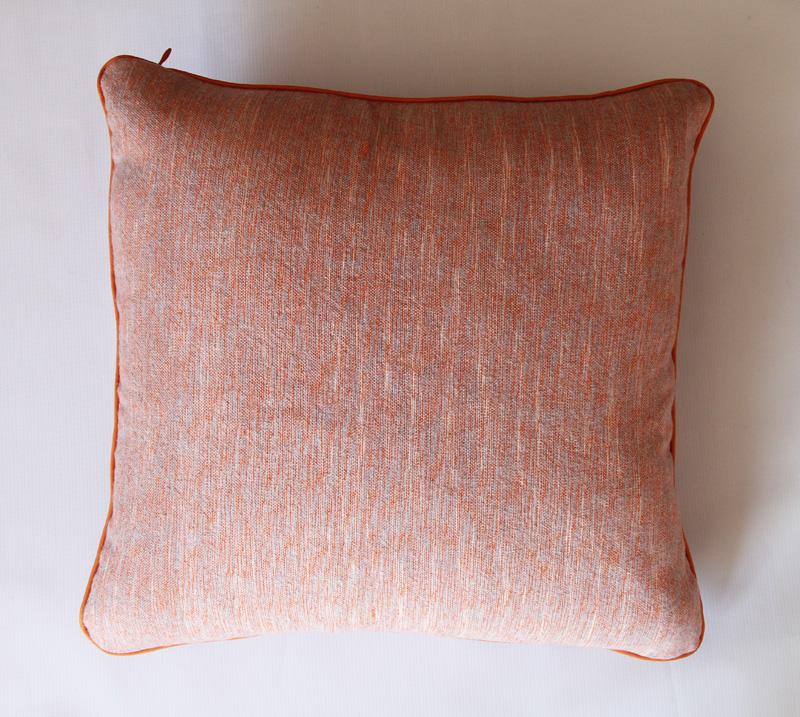
You now have a professional-looking cushion cover with piping that is sure to impress.
Here is a cushion cover with piping where I added a Christmas applique and pom-poms on the corners.
Nguồn: https://iatsabbioneta.org
Danh mục: Pillow


