If you’re looking to make a statement cushion, a knot pillow is a good option. A half yard of fabric is all you need for this adorable craft, which is perfect for those just learning to sew!
What you will need:
- Fiskars RazorEdge Fabric Shears with Easy Action
- A half-yard of a stretchy fabric like spandex.
- machine for sewing
- stuffing
- tube made of cardboard
Instructions:
When it comes time to stuff and tie the knot, the sort of fabric you use will make ALL the difference. When I started knotting, I discovered that jersey knit, especially the organic or less stretchy variety, began to unravel at the seams. Spandex, such as the kind used in dance costumes and swimsuits, should have a glossy, slick quality to it.
Bạn đang xem: How To Make A Knot Pillow? A Perfect Guide For You!
Another thing to keep in mind is that you should always use a zigzag stitch on your sewing machine. The seams will rip if you try to make a knot with a straight stitch since the fabric is too elastic.
You’ll need two 6″ or 7″ wide fabric strips for this project (I made both and I prefer the smaller dimension). To do this, I folded the fabric in half lengthwise and cut both layers to the correct width…. Since you can put the fabric down flat, you won’t have to worry about the fabric shifting while cutting using Fiskars RazorEdge Shears. During transit and storage, the blades are protected by a thumb lock that is easy to open, and their spring-action mechanism softly opens the blades after each cut to reduce hand strain.
Both fabric strips will be sewn together to form a long noodle, so pin both ends of each strip and feed them through your sewing machine.
Take a 3/8′′ or 1/4′′ strip and fold it in half. When you begin sewing your tube, you’ll want to make sure you’ve got a straight line.
Put a stitch or a knot on the tube’s one end.
You’ll need a stiff cardboard tube to feed the stuffing through and a rod/dowel to secure the stuffing in your noodle/tube (I used a broom handle). A present roll tube didn’t work for me when I tried to use it as a cardboard tube (it fell apart shortly after). The firm tube that was holding a little bolt of cloth worked best for me, however a piece of pvc tubing would also work.
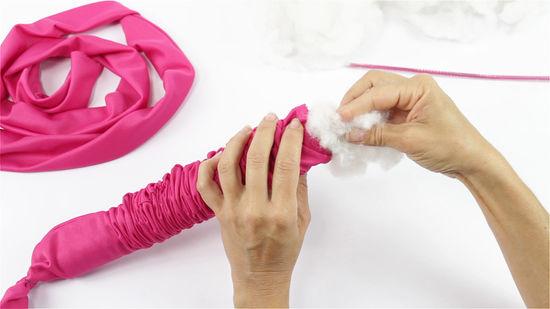
This is the amount of fiberfill that went into one knot cushion. To get the best knots, you don’t need to pack it too firmly.
Once you’ve reached the opposite end of the tube, leave it open.
Make a longer tube (you’ll need 1 yard for 3 loops on each side) or tie a knot (see image below) with only two loops instead of three for the length we made. A simple knot and tuck is all that is needed if you have a spare tube. The ends aren’t going to be seen, so don’t worry about sewing them in.
On this page, you’ll find more information about the wide range of crafting tools from Fiskar’s, including their 50th anniversary Orange-handled scissors. Fiskars has a website and social media accounts, so check them out!
Fiskars has sponsored this post. Ruffled just expresses his personal views. Please thank our sponsors for their support!
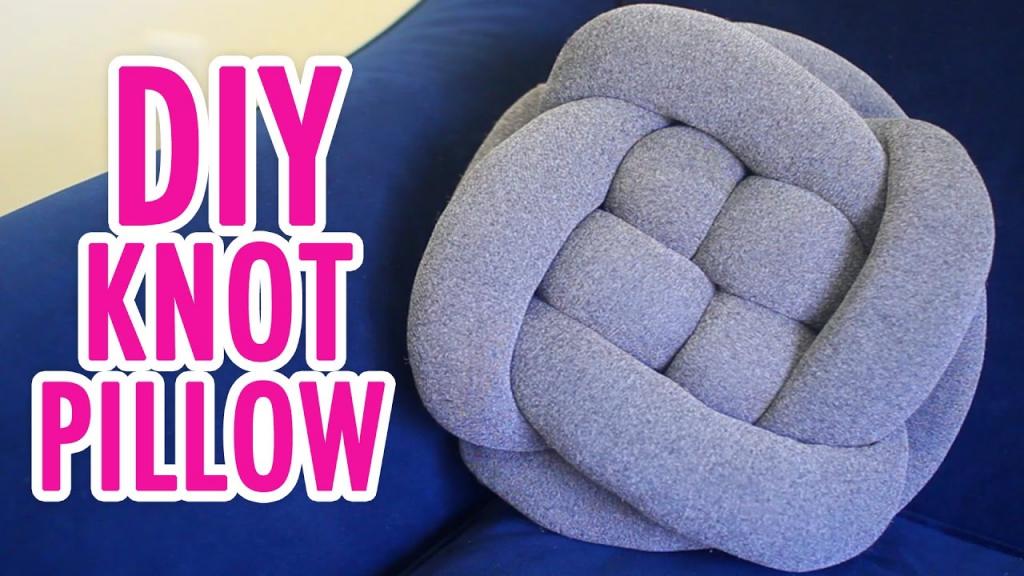
How To Make A DIY Knot Pillow
How to Make a Knotted Pillow — For this season’s most popular fad, knotted pillows, we have instructions! Make your own DIY knot pillow with these simple instructions.
I, Erin, am always on the lookout for a new piece of decor to brighten up my home for spring!
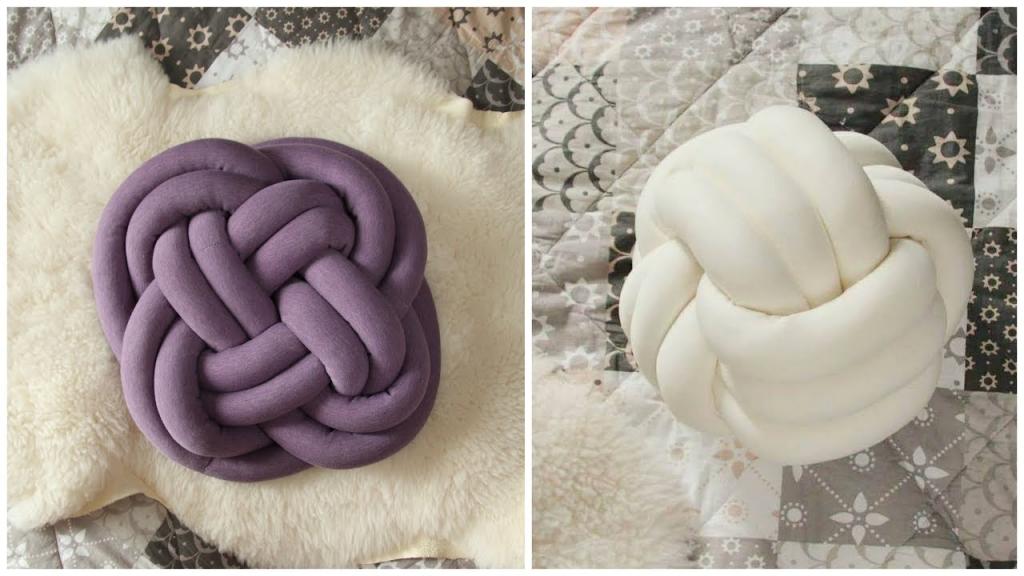
These nautical-themed DIY knot pillows are exactly what I was looking for!!!! Playful designs make them look like fluffy and sculptural bundles of goodness.
For the sofa in the main room, though. Additionally, knotted pillows are a hot new fad.
Grab some flexible knit fabric and poly filling if you’re looking for a small home decor refresher.
In this tutorial, I’ll teach you how to build a DIY knot pillow for your new home décor.
Materials Needed To Make A DIY Knot Pillow
- Knitted cloth that is 14″ wide x the entire length (stretchy fabric)
- Ruler
- The sewing machine
- pins for sewing
- Scissors
- Wrapping a cardboard tube in paper
- Traditionally employed in doll-making, I like the coarse dry fill used in polyester fibers rather than the finer wet fillings. It’s more stable and doesn’t shift around.
Trend Alert Knotted Pillow | How To Make A DIY Knot Pillow
First, cut two strips that are 7 inches wide and as long as your fabric will allow (minimum 54 inches).
Xem thêm : How To Use Breastfeeding Pillow? Comprehensive Guide
If you use a larger number of strips, your knotted pillow will be larger.
Using two strips of fabric, fold each in half to create a sleeve. Ensure that the long way with the right sides is facing the other way around before you start.
To complete the process, pin the two pieces of fabric together.
Using a zigzag or knit stitch, sew the entire length of the fabric. Close the sleeve at one end by sewing down the short side as well.
Using a zig-zag stitch ensures that the stitches will stretch along with the fabric while packing the sleeves.
Insert the fabric sleeve into the cardboard tube at the end.
Pull it out from the other side.
Fold the fabric sleeve back onto the cardboard tube, right side out.
Completely cover one end of cardboard tube with fabric sleeve and secure it with zip ties.
Small chunks of fill can be stuffed in from the other end of the tube.
A ruler or a wood dowel can be used to push it all the way to the other end of the tube, until it hits the cloth sleeves.
Try to maintain a consistent level of fill density throughout the cloth sleeve during stuffing.
Once the entire sleeve is stuffed, either tie a knot or use your sewing machine to sew the open end of the sleeve shut.
Once the knot is made, both ends will be completely concealed!
How to Tie into a Knot
Begin by tying a knot with just one fabric sleeve as shown above.
To “trace” the knot that you just tied with the second sleeve, tie the first sleeve. In order to do so, tuck it under and over as necessary to align the two sleeves.
Adjust the sleeves to form a tight knot after the second sleeve is in. And tuck the four loose ends back inside the pillow so that they’re hidden.
FAQ About Our Tutorial
What’s the final size of this DIY knotted pillow?
This DIY knot pillow will have a diameter of 8 inches if you follow our minimal measurements.
The larger the knot pillow becomes as the length of the knot pillow strips increases, allowing you to fine-tune the size of the knot pillow.
What type of fabric did you use for this knot pillow tutorial?
We made use of cotton that was both thick and elastic. In any case, you’re free to go with whatever kind of elastic material.
Xem thêm : How To Make A Latch Hook Rug Into A Pillow? Step-by-Step Tutorial
Your finished cushion will last longer if you choose a fabric that is more sturdy than the one you started with.
How much does this DIY knot pillow cost?
For the same price as one store-bought cushion, you can simply produce multiple knot pillows in different sizes and colors.
What sort of fabric you choose will affect the price.
My favorite feature of this project, in addition to the finished DIY knot cushion, is that it doubles as a volleyball for spontaneous game night matches in the living room!
How To Make A Knot Pillow For Beginners
Step #1. Design
Seeing a knot cushion, you might believe it’s a difficult project to complete. Preparing and planning the materials in advance, on the other hand, will make the process go much more smoothly. To begin, cut two strips of fabric and fold them in half each time you want to cut them.
Make a sleeve by pinning the top and bottom layers together. It’s important that you have the ability to sew by hand or using a machine. Zigzag stitches are wonderful, but you may also use knit stitches for this pattern.
Step #2. Sew
Sew the entire length and short side of the fabric with a 3/8-inch seam allowance. You’ll be able to secure one end of the project this way. A zigzag stitch is the greatest option for this project because it makes stuffing easy.
Pull the other end of the sleeve out after you’re satisfied with the stitch quality. With the correct side out, refold it onto a cardboard tube. Make sure the cloth sleeve is completely gathered on one end before filling the pillow.
Step #3. Stuff
It is possible to begin stuffing your pillow at the opposite end with polyester fiber-fill, making sure that you press each piece toward the far end so that you finish up with an evenly distributed filling. Once the stuffing is done, bind the sleeve with a knot.
Instead of tying a knot, you can stitch the exposed end. The knotting will cover both ends of the cushion, so you can finish it in any way you choose at this stage. The sailor knot can be found in a variety of styles online, which you can use to tie the pillow.
Step #4. Knot
First, tie a knot in one fabric sleeve, and then use the second to follow the first. Doing so requires nothing more than paralleling the sleeves of your second shirt by tucking them under and over your first. One ornamental pillow’s unique form and dimensions can be attributed to this single factor.
Adjust the two sleeves on your knot cushion once it’s finished to make sure it’s snug. To avoid a messy appearance, tuck the four ends you’ll have at the end of the project into the rear. The knot cushion is all that’s left to do!
What Is A Knot Pillow?
This type of throw pillow is known as a knot pillow because you tie it into a knot. Makes a terrific centerpiece for any room or space thanks to its distinct design. The great thing about this knotted tube pillow is that it can be used as a cushion or support on the couch.
How To Make A Knot Pillow Cover
The knot pillow can also be made with a knotted cover. A great option for individuals who frequently change the style of their pillows is this one. This time, you won’t be stuffing a liner.
Step #1. Position
Cut your cloth to three times the size of your pillow and set it aside. Take a measuring tape to your pillow and add three to the height and width to be sure. Then, insert your pillow form in the middle of the fabric with the wrong side facing up.
Step #2. Fold
The top and bottom edges of the cloth should be folded over the cushion shape. Next, fold the fabric’s left and right sides into a point. To form a triangular shape, fold the top and bottom edges of the fabric inwards toward the middle.
Step #3. Tie
Fold the left and right edges of the fabric over each other so that you have two pointed shapes. The knot pillow cover gets its name from the way the ends are tied in a square knot. Lastly, secure the knot by tucking the loose ends beneath it or making a second knot for more security and style.
Conclusion
Not only is a knot pillow a great conversation starter, but it’s also an eye-catching ornamental pillow. And the best part is that anyone can quickly learn how to build a pillow with knots! To begin, just stitch two fabric sleeves together and fill them with polyester fiber-fill before pressing them to the desired size.
Once the tubes have been completed, tie a sailor knot with one of them and you’re done. The second sleeve should be tucked into the knot, and the two sleeves should be aligned with each other. It’s as simple as hiding the ends of the pillow’s fabric towards the back.
A knot pillow cover can also be made. The goal of this project is to create a square knot by placing a pillow form on top of a fabric piece and tying both ends together. Switching out pillow covers has never been easier thanks to this design.
Nguồn: https://iatsabbioneta.org
Danh mục: Pillow


