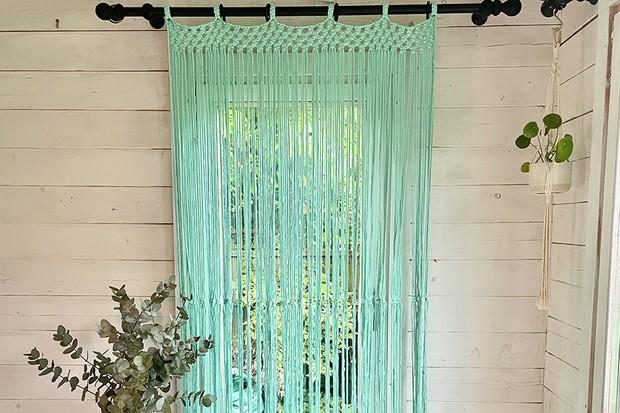
A number of products, including planters and panels, can be made using the knotting technique known as macrame. Learn how to make macrame curtains without getting bogged down in knots by making this curtain.
- How To Hang Curtains From Ceiling? Comprehensive Guide
- How To Replace Vertical Blinds With Curtains? Step by Step Instructions
- How To Tie Back Curtains With A Tassel? Complete Step-by-Step Guide
- How To Calculate Yardage For Curtains? Step by step guide
- How To Store Curtains? Everything You Need to Know
Using the ropes that hang from the top, the rest of the curtain is tied in a knot. Because of this, it is great for hanging on closet doors or other areas where you want to keep your belongings accessible but also somewhat obscure the view. Make a long curtain into a room divider.
Bạn đang xem: How To Macrame Curtains? Comprehensive Guide
Materials and Equipment needed are:
- scissors
- Approximately 50 to 150 yards of 6mm cotton macrame rope
- 1 wood dowel or smooth branch, no thicker than 1 inch
To make a macrame curtain, these are the procedures to follow after gathering the supplies.
Step #1: Cutting the Rope
Due to the fact that curtain sizes vary depending on the application, you’ll have to do some math. There are two critical aspects to consider when it comes to covering a gap: its breadth and length.
After that, you’ll need to cut the design into twelve sections, each of which will be 12 inches wide. Fine-tune size by modifying spacing between each one if necessary.
These are the measurements for a 30 inch-tall window curtain. If you’d want to shorten or lengthen it, be sure to take note of the supplementary instructions.
The formula for a 12-inch wide panel is as follows:
- a total of 108 inches
- Four cuts of 92 inches
- Six cuts of 84 inches
Use these cuts to make as many panels as you need.
If you’d prefer a shorter curtain, simply cut off the extra rope at the end of the project. You can also figure out the difference and subtract it from your bill. For each rope, multiply that by two and subtract the result from its overall length.
If you want to build a longer curtain, subtract 30 inches from the total length required. Add the result to each of the previously mentioned cutting lengths, then divide the result by two.
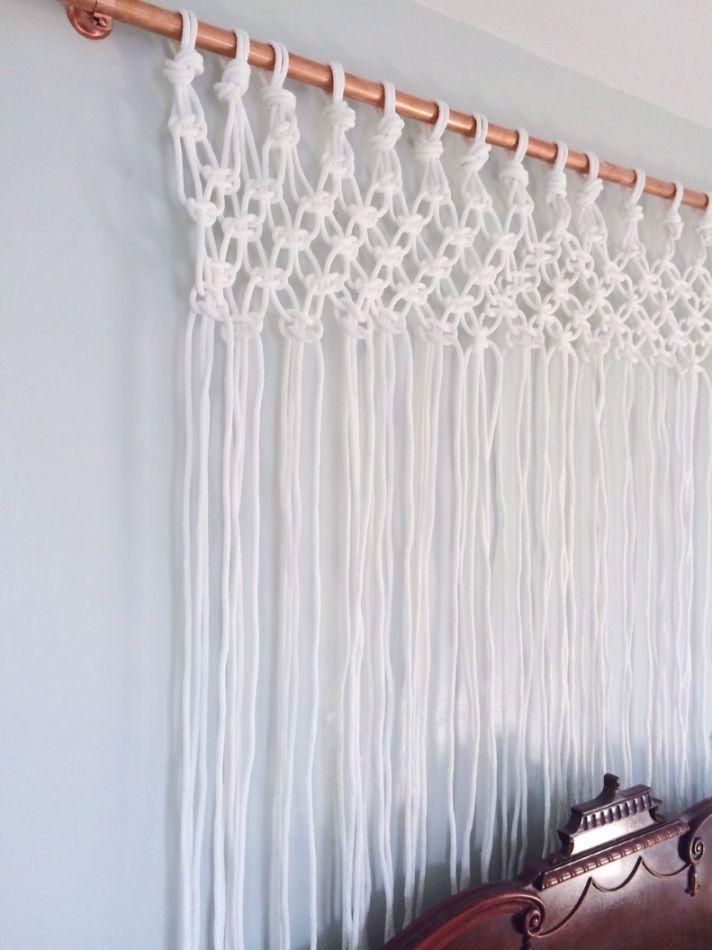
Step #2: Attaching the Ropes to the Rod
Fold each piece of rope in half and tie a lark’s head knot to link it to the hanging rod. Draw the ends of the loop together and over the rod to secure it.
If you’re making a curtain with an odd number of panels, start with the two longest ropes and center them on the pole. You can use two medium-length and three short-length ropes, depending on your preference.
You can either work your way right or left by starting with a short rope and working your way up to a long rope and back down to a short rope after you have reached the end of the rod.
A lark’s head knot can be used to tie the rope to the branch. The ropes should be spaced around twelve inches apart.
Step #3: Tying Square Knots
Once you’ve learned the method, remembering the pattern for this curtain is a breeze thanks to the use of just left-facing square knots.
The first four strands of rope should be separated first. Using the left rope, bring it under the right rope and then over the center two filler ropes.
Next, pass the right rope through the loop made by the first rope and beneath the two ropes in the center. When you accomplish this, the right rope crosses across the left loop.
Bring the right rope under two and over/through the left rope. Once you’ve reached a snug knot below the lark’s head, begin tightening the ropes up to roughly an inch. By now, you should be able to tie a square knot in two with no problems.
Make a simple knot by putting the left rope beneath and over the two middle ropes.
As a last step, carry your rightrope over the middle ropes and then through the loop of the left rope.
Right under two and over one, then left under two and over one, right under two and over one, and so on.
Xem thêm : How Much Does A Curtain Cost? Everything To Know!
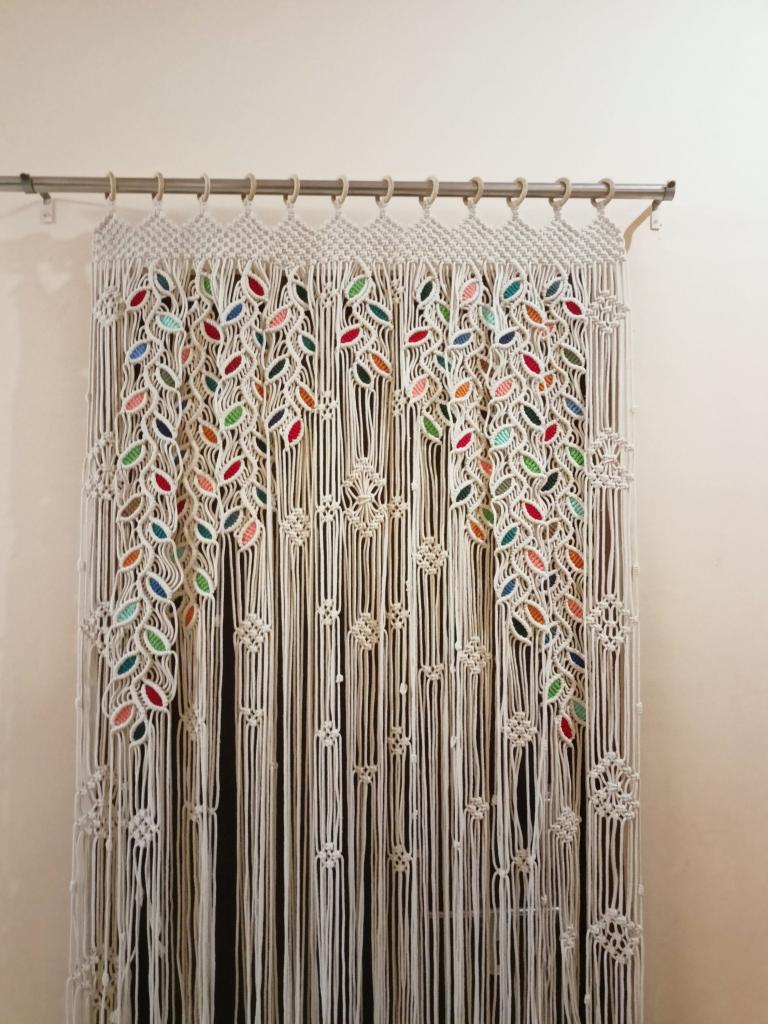
Make as many rows of knots as you need to achieve the desired effect
Step #4: Tie the Last Row of Knots
Add one more row of knots diagonally from the left to the center and then the right. Always work in groups of four and provide three to four inches of space between each set of left-facing square knots and those above them when tying them.
It’s just like adding another panel to the curtain.
Step #5: Trim the Rope Ends
After you get the curtain at the right height, trim the rope ends so that they are even. It’s up to you whether you want to untwist the ends or leave them as is.
The curtain is now ready to be hung! To hang your curtain, you’ll need extra rope or brackets. While operating from a branch can be challenging, this adds to the rustic appeal. The knots and panels can also be spaced differently.
Using macrame to cover a window or door without blocking the light is a great way to provide some seclusion! In order to improve an opening and even provide some protection, this DIY macrame curtain is an excellent option.
You can make panels, pots, and so much more with macrame, a knotting art technique. This curtain has a tiny portion of knots at the top, and then the ropes dangle down to form the rest of the design. You may use this in places like closet doors, where you want to keep things accessible but still partially conceal the view, making it ideal for this purpose Even a large curtain could be used to partition a room.
Learn how to macrame without getting yourself in knots by making this curtain.
What You’ll Need
Equipment / Tools
- Scissors
Materials
- Approximately 50 to 150 yards of 6mm cotton macrame rope
- 1 wood dowel or smooth branch, no thicker than 1 inch
Choosing Supplies
Macrame Rope
There are numerous designs and thicknesses of macrame rope, and while all will work, the results will vary.
Easy to work with, this twisted cotton is also incredibly soft. Untying your knots and retying them can sometimes cause the ends to tear a little. Fortunately, you can always trim the ends when you’re done.
You’ll need 6mm rope for this macrame curtain to match the gauge. In order to have a consistent length of rope, you’ll need to use a different thickness of rope.
Hanging Rod
We chose a smooth, mostly straight branch big enough to span a window or standard door to give this a more natural appearance. To hang it without brackets, you can either use a wooden dowel rod or a stout tension rod.
If your branch or hanging rod has a diameter greater than or equal to 1 inch, you need increase the length of your rope by a few inches.
Cutting the Rope
You’ll have to perform a little math to figure out what size curtains you need because they come in so many various sizes. But don’t be alarmed! You don’t have to do any of the arithmetic yourself. The size of the aperture you’re trying to conceal and the length of the curtain are the most crucial considerations.
Panels of twelve inches broad form the basis of this design. The more you use, the more precise your measurements will be.
For a 30-inch-long window curtain, these specifications are appropriate. Follow the additional instructions for adjusting the length.
For one 12-inch wide panel:
- For a single 12-inch-wide panel, the formula is as follows:
- A 92-inch-long piece of wood
- Sixty-eight inches in length
If you need more than one panel, simply repeat these steps for each one.
Altering the Length
The easiest way to make a shorter curtain is to cut the excess rope when you’re done. You can also subtract the difference by measuring and subtracting. Then multiply that by two, and deduct the result from the total length of each rope.
To get a longer curtain, subtract 30 from the overall length. Add the result of doubling the result to each of the above-mentioned cutting lengths. So if you want an 80-inch curtain, take 30 inches off the length and multiply by two to get 50. Double that, then add a further 100 inches to each rope cut.
Attach the Ropes to the Rod
Use lark’s head knots to secure each rope to the hanging rod once it has been folded in half. Once you have the center over the rod, tighten the loop with the ends.
Xem thêm : How To Hang Curtains And Sheer? Comprehensive Guide
Start with the two longest ropes and center them on the pole when constructing a curtain with an odd number of panels. On each side, start with two medium-length ropes and end with three short-length ropes.
Using an even number of panels, start with a short rope at its center and move either to the right or to the left as follows: three short, two medium, two long, two medium, three short.
Set the ropes at a distance of twelve inches apart.
Add one section of rope at a time to keep the ropes and panel portions from getting mixed up. Working with the rod dangling at shoulder height is preferable to reclining flat.
Tying Square Knots
Once you’ve mastered the knotting technique for this curtain, it’s a snap to recall the pattern.
To begin, cut the rope into four equal lengths. Make a loop with your left rope, then bring it over the middle two filler lines and under your right rope.
Right after that, bring your right hand under and through the first two ropes, and then under and through the first rope’s loop. In this case, the rope on the right is actually going over the left loop.
Tighten the ropes until they are approximately an inch below the knots on the lark’s head. It’s time to get started on the square knot.
Bring the left rope over the right rope and beneath the two middle ropes to finish the knot.
Finally, pass the right rope through the loop of the left rope and over the center ropes, bringing it under the left rope this time.
Right under two and over one, left under 2 and under 1, left 2 and 1 and over 1 are the knot’s basic components.
Repeat With the Following Groups of Ropes
Repeat the previous step to create a left-facing square knot with the next four ropes.
Each set of four ropes on the panel should be repeated this way. Take a step back and ensure that all knots are of equal height.
Start the Next Row of Knots
Set aside two ropes and work with four others. One knot will produce two ropes, while the other will produce another two ropes. Start the second row by tying a square knot a few inches lower than the first.
Knot four ropes together across the row at a time. You will get two extra ropes at the conclusion of the course.
Add More Rows of Knots
Knot a new row with two ropes set aside at the beginning and end of the row. This will create a triangle of square knots that face leftward. Each row should have the same spacing.
Tie the Last Row of Knots
Another row of knots should be added, this time going diagonally from the left to the middle. Tie the left-facing square knot so there is a gap of three to four inches between the first and second square knots.
Add Panels for Width
Repeat the procedures above to add the remaining panels to the curtain.
Trim the Rope Ends
Trim the ends of the rope to ensure that the curtain is hanging at the correct height. It’s up to you whether or not you want to untwist the ends or leave them as they are.
Hang Your Macrame Curtain
Extra rope or brackets can be used to secure your curtain in place. Working on a branch might be challenging because of the uneven surface, but that adds to the rustic appeal. The knots and panels can also be spaced differently.
The curtain isn’t your cup of tea? This design can also be used as a wall hanging, or you can modify another wall hanging pattern into a curtain!
Conclusion
As far as how to make a macrame curtain goes, this is it. Using only a few supplies and tools, you may complete these simple tasks in the privacy of your own home.
Nguồn: https://iatsabbioneta.org
Danh mục: Curtains


