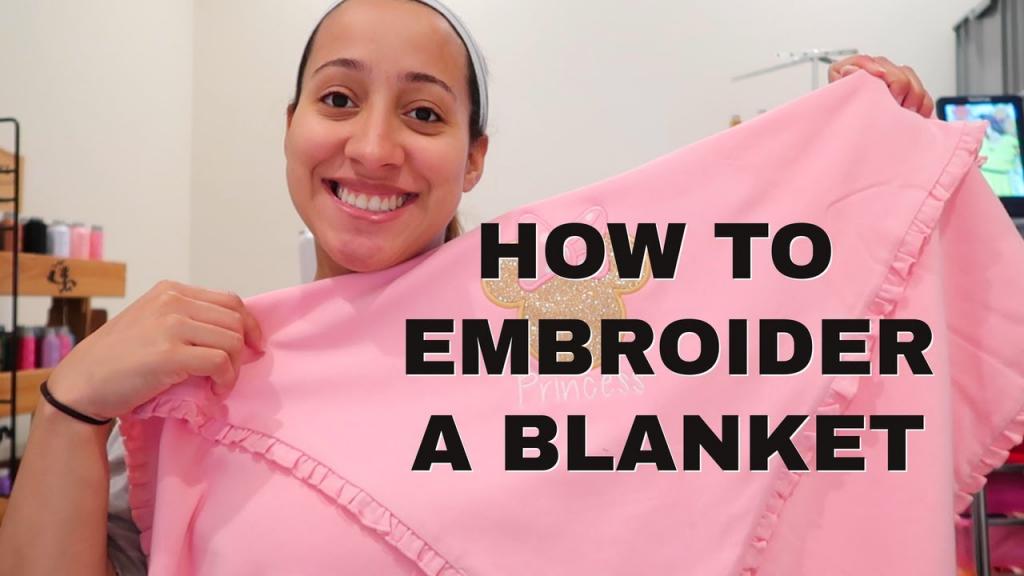
An embroidered blanket is a thoughtful and practical present for any occasion, but especially for a new baby or a wedding.
- How To Make Faux Fur Blanket Soft Again? 4 Easy To Follow Steps For You!
- How To Dry Weighted Blanket? A Perfect Guide For You!
- How To Finish A Granny Square Blanket? Step by Step Instructions
- How To Clean Crochet Blanket? A Step-by Step Learning Guide
- How To Crochet A Round Blanket? Easy Step-by-step Guide
In less than an hour, I can take one of those luxuriously soft The Big One throw blankets from Kohl’s and customize it with an embroidered name or monogram.
Bạn đang xem: How To Embroider A Blanket? Comprehensive Guide
Or, I may stitch a baby’s name into a quilted heirloom blanket, creating a keepsake that will be treasured for generations.
Blankets, which come in a wide variety of sizes and forms, are enjoyable projects for machine embroidery. Inquiring minds want to know more!
Blanket Embroidery Supplies
Please see below the materials required to complete this task:
- Embroidery hoops, machines, and patterns
- Superb throw blanket
- Cut-away, tear-away, and wash-away stabilizers (To learn how to select, scroll below.)
- Fluffy blankets with a water-soluble coating (not paper) on top.
- The top thread was 40wt polyester, and the bobbins were pre-wound white thread.
- Thickness: 75/11 for needlework
- The use of a washable marker or other marking device
- Stabilizing pins or other devices (if not hooping) …and a pair of scissors
- Fabric glue that is only temporary (optional)
What is the best stabilizer for a blanket?
With a lower stitch count and a less dense design, even slightly stretchy blankets, like my fluffy Big One up there, can handle tear-away stabilizer.
The intricacy of some patterns might make it difficult to pick out individual bits of tear-away stabilizer, which is a disadvantage of the product. Piece & Stitch stabilizer is my go-to in these scenarios because it can be easily removed by tearing or washing.
Now, you will likely need a cut-away or no-show mesh stabilizer if your blanket is particularly elastic or of poor quality and/or you are embroidering a dense, high stitch count design.
During and after embroidery, the blanket will not stretch or distort thanks to the firmness of the cut-away stabilizer. When using cut-away stabilizers, the embroidery design will not pucker even after several washes.
However, cut-away stabilizer has the disadvantage of remaining on the back of your blanket once the embroidery is completed.
Therefore, if tear-away doesn’t do it for you and leftover cut-away doesn’t appeal to you, here are some alternatives for blanket embroidery:
- Consider using a stronger wash-away stabilizer, such Sulky Ultra Solvy, which dries to a film-like consistency.
- Try a tear-away stabilizer with more bite, like Sulky Stiffy.
- To reduce swaying, hoop the blanket rather than float it. If it is floating, make sure it is very firmly secured.
Make sure the design doesn’t pucker or curl if you use tear-away or wash-away when you should be using cut-away if the blanket will be washed.
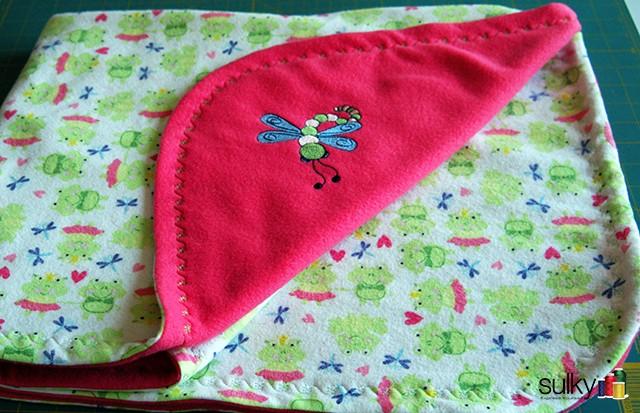
Fuzzy Blankets Need a Topper
For the best results when embroidering on fuzzy blankets (minky or fleece throw blankets, for example), use a water-soluble topping such as Sulky Solvy to prevent the stitches from disappearing into the fabric’s nap.
After the job is done, the topping is rinsed (or torn) off.
Design Selection
When it comes to a plush, fluffy blanket, not all patterns will do. Blankets devoid of fluff and stretch allow for a wider range of creative expression.
Running stitch patterns disappear entirely on fluffy blankets, and very dense patterns might pucker the fabric and alter its feel.
Xem thêm : How Many Chain Stitches For A Blanket? All Questions Answered!
Low- to medium-stitch-count appliques, monograms, names, and fill-stitch designs work great.
If you have a particularly fluffy blanket, the knockdown stitch is another option for keeping your motifs from becoming lost. To embroider on top of the fluff, simply tack it down with this. See an actual robe-wearing example down below!
How to Embroider a Blanket – Tutorial
Let’s stop dancing about the issue and get down to brass tacks, shall we?
I’ve included two galleries of images below. Both include the personalization of a blanket in some way, whether it be with embroidery or a monogram.
Just keep in mind that you can adapt this lesson to your specific type of blanket by using the aforementioned suggestions.
1. Prepare the Blanket.
It’s recommended that you prewash your blanket before using it. Embroidering on preshrunk fabric prevents frustration down the road.
Then, using a combination of vertical and horizontal lines, indicate the precise center of the area where the name or design will be placed. To make hooping easier in the future, it is best to extend the lines vertically and horizontally further than I did in the image above.
Paper templates can be used as a sample when deciding where to insert designs. (For more on this topic, see the section on central embroidery designs.)
2. Hooping vs Floating a Blanket for Embroidery
Determining now whether or not you can hoop your blanket or will need to float it.
Hooping shouldn’t be an issue as long as your blanket isn’t too thick. I prefer using hoop whenever possible since it provides greater structural support for my works in progress. Hula hooping helps me avoid puckering and unintentional slippage.
However, you might need to float your blanket if it’s particularly thick.
A. Hooping a Blanket
Press the stabilizer into the back of the blanket after spraying it lightly with a temporary fabric adhesive (such as Odif 505 or quilt basting spray).
Spray isn’t required, but it does make for a stronger bond between the layers and an easier hooping process.
Choices like as sticky tearaway or fusible tearaway stabilizers can also be made to aid in securing the blanket to the stabilizer (not a great idea for fluffy blankets). If you decide to use an adhesive, make sure it won’t harm the blanket’s fibers by testing it out first.
Carefully hoop the layers once you’ve placed the water-soluble topper (if used) on top of the blanket. Place the plastic template over the hoop so that the center marks match up with the center of the designated blanket.
You can float the water-soluble stabilizer on top of the hoop if you are having trouble hooping the blanket and stabilizer together.
Take a look at my machine embroidery hooping lesson if you need some guidance.
B. Floating the Blanket
As an alternative to using temporary fabric adhesive spray, I prefer to use sticky stabilizer when floating blankets outside the hoop.
Xem thêm : How Much Does An Alpaca Blanket Cost? Everything To Know!
Hoop the sticky stabilizer and peel off the protective paper to expose the sticky side for use. Scoring the edges with a pin makes it simple to unstick the layers.
Last but not least, place the blanket on top of the adhesive stabilizer and press firmly.
If you decide against using sticky stabilizer, you’ll need to come up with a solution to keep a floated blanket from sliding around on the stabilizer as you work. For inspiration, consider these six methods of floating embroidered fabric.
3. Set Up the Machine
The next step is to upload your design to the machine.
When monogramming a baby blanket or creating a personalized gift, you can use the machine’s built-in letters if they are available. (If you’re in need of some variety in your font selection, here are 30 free embroidery fonts to try.)
Since I load my blankets with the widest part towards the left side of the machine, the patterns will need to be flipped.
Stitching machine instructions suggest loading an embroidered hoop next. Put the water-soluble stabilizer on top of the blanket now if you didn’t hoop it before.
To keep the topping in place, use pins or a small amount of adhesive spray or water applied around the edge.
The presser foot should then be lowered. Verify that your needle and top and bottom threads are the right sizes and that you have the right colors.
Using the touchscreen, align the machine’s presser foot with the design’s center.
Next, sew your own blanket with an embroidered pattern.
4. Finishing Up
Take your blanket out of the hoop once you’ve finished embroidering it. Any hoop marks can be washed away with water or Magic spray sizing.
Disconnect the stabilizer. If you’re going to use cutaway, this implies you should remove the stabilizer from the reverse side while leaving a thin border around the artwork. Another option is to remove the stabilizer by tearing it off or by washing it away. When removing, be gentle as vigorous tugging can cause stitches to come loose.
If you embroider and forget to cut the jump stitches, do do now.
Embroidered Blanket: Done!
That sums it up nicely!
Making personalized baby blankets as gifts is one of my favorite pastimes (for more embroidery baby gift ideas, read on).
With any luck, you’ll find this blanket embroidery tutorial useful for creating your own unique blankets.
Methods for Embroidering a Blanket
Nguồn: https://iatsabbioneta.org
Danh mục: Blanket


