Are you in the market for a new bed, or are you looking to replace an existing one? Build the frame yourself and save money. Even though it’s a large project, it’s not difficult to understand.
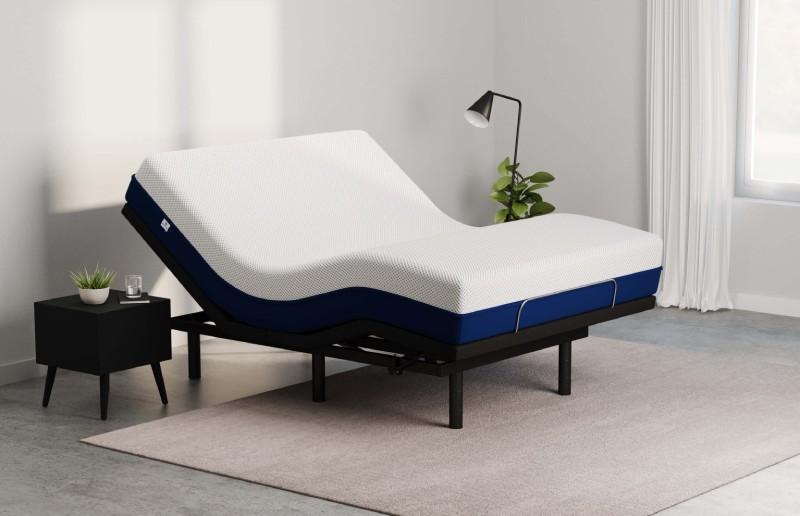
You can choose from a wide range of options, but we prefer floating bed frames because they’re so minimalistic. However, if you’d like to learn how to build a floating bed frame from scratch, check out the lessons below.
Bạn đang xem: How To Build A Floating Bed? Comprehensive Guide
Before You Begin
The following building plans are for a 60 x 80-inch Queen-sized bed, but they can be adapted to fit any bed size. This may be accomplished by simply lining up all of your center boards and support blocks on both the bottom platform and the upper framework before you begin building the structure.
Self-tapping screws that don’t require pre-drilling should be used when joining the two frames. Standard screws, on the other hand, can be used if the holes are pre-drilled with the proper bit. If you don’t, you run the danger of splitting the log.
Safety Considerations
A miter saw and a circular saw will be used in this project, both of which have the potential to be hazardous. When working with these tools, you should only do so if you know how to properly use them and have the proper safety equipment. Always safeguard your eyes and ears.
What You’ll Need
Equipment / Tools
- 10-inch miter saw with a compound blade
- Saw with a circular blade
- hammer impact
- Measurement with a tape
- Pencil of Carpenter
- a straight line of increasing speed
- a pair of goggles
- Squaring off
- a chalk line
- C-clamps, pipe clamps, and other woodworking clamps (optional)
- straight lumber or an 8-foot spirit level (optional)
Materials
- Self-tapping 2 1/2-inch wood screws
- Self-tapping 1 5/8-inch wood screws
- Adhesive for wooden surfaces
- Two-by-six timber
- 2 x 4s of wood
- A sheet of 3/4″ plywood
- Adhesive for construction
Instructions
Cut the Lumber for the Base Frame
Use a miter saw to make the following cuts in your lumber:
-
-
- Two 48-inch long 2x6s
- 56 1/2-inch length of 3 x 2×6
- six 22 1/2-inch-long 2x6s
- 10 x 11-inch 2x4s
-
Cut the Lumber for the Top Frame
Cut your lumber to the following dimensions with a miter saw:
-
-
- Two 60-inch-long 2x6s
- 78-inch length of 3 x 2×6
- 10 x 2x6s with a 28 1/2-inch spacing
-
Cut the Plywood for the Top
Cut two sheets of plywood to 40 1/2 x 60 inches each using a circular saw. You can use a chalk line to mark your cut, or you can clamp an 8-foot straight edge—like a straight piece of lumber or a spirit level—onto the plywood to help guide the circular saw. If you’re new to using a circular saw, utilizing a straight edge to guide the saw will help you get a more precise cut.
Assemble the Base Frame
Make a mark at 23 1/4 inches on the top edge of one of the 48-inch boards, measuring from the end of the board. Mark the face of the board with a speed square and draw a straight line parallel to it. Mark an X on the outside of the line, on the opposite side from where you’re pulling the tape.
Mark the 48-inch board with a framing square and transfer the mark to the second board by laying it edge-to-edge with the other 48-inch board. The central support board will be located here.
Make sure that one of the 48-inch boards has a 56 1/2-inch board attached to it. The end of the 56 1/2-inch piece should be held flush to the top and outside edge of the 48-inch piece by resting its edge on the face of the 48-inch board. It’s time to attach the 48 and 56 1/2-inch boards to each other with two 2-1/2-inch self-tapping wood screws.
Using another 56 1/2-inch board, repeat these processes on the other end of the 48-inch board.
Make an X with the edge of the third 56-1/2-inch board, which serves as the center support board. Check to see that the board’s edge is flat with the 23 1/4-inch straight line and the 48-inch board’s top edge. Drive two 2 1/2-inch self-tapping screws through the back of the 48-inch board and into the end of the center support board at the bottom.
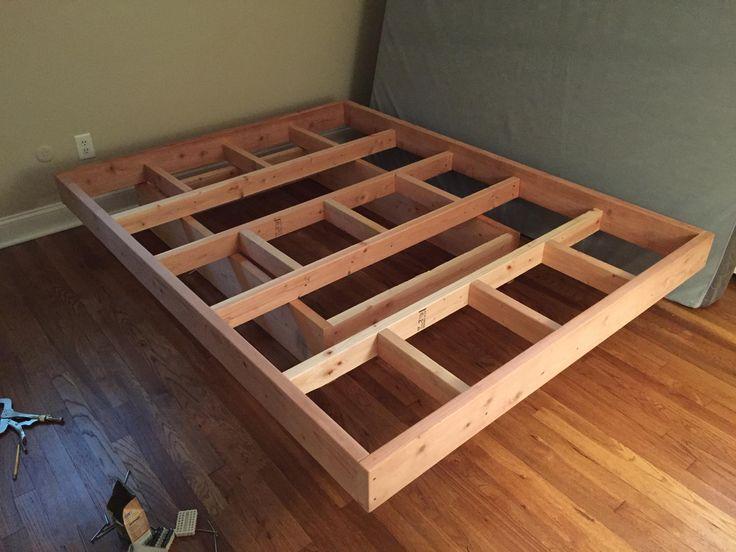
Install the Base Frame Blocking
For each of the 48-inch boards, measure along the top edge of the 56-inch board affixed to it and mark it every 13 1/4 inches. Put each of these points with a speed square, then draw a perpendicular line across the board and mark an X on the other side of the line from which you took your tape measure.
This process should be repeated on the other side of the frame and the center support board. Your support blocks will be placed here.
Place the edge of one of the 22 1/2-inch boards (the blocks) on one of the outside 56 1/2-inch boards that you have made an X on before. The edge of the block should be flush with the 13 1/4-inch straight line and the 56 1/2-inch board’s top edge. Screw the 56 1/2-inch board to the end of the block with two 2 1/2-inch self-tapping screws driven through the rear of the board.
Xem thêm : How To Use Neem Oil For Bed Bugs? Step by Step Instructions
To secure the other end of the block, place it on the center support board’s line and X. Attach the 56 1/2-inch board to one side of the block with two screws—one on top, one on the bottom—and attach the other side of the block with a single screw through the center of the other side of the block.
For each of the six blocks, repeat the above procedures.
What Is Toenailing?
Toenailing is the process of using screws or nails driven at a 45-degree angle to secure two boards that are perpendicular to one another.
Install Vertical 2x4s Onto the Base Frame
Put a 2×4 in each of the four corners of the frame where the three 48-inch boards meet the two 56-1/2-inch boards. Place the 2x4s upright so that they stick out 5 1/2 inches above the frame. Drive two screws through each 2×4 into the 48-inch boards by holding the 3 1/2-inch face against the 5 1/2-inch face of the 48-inch board.
After anchoring six 2x4s to the inside corners of each block, secure the remaining 56 1/2-inch boards to the blocks.
Tip
Screw the 2x4s diagonally from each other, staggering the screws as you go. Drive one screw into the board’s upper left corner and the other into the board’s lower right corner, for example. The wood will not split as a result of this action.
Assemble the Top Frame
Make a 29 1/4-inch mark on the top edge of one of the 60-inch boards by measuring from the end of the board. Mark the face of the board with a speed square and draw a straight line parallel to it. Mark an X on the outside of the line, on the opposite side from where you’re pulling the tape.
Then use a framing square to transfer the mark from the first 60-inch board to the second 60-inch board. The central support board will be located here.
One of the 78-inch boards should be attached to the outside of one of the 60-inch boards. Using the 78-inch board as a support, place the end of the board flush on top of the 60-inch board and the outer edge flush with the top of the board. Drive two 2 1/2-inch self-tapping wood screws through the rear of the 60-inch board and into the end of the 78-inch board, as shown.
Then, using a second 78-inch board, go around the other side of the 60-inch board and repeat the process.
Place the 78-inch center support board’s edge on the X of the 60-inch support board. The edge of the board should be flush with the 29 1/4-inch straight line and the 60-inch board’s top edge. To secure the center support board, drive two 2 1/2-inch self-tapping screws through its backside and into its end.
Install the Top Frame Blocking
When starting from the end of one of the 60-inch boards, mark the 78-inch board’s top edge with 13 1/4-inch intervals. Put each of these points with a speed square, then draw a perpendicular line across the board and mark an X on the other side of the line from which you took your tape measure.
This process should be repeated on the other side of the frame and the center support board. Your support blocks will be placed here.
One of the 28 1/2-inch boards—the blocks—should be placed on one of the Xs you cut on one of the outside 78-inch boards, as shown in the illustration. The edge of the block should be flush with the 13 1/4-inch straight line and the top edge of the 78-inch board. The end of the block should be secured with two 2 1/2-inch self-tapping screws that are driven from behind the 78-inch board.
To secure the other end of the block, place it on the center support board’s line and X. Top and bottom screws should be inserted into the 78-inch board, while a central screw should be inserted into both blocks from a different side.
For each of the marks you created, repeat the procedures above for all 10 blocks.
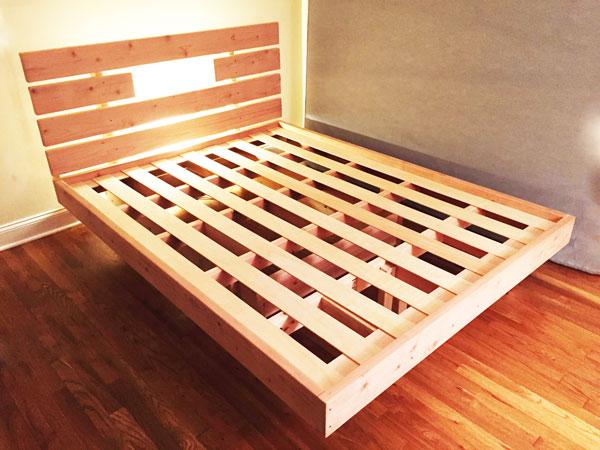
Attach the Top Frame to the Base Frame
While holding on to one of the base frame’s center support boards, carefully lift and place your new, higher-quality topframe atop your old one. There should be no gaps between the 2x4s projecting from either frame, and their faces should rest against the upper frame’s.
When attaching the top frame blocks to the 2x4s, drive two screws through each 2×4.
Attach the Plywood to the Top Frame
Using a caulking gun, coat the top frame edges with construction adhesive. This comprises the four sides, the middle support board, and the ten blocks of wood. Placing the plywood on top of the frame, with the 40 1/2-inch and 60-inch sides flush with the frame’s outer edges, is a simple and straightforward process.
Place self-tapping screws every 12 inches on the plywood’s outside perimeter and the plywood’s center.
How To Design, Plan And Build Them From Scratch
Floating bed with LED lights
C Love1 takes you step-by-by-step through the process of building this floating bed frame. Because of the integrated LED strips, it stands out as a unique piece of furniture with a very contemporary and intriguing appearance. For a bedroom, the ambient lighting is ideal.
Traditional Floating Bed
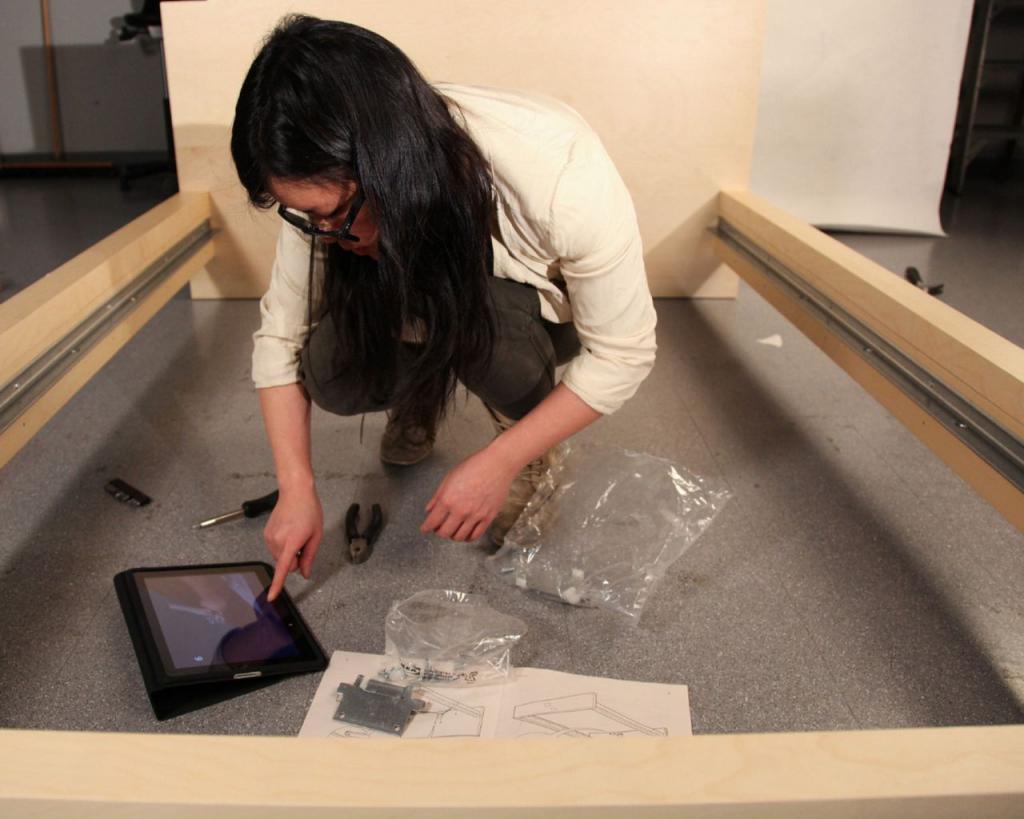
When creating a floating bed or any other form of bed frame, there are a number of stages that you need to take. The first step is the planning process, which is critical since you get to choose the particular measurements and overall design of your frame at this point.
Make sketches and drawings to help you see the design in your head. Next, you’ll need to complete the remaining steps, which are detailed in this instructable from instructables.
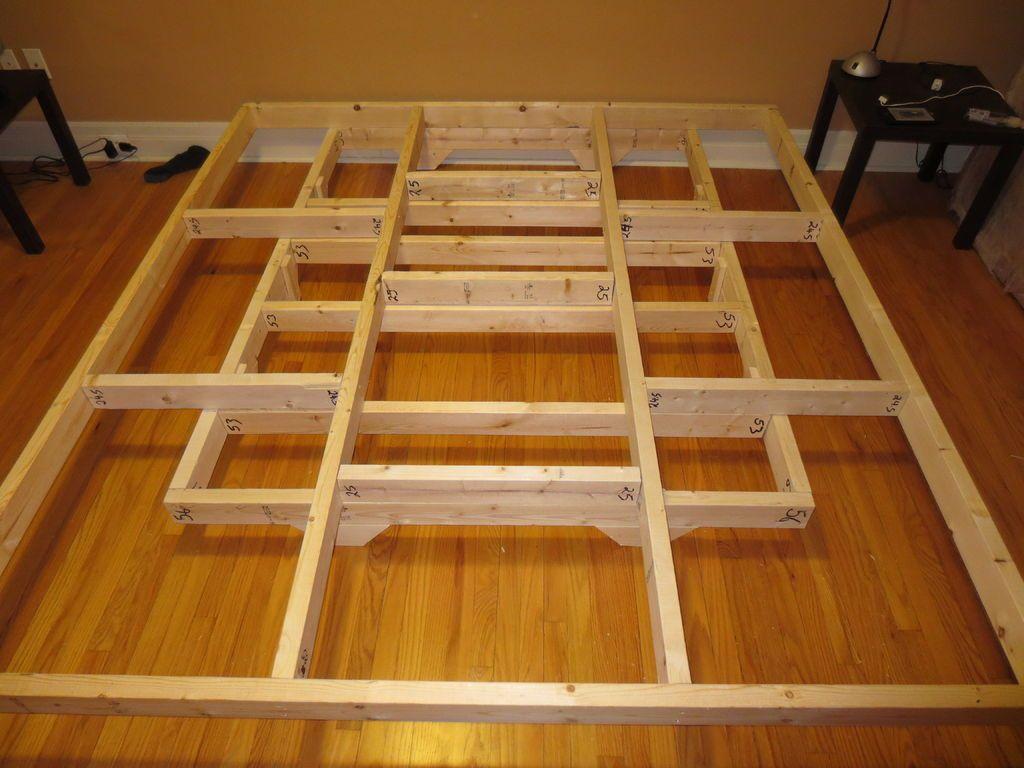
Platform floating bed
You can bet on wood for this project because it is the most common material for furniture-related projects. This queen-size bed’s structure may be constructed entirely using standard framing lumber, according to the guide provided by Stud Pack. You’ll discover a list of the materials that were used to construct the frame, along with an explanation of each stage in the construction process.
Wood platform bed with headboard and LED lights
If you’re building your own DIY floating bed, you have a lot of design options. This one has a very clean and basic appearance, making it ideal for a modern or minimalist bedroom.
With a headboard that extends to the side and attached floating nightstands, the floating bed frame is broader and longer than the mattress on top of it. Everything is included. More information can be found in the plans and tutorials offered by DIY Creators.
Live edge headboard
This design offered by HomeMadeModern is a great option if you want a bed frame that looks like it’s floating rather than merely creating the illusion that it does. Material choice is the key distinguishing factor between it and most of the other products on this list.
Steel 1″ square tubes are used instead of wood in the construction of this bed frame. So it may be extremely thin and compact while also being extremely durable, and it can even float on water. The headboard is made of live edge cedar, and the frame is linked to it.
Minimalist Floating Bed Frame
You may also like SeoulBOY’s floating bed frame design, which has a clean and modern feel. Sturdy and aesthetically beautiful, it’s made of wood and may be stained or painted to complement the design and theme of the space.
A floating nightstand and attached headboard complete the look. The details can be found in the video’s transcript.
Floating bed frame base
Try putting LED lights into your floating bed design if you like accent lighting or want to add some ambiance to your bedroom. The colored lights create an eye-catching effect that would go well in a contemporary-styled space. neat and uncomplicated Detailed instructions on how to build the wooden frame may be found in Carpenters Dream DIY’s tutorial.
Platfom Bed
Floating beds are known for their simplistic design, and this one is no exception. With a solid platform and headboard to match, there’s even more going on beneath the mattress.
Check out Carlo Ray’s full video tutorial if you’d want to see all the inner workings of this floating bed design and everything that isn’t visible from the outside.
Another traditional wood floating bed
To build a bed frame from the ground up, you’ll need a lot of lumber, which you can generally find at your neighborhood hardware shop. The screws and wood finish of your choosing can also be purchased at the same time.
If you don’t already own a miter saw, it would be ideal if the retailer could help you cut the board to the proper length. Check out this instructables tutorial to see exactly what needs to be done, as well as the cut list and other specifics.
Floating bed with LED lights and pallet headboard
When it comes to floating bed frame designs, this one from lifebuzz is small and efficient. If you have a small space or don’t want the bed to be the focus point, this is a fantastic option. This one, on the other hand, has LED lights integrated in the bottom that provide a luminous look.
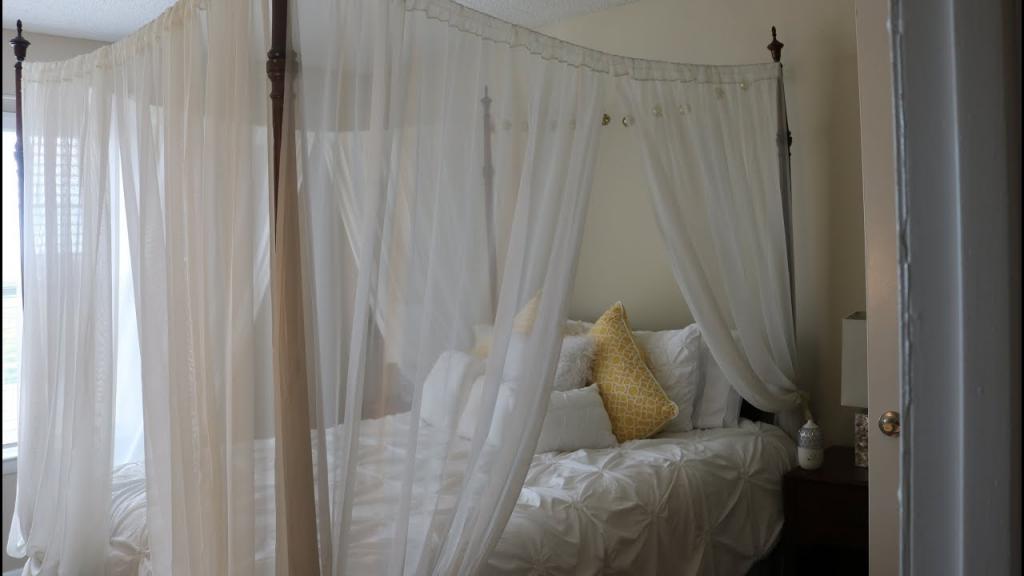
Boho Chic Bed
Uglyducklinghouse’s floating bed is sure to seem warm, and despite its size and solidity, it nevertheless manages to preserve a light aspect. Floating beds, in general, have a lot to offer. Detailed instructions are available in the entire tutorial if you’d want to create a comparable piece of furniture for your own home.
Full size floating bed
If you’re in the mood to build a bed frame, you can accomplish so in only a few days. There is a detailed list of all the materials you will need for this project provided by howtospecialist.com so you know exactly what to buy.
Nguồn: https://iatsabbioneta.org
Danh mục: Bed