The correct way to store turmeric rhizome is a two-step process. It’s not surprising that so many people are interested in producing turmeric because of its long list of health advantages. There is no reason why you shouldn’t be able to grow your own turmeric at home.
Regardless of how you intend to use turmeric rhizome in the future, you must first understand how to store it properly. You’ll learn how to properly prepare the rhizome and where to store it in this tutorial. The rhizome’s ability to produce a productive garden without the need for new stock is further enhanced by correct management.
Bạn đang xem: How To Store Turmeric Rhizome? Comprehensive Guide
Comprehensive Guide On How To Store Turmeric Rhizome
Consideration #1. Preparing turmeric rhizome for storage
Harvesting turmeric rhizome for storage
When it comes to harvesting turmeric rhizome, it’s important to know what to look for in the early stages. Keep an eye out for wilting leaves that have become a yellowish brown color. Ten months after planting turmeric, you can do this.

Then, when you’re certain you can harvest the crop, loosen the dirt surrounding the stalks by digging around them. Taking care not to injure the rhizomes, pluck up the plant stems should be possible. It is common for some gardeners to instantly yank up the stalks, which prevents harvesting and damages the plants.
Cleaning turmeric rhizome before storage
Watering the soil softly can help soften it up even more if you still sense some resistance. The rhizome should be clipped from the stalk or the leaves should be trimmed before lifting the rhizomes. Using sterilized scissors, cut off the lengthy roots and leaf scales.
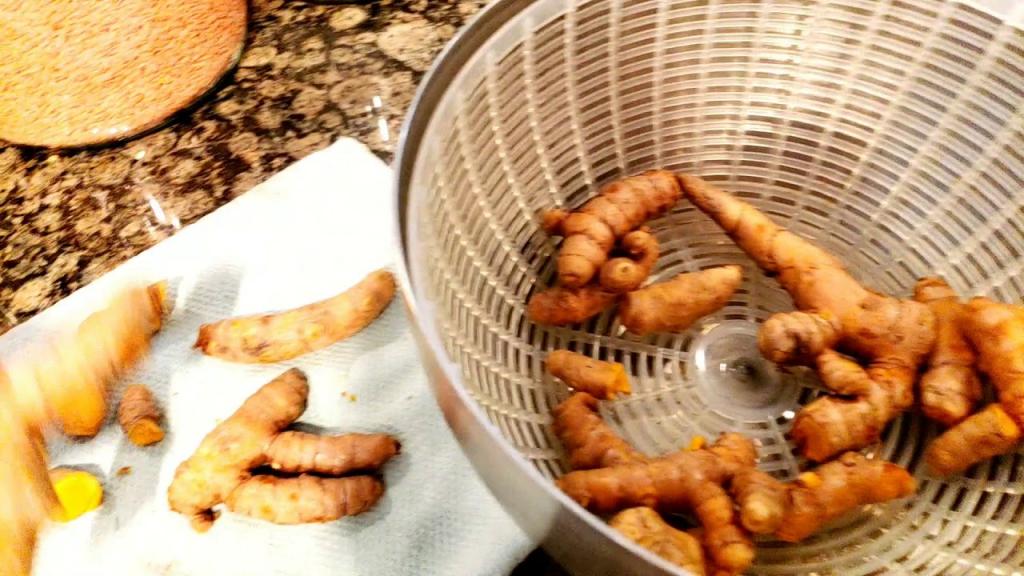
You can next rinse the turmeric rhizomes to remove any residues or dirt that may have been left behind. After the rhizomes have been submerged in water, they can be dried out in the open air. Before storing them, you can either cure and treat them for planting or use them in the cooking.
Consideration #2. Where to store turmeric rhizome
After the turmeric rhizome has been dried, the next thing to consider is where you can keep it safe. Storage of turmeric is simple, although mistakes might be made regarding where to put it. The Food and Agricultural Organization’s guidelines can help you avoid this.
Storing turmeric rhizome for planting
There are several ways to preserve and protect rhizomes, including covering them with dried leaves and keeping them in a well-ventilated environment like the greenhouse. Insect infestation can be prevented by using sand-covered pits. But if you like, you can use the Indian Institute of Spice Research’s suggested fungicides on the rhizome seeds or mother rhizomes.
Storing turmeric rhizome for eating
In the future, what if you want to cook using fresh turmeric roots? After drying, store the rhizomes in an airtight container in the refrigerator. This way of storing the rhizomes should keep them fresh for a few weeks.
On the other hand, if you want to make turmeric powder, you can freeze some rhizomes and dehydrate the rest in the sun. For the freezing, you can put them in an air-tight container in the freezer, and they’ll last for a year. However, keep in mind that you’ll get the best flavor if you utilize them as soon as feasible.
A dark, well-ventilated area away of direct sunlight is ideal for keeping ground turmeric. To avoid the growth of microbes and moisture within, you can expose the container to some sunlight on a regular basis. Overall, the most important thing to take away from this is that the best place to store turmeric rhizome is a dry and out of direct sunlight.
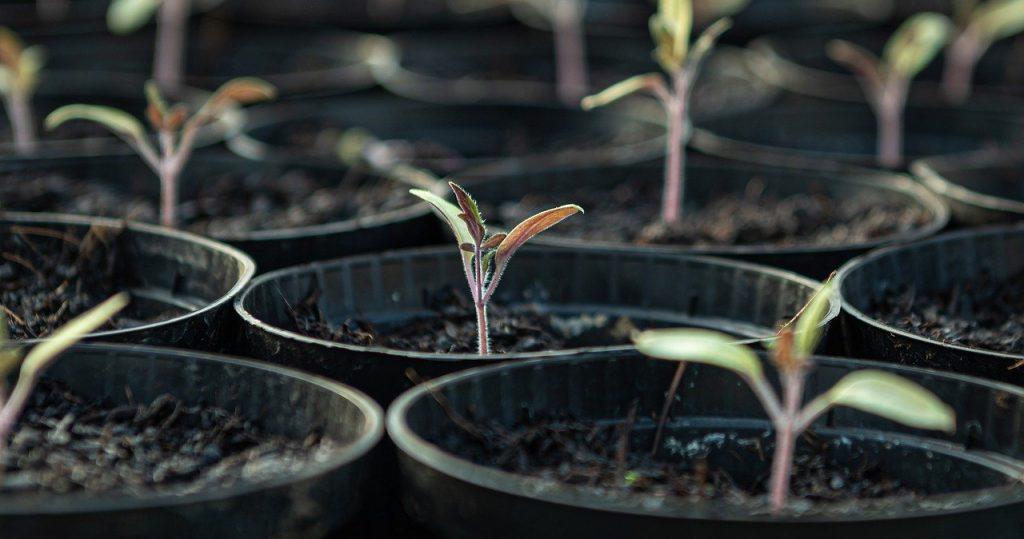
Planting Turmeric Rhizome
Turmeric rhizomes can be used for planting if you choose to grow it. Using pots or planters, you can do this in the greenhouse. Cut the rhizome so that each piece has at least two buds on it.
It’s easiest to use a slightly alkaline potting soil for turmeric, and then place a piece on top of the soil with the buds facing up. Soil the piece completely and then thoroughly wet it. In a greenhouse, place the pot in a plastic bag and keep it at 70 to 95 degrees Fahrenheit.
How Does Turmeric Grow?
Curcuma longa, the perennial herb from which turmeric (Curcuma longa) is derived, is closely related to ginger. However, most of these growing suggestions are also applicable to ginger! Even yet, ginger has a tendency to be a bit more picky. There are no “seeds” in turmeric like you’d expect from most plants. As a result, rhizomes, a type of root system that produces both above-ground and below-ground rhizomes, are planted. If you want to grow turmeric, you need to get your hands on those rare rhizomes! When fresh turmeric is harvested, the rhizome clusters around a central node resemble the shape of a hand, and each seed rhizome is referred to as “a finger.”
Consuming Turmeric & Curcumin
Turmeric powder, supplements, and other edible extracts are all derived from the rhizome of the plant. Whole, grated, or sliced in many cooking applications, it is where the plant’s flavor, color, and nutrients are concentrated, making it a popular ingredient. Turmeric’s most potent active element, curcumin, may be found in the rhizomes, which are the most readily available source.
Curcumin has been shown in thousands of scientific research to be one of the most effective herbal substances ever! A wide range of health benefits have been linked to curcumin’s anti-inflammatory and anti-oxidant qualities, including a reduction in inflammation and improved memory. It’s awe-inspiring stuff! We try to include as much turmeric into our diet as possible, and we also take these pills on a regular basis. My enthusiasm for curcumin is so great that I plan to devote an entire article to its incredible health advantages.
What if I told you that the leaves are edible as well? Yep. If you don’t want to use them whole, you can either dry them out and grind them up or steep them in water to make an infused beverage that you can then use in your cuisine. Turmeric leaves can also be used to wrap and roast or grill fish, much to the traditional method of using banana leaves.

The leaves, however not as mystical as the rhizome, are packed with minerals and antioxidants. During the plant’s growth phase, I advise against removing too many leaves, as the plant relies on them for photosynthesis. Use the best leaves that are left over after collecting the rhizomes, or save them for later!
Where to Obtain Turmeric Seed
There are several ways to obtain turmeric seed rhizomes. Find organic turmeric at your local grocery store’s produce area and you’re in luck! Because you can grow turmeric from rhizomes purchased at a grocery shop! Our favored method of procuring turmeric seed these days is through this method! It’s too simple. The organic rhizomes should be sought out, however. Sprouting is often inhibited in non-organic food through the use of chemicals. Turmeric is most commonly found in natural food stores or Asian marketplaces.
It is possible to acquire turmeric seed rhizomes from the internet in order to grow specific varieties of the plant if you can’t get fresh organic ones in your area. It is Hawaii Clean Seed that I am aware of as the primary source. We’ve used them several times for turmeric (and ginger) seed and have always been satisfied. However, their ordering mechanism is a bit of a challenge. There will be a limited supply, so place your order right away when it goes on sale (on November 1st). Also, the seeds are shipped from February to March; a minimum order is required.
Xem thêm : How To Propagate Oleander? Things You Will Need
You can keep seed rhizomes from your turmeric crop to replant once you’ve started growing it yourself! Alternatively, use it all up and then go out and get more.
Different Turmeric Varieties
The bright orange Curcuma longa type is nearly always the turmeric you’ll find in supermarkets. It’s known as “Hawaiian Red” around here. A few more mango kinds have been grown, including Indira Yellow and White Mangoes. All three of those turmeric kinds can be seen in the photo below. We favor the deep orange color and sweeter flavor of the Hawaiian Red, and we’ve been planting less and less of the other two. Compared to the yellow, the white mango tastes like a green, underripe mango, with a milder flavor.
Actually, darker orange variants are better for you! When we initially started producing turmeric, I had no idea how much curcumin it contained in its bright orange color! As a result, while yellow and white types are eye-catching and interesting to grow, they don’t offer as much nutritious value.
TURMERIC GROWING REQUIREMENTS
Climate & Temperature
India is the country where turmeric originates. As a result, it thrives best when it receives plenty of sunlight, moderate temperatures, and regular waterings. In the summer, these conditions can be found in a wide variety of locations. As a result, cultivating turmeric might be a challenge due to its exceptionally long growing period. From planting to harvest, turmeric necessitates 8 to 10 months of frost-free cultivation. It is often sown in the fall or early winter, and harvested in the fall or early winter the following year.
Turmeric can be cultivated year-round in the ground or in containers outside in USDA zones 8 and higher. It’s easier for us to control the soil quality and moisture level if we grow ours in numerous wine barrels. Turmeric can still be grown in zones 7 and lower. When the weather warms up, simply put it in a portable container indoors and move it outside. The sprouts will require plenty of light or sun if they appear while the seed is still within.
Planting Location
Turmeric is a fan of the light, but it can be a little sensitive to overexposure to the sun’s ultraviolet rays. It may grow in full sun to moderate shade, although in the hottest regions, it will benefit from some afternoon shade (when over 90 degrees). Gardeners in Arizona, for example, use shade cloth to protect their turmeric plants in the fall. We don’t use it here in the Central Coast of California since it’s so mild.
While turmeric is actively growing, it will require the most water, but not nearly as much water before it sprouts. The seeds of the rhizome are prone to rotting if they are kept in water or soil that is too wet. Turmeric rhizomes can take months to sprout and thrive if they are planted immediately outside! As a result, find a place with good drainage and where you can easily modify the amount of water your plants receive – especially in the early stages of growth. Avoid planting them in a place where water accumulates in the springtime, for example.
Turmeric can be planted in a smaller, portable container that you can move around your garden as needed. You can also choose a sunny window for your turmeric when you move it indoors in late fall (in climates where frost is expected). You should bear these considerations in mind, though, if you’re going to plant your turmeric in the ground or a raised garden bed, or in anything heavy and immovable (like a wine barrel).
Containers
Don’t skimp on size while looking for the ideal container for growing turmeric! The more space you have, the better, but don’t go overboard. Smaller pots are also an option. There is no requirement for turmeric to grow in soil that is particularly deep. A depth of between 10 and 12 inches is sufficient. If you want to be able to harvest enough turmeric, then width and surface area are critical. Several inches of gap between the rhizome seeds you plant is required for good growth. As a result, you can only grow so much in narrow containers.
Turmeric, like all plants, thrives in well-drained containers. To put it another way, the pot must have holes in it! Possibly a few. We’ve grown turmeric in wide fabric Smart Pots, which offer better drainage than wine barrels. However, they will lose moisture more quickly, so bear that in mind as you begin your watering regiment.. Add drip trays if necessary to catch water runoff, especially for indoor plants.
Although wine and whiskey barrels make excellent planters, they usually necessitate some form of modification before they can be used to grow any kind of crop. After all, they’re meant to be used with liquids. So, in order to improve drainage, we place a layer of landscape fabric on the bottom of the barrel, then add 1-2″ rocks, another layer of landscape fabric on top of the rocks, and finally, dirt on top of all of that.
In relation to soil…
Soil
Soil that is loose, well-draining, clear of large clumps or pebbles, and somewhat rich in organic matter is best for growing turmeric. Raised garden beds are an excellent option because they already have these characteristics. At least a foot deep of the native ground soil should be worked, and the area should be supplemented with aged compost. Alternatively, if you’re starting from scratch with a new container for turmeric, you can fill it with the correct ingredients! In fact, most bought potting mixes are already slightly acidic enough for turmeric to thrive.
A mixture of 70-80% organic potting soil (or a comparable raised bed/container soil combination) and 30-40% well-balanced compost is ideal for containers. Fresh animal dung should be avoided at all costs. Too “hot” and nitrogen-rich, it’s unfit for human consumption. Choose a product that has been adequately aging for its age. If we don’t have worm castings or our favorite organic bagged compost on hand, we use a combination of our own homemade compost and worm castings. Most commercial potting soil already contains pumice or perlite to improve drainage. A small amount of 3/8′′ volcanic rock is also incorporated into the mix.
Pre-sprouting fertilization will not benefit the rhizomes. As a result, we prefer to add some moderate, slow-release fertilizer to the soil when we plant them. In addition to compost, we use alfalfa meal, kelp meal, and neem seed meal as our primary fertilizers. Rock dust and oyster shell flour are also used as an extra source of micronutrients. Almost all of our garden uses the same tools and materials. Err on the side of caution and follow the product’s directions to the letter.
Preparing Turmeric Seed for Planting
It’s best to break down any large chunks of turmeric or other spices to make more seed pieces if you have some on hand. In order to limit the risk of infection and disease, it is recommended that this be done at least a few days before planting. In order to produce several seedlings, cut the hands or rhizomes at their narrowest junctions (where the fingers meet the base, or “palm” of the hand).
If you want your seeds to sprout, you must leave at least two to three nubs or fingers on each piece of seed. After cutting, place the turmeric pieces in a well-ventilated area to allow the exposed regions to dry quickly.
Turmeric seed should be kept cool and dark before planting. My husband and I often store ours in an open cardboard box in a spare room. The seeds can be stored in a warm, moist layer of peat moss, coco coir, or light fluffy soil like seedling starter mix – to encourage early sprouting. You may get a head start on the season by beginning your turmeric indoors. Additionally, seedling heat mats can be used to warm the soil medium during pre-sprouting or after planting in an individual container
Pre-sprouting isn’t necessary in our experience. It didn’t produce a greater or earlier yield one year when we pre-sprouted our rhizomes indoors before planting them outside. To be honest, it was one of the most sparse seasons in memory. In our moderate environment, pre-sprouting isn’t necessary, and it was enough to convince us of this.
How to Plant Turmeric Rhizomes
The optimal time to plant turmeric rhizomes is when the soil is consistently 55 degrees or warmer and the daytime temperature is close to 70 degrees Fahrenheit. As a rule of thumb, we plant our turmeric seedlings in March and harvest in late December. Count backwards around 10 months if you need to start your turmeric indoors before your first fall frost! Turmeric can be started inside in December or January, depending on where you live.
At least 4 to 6 inches apart, plant each seed rhizome 2 to 4 inches deep. My preferred method is to dig a hole, insert the seed (and then carefully cover it back over), rather than shove it down into the dirt like I might when planting garlic cloves. The rhizome should be placed in the planting hole with any little fingers or nubs facing upward. From the start, the sprouts will develop from the nubs, thus this sets them up correctly. To keep the soil surrounding them moist, sprinkle some water on it.
Notes for Starting Indoors
Keep your pots of turmeric indoors for now if you live in USDA zones 7 and lower! Since they haven’t yet sprouted, sunlight isn’t an issue. As a result, you are free to store them anywhere in your house that is both safe and warm. Once they’ve sprouted, you’ll need to come up with a way to provide them with enough bright light – either by utilizing grow lights or a sunny window.
Xem thêm : How To Root Begonia? Comprehensive Guide
Keep an eye on the weather prediction for the following two weeks before bringing the pots outside. The rhizomes, on the other hand, are ineligible for freezing. When it comes time to move the containers outside, you’ll need to make a gentle transition to help them adjust to the new environment. It’s called hardening off, and it’s really crucial!
This article has more information on hardening off. It’s best to bring them out for brief periods of time in an area that is well-ventilated and shady for a few days before gradually increasing their time and exposure to the sun. Avoid placing them in direct sunlight at once! They’ll go into meltdown mode over you.
Patience
The waiting game begins after planting. While growing turmeric is a lengthy process, it also takes a surprising amount of time to sprout! Your turmeric may grow faster if you’re growing it indoors. Our first rhizome sprouts normally don’t appear until July or August, even if we plant them in February or March!
Every year, even though I know what to expect, it still causes me tension. I’m convinced they’ve thrown in the towel on us every time! Because we had such a mild spring and early summer here, it’s possible that warmer climates will have earlier blooming, but at least now you’re prepared. Be patient. Don’t worry.
Ongoing Turmeric Plant Care
Water
Every year, even though I know what to expect, it still causes me tension. I’m convinced they’ve thrown in the towel on us every time! Because we had such a mild spring and early summer here, it’s possible that warmer climates will have earlier blooming, but at least now you’re prepared. Be patient. Don’t worry.
Every year, even though I know what to expect, it still causes me anxiety. They always seem to think they’ve blown it on us, don’t they? Even though we had an unusually chilly spring and early summer here, warmer climates may have faster germination, but at least you’ve been warned. Be patient; it will all work out in the end. Don’t worry.
During the fall and winter months, if you’re getting rain, you may want to reduce the amount of water you use. When your selected harvest date is one to two weeks away, you can cease watering completely. Not everyone needs to take the time to go through the process. We’ve discovered that gently uprooting the rhizomes in semi-dry soil is the best method so far.
Turmeric is a heavy feeder when it is actively growing. Composted and well-balanced fertilizer is all it needs to thrive this year. Turmeric is frequently fed aged pelletized chicken manure. There are a few different ways we keep our turmeric in good spirits throughout the year. It’s common practice to add alfalfa and kelp meal to the soil around plant stalks once or twice during the summer and fall growing seasons, and then water it all down to ensure that it’s incorporated.
We also provide a few moderate liquid fertilizer options. Compost tea, which we use to water the turmeric with every other month or so, is another. Check out this tutorial to learn how we brew compost tea! We may use a seaweed extract solution instead of watering in the opposite months. Anyone without access to compost tea-making tools can choose for this alternative.
How to Harvest Turmeric
When turmeric is ready to be harvested, the leaves will turn yellow-brown and dry. However, not all of our outermost foliage changes. The leaves can be seen in the next harvest photograph. When determining when to harvest, consider the appearance of the leaves as well as how long it has been after planting.
Don’t just yank the stalks out of the ground at harvest time! By doing so, you run the risk of fracturing your hands! Carefully and gently remove the soil from around the turmeric stalks, making sure to avoid stabbing or damaging their rhizomes. When the dirt is a little looser, you may either gently lift up on the stalks or scoop them out from the bottom. If you run into problems, try tossing the container sideways and sifting through the contents. Here’s an illustration of how the wine barrels can be tipped onto a tarp for easy cleanup.
Rinse the rhizomes after harvesting to remove dirt. Remove the rhizome manually from the stalk using a clean, sharp knife. The roots attached to them can be cut out using clean scissors or snips and composted. They’re not harmful. Once they’ve dried completely, store the skins in a cool, dry place.
The best way to eat turmeric fresh is to use it within a few weeks of harvest. Refrigerate dried rhizomes in an airtight container. In order to replant some of the rhizomes, keep them in a cold, dark spot for longer periods of time, since you are hoping they may ultimately sprout! There are several ways to preserve your turmeric harvest, and I suppose that you won’t want to eat or replant it all right away.
A portion of our harvest is frozen while the rest is dried to make our own turmeric powder! Turmeric rhizomes can be frozen whole in an airtight container for up to a year if not in use. The fresher and more vibrant the flavor, the sooner you use them. Rhizomes can be stored in the freezer and used whenever they’re needed! We don’t bother removing our homegrown turmeric’s skin because it is so soft and supple.
Using Turmeric in Meals
What’s the difference between dried and fresh? Turmeric can be used in a plethora of different ways. Whole turmeric rhizomes can be grated fresh or frozen and used to a wide variety of dishes — including beans, lentils, brown rice, mixed vegetables, eggs, and more. In addition, we use it to make sauerkraut, fire cider, and kombucha! To see our recipes for each of these, click on the links.
In many of the same ways, you can use dried turmeric powder! Golden milk is another famous usage for turmeric powder. Mixing milk with turmeric powder, cinnamon, a small amount of oil, and most often a natural sweetener like honey or maple syrup creates golden milk. Here’s a simple recipe for golden milk that you can try right now!
Keep in mind that if you’ve never tasted turmeric on its own, it’s not as hot as you may expect. Despite the fact that turmeric is a significant ingredient in curry, it does not have the same sharpness as pre-mixed curry powder. Chili powder and other seasonings are included in the above list.
As a final piece of advice, always add a pinch of black pepper to your turmeric for maximum health benefits! Why? This is because black pepper greatly enhances the absorption of curcumin. A quarter teaspoon of pepper with curcumin has been shown to improve its bioavailability by 2000%. Even a small amount of pepper raises the potency noticeably. The bioavailability of curcumin is greatly enhanced when it is consumed as a whole meal or root (even dried and crushed), or when it is combined with fats such as oils or coconut milk.
Even while money doesn’t grow on trees, good health may!
Let me conclude by saying how much we enjoy growing turmeric here on the homestead. Thanks for reading my post, and I hope you’ve learned something new about how to grow turmeric in your own garden! Ask questions in the comments section below and help spread the word by forwarding this page to others.
Conclusion
When it comes to harvesting crops, you can’t go wrong with the turmeric rhizome. Proper storage of turmeric rhizome is essential if you wish to plant and use it. To begin, make certain that the rhizome has been thoroughly cleaned by removing its long roots and leaf scale.
The rhizomes can then be stored in a cold, dark, and well-ventilated place. The most important thing to remember is to keep it dry to avoid disease and fungus growth. Also, you can use certified fungicides, cure the rhizomes, or let them dry out in the sun before grinding them.
In order to eat the rhizomes, you can freeze or refrigerate them in an airtight container. Rhizomes can be frozen for up to a year, but the flavor of the rhizomes is best enjoyed fresh, so don’t wait too long to use them.
Nguồn: https://iatsabbioneta.org
Danh mục: Guide