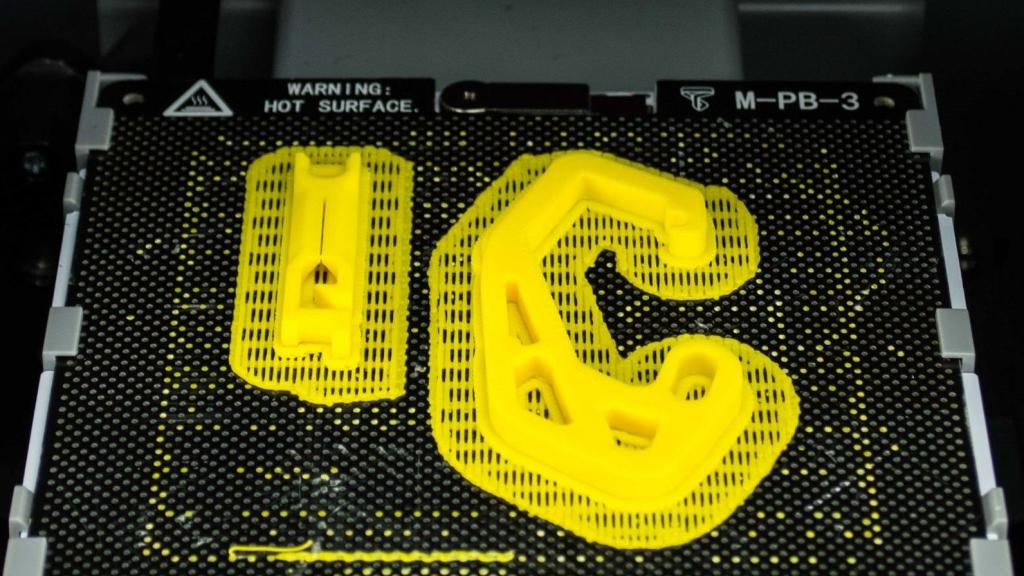
When you return home from your 3D printing session, you find a beautiful model—with one small catch: it’s stuck down a little too well. This is an issue that a lot of individuals have, including me.
Whether you’ve printed with PLA, ABS, PETG, or Nylon, there are straightforward methods for removing your finished print from the print bed.
Bạn đang xem: How To Remove 3D Print From Bed? Ultimate Guide
To easily remove 3D prints that have become stuck on your 3D print bed, heat the bed to 70°C and then use a good quality scraper to go beneath the print and take it off. Remove 3D prints from the print bed with the use of liquid solutions that work by weakening the binding between the print bed and the plastic.
The rest of this article will go into depth about how to get rid of 3D prints off your bed and how to prevent them from returning. Read on to gain insight into some crucial information.
Easiest Ways to Remove Finished 3D Prints Stuck to Bed
Several users have reported success after spraying a solution of equal parts water and alcohol over their problematic 3D print, as seen in the video below.
In the event that this solution doesn’t work, you may take heart in knowing that there are plenty of others available to you, as well as preventative measures to ensure that this doesn’t occur again.
Too much adhesion between the print and the bed might cause serious damage to the printer.
As a matter of fact, I once saw a video of Joel Telling (3D Printing Nerd) smashing the glass bed of a $38,000 3D printer because the PETG had bonded with the glass and couldn’t be separated.
Several methods exist for freeing stuck 3D prints, but we’ve compiled a short list of what we think are the most practical options.
Apply Some Force
A 3D print can be removed from the build surface by gently pushing, twisting, bending, or just grabbing it and lifting it off the surface.
If you have a decent setup, this should work perfectly; but, if you are here reading this, it obviously didn’t!
First, wait for the print bed to cool for quite some time before attempting to remove the print, and then use some force to do it.
If the 3D print is stuck fast, you can use a rubber mallet to gently pry it loose. You should be able to use the same force to lift your print off the print bed once it has been weakened.
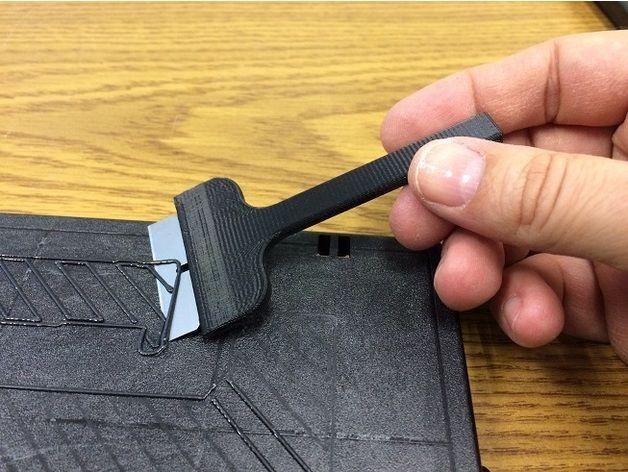
Use a Scraping Tool
The next step would include making use of some tools, such as the spatula that comes standard with most 3D printers.
Most 3D prints may be easily removed off the print bed by applying pressure from underneath and applying extra force in several directions.
With my hand resting on the 3D model itself and a spatula in my other hand, I would move the spatula in a side-to-side, diagonal, and vertical motion until the adhesion weakened and the section popped off.
Warning: Be careful where you put your hands when using a sharp object to remove fingerprints. If you lose your balance, you don’t want your hand to go where the force is coming from.
There are a variety of scraping tools and spatulas available; the one included with your 3D printer might not be the best option.
If you’re having trouble getting prints off, it could be worth it to invest in a quality print removal kit from a site like Amazon. The Reptor Premium 3D Print Removal Tool Kit is the best option.
One of the included tools is a long knife with a beveled front edge, ideal for slipping beneath prints, while the other is a smaller offset spatula with a black ergonomic rubber handle and safe rounded edges. AD
Stiff, hardened stainless steel blades make them flexible without being fragile. It has a high rating on Amazon (4.8 out of 5.0 stars) and can effectively remove even the largest of prints.
User reviews attest to the product’s superiority as a tool for removing prints off a 3D printer’s bed without damaging the surface. AD
Use Dental Floss
A slight push in the right direction should be enough to loosen it, but if you can’t, try dental floss.
Put some dental floss in the palms of your hands, position it at the bottom of your print, and slowly pull it toward you. So many people have found success with this approach.
Heat your Print Bed
Reheating the print bed to around 70 degrees Celsius can also help the print release from the bed. Since we know that certain print materials react to heat, this is a fantastic approach for manipulating the print.
Materials can lose their ability to stick to the print bed if the temperature is raised to over a certain point.
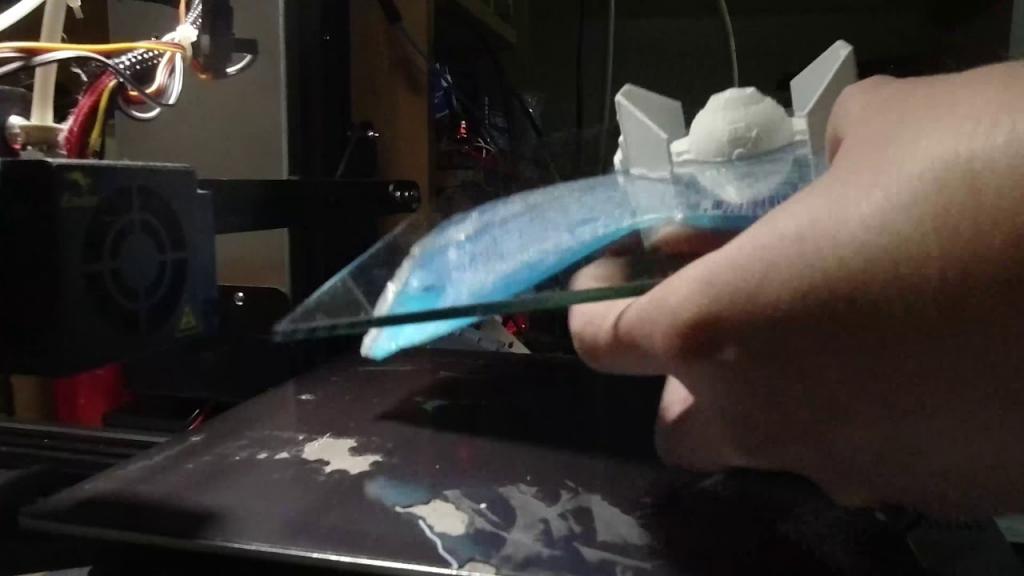
Freeze the Print Bed Along With Your Stuck Print
Xem thêm : How To Attach Headboard To Flex Fit Adjustable Bed Frame? Complete Guide
When you spray your sticky prints with compressed air, they will readily peel off because of the sudden shift in temperature.
When you put your print and bed in the freezer, the plastic contracts somewhat, causing the print bed to become less affixed to the print.
Once the necessary preparation has been made, future prints should come off rather readily, making this process uncommon.
Dissolve the Adhesive Using Alcohol
Isopropyl alcohol can also be used to dissolve glue and release trapped prints from the base. You should let the print sit in the solution for 15 minutes after placing it near the base.
The glued print can be simply peeled away from the margins with the use of a putty knife.
As an alternative, you can use hot water to melt the glue, but it should not be boiling, as this could cause the print material to reach its glass transition temperature and become deformed.
How Do You Remove a Stuck PLA Print?
When the heat bed is heated to about 70 degrees Celsius, the PLA becomes soft enough to be easily removed off the print bed. Once the glue has been weakened, the prints can be easily peeled from the glass bed.
Heat is going to be one of the better ways to remove a stuck PLA print due to PLA’s low heat tolerance.
To remove the print completely, twist it away from the sides and pry it off with a putty knife or high-quality spatula.
The use of alcohol to dissolve glue on PLA will not work. It is recommended to heat up the PLA and then remove the prints because of its lower glass temperature.
Because to its efficiency and quickness, this technique has gained widespread acceptance.
How to Remove ABS Prints on a 3D Print Bed?
The expansion and contraction of a glass print bed, which puts stress on the interface layer, is a common cause of difficulty removing ABS prints.
ABS prints that are very firmly adhered to the print bed can be removed off the bed by placing them in the refrigerator or freezer.
If you want to preserve your prints, you should freeze both your print bed and the prints. If you take your stuck print outside into the cold, the plastic will compress as a result of the temperature change and the print will come loose.
When exposed to temperatures above or below that specified by the ABS, the glass surface expands and contracts accordingly.
A thin scraper can be used to take advantage of tension on the interface layer caused by the glass bed’s contraction as it cools.
Moreover, the link weakens to the breaking point when the bed and the print are placed in the refrigerator together.
In some cases, this causes the print to come loose entirely, whereas in others, it only loosens in a few spots.
Another fantastic option when your ABS print is done is to turn on the fan to cool it down immediately. Since this causes rapid contraction, the prints will pop off as a result.
Use an ABS and acetone slurry mix on the print bed beforehand, along with some inexpensive tape, to prevent ABS prints from sticking to the print bed. You may not need the tape if the print is on a smaller piece of paper.
Because of its effectiveness, the humble glue stick is still a staple in many households. Most prints will adhere to the bed, and removal will be a breeze.
How to Remove PETG Print From Print Bed?
PETG prints can be difficult to remove from the print bed or build surface and, in some cases, fall off completely.
To ease the process of removing PETG prints from the print bed, you may use a glue stick or hairspray. Avoid printing on BuildTak, PEI, or glass directly as a build surface.
The prints should peel off the glue, not the build surface.
Watch as a 3D print is stolen off of a glass print bed in this video.
How to Prevent 3D Prints from Sticking to Print Bed Too Much
You should take preventative measures to avoid the hassle of dealing with a print that has become overly adhered to your print bed.
One of the most important things you can do to make your 3D prints easier to remove from the print bed is to use the right build platform.
Remove the magnetic construction plate from the 3D printer and simply “bend” it to release the 3D print.
In fact, many people who have access to flexible build surfaces have raved about how simple it is to remove 3D prints once they’ve been installed. Creality Ultra Flexible Magnetic Build Surface is an excellent flexible build surface that can be purchased on Amazon.
Xem thêm : How to Give A Bed Bath? A Step-by Step Learning Guide
A lot of people put blue painter’s tape, Kapton tape, or glue stick on the print bed if they don’t have a flexible build plate (also prevents warping).
Borosilicate glass, in contrast to tempered glass like that found in automotive windshields, is a construction surface made to resist shattering.
A quality borosilicate glass bed may be found at a reasonable price on Amazon. Many people who use 3D printers have found that the Dcreate Borosilicate Glass Print Platform is both reliable and effective.
How to Remove 3D Print From Ender 3 Bed
The process of taking 3D prints off an Ender 3 bed is essentially identical to the one described above. If you want decent results, you need a good bed, glue, scraper, and filament, in that order.
You may remove completed 3D prints from your Ender 3 by either popping them off with the flex build plate or scraping them off with a print removal tool, such as a spatula or even a thin blade.
The water and alcohol spray mixture can also be used to try to weaken the binding between your print and the print bed, which can be helpful when attempting to remove a larger print.
If your 3D print is stuck to the bed a little too firmly, you may either heat the bed and try removing it again, or you can place the build plate and print in the freezer to take advantage of the temperature shift to decrease the adhesion.
How to Remove a Resin 3D Print From Build Plate
Your resin 3D print can be easily removed by inserting a thin, sharp razor or blade underneath it, followed by a palette knife or spatula. Because it is so efficient, this technique has become widely used for removing resin 3D prints.
You can see this technique in action in the video we’ve embedded below.
You can also try printing using rafts that have a high rim at a slight inclination such that a print removal tool can slide beneath and utilize a lever motion to remove the resin print.
Miniature prints are much simpler to remove when their bases are angled.
Remember to keep your hand away from the print removal tool at all times to avoid injury.
If you have a resin 3D print on your build surface, you can generally just rotate under it to get it off.
Some users have reported success after experimenting with different base heights in search of the “sweet spot” when good adhesion is achieved without requiring excessive effort to remove the print.
It is recommended to clean the aluminum build surface with isopropyl alcohol and then sand it with 220-grit paper in small, circular motions.
Sticky grey film will fall off; use a paper towel to wipe it away, and keep doing this until the film disappears entirely. Use IPA to thoroughly clean the surface, wait for it to dry, and then sand it down to the point where you can no longer see anything except dust.
If you follow these steps and then give the printing surface one last washing with IPA, you should get excellent adhesion and have no trouble removing the prints afterward.
How Do You Clean a Magnetic Build Plate?
Isopropyl alcohol (91%) is the best cleaner for your magnetic construction plate. This is not only a good cleaner but also a powerful disinfectant. You should use a lint-free cloth to clean and dry the surface.
Cleaning the construction plate with dishwashing solutions and hot water is an alternative to using alcohol.
This cleaning solution can be stored conveniently in a spray container. Spray it as needed, and then use a lint-free cloth to dry the surface.
How Long Should I Let 3D Prints Cool Between Prints?
Many people wait a set period of time between prints because they’ve heard that’s how long the ink needs to cool, but in reality, that’s not necessary.
I remove the print, clean the bed, and start a new print as soon as I see that the current one is complete.
Prints are typically easier to remove in the final minutes of printing, but with the methods outlined below, you should have no trouble removing prints at any time after they have cooled down.
After cooling on a glass bed, the print quality may suffer if you applied any substances to the print platform in advance.
Depending on the build platform, the printing materials, and the adhesive component, prints may be easier to remove once they have cooled down. Once you’ve established a pattern, you can fine-tune your procedure to save time and effort.
After the plastic has cooled, it may contract to the point where the print can be removed off the print bed on its own.
Conclusion
Those workarounds sound promising for freeing your prints from the print bed. The nozzles can be adjusted to fit any printing situation.
Methods for Quickly and Easily Removing 3D Prints from the Print Bed (ABS, PLA, and More)
Seven Methods for Removing a 3D Print from Your Bed
Nguồn: https://iatsabbioneta.org
Danh mục: Bed