If you want to improve your home, you should learn how to sew ruffled pillows. It’s inexpensive, yet it enhances the aesthetics of your home.
What are the Benefits of Using a Pillow?
Let’s look at some of the biggest advantages of using a cushion before you start adding ruffles to it.
Bạn đang xem: How To Make A Ruffled Pillow? A Step-By-Step Guide
It helps keep your spine well-aligned
When you’re standing up straight, your neck should bend slightly forward to support the weight of your head. You must maintain this curve while you are in a resting position.
If you don’t use a pillow to keep your spine and neck in a natural position, you’ll wake up with a kink in your neck. You don’t want to feel pain in your shoulders or the back of your neck as a result of poor posture.
It helps prevent snoring
By keeping your airway open and your breathing unhindered, utilizing a pillow that isn’t too low or too high is yet another amazing benefit.
It’s adjustable
Adjusting your pillow to suit your own preferences can help you obtain a good night’s rest. When you wake up the next day feeling rested, it’s because you changed your pillow the night before to fit your specific curves.
A Step-By-Step Guide on How to Make a Ruffled Pillow
You can use ruffled pillows to enhance the look of your home’s decor. As a result, DIY projects are becoming increasingly popular among the general public. Even for inexperienced house decorators, designing your own throw pillows sounds like a lot of fun.
Another reason to build your own ruffled pillow is that it will save you money in the long run. In truth, the cost of interior design can quickly add up. Making your own ruffled pillow is easy with this simple step-by-step guide.
Step 1: Have the necessary materials at hand
You need to prepare the following sewing essentials: a pair of scissors, an iron, a marker, some pins, and a sewing machine. You will also be needing some thread, dental floss, and of course, the fabric or cloth of your choice.
Step 2: Create your pillow
Sewing basics include scissors, a heat tool (such as an iron or steam iron), a marker, some pins, and a sewing machine You’ll also need some thread, dental floss, and the fabric or cloth of your choice.
Stuff it with your preferred filling. Polyfill can be found at any fabric or craft store. You can also use the stuffing from an old pillow if you have one. In general, the less money you spend, the better. Afterward, patch the hole close.
Step 3: Make the ruffle
Press the fabric you’ll be using for the ruffle in the same way you did for the pillow. Once you’ve done that, cut a 7-inch-long strip using a rotary cutter. 17 × 20 inches is 17 + 17 + 20 + 20 + 20 = 74 inches in total.
In this case, the ruffle strip will be approximately 7″ wide by 148″ long. With a 14 inch seam, sew two 7-inch strips together. There should be no exposed edges. You’ll need to finish the edges of the ruffle with a 12″ seam allowance on each strip end.
Step 4: Clean your edges
Xem thêm : How To Make A Bath Pillow? Everything To Know!
The next step is to fold your strips in half lengthwise. From this point forward, the ruffles will have a width of 3.5 inches. After that, you may either use a serger or bast your edges to keep them tidy. After you’ve folded and pressed your cloth with the wrong sides together, perform this step.
Step 5: Gather the ruffle
Gather as much ruffle as you like with your waxed dental floss. This is a better option than using a gathering foot on a sewing machine. The floss should be placed immediately above the fabric’s unfinished edge.
When it comes to gathering the ruffle, you have the option of using zigzag or basting stitches over dental floss. When gathering the cloth for the ruffle, use a high-quality thread that will hold. Stitching should contain the floss as well.
Step 6: Work on the pillow fabric
Prepare three 17″ x 20″ pieces of cushion fabric. Make a ruffle the same length as your cushion by pulling the floss from the ends of your strip. Using waxed dental floss helps to streamline the procedure.
To secure the ruffle’s raw edge to the pillow fabric, pin it to the right side of the fabric. Rather than starting at the corners of your pillow, begin in the middle. When stitching the sides, be cautious not to include the ruffle.
Step 7: Do the finishing touches
Using a 12″ seam allowance, sew a ruffle on the front of the pillow. Throughout the final stage, be sure to pin and pull the ruffles at the corners. Finish putting the pillow ruffles up using your sewing machine. As you proceed, make a few modifications.
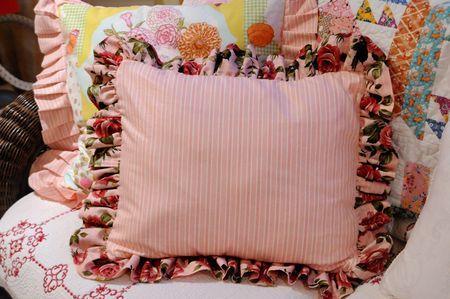
How to Make a Ruffled Farmhouse Style Pillow
Hello there, everyone! I’m so glad you could join me today as I show you how to make a brand new DIY! I stated a few weeks ago that I’d recently rediscovered my sewing machine after a few years of not using it! Simple sewing projects like these plaid ruffled pillows have given my Christmas home a fresh new look this year, and I couldn’t be happier! Make ruffled farmhouse pillows with the help of this step-by-step tutorial. You can make ruffled pillows even if you aren’t the best seamstress in the world, and you’ll have a home full of them in no time! As a disclaimer, some of the links in this post are mine.
Below, you’ll find a video of the complete tutorial! Then press play to see how it’s done from start to finish! In the sake of expediency, however, I’ve included a few extra details. Firstly: I pinned the ruffles to the front piece of fabric then I carefully in pinned and re-pinned the fabric with the back pieces on top. To avoid having pins lodged in the centre of your pillow, you should use a pillow protector. Sewing all four edges together, cut a line along the fabric, but don’t cut through the seam, and then stitching all four edges together is complete! This will prevent puckering of the corners. For those who are curious, I bought this plaid fabric at JoAnne’s in the fall of 2017. In addition, I’ll include a complete supply list for making your own version of these ruffled farmhouse pillows.
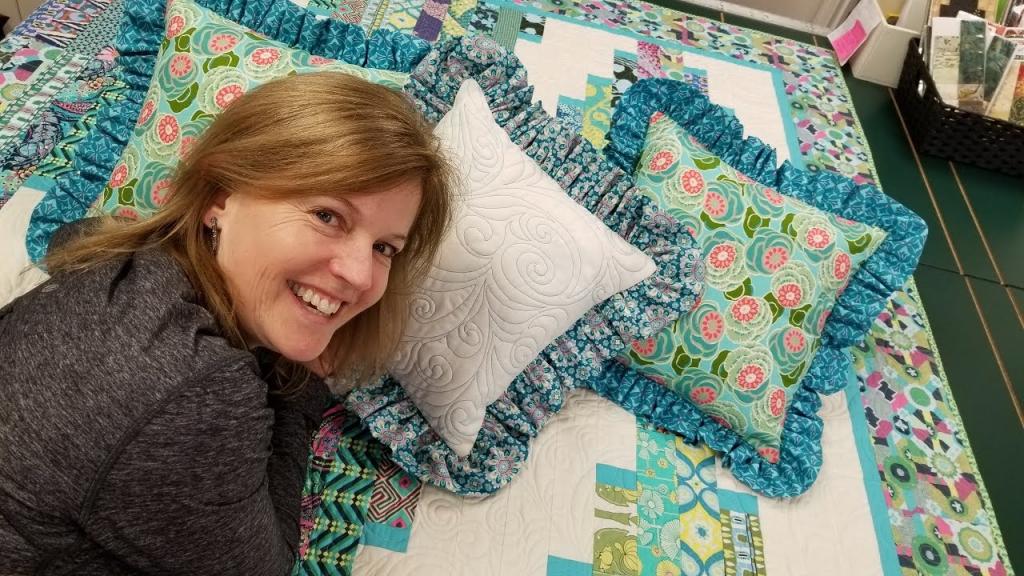
How To Make A Ruffled Pillow Sham
Donna Jordan of Jordan Fabrics is by far my favorite quilter on YouTube. We can everyone comprehend Donna’s explanations about the craft of quilting because she’s so down to earth. Seeing Jordan Fabrics’ incredible ruffled pillow sham video sewing guide on YouTube convinced me to make one of these for myself. Donna, as always, doesn’t let us down when it comes to sharing her expertise and suggestions for making this lovely quilt-making project as simple as possible. While I like sewing throughout the year, there is something special about creating something that will be passed down through generations when the weather warms up. Seeing a variety of vivid colors in my summer creative projects makes me happy. It was then that I decided to buy a fat quarter bundle of brilliantly colored blossoms and make this stunning double ruffle pillow design.
Materials For The Ruffled Pillow Sham:
- Textured (according to instructions in the video)
- Thread
- Scissors are needed for this task.
- machine that sews
- a cutting tool with a rotating blade
- A mat for making cuts.
- It is made of iron.
- a board for ironing
Directions:
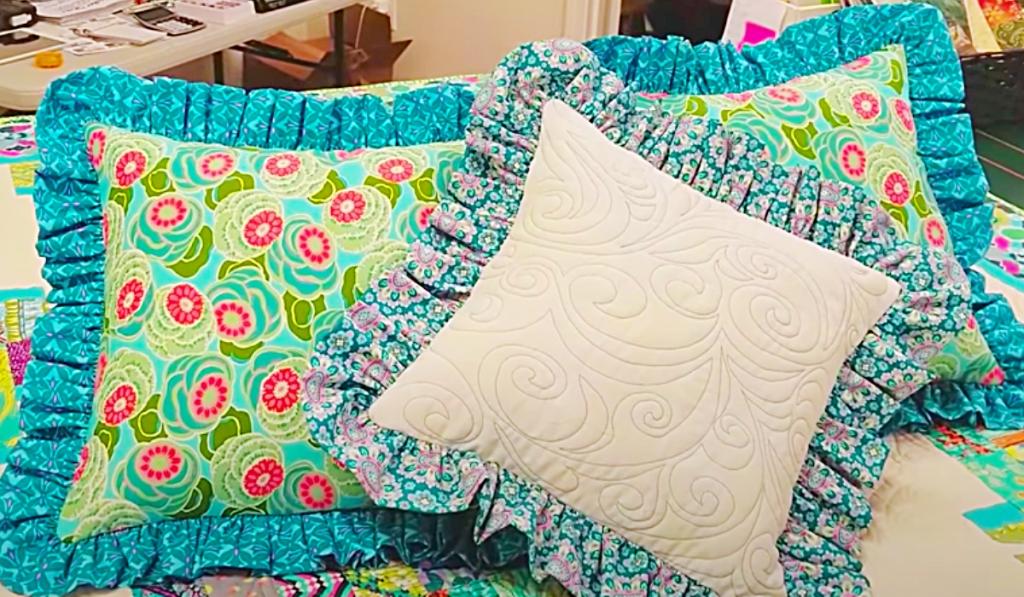
To make Jordan Fabrics’ stunning ruffled pillow sham, follow along with Jordan Fabrics’ video sewing tutorial on YouTube. The ruffle is the first step.
The ruffle and batting will then be attached to the pillow’s front. Honestly, it’s that simple!
How do you make a ruffle step by step?
How to Make a Ruffle. Make a Ruffle Fabric Strip in Step 1. Finish the Ruffle’s Hem First in this step. Step 3: Stitch the Hem with a Machine. Using the Gathering Stitches, complete Step 4. Step 5: Before gathering, pin the ruffle to the seam. Pull the threads of the Basting Stitch to gather the fabric. Step 7: Use a pin to secure the ruffle’s bottom edge.
How do I calculate the amount of fabric needed to make a ruffle around a pillow?
Divide the 41-inch usable width of your fabric by the total length of your ruffle cut. Many times, you’ll end up with an unusually large sum. Don’t round down; always round up. The cloth will be divided into 14 equal-length strips for the sake of this demonstration.
How do I calculate how much material I need?
The number of rows required is equal to the sum of the pieces divided by the number of pieces that fit within the width. The length of one component multiplied by the number of rows needed equals the total project in inches. The total amount of yardage required is equal to the sum of all the project’s inches divided by 36 inches (rounded up to the whole number).
How do you make cuddles?
Xem thêm : How Often To Replace Memory Foam Pillow? Best Answers To FAQs!
A great cuddle session can be had in any of these typical positions, as there is no right or wrong way to snuggle. Insta-pin of the “spoon” Pin this image of a “half spoon” for later. Butts face-to-face. It’s the “honeymoon smother.” “The sweetheart cradle” the “leg embrace” The term “butt pillow” is often used to refer to this item. This is the “lap pillow”.
How do you make a bed pillow case?
Pillowcase Instructions Cutting the fabric you’ve chosen. To begin, cut two pieces of cloth with the same dimensions: 29.5″ long by 21.5″ broad. Snip and stitch your way through fabric. Using the second piece of material, repeat step 2. Pin and stitch the pieces together. Simply turn the pillowcase over and you’re set to go.
How much should an envelope pillow overlap?
The finished product will have the ends overlapping roughly 3 inches towards the back. When the pillow cover is in place, the pillow form will be completely concealed by the excess fabric. The fabric measurement can be calculated by measuring the cushion insert.
How much fabric do I need for a 20×20 envelope pillow?
In order to construct envelope pillow covers, how much fabric need I purchase? Cut 17′′ x 38′′ — 1/2 yard of cloth for the 16′′ x 16′′ project. Cut 19′′ x 42′′ – 2/3 yards of fabric for an 18′′ x 18′′ square. Cut 21′′ x 46′′ -3/4 yards of cloth for the 20′′ x 20′′ project.
How do you measure fabric for envelope pillows?
When cutting your fabric, multiply the pillow size by 2 and add 6 to get the final result. So, for example, my pillow, which is 18′′x18′′, is 42′′ long. if your pillow is: Fabric with a size of 16′′ x 16′′ 16′′ x 38′′ 17-inch-by-17-inch fabric 17′′ x 40′′ The cloth should size 18′′ by 18′′. 18′′ x 42′′ 19-inch-by-19-inch fabric a piece of fabric 20″ x 46″ in size is 19″ x 44″ wide and 20″ x 20″ tall.
How do you measure a ruffle length?
Measure the circumference of the object on which the ruffle will be attached. That measurement should be multiplied in order to achieve the desired volume. When making ruffles for a small girl’s outfit, you’ll need at least 100 inches of cloth (40 inches multiplied by 2.5) or 120 inches (40 inches multiplied by 3).
How do you make linen pillow cases?
Linen Pillowcase Instructions Step-by-Step Buy one yard for each standard pillowcase. Wash and dry the linen in the dryer. Trim off ragged edges. Use a steam iron on a high heat setting. To make one pillowcase, cut two pieces; to make two pillowcases, cut four pieces. If the fabric is printed, sew the first seam with the outside facing out.
What does 1 yard of fabric look like?
Simple Linen Pillowcase Tutorial Step-by-Step For each normal pillowcase, purchase one yard of fabric. Use the dryer to dry your linens. Remove any rough edges. Use a steam iron on the hot setting. Cut two pieces for a single pillowcase and four pieces for two. The first seam should be sewn with the printed side facing out if the cloth is printed.
How many feet is in a yard of fabric?
3 feet is the length of a yard. This can change, so be aware. 60, 72, or 102 inches wide are all possibilities for the width of a yard, but the length is always 3 feet.
What is a Minky fabric?
Minky is a sort of fleece, as you may already know. Suitable for blankets, throw pillows, and even quilt backing, it is made of 100% polyester. Minky fabric, on the other hand, is completely unique. Unlike ordinary fleece, minky is more softer and more comfortable. This is why we call them blankets that feel like hugs 🙂 On April 10 of this year (2020).
Where do you touch a guy when cuddling?
While you’re cuddling, here are some techniques to keep your boyfriend’s hand on yours: Arms around his neck, please. Make a mess of his mane. You can place your hands on his chest. Put your hands on his shoulders and sit on his lap.
What is cuddling to a guy?
It’s difficult to find the same sensation of closeness and comfortable intimacy in other hobbies as when cuddling with someone you enjoy. When you’re at ease with someone, it’s easier to relax and do less physical work.
How do you cuddle in bed?
Curling up in bed: the most comfortable postures 18% of Americans say they prefer to sleep spoon-side-down, making it a popular choice. Snuggle: One partner rests on their back with their arms around the other’s waist as they cuddle up. Your bodies should be linked in a full embrace. Hug that’s roomy:.
Conclusion
Begin organizing your home life now that you know how to construct a ruffled pillow. To build your own ruffled design, all you have to do is mix and match different materials. It’s also a good idea to get your hands dirty when it comes to decorating your home.
Nguồn: https://iatsabbioneta.org
Danh mục: Pillow


