Is a body pillow something you regularly use? I’m unable to sleep without it. I used to be able to do so, but my joints have deteriorated with time and now require extra support while I sleep. Fortunately, my wife doesn’t mind if I sleep with anything else, but when it comes to looking for a body pillow cover, there aren’t many possibilities. As a result of this, I’ve always had to make my own food. Body pillows are now on cheap for back to school, so I decided to construct a fancier cover than I usually do from an old sheet. You can produce a body pillow cover if you can stitch a straight line on a sewing machine.
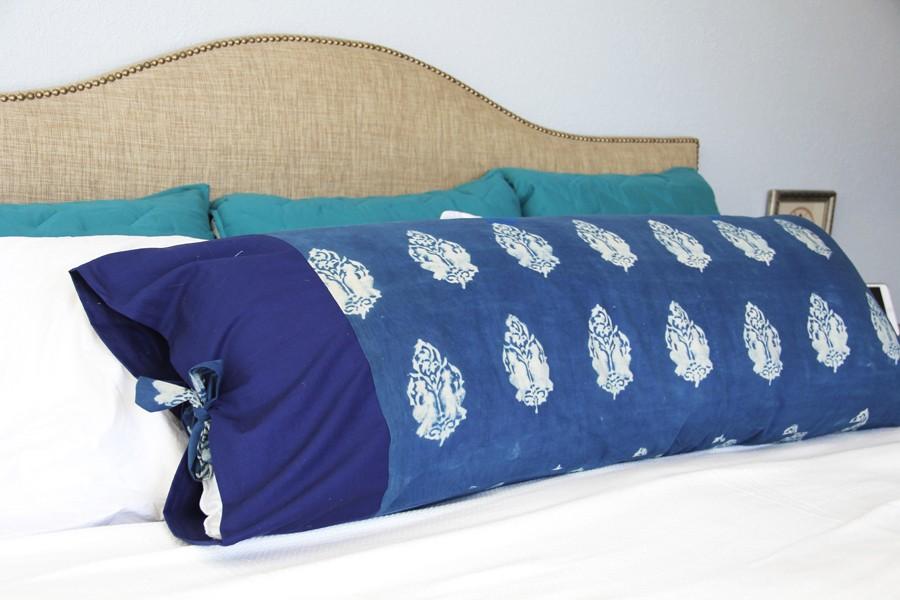
My first attempt at adding tassels to a body pillow cover has been a bit of a learning experience. There is an option to remove the fringe if you prefer a smoother sleeping surface.
Bạn đang xem: How To Make A Body Pillow Case? Step-by-Step Tutorial
MATERIALS
- 1 yard and 6 inches of 54′′ wide cloth (fabric pictured can be found here)
- Using the same thread
- One-yard and six-inch-long fringe
- Velcro
- Needles with a sewing machine
- The ironing board and ironing board surface
It’s important to pick a fabric that you’ll enjoy sleeping on when making your body pillow cover. Be careful not to go overboard on the beading and raised pattern elements. Cottons and linens are great options, as are non-stretch fabrics.
Step1
To get started, take a width and length measurement of your body pillow. The dimensions of a brand-new pillow are most likely 50 x 20 inches. If you’ve been sleeping on the same pillow for a while, it may have shrunk in size.
Once you know the dimensions of your cushion, you can figure out how much fabric you’ll need. The following is a breakdown of the data:
- For your fabric, the length of your pillow plus four inches is the long measurement. My fabric is 54 inches long because my pillow is 50 inches long.
- Two inches is added to the width of your pillow to get the short measurement of your fabric. If my pillow is 20 inches broad, then multiplying it by two and adding four results in 42.
Please follow these guidelines while cutting your fabric. I used a 54 x 42 inch piece of cloth as a guide.
Step2
Fold the fabric in half lengthwise on your ironing board before you begin pressing. The fold should be flattened out with an iron. When you’re done folding the fabric, fold the short sides by half an inch and iron flat. You’ll have an ironed hemline at the top and bottom of your rectangle of cloth if you do this on both short sides.
If you think of your fabric as a book, then the center fold would be the spine. You’ll pin trim to the top and bottom of the right page of this book with the spine running vertically. Make two pieces of fringe by halving it and pinning one to the bottom and the other to the top. Pin the fringe in place over the ironed hem. The fringe’s ends can be folded under themselves to prevent fraying.
Using a straight stitch, sew across the fringe on your sewing machine. Do this with both of the fringe pieces.
Step3
Velcro will be added to one side of the body pillow cover now that we’ve finished sewing. I prefer Velcro with a sticky back while I’m using it. No need for pins now, but I will sew across the Velcro to provide further stability.
The right page of the “book” should have one side of the Velcro attached to it. Right-hand page of your “book” has a Velcro piece attached. Sew a straight stitch around the Velcro’s perimeter on your fabric before transferring it to your sewing machine.
Step4
Getting close! Using an iron, form a crease in the middle of the cloth and fold it in half, wrong side out. To close the body pillow case, use pins to secure the long edge. Close the long side with a straight stitch. Right-side-up the pillowcase. Without using Velcro, attach a pin to the short side of the garment. Closing the end of the pillow, sew a straight stitch down the short side. And that’s it!
After that, all you have to do is put the body pillow cover on top of it. In my opinion, this is one of the most odd pillowcases to place on a pillow. What’s my recommendation? Turn the pillowcase over the pillow with your hands inside the case, and then turn the pillowcase right-side out over the pillow with your hands inside the case. It’s a dream come true.
This new pillow is a big hit with my cat. Cats are known for their love of pillows. She prefers to rest her head on anything supple. Because she knows how much I despise it when she gets her cat hair all over dark-colored fabrics, I believe she has some sort of cat-hair-detecting radar. This is, I suppose, the function of lint rollers in this situation.
Do you use a body pillow before you go to bed? What do you use as a cover for it, if any, or are you going bare? Let me know what you think in the comments section!
How To Make A Body Pillow Case At Home
Pillows can harbor bacteria and fungi, so it’s important to maintain them sanitized at all times. To keep our pillows fresh, we might use a pillow cover that we can wash frequently to keep them clean. A body pillow is always in direct touch with the skin, so you should use a pillow case that is appropriate for that purpose.
Step #1. Designing
Xem thêm : How To Make A Lavender Eye Pillow? Step-by-Step Tutorial
Before creating a pillow case for your body pillow, make essential to take accurate measurements. Lay your pillow down on a flat surface and measure its breadth and length with both ends held in each hand.. In the event that your pillow has been previously used, it’s possible that its dimensions have altered from those listed on the packing.
It’s time to get to work on cutting out the fabric for the cover. Add four inches to the length of your pillow to get the long side of your fabric. Your pillow’s width multiplied by two plus two inches is the measurement of the short side of the material.
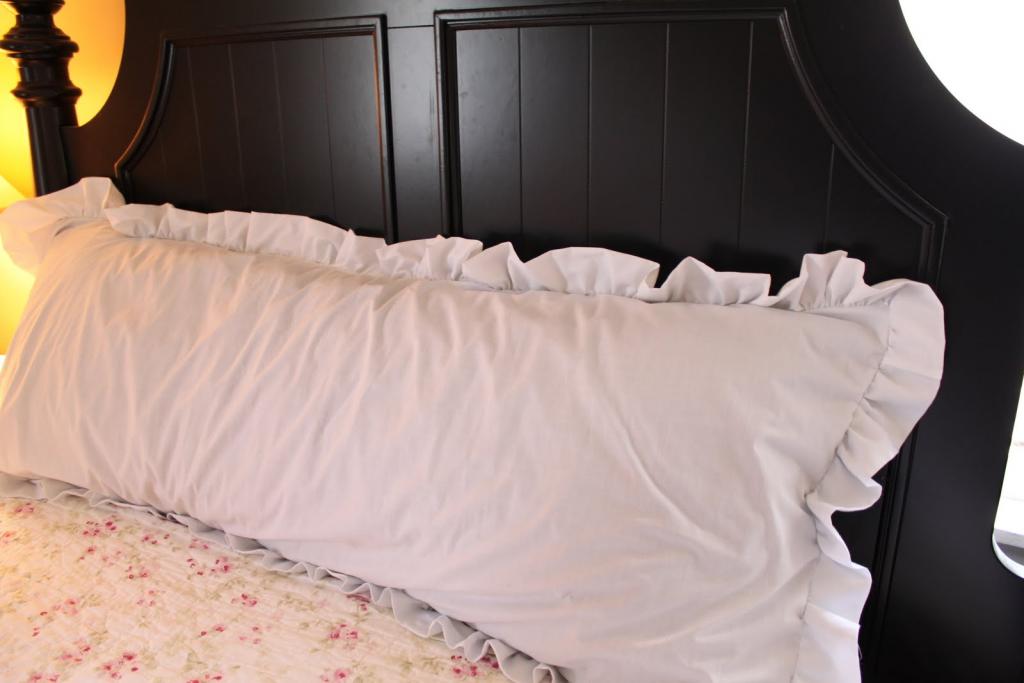
The fabric should be cut to these dimensions. You may now add a fringe to the pillow cover, which will be made easier if you sew a hemline around the entire thing. If your body pillow case does not require a fringe, you can skip this step.
Step #2. Sewing
The final step is to sew the cushion cover on. ” If you’re creating a body pillow case, Velcro is a great tool to have on hand. The Velcro pieces should be attached to the fabric on opposite sides and sewn around each piece. Then, fold the fabric in half with the wrong side facing out and pin the long side together to make stitching easier.
Pin the short side of the pillow cover that does not have the Velcro piece. Finally, you can sew the pillow’s end shut to complete the project. Do keep in mind that this body pillow cover has an open end, so feel free to make any necessary closure changes.
How To Choose Fabric For Pillow Case
You’ll have complete control over the materials when you make your own pillow cover. Keeping the cushion clean and protecting it from daily wear and tear is the most essential material. Furthermore, because it is in constant contact with your skin, the body pillow case should not irritate you.
Pillowcases can be made from a plethora of fabrics, making it difficult to narrow down your options. Let’s separate these fabrics into two groups so that you can make an informed decision. Choose from a variety of materials, including natural and synthetic fibers.
Natural fabrics
As a general rule, most sleepers prefer natural textiles since they are less likely to induce an allergic reaction. Cotton and silk are just two examples. When it comes to body pillow cases, cotton would be a fantastic option because it is both soft and breathable, making it excellent for hot nights.
Silk is an option if you’re looking for something that doesn’t cling to your skin or if you’re utilizing body pillows as decor. You can wear it year-round because of how comfortable and versatile it is. Silk body pillow cases would be ideal for memory foam and down body pillows.
Synthetic fabrics
Pillow covers made of synthetic textiles are an affordable option for those on a tight budget. Polyester and nylon are two of the most common synthetic fibers, and the best ones can feel just as luxurious as natural fibers. However, some sleepers claim that these textiles cause their skin to dry out.
What about combining the two?
Natural and synthetic fabrics can now be found on the market in a variety of combinations. Natural and synthetic fibers are combined in this fabric to take use of both. You’ll get a long-lasting and easy-to-maintain fabric.
It’s also a good idea to look into the fabric’s thread count, as this has the potential to have an impact on the overall quality. It is the number of threads per square inch of the material. As a result, fabrics with a higher thread count have a softer hand.
Body Pillow Cover Tutorial from a Bed Sheet
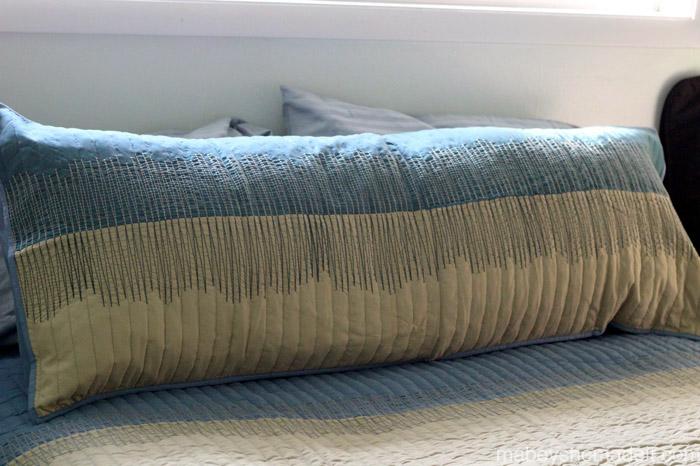
Since I was in high school, I’ve been sleeping with a body pillow. Since then, I’ve attempted to sew a body pillow cover for my beloved bed partner countless times. In the event that I had to choose between you and someone else, I’d pick you. All of my covers did their job, but this one surprised me by being better than the rest.
It was modeled on the store-bought body pillow that I had acquired when I first got my pillows many years ago. It measures 19 inches broad by 51 inches long. But I had no idea of making my own body pillow cover with a zipper. An inside flap, like those found on IKEA, Pottery Barn, and European pillow cases, was what I had in mind. To be honest, I’d tried this previously, but it didn’t turn out that well.
Materials
- a twin or full-sized flat sheet (measure your pillow first)
- The aforementioned tape measure
- Scissors
- Thread
- Pins
- Machine for Sewing (hopefully)
Measure your pillow or an existing pillowcase first, as this tutorial may be applied to any pillowcase type or design. Keep in mind that this technique uses one flat sheet to make four panels, which equals two body pillow covers, e.g. 19′′ x 4 = 76, etc.
That being said, I’ve found Walmart’s basic color sheet sets to be rather comfy after washing. They can also withstand a lot of wear and tear. Many years and many washes later, I have never seen a pill or tear in any of their fitted sheets.
When I was constructing the pillowcase, I thought I had used a Walmart twin sheet to make my first flap body pillow cover, the green one. Unless they’ve made a mistake or the proportions have been altered, this appears to be the case. The green body pillow cover and the burnt orange body pillow cover have been around for a long time. I had already cut a twin flat sheet in half lengthwise when I realized that each panel would be 19 inches short of the width I needed. If I had been smart, I would have done the math, as I am advising you to do.)
As a result, the sheet has been slashed in half. In the end, I decided to use one of our older, squashed body pillows because it was only about 16 inches wide and I could still stuff it in there without having to yank the seams apart lengthwise. I spent 15 to 20 minutes getting to know my seam ripper in order to get my hands on that priceless fabric. In the long term, it will be more efficient to leave the seams that go across the width of the fabric.
It is necessary to cut your sheet down to 19 inches if it is wider than your pillow.
If it didn’t fit even with the extra inch and a half of cloth, I decided to give it a go anyhow, so I cut my two halves into quarters.. We now have 4 16.5-inch broad panels that need to be longitudinally trimmed.
You can select the type of seam you prefer, whether it’s the narrow one at the bottom or the wide one at the top.
Make a piece of fabric 51 inches long, or as long as your cushion measures. Since you kept the seam intact, you’ll be able to see it.
Cut the second panel to a length of 61 inches (or thereabouts, basically add 10 inches to length for your second panel). Inner flaps are the reason for the greater length. 10 inches for the flap on a smaller, harder pillow might be too much. You can shave off a few millimeters, or perhaps half of it. Here’s why I’m going with a 10-inch flap:
Honestly, what the hell is going on with this dog. You can hardly see the pillow through it! It brings back memories of shopping for jeans and feeling self-conscious about my body type because of my behind pooch.
Put the wrong sides together and begin pinning from the bottom up, starting with the freshly cut raw edges. Your cushion will open up with the seams on the top and bottom that you haven’t cut off or undone. Saved time.
In order to finish pinning, fold the excess flap over the opening as close as possible to the other panel’s final edge, but do not fold the other panel down.
This may feel strange to some of you, as if you’re closing the door on the beginning, but trust me. It does what it’s supposed to. I’ve done it the old way before, and the results weren’t quite as good as this new method. The green was referred to as “the other way” in this context. Bad.
It’s time to stitch. Except for the opening of the pillowcase, sew three sides with a straight stitch. Due to the thinness of my panels, I decided to utilize a.25 inch seam allowance. Not a poor decision. In any case, it’s something I’d suggest to keep the seams from looking clunky.
To minimize fraying, serge or zigzag the raw edges after they’ve been clipped to reduce bulk.
Turn the book’s cover over.
Check at this pillowcase’s amazing seamwork. That’s what I predicted.
It’s now time to place it on your neck pillow for comfort. The fitted sheet (which I also purchased from Walmart) and body pillow cover are now complete.
Because my body pillows are older and more prone to wear and tear, I prefer the thinner one than the one that is actually wider.
A Bed Sheet turned into a Body Pillow Cover is a simple DIY project that I hope you enjoyed.
Conclusion
If you don’t have a cover for your body pillow, it will get dirty. Two simple steps are all that is required to construct a body pillow case at home. To make a body cushion, all you need is a fabric of your choice and a few simple measurements.
Sewing can begin as soon as the fabric is in your possession. In addition to sewing the pillow cover, a practical option is to use Velcro pieces. It’s also possible to alter some of the processes to suit your needs.
Nguồn: https://iatsabbioneta.org
Danh mục: Pillow


