Growing hops in a small space can be a rewarding experience if you’re up for it.
Getting started with container hops gardening is as simple as following the steps outlined below:
Bạn đang xem: How To Grow Hops In Pots? Comprehensive Guide
- Hops need at least six to eight hours of direct sunshine each day to thrive in a full sun area.
- With a diameter and depth of at least 20 inches, you need a pot large enough to grow hops, with enough of drainage at the bottom.
- Pot your hops in a slightly acidic soil that drains nicely.
- Ensure that the hops have a sturdy trellis to climb on.
- In order for water to exit the drainage holes, water leaps deep enough.
- Before re-watering, let the soil to dry out for a few hours. The soil should never totally dry out.
Even in a little place like a balcony or backyard, hops are a beautiful and satisfying plant to grow. You will eventually get a bountiful harvest of gorgeous hops if you put in the time and effort.
Select The Perfect Location
Location matters when it comes to the production of hops, especially in the United States. Hops need a lot of room to grow and need at least 6-8 hours of direct sunlight each day to do so. You should expect a very limited or non-existent cone harvest if sunshine is reduced.
To build a trellis for your hops, you’ll need at least 8 feet of clearance. However, if your apartment balcony is facing south and receives enough direct sunlight, this can be done even on an apartment balcony.
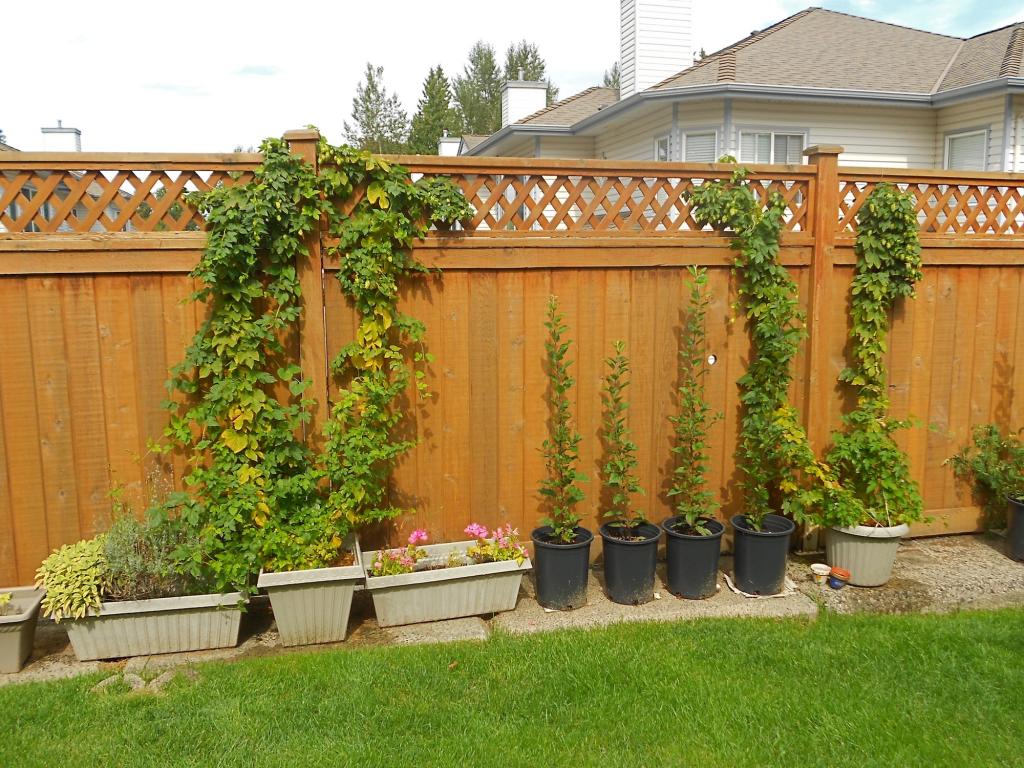
Use A Large Container
Choose a container with a diameter and depth of at least 20 inches if you want to grow hops. You can plant up to two rhizomes in a pot of this size because hops have strong root systems.
When cultivating hops, drainage is critical. Make sure your container has enough drainage. You will need a drill if there are no drainage holes in the floor.
Provide Ideal Soil Conditions
It is essential that the soil in which hops are grown be exceptionally well-drained. 4 parts fresh potting soil and 1 part perlite would be the optimal mixture. Soil should not be compacted or firmed since this will impede its ability to drain. After watering, if additional soil is required, do so.
Additionally, hops require soil that is a tad more acidic than normal. To determine if supplementing the soil is necessary to increase the acidity, a pH testing kit can be utilized.
The pH of the soil can be organically lowered by mixing in used green tea or coffee grounds. You can also buy Aluminum Sulfate and Sulfur at the shop to lower the pH of your soil. Local garden centers carry both of these items.
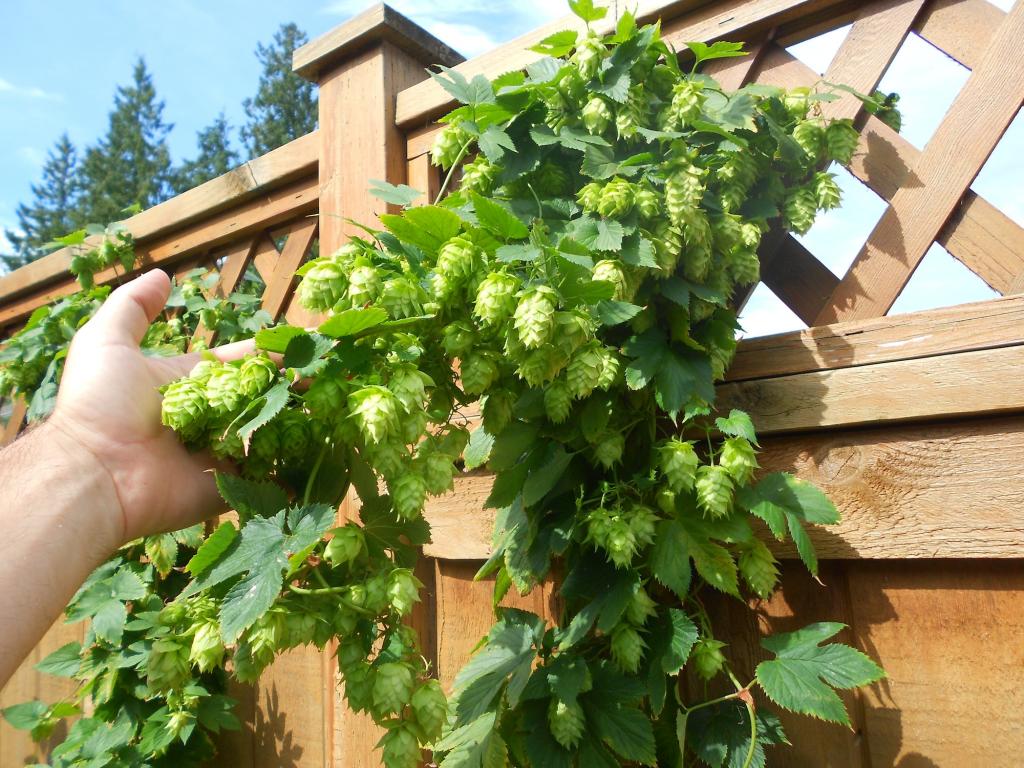
Build A Sturdy Trellis
Hops are a remarkable plant that has a remarkable pace of growth. If given enough room, they can reach heights of up to 20 feet and gain as much as 12 inches in a single day. This is why it’s critical to have a well-built trellis in place from the beginning of the planting process.
The optimum trellis design for growing hops in a small area is actually rather simple to put together. ‘ A few screws, two 8-foot stakes, and a length of strong twine are all you’ll need.
The stakes should be pushed as far into the ground as possible, roughly 5 inches apart. Using a long piece of twine, attach a screw to the top of each stake. Cut and tie the twine at the bottom of the stakes, winding it criss-cross between them.
The hops will grow at an angle due to the criss-crossing. As a result, while only growing to an 8-foot height, a plant has access to a growth surface area of over 20 feet.
Acquiring Rhizomes
Xem thêm : How To Loosen A Ratchet Strap? Complete Step-by-Step Guide
It is a species of hops that is dioecious. In other words, they have distinct plants for the male and female reproductive systems. There are two types of hop plants: male and female. Male plants yield cones, which are lovely and fragrant.
When it comes to harvesting cones, if you buy a package of seeds from the shop and plant them all, you’d have a 50 percent chance. That’s why hops are grown from rhizomes rather than seeds.
A rhizome is a portion of a mother plant’s root system that has been sliced off. The mother plant’s genetic twin, a fully functional female hops plant, will grow when replanted. This is how you may be certain that the plant you are growing is a female.
However, rhizomes have one drawback. Buying rhizomes from a reputable supplier is essential since they are genetically identical to their mother plant. Because hops can be infected by a variety of hereditary diseases, a rhizome taken from a sick plant could spell disaster for your future crop.
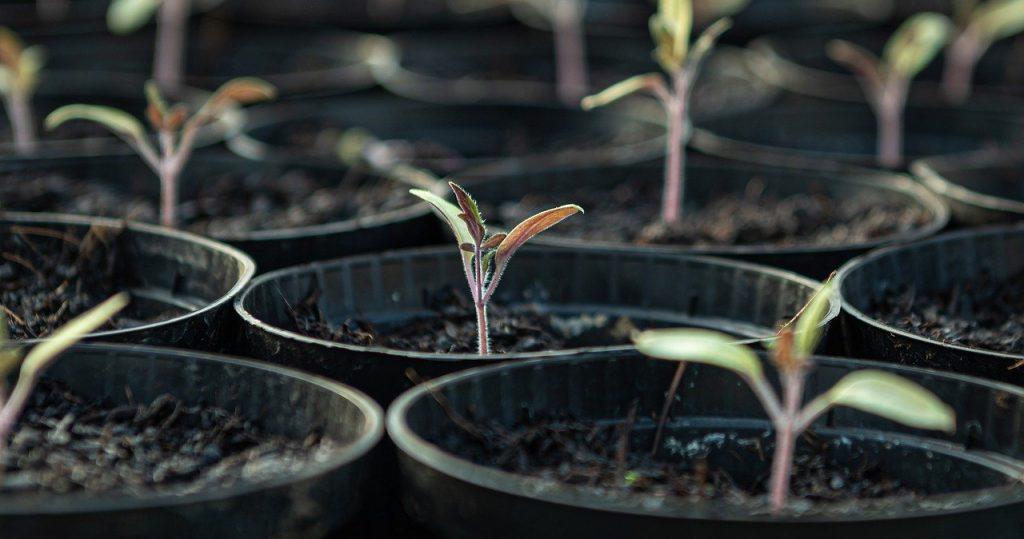
Planting Hop Rhizomes In Pots
According to where you reside, the best time to grow rhizomes varies greatly. You can safely plant your rhizomes after the risk of a late frost is over.
Plant a rhizome vertically at the base of each post, making sure that the buds face upwards towards the surface of the earth, and dig a 2 to 3 inch hole. Apply potting soil and water thoroughly.
If the top 2 inches of soil on the hops rhizomes feel dry, keep them moist. Within the first two to three weeks, they should begin to sprout.
When the sprouts first appear, gradually increase the amount of water you’re giving them. As soon as the drainage holes begin to empty, you should be watering your plants heavily. However, before re-watering, make sure the top three inches of soil are completely dry.
Caring For Your Hops
There is a lot of upkeep involved in growing hops. To develop as quickly as they do, they need a lot of water and regular food. When the weather is hot, you should water your hops every day. Drainage holes should be dripping with water at all times.
Dilute a liquid soluble fertilizer to 1/4 strength before using it on container-grown hops. Hops roots can be burned by overly potent fertilizer.
Keeping an eye on the weeds in your hop planter is essential. Grass and weeds aren’t friends when it comes to competing for water and minerals.
Trellis And Pruning
In the beginning, the angled trellis system will need assistance in developing your hops vines. Because they develop so quickly, it’s critical to check on them daily to make sure they’re following the criss-cross pattern and wrapping around the twine.
Once the hops vines have grown long enough to outgrow the trellis, cut them back. Trim the ends of the vine by snipping just below the node on a regular basis. Branching off from the main stem will allow for extra cones to grow. Pruning shears should always be kept in good condition and be as sharp as possible.
Another critical step in pruning is to remove all of the vines’ foliage from the lowest one foot of the plant. Plants are better able to fend against disease and pests when their lowest leaves are removed.
Winterizing Potted Hops
Xem thêm : How To Gather Lantana Seeds? Complete Step-by-Step Guide
To successfully grow hops in a container in a cold area, you must protect the roots from frost throughout the winter months. In-ground plants have their roots buried deep in the earth, which acts as a natural frost protection.
However, despite the fact that hops are quite tough, cold can penetrate and damage the roots when planted in containers. To avoid this, there are certain steps you can take.
The hops vine will naturally begin to die down as the first front draws near. Bringing the container indoors is an easy solution because hops will go dormant throughout the winter. A cool basement or garage would be excellent because it doesn’t require any sunlight or water to operate.
If you have hops on your balcony, bring them closer to the building so they can get some heat from the sun. Straw, mulch, or blankets can be used to cover the soil surface. This should keep the roots safe until April.
Be Patient
A strong root system will be established the first year after planting hops rhizomes. In the second year, you may begin to see some cones, with the first significant harvest often occurring in the third year.
However, if you don’t see any cones after the first growing season, do not panic. When it comes to growing hops, patience is a virtue.
A lot of time and effort at first may seem like a waste of time and money, but it will pay off in the long run.
Required Materials
Only a few basic supplies are required to get started, and these can be purchased at any nursery or home and garden store. To begin, you’ll require some sort of container. Roots need a least of a 20-inch (51-cm) diameter container or planter for proper growth. When growing hops in a container, the major problem is that you’re squeezing the plant’s roots into a small space. All of your efforts during the growing season will be directed on making up for this shortage.
To make an adjustable trellis, all you need is a 1″ x 2″ post, a #6 (or similar) hook and eye, and some hop twine. Regular twine is also required (jute or sissel or whatever works for you). Any trellis system for in-ground hops, such as hop wire strung from your roof’s edge, can also be used.
You’ll also need a growing medium for the hops. Your growing media must be tailored to this application, even in a large planter, because the roots of the hop plant will be constrained. You’ll need a medium that’s especially well-suited to drainage. It’s not a good idea to use “dirt” in your backyard as a substitute for this type of soil. Planting mix is an appropriate substitute. All nurseries and garden centers sell this medium, which is great for drainage and is quite light when dry. Potting mix is around 2.0 cubic feet (0.06 m3) for each 20-inch planter.

Finally, hop rhizomes and liquid fertilizer are required. All-purpose liquid fertilizer is required for each planter to hold one rhizome during the growing season.
Conclusion
It takes a lot of time and effort to grow hops in a container. It’s not a good choice for first-timers because it necessitates a lot of upkeep and meticulousness.
In addition, producing hops is a more long-term endeavor than most other crops. The harvest normally doesn’t begin until the third year, so you need to be prepared for a long wait.
It’s worth the effort, however, when you finally get to enjoy the fruits of your labor with a gorgeous harvest of hops. Home-grown hops can be a gratifying experience whether you’re interested in their roots in traditional medicine for sleep and anxiety or you’re trying your hand at home brewing.
Nguồn: https://iatsabbioneta.org
Danh mục: Guide