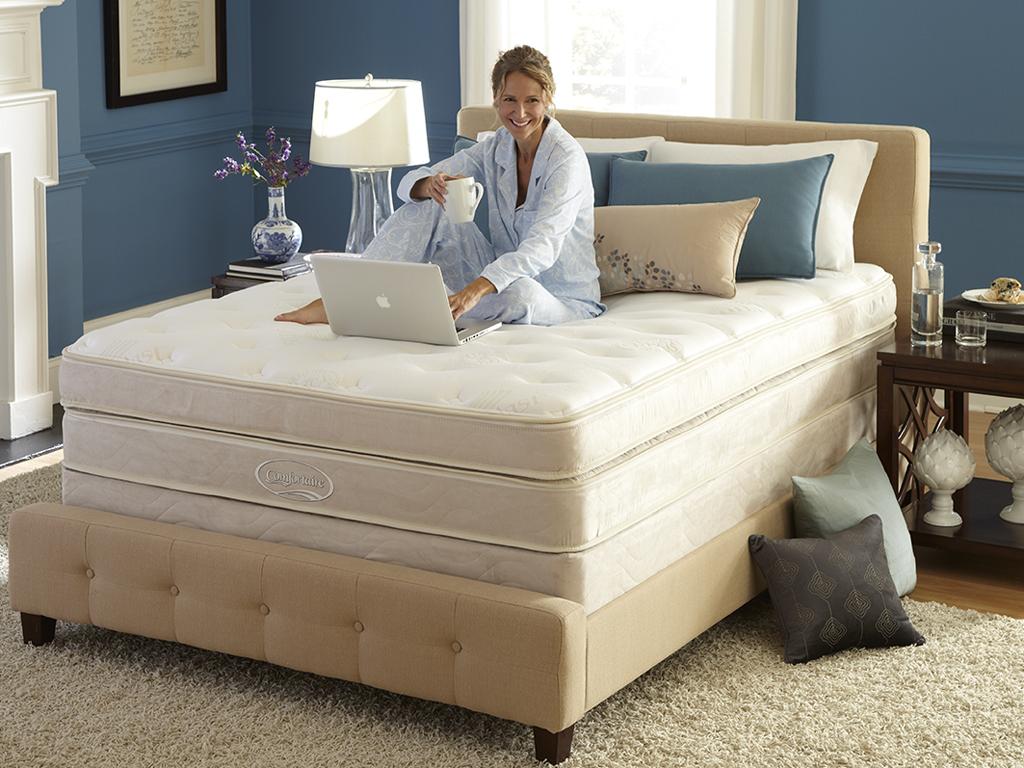
When purchasing a Sleep Number bed, keep in mind that most of these beds are not delivered to your home assembled. As a result, in addition to investigating the bed’s suitability with your sleeping habits, you’ll need to know how to properly place the hardware and bed layers together. Even with the time spent filling the air chambers, assembling your bed is simple and just takes a few minutes from start to end.
Eleven steps are required to install a Sleep Number mattress and frame, as well as to set up the Firmness Control System and customize your sleeper settings. A 360TM Smart Bed might speed up the process and cut down on the 40-minute time required to complete it.
Bạn đang xem: How To Assemble A Sleep Number Bed? Effective Guide For You!
Here are the instructions for putting together a Sleep Number mattress:
- Put the foundation together.
- Cover your foundation with the mattress cover.
- The corner lock mechanism must be properly installed.
- Make sure that the foam walls and the base pad are in their proper places.
- Make use of air-filled containers.
- The Firmness Control System can be set up now.
- In order to use DualAirTM Technology, you must first enable it.
- Add a layer of foam padding.
- Verify that the border wraps correctly.
- Close the top of the mattress.
- Adjust your sleeper’s settings and have a good night’s sleep!
Assembling a Sleep Number bed is a lot easier than you would think. As a result, if you are unable to use Sleep Number’s Comfort ServiceSM Home Delivery, you need not be concerned. This tutorial will walk you through the process of putting together your own small slice of heaven in no time.
What You Need:
Your Bed Frame:
This jersey sheet set may be a good option for you if you’re looking for a luxuriously soft, lightweight, and warm pair of sheets.
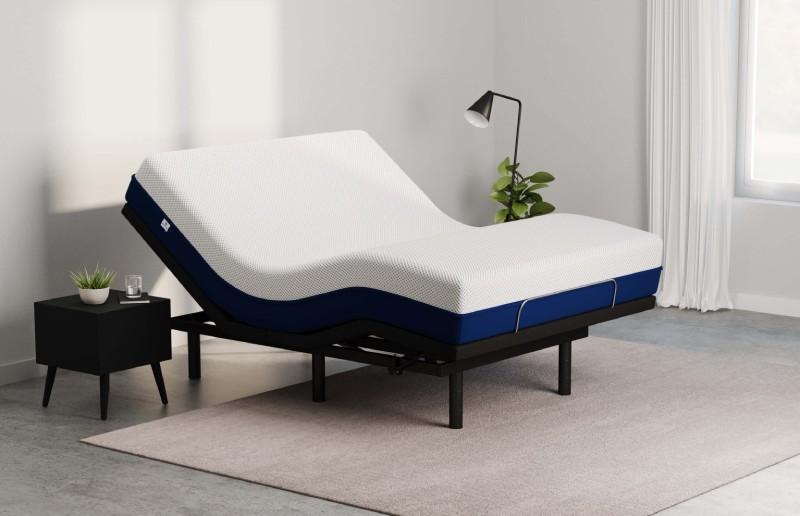
Optional Modular Base from Sleep Number:
The Sleep Number modular bases and FlexFit bases are available if you don’t want to deal with your own frame or if you want to use it but don’t feel like you can give the required support. These can either be used as a stand-alone piece of furniture, or they can be incorporated into an existing bed.
Your Sleep Number Bed:
You should have enough space to accommodate your new Sleep Number bed, which is either on its way or has already arrived. You can begin putting out your bed as soon as your frame and support are in place.
How to Assemble a Sleep Number Bed
1. Assemble the base.
If you purchased one of Sleep Number’s modular or FlexFitTM bases, the first step is to assemble the modular base, side rails, and foot rails of your bed. Either option can be used on its own or in conjunction with your current bed frame. You don’t need to assemble the foot rails or legs if the latter is true. Unless you’re purchasing a smart bed, you won’t need to purchase a modular foundation if you already have a box spring.
Proper Bed Support
Manufacturer-supplied bases fit together easily with rails that interlock. For those who don’t want to deal with their old bed frame, consider purchasing a new one. A screwdriver is all that is needed to secure the legs in place. To use a Sleep Number 360TM Smart Bed, you must also plug in the smart base.
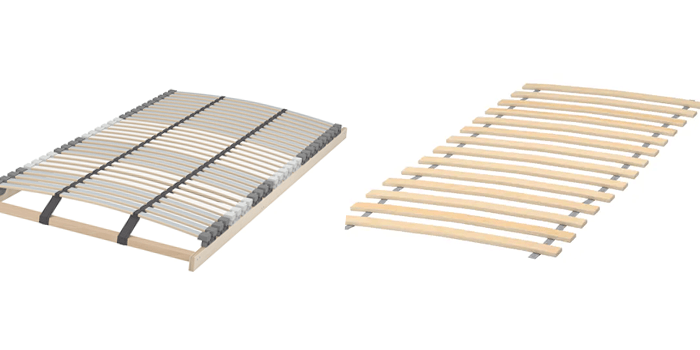
Slats or a Bunkie board are commonly used by those who already have a bed frame as an extra layer of support between the frame and their mattress. Make certain that whatever of these two you’re using is properly configured. The gaps between the slats (see on Amazon) should not be greater than two inches and should be evenly placed (some online resources suggest 4 inches). A Bunkie board, on the other hand, should have a thickness of 1-3 inches and fit snugly into the space it occupies. You don’t have to use a Bunkie board if you already have slats, and vice versa.
Sleep Number Bed Assembly
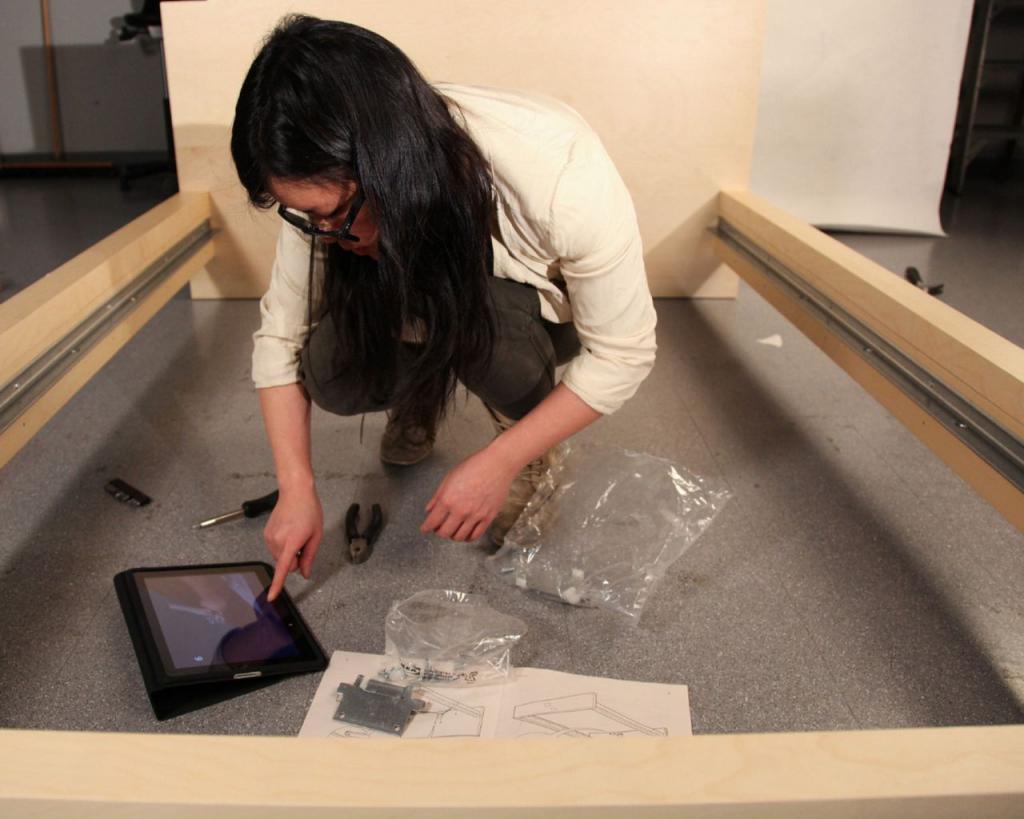
Rails, support beams, and deck panels are all that’s required to put together a standard Sleep Number bed. Components are labeled “A” or “B” based on which side they should be placed on in the diagram. When fitted together, the parts should fit snugly and snap into place. Utilize the provided pins to keep them in place.
Xem thêm : Why Is My Adjustable Bed Not Raising Even? Helpful Information!
Prior to installing cross supports on modular bases, install the legs first. It will be more difficult for you to build legs later if you go straight for the beams. If you’re utilizing an existing bed frame, you may skip this step. Keep the height of each leg consistent when using a FlexFitTM base. Connect the base, headrails, and footrails of split bases. Build a stable platform for your mattress by placing the deck panels on top of the frame.
For existing headboards, you’ll need appropriate brackets for the Sleep-Number bed frame. If you want to attach the brackets from your base to your headboard, you’ll need to have modular base legs that allow you to do so. If you have a raised bed frame, you won’t need any base legs. To complete the look, drape a coverlet over the base (view on Amazon).
2. Place the mattress cover over your base.
In Step #2, you begin putting together your mattress. The bottom of your mattress cover may have one or two openings, depending on whether or not your bed has a dual system. To correctly set up your air system, you’ll need to position these apertures near the top of your bed. When using two of these, be sure to unzip the bottom zipper to allow access to all of the padding and air chambers (including the base pad and sidewalls).
3. Secure the corner lock mechanism in place.
Most double beds utilize a corner locking system rather than the notch side walls found on queen- and larger-sized mattresses. On the mattress cover’s bottom, there are two adjoining mating side and end panels that form its corners and maintain its walls in place. Prior to inserting the foam and air chambers into a double bed mattress, it is critical to secure these components in their proper position.
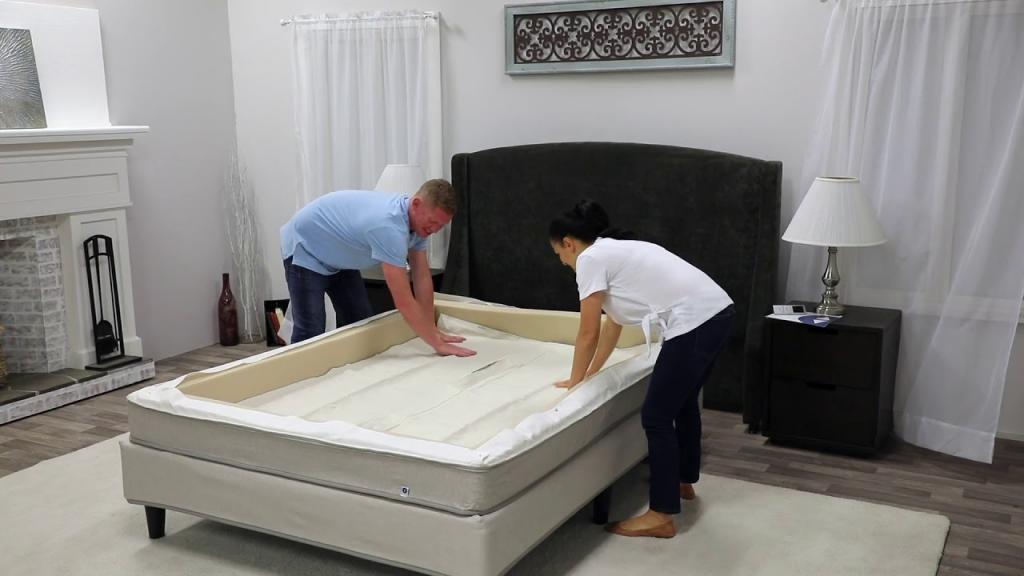
4. Place the foam walls and base pad.
Begin constructing your bed with the mattress top open. For starters, ensure sure the notches or corner locking mechanisms on each wall are facing inwards, since these help form and complete the rest of wall support. Following the sidewalls, begin with the end walls. Lay down the base pad in the centre of the mattress once the side and end walls are attached.
Before laying the mattress cover on top of the foundation pad, shake it out to prevent any foam from folding. If it has a rough side and a smooth side, the smooth side should face down and the smooth side should face up if it is dual-sided. Remember to arrange the air chambers on top of the bed, with both hose connections facing toward the head of it. You will now have complete access to the inside of the container, allowing you to begin layering the bed and installing air technology after these three sections are in place.
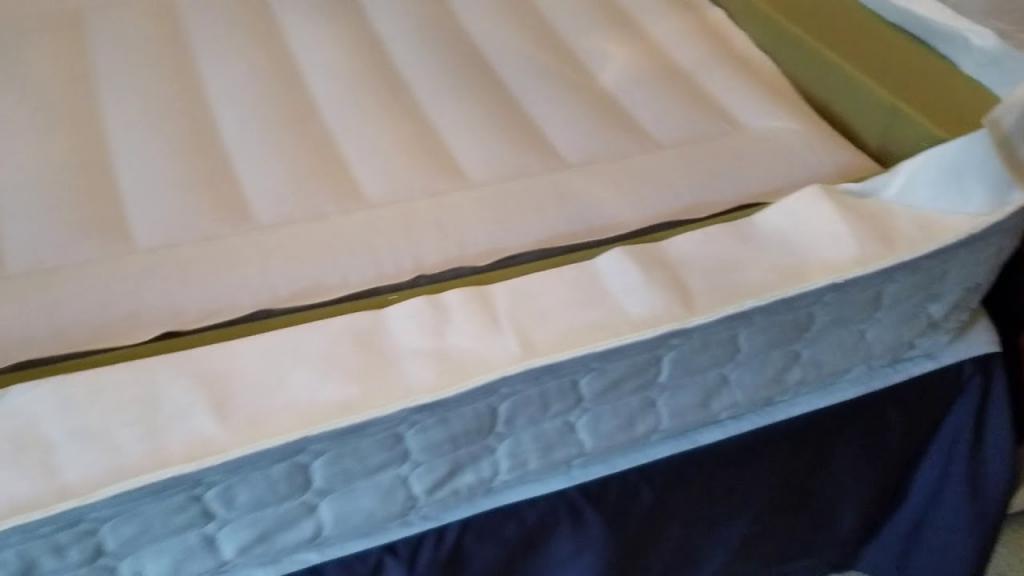
5. Install air chambers.
Once air chambers are installed, they should be placed on top of the base pad such that the hose connectors face the bed’s head and lie on the bottom when filled. They are then ready to be used. Set up your bed’s air chambers after laying the air chambers flat.
6. Set up the Firmness Control System.
Once the Firmness ControlTM System has been installed and connected to the air chambers, make sure that it is situated correctly. It should be placed in the initial segment of the base for elevated or legless bases. The system should be outside the base at the top of your bed if the base is on the floor. The Firmness ControlTM System must be plugged into a surge protector to ensure that your air control unit and electronics are protected from harm in the event of a power surge or lightning strike. This is a preventive step
The manufacturer recommends using a surge protector with a clamping voltage of 330 volts and a joule rating of 700 or higher. The Firmness ControlTM System on a Sleep Number bed is not covered by the 20-year limited warranty because of damage caused by a power surge, regardless of the source.
7. Activate DualAir™ Technology.
Connect the hoses when the Firmness ControlTM System has been properly installed. You can begin by passing the left hose through the opening at the bottom of the mattress cover. You’ll know you’ve achieved a tight seal when you hear the hose connected to the left air chamber click. Repeat, except this time on the other side. The right hose has the same distinctive blue band mark as the left one, making it easy to locate. During this phase, you may have to feed or pull a section of the hose through the aperture.
Use a functional electrical outlet to connect the Firmness ControlTM System Then, turn on the system and use the remote control to inflate the air chambers. But before you do so, make sure your remote has two AA batteries, you’ve downloaded the app to your smartphone, and you’ve followed the web app setup instructions. Press and hold the “firmer” button to begin inflation if you’ve completed all of the above steps, and then switch on your system.
Xem thêm : How To Kill Bed Bugs In Books? A Few Tips to Remember
By starting the night with your system completely inflated, you’ll be able to set up your bedding in the evening and customize your specific comfort levels afterwards.. One side or air chamber of a dual-system bed is inflated at a time. As a result, you’ll need to be patient. As a final precaution, you’ll need to zip together both chambers of your inflatable raft to eliminate a gap between them. If you’re using a single-chamber bed, you can skip this step.
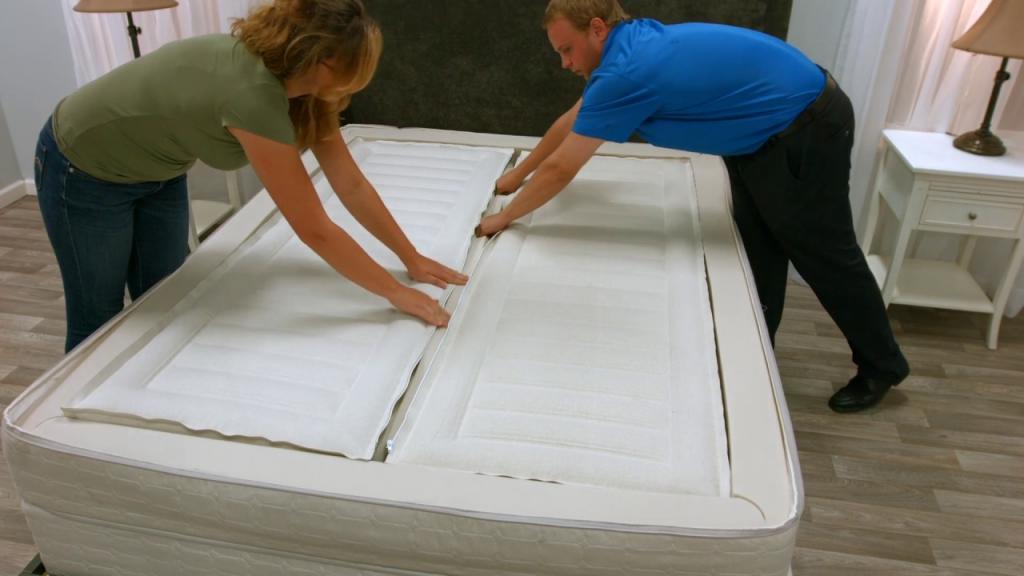
8. Add foam comfort layers.
It’s now time to add foam layers to your Sleep Number bed’s mattress casing after completing the foundation, mattress, and air chamber. In the same way as you would with a foundation pad, make sure that the layers are evenly distributed, smooth side up. The top comfort layer of your Sleep Number bed can be either the firmer or the softer one, depending on your personal taste. Line up the zippers on the duvet or mattress cover (see on Amazon) or pillow top before placing it over the filled air chambers. On top of it, put the border wraps. Connect the zippers closest to the floor to seal the two halves together.
It’s best to open the padding and let it expand for 20 minutes before stowing away in a duvet cover or mattress protector.
9. Verify border wrap positioning.
All of the foam walls and comfort layers should be covered by the foam border wrap at this time. Ensure that your Sleep Number bed meets federal and state flammability criteria by verifying that the border wrap extends all the way over your comfort pad. It also extends the guarantee on your mattress. To ensure a secure fit, the border wrap should be pulled over the mattress’s edges and placed on top.
10. Close the mattress cover top.
Zip up the top of your duvet or mattress cover once the border wrap is in place and your mattress has been set up appropriately. Make sure the zipper pull is at the head of the bed and fully placed into the zipper box to ensure a proper seal when closing it.
To put together your Sleep Number P5 bed, you can watch this video by Gears & Gadgets:
11. Adjust sleeper settings and enjoy!
As soon as you finish putting together your Sleep Number bed, it’s time to modify the settings to suit your needs. Use the remote to gradually lower the firmness or Sleep Number setting on your smart bed until you get the perfect amount of comfort. If you have a dual system, have your partner do the same. Just relax and take a nap or look forward to a peaceful night’s sleep when you are done!
In spite of the sophisticated technology of your Sleep Number bed, you will still need some time to figure out your optimal sleeper setting. The built-in sensors begin tracking your sleep movements, respiration, and heart rate as you use the bed for the first time. After three or four nights of sleeping in a specific position, your body will adjust to your new bed and you will know that it is at its most comfortable.
Sleep Number 360TM Smart Beds are easier to assemble because the mattress is packaged in one piece. It won’t be necessary to assemble it by hand. Once the FlexiFit foundation is fully assembled, all that’s left is to attach the mattress’ magnetic pieces to the top. The following video from Sleep Number demonstrates how simple it is to put together a Sleep Number 360® Smart FlexFitTM bed.
Conclusion – Sleep Number Bed Assembly
Step-by-step instructions for putting together Sleep Number beds are as follows:
Having the correct area for your upcoming arrival is just as important as learning how to install Sleep Number mattresses. You need enough room in your bed to put together the components and move around without feeling cramped. This could be a hassle depending on the arrangement of your home if you don’t already have a place to put your Sleep Number bed together. When it comes to setting up your new bed, having a plan in place before it arrives is the best way to assure a hassle-free experience.
Nguồn: https://iatsabbioneta.org
Danh mục: Bed