Many gardeners’ thoughts turn to forcing tulip bulbs into the ground when the outside temperature drops below freezing and winds pick up. Tulips in pots can be grown easily with a little forethought. Continue reading to find out more about winter-forced tulip bulb care.
How to Force Tulip Bulbs
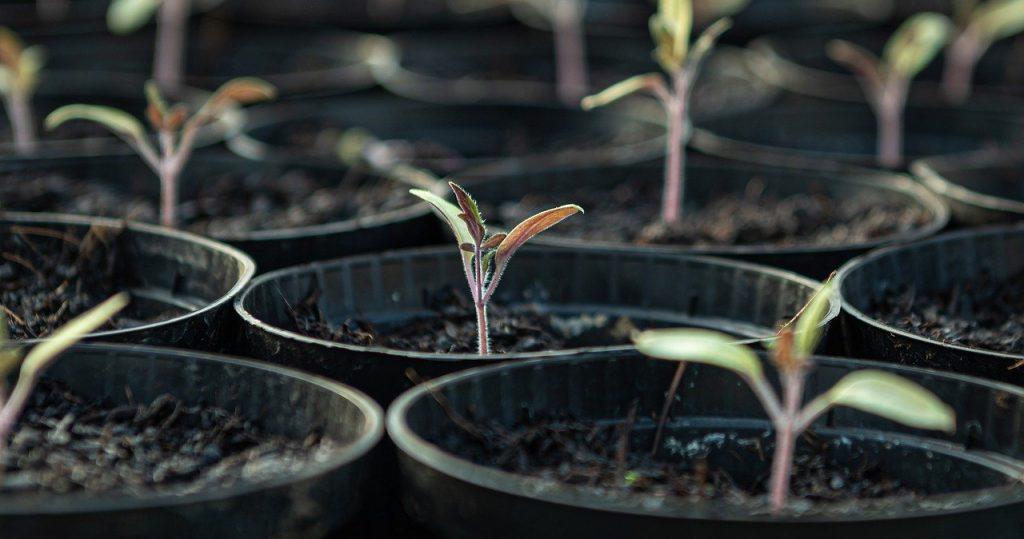
The first step in forcing tulips is to select the bulbs that will be forced. In general, tulips aren’t offered “ready to force,” so getting them ready will be a chore. Purchase some tulip bulbs for forcing in the fall when spring bulbs are on sale. Make sure they’re firm and free of any imperfections before you use them. The larger the bulb, the larger the tulip blossom will be. Place the tulip bulbs you intend to force in a cold, dark location for 12 to 16 weeks. Temperatures should range from 35 to 45 degrees Fahrenheit (2-7 C.).
Bạn đang xem: How To Force Tulips To Bloom Indoors? Tulip Forcing Tips
The vegetable drawer in the fridge, an unheated but adjacent garage, or even shallow ditches near the foundation of a home are common places for homeowners to keep their bulbs cool. You are now ready to begin growing tulips indoors after a few days of rest. A well-drained container is a must. Using a shovel, fill the container with soil until the lip of the container is about 3 to 4 inches (7.5 to 10 cm) below the surface. Put the pointy end of the tulip bulbs up against the earth, just above the soil surface, to continue the process of pushing them.
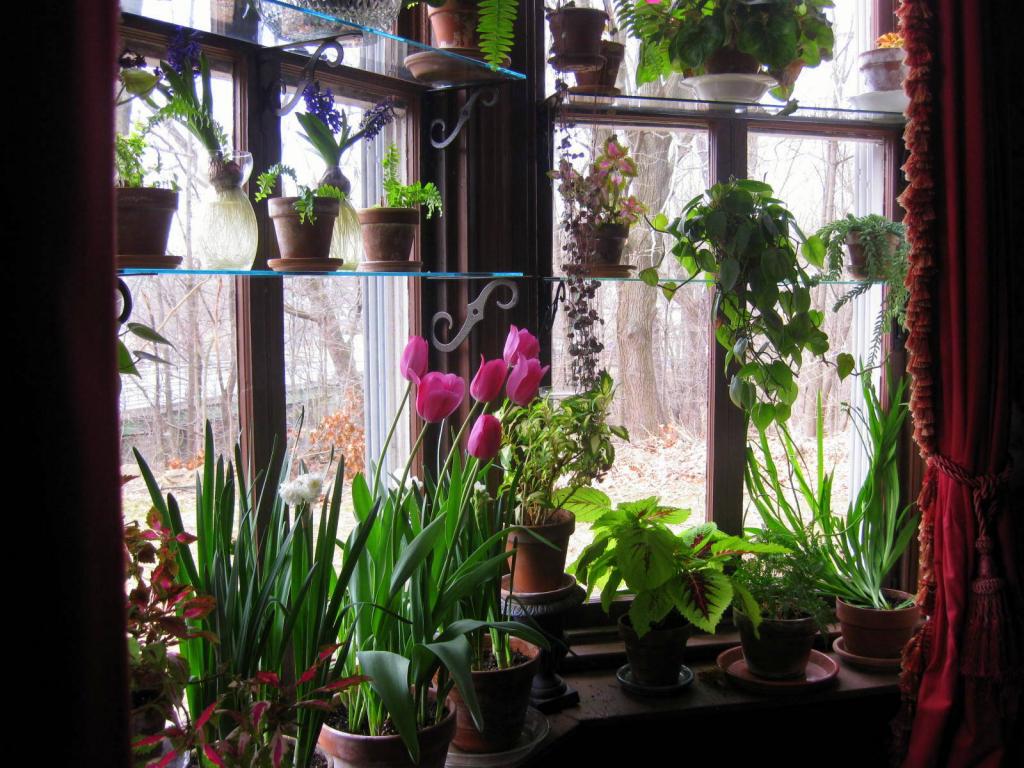
Make sure the soil covers the tulip bulbs all the way to the top of the pot. The tops of the tulip bulbs should still be visible through the dirt. After this, place the pots in a cool, dark location for tulip forcing. Basements or garages that aren’t heated are good. Once a week, give the plants a gentle mist of water to keep them healthy. Bring the tulip bulbs outside as soon as the leaves begin to develop and position them in an area that receives bright, but indirect, light. Two to three weeks after they’ve been exposed to the sun, your forced tulips should begin to bloom.
Forced Tulips Indoor Care
Tulips are treated like houseplants once they’ve been forced. When the earth seems completely dry to the touch, it’s time to water the tulips. Make sure your forced tulips are kept away from drafts and bright light. To grow tulips in pots at home, you just need a small bit of preparation. You may bring a little spring into your winter home by growing tulips in your house.
Springtime isn’t complete without the cheerful sight of tulips. However, you don’t have to wait until April or May to get your hands on these spring favorites. Indoor tulip bulbs can brighten the gloomy winter months. It is possible to enjoy tulips indoors from January through March if they are planned appropriately.
Forcing tulips in the late summer or early fall is the only way to enjoy them through the winter. Indoor tulip propagation requires high-quality bulbs, a nutrient-rich growing medium, and containers with holes in the bottom for drainage.
Visit your local garden center as soon as the bulbs arrive in September for the finest variety. Large, firm bulbs are best. Avoid bulbs that are too soft or blemished. Buying tulip bulbs online is also possible. A few of the greatest tulip varieties to force include Triumph, Single Early, Double Early, and Darwin Hybrid.
Xem thêm : How To Use The Bissell Swivel? 3 Tips to Remember
Plastic, clay, ceramic, or metal containers can be used for forcing. As long as the bottom of the container contains drainage holes, almost any container can be used.
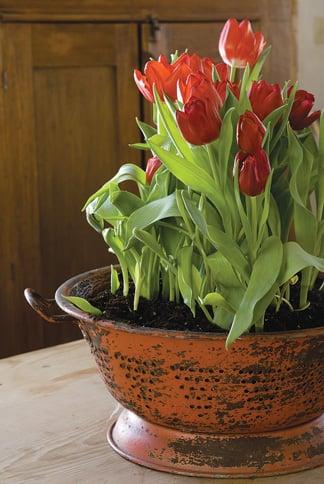
Start by filling the container half way with potting soil. After that, plant the tulip bulbs in the ground. Lower the soil level until the bulbs’ tops are barely below the container’s rim. Planting the correct amount of bulbs depends on the container’s size. A 5-inch pot holds 4 to 5 bulbs, while a 6-inch pot holds 6 to 7 bulbs. Make sure the flat side of the bulb faces the pot’s wall while planting tulip bulbs. An lovely border will form around the container’s edge when bulbs are positioned so that their huge lower leaves grow outward over the edge. Place more potting dirt around the bulbs once they’ve been placed correctly. Do not, however, entirely encase the bulbs in fabric. Tops of the bulbs should protrude above the soil. The soil mix should be 12 to 1 inch below the container rim for ease of irrigation. Each container should be labeled as the plants are planted. Include the cultivar’s name and the date of planting. Immediately after planting, thoroughly saturate each container.
Tulips and other spring-flowering bulbs require 12 to 16 weeks of exposure to temperatures between 40 and 45 degrees Fahrenheit before they will blossom. This is called the “blooming period.” The refrigerator, root cellar, or an outdoor trench are all viable storage options. Potted bulbs should be stored in plastic bags in the refrigerator if apples or other ripening fruits are present. Ethylene gas is released by ripening fruit and has been shown to interfere with flower formation. Water the bulbs frequently and store them in total darkness while they are in cold storage.
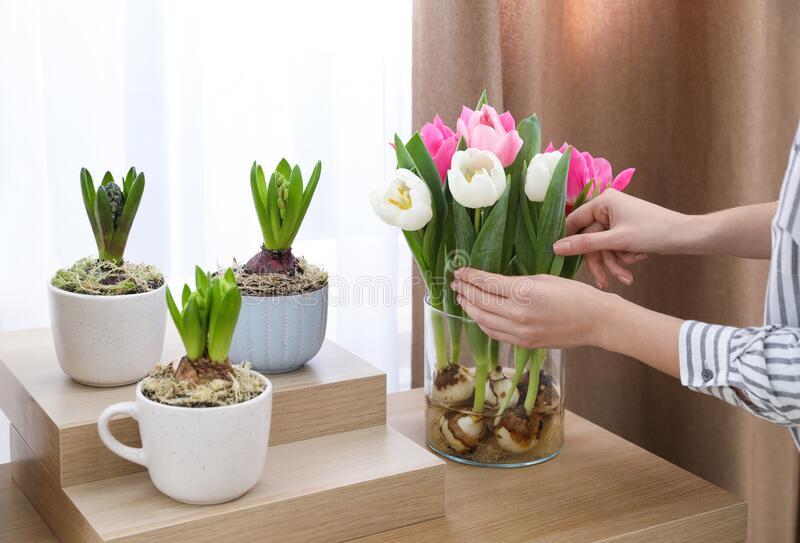
Remove the potted tulip bulbs from cold storage as soon as the cold requirement has been reached. The bulbs should be sprouting golden shoots by now. A cool (50 to 60 degree Fahrenheit) area with low to medium light is ideal for tulips. Wait for the shoots to turn green, which normally takes 4 to 5 days. Then relocate them to a well lit, 60 to 70 degree Fahrenheit setting.. Take care of the plants by watering them frequently and thoroughly. To encourage straight, upright growth, rotate the containers on a regular basis. After the bulbs have been taken out of cold storage, they should bloom in around three to four weeks. To ensure a steady flow of blooms in your home, remove pots from the refrigerator every two weeks.
Tulip Forcing Tips
Making Tulips Survive a Season in Pots
The first step is to choose kinds of Tulips that can be forced. Tulips aren’t all created equal. Tulips from the Species Tulip, Double Early Tulip, Single Early Tulip, and Triumph Tulip varieties are the finest for forcing. Choosing just one type per pot ensures that the pot will be full of blooms. Tulip Mixtures should not be forced.
Plan your flower bulb delivery for the beginning to the middle of the month of October.
Make sure your flower bulbs are in good health when you open and inspect them after receiving them. The blue-gray transportation mold can be removed with a paper towel or the bulbs can be placed in the sun in a single layer. It is best to eliminate any bulbs that have become soft, as they will not be able to withstand pre-chilling.
Soil must be added to the pots of forced flower bulbs prior to chilling. Prechilling hyacinth bulbs can be done either by planting them in soil or by suspending them in water in hyacinth glasses. Select containers with enough drainage that are the correct size for your plants. Use a sterilized, high-quality potting soil. Potting soil should be able to support the bulb and hold enough moisture for healthy root development.
Drainage holes on the bottom of the pot should be filled with a broken pot shard to prevent dirt from seeping out when the pot is watered.
How many bulbs are there in a pot, on average? As many bulbs as you can fit in the pot without them overlapping! We’re a big fan of filled flower pots! Some gardeners prefer to remove any baby bulbs from the mother bulbs’ sides (if any) in order to maximize the number of blooms per container.
Xem thêm : How To Plant Canna Seeds? Comprehensive Guide
Potting soil should be layered halfway up the sides of each container. Put the flower bulbs in the pot, root side up. To finish the pot, add potting soil to a depth of 1 inch below the container’s rim. If required, add a little more soil to bring the soil level down to 1′′ below the top of the pot. This is to prevent soil and water from spilling when watering. Every single thing a tulip bulb requires to bloom ideally is contained within a tulip bulb. Any type of fertilizer, even organic, should not be added to the pot. If fertilizer is introduced to the soil beneath the bulbs, it may induce root burn as well as excessive foliage production.
Label each pot with the name of the variety being pushed and the date it will be placed in the refrigerator to chill. Keep track of the varieties that work best for you so that you can use them in the future!
Maintain a constant temperature of 35°F to 45°F in the flower pots by placing them in a dark refrigerator or cooling unit. Avoid storing them in the fridge! Don’t pre-chill bulbs with ethylene gas-producing fruits like apples and peaches.
Unheated cellars and garages are acceptable as long as the temperature remains constant between 35°F and 45°F. Monitor the temperature with a minimum-maximum thermometer. Keep the pots in the dark by covering them with newspaper. Developing a strong root system in flower bulbs necessitates a constant temperature range over the prechilling stage. As a matter of fact, they despise freezing and thawing cycles, as well as temperature spikes of any sort. Immature root development is caused by temperature spikes, which lowers the bulb’s viability. Alternatively, you can place the pots in a cold frame or trench and cover them with a 6- to 8-inch layer of salt hay or sand to keep them warm throughout the winter months. To prevent root germination, place the cold frame or trench above the freezing point of the ground.
Once or twice a week, check the flower pots to see whether they need watering. The soil should be watered sparingly if it seems completely dry to the touch.
The pots of Tulips should be kept in the refrigerator for 12 to 14 weeks before planting. When planting bulbs, it is best to keep a pre-chilled pot in a cool place for as long as possible to allow the bulbs to develop strong root systems. There will also be a few sprouts in the soil: Don’t stack the pots on top of each other if you don’t want to inhibit sprout growth. To compensate for the lack of sunshine, the plant’s early top growth will be white to pale green-yellow in appearance.
Bring the flower pots outside into filtered sunshine at the conclusion of the cooling time so that the new sprouts can adapt themselves to the sun and the warmer weather. For three to five weeks, gradually increase the pots’ exposure to more direct sunshine. Drink as much water as you need.
Move the pot into direct sunlight in a temperature range of 50°F to 65°F once the blossom appears. The pots can be placed anywhere as soon as the flower buds begin to turn color. Just keep in mind that flowers do better in chilly environments. Tulip bulbs should be thrown away as soon as they’ve been forced.
You can’t go wrong with Tulips in the winter! If you have extra pots, you may also utilize them as a private cutting garden so that you can have vases of Tulips in the winter as well..” Since you purchased our size 12 cm/up bulbs, your Tulips will be larger than those sold as cut flowers.
In addition to Tulips, other types of flower bulbs that are good for forcing include Narcissi, Crocus, Scilla, Rock Garden Iris and Muscari. Anemone blanda and Fritillaria meleagris are also good for forcing. Puschkinia and lilies are also good for forcing if you are looking to expand your indoor garden.
Nguồn: https://iatsabbioneta.org
Danh mục: Guide