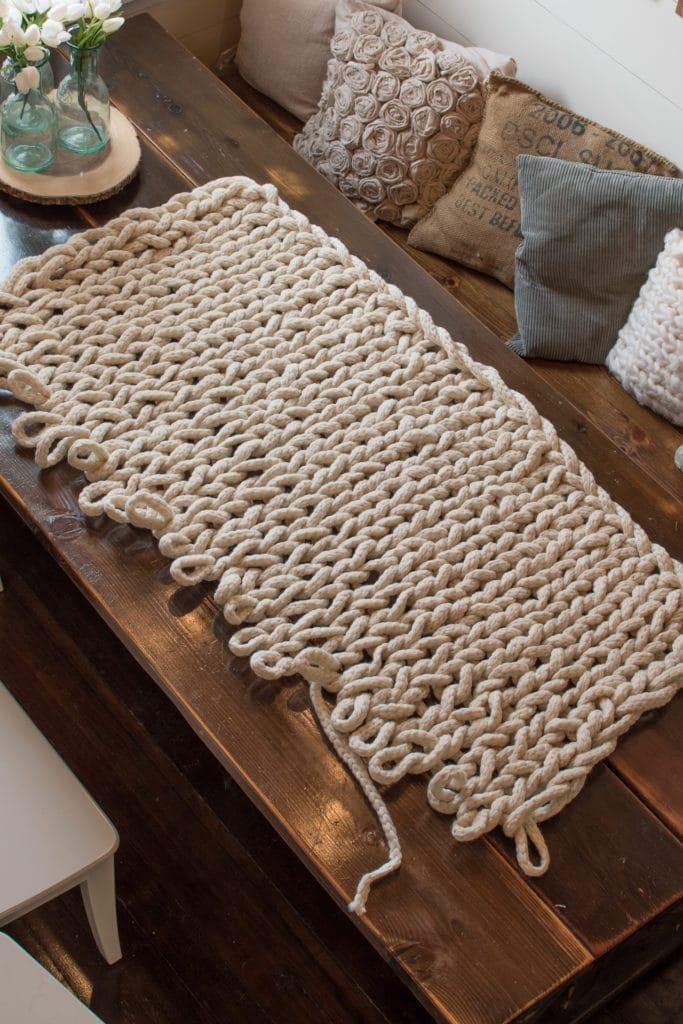
Making this warm finger knit blanket was a breeze. And I did it in under two hours, with two stops for coffee.
Once upon a time, around a year ago, I attempted to arm-knit a thick blanket in under an hour. When I finished, I was not pleased with the result or the yarn I had used. Since then, I have been on the lookout for a pill- and shed-resistant yarn or wool and a quick method for finishing one of them.
Bạn đang xem: How To Finger Knit A Blanket? Comprehensive Guide
A reader suggested I try finger knitting, so I did. Now that I’ve had a chance to try it out, all I can say is how fantastic a recommendation it was. In case you, like me, were underwhelmed by arm knitting and are unwilling to tackle huge needles, I heartily recommend giving finger knitting a try.
HAND KNITTING A BLANKET – HOW MUCH EXPERIENCE DO YOU NEED?
I had no prior expertise with hand or finger knitting before I started this project. I’m a beginning knitter at best. I have enough knitting skills to get by, but I frequently make mistakes, twist the yarn, and drop stitches.
I have some experience knitting a large, thick blanket, and if you’d want to read about the difficulties I had, you can find that story here. There hasn’t been anything this big or meaty before.
Despite the challenges, I found the entire process to be surprisingly simple, especially considering the scope of the undertaking.
VELKY BLANKET AND WE ARE KNITTERS
I received a message from We Are Knitters asking if I would be willing to try out one of their kits. The Velky Blanket, along with some of their extra-chunky highland wool, was the one I was asked to try out.
Since excessive shedding and pilling are my main concerns, I replied by email and inquired if they were common complaints. After trying out their wool, I can see why they don’t have any complaints in that regard.
Amazing kits for knitters of all skill levels may be found on the We Are Knitters website. The necessary yarn and needles/hooks/etc. are included in each set. The kit I received had five XXXL highland wool skeins, a care tag, and some other interesting extras.
Needle sizes appropriate for the project are included in the other kits. Even if you don’t need needles, you can skip that step if you already have the correct size. I really appreciate the ease with which they’ve designed their website.
The knitters and crocheters in your life would love to receive one of these kits as a present. And if any member of my amazing family happens to be reading this… Hint, hint, hint.
Arm knitting instructions are included with each Velky blanket purchase. To put it bluntly, I am terrible at knitting with both arms together. That’s why I went with finger knitting for my blanket. Because I used a different technique when knitting, my instructions change slightly from theirs. However, I was able to knit up a blanket that measured 70 inches by 50 inches using the same method.
A FEW NOTES ABOUT THE XXXL WOOL FROM WE ARE KNITTERS.
It’s possible that some of the links in this post will lead to an affiliate program. The use of these links does not increase the price you pay for the item, but it does allow me to earn a little commission.
When asked for advice on a project, I only ever suggest the tools and supplies I myself use. I also make sure everything is working properly before I release it to the public. In exchange for an honest evaluation, We Are Knitters gave me with the materials for this post at no cost.
This is pure highland wool from Peru. This wool is made by braiding and weaving together many individual fiber strands. This kind of weaving produces a rope-like appearance, which I found to be a welcome addition to the finished product.
There is less shedding because of the way this wool is woven. After finishing this blanket using my fingers, I noticed almost no shedding. Will wool hold up to heavy wear? Only time will tell.
Because the shedding is so low (and I do mean low), the pilling should be much reduced.
Xem thêm : How To Knit A Blanket With Straight Needles? Comprehensive Guide
In a few months, I’ll return to this topic with an update on pilling.
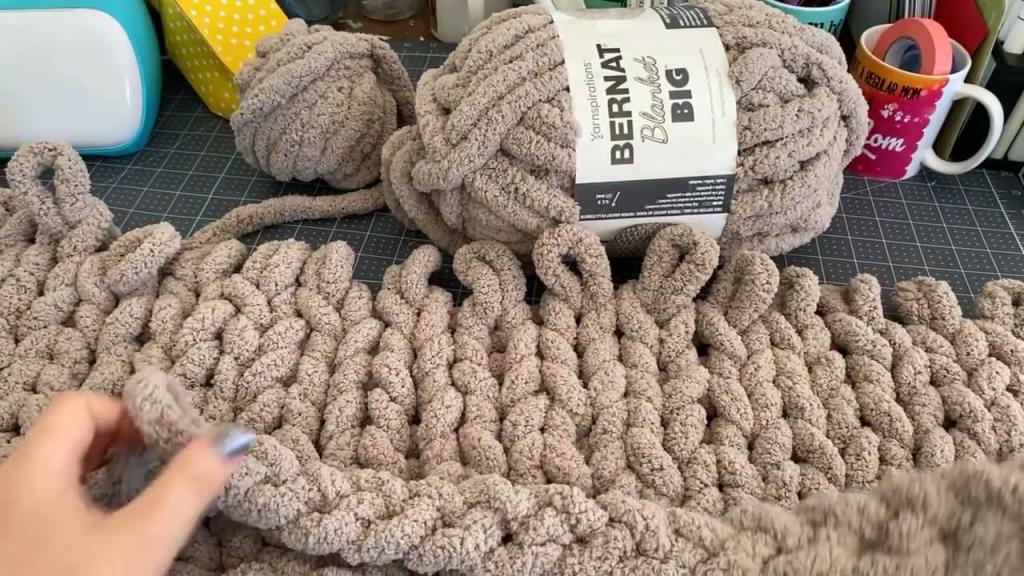
It’s also worth noting that this wool is quite dense. Pictured below is Lion Brand’s Wow next to Red Heart’s Irresistible for comparison. I used both yarns in various experiments. I wanted to try knitting a large blanket again, but this time with the proper fiber, so I went on a hunt for wool or yarn that wouldn’t shed or pill. The previous attempt failed miserably.
If you’re looking for a different gigantic yarn, you might want to check out the comparative page. Although none of them come close to the scale of this XXXL wool, they are all manageable with this hand knitting technique.
This extra-extra-extra-large wool is wonderful. It’s really cushy and makes a wonderful blanket. Additionally, it is quite user-friendly.
In the future, when I want to knit something really enormous, I will definitely be purchasing this yarn.
We Are Knitters XXXL, Red Heart Irresistible, and Lion Brand Wow, from left to right.
SO IS THIS BLANKET KNITTED OR CROCHETED?
Neither.
This is a knit blanket, but we’re crocheting chains, right? Yup. Although it may sound strange, the finished blanket resembles knitting more than crocheting. So we will call knitted blanket. You aren’t knitting or crocheting, but rather using a whole different technique.
Wait a minute, we crochet chains on a “knit blanket”? Yup. It may sound strange, but after you’re finished with the craft, the blanket will look knitted, not crocheted. Knitted blanket is the term we’ll use. This is not the same as knitting or crocheting; it’s an entirely separate technique.
What does this mean? I will explain everything in detail, and even include a video that will teach you how to finish your finger knit blanket from start to finish.
STEP 1:
First, tie a slip knot.
STEP 2: CHAINING THE FIRST ROW OF YOUR FINGER KNIT BLANKET.
Make a chain of 25 links, plus one more for the end. Stay focused and avoid turning in your work early.
In case you didn’t see the video up top, chaining is as simple as pie.
STEP 3: WORKING THE ROWS AND EDGES OF YOUR FINGER KNIT BLANKET.
Make sure there is no turning loop in the very last chain of each row. That loop will be disregarded as you move on to the next chain. To those who are unfamiliar with crochet, I say not to fret; I know just enough to get by.
If you need a refresher, just chain two, skip the third chain, and start looping into the second row of loops.
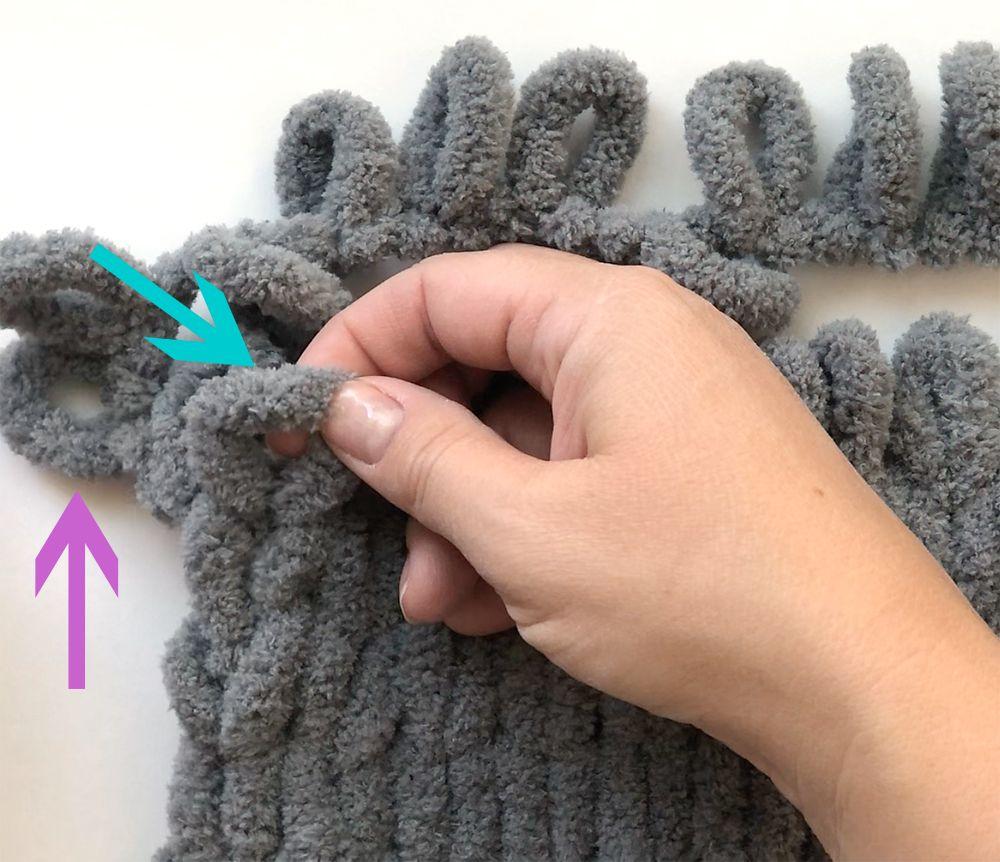
Make careful to pick up the loop we dropped at the end of the third row. Please refer to the image below. Once you’ve looped into it, there’s no need to do it again; move on to the next item. If these written instructions are unclear, the video will demonstrate the process. It’s more challenging to put them into words than to really carry them through.
You should be able to get about 10 feet of yarn by looping it through each row repeatedly.
Xem thêm : How To Knit A Zig Zag Blanket? Comprehensive Guide
The approach of leaving a loop at the end of each row produces a clean, uniform edging at the top and bottom.
STEP 4: CASTING OFF & WEAVING IN LOOSE ENDS.
To cast off, draw together two loops, loop into them, and continue in this manner across the row. Use the scissors to snip the yarn, leaving a tail of about 18 inches. Weave this tail and any other stray yarn ends into the blanket.
TRICKY BITS AND TIPS AND TRICKS
Having never attempted any kind of knitting with my fingers before, I ran into a few little problems. If you make these adjustments before beginning your project, I believe you will have an even more successful outcome than I did.
Make Sure Your Workspace Is Big Enough
Space is of the essence when working on this project, so don’t try to jam in. Initially, I worked on a desk, but as the blanket grew in size, I realized that moving it back and forth distorted my stitches.
I suggest using a large surface, such as your dining room table or an expansive island, to work on this. You won’t have to worry about rearranging your workspace to accommodate the project, as it works up really quickly.
It was also helpful to have my finger knit blanket spread out on the dining room table, where I could easily move it from one side to the other while I worked on it. In addition, it facilitated the detection and repair of any twisted or dropped stitches. When the blanket is gathered, they are harder to spot.
Watch for Twisted Stitches
Keep an eye out for twisted stitches since we’re on the topic. In order to fix them, you would have to undo all you’ve done, which is obviously not an option. Stitch into a U-shaped loop rather of an X-shaped one. To illustrate my point, please watch the attached video.
Watch the Size of Your Loops
Having perfectly even stitches isn’t absolutely necessary, but you should always pull enough yarn through each stitch to prevent it from being dropped accidently due to too small of loops.
THIS ISN’T A CHEAP PROJECT!
Therefore, let’s discuss how much this undertaking will cost. A total of $250 USD is required to purchase 5 skeins of wool. There is a hefty price tag attached.
I looked for a blanket of this size in Canada and found that it would cost at least twice as much. Considering that the DIY version turned out so nicely and is made with wool, rather than artificial yarn, it seemed like a worthwhile endeavor.
When writing reviews or sharing my personal experiences, I give nothing but the truth. You can read all about my failed attempt at arm knitting and the $160 Canadian dollars I spent on a blanket that my dog ended up using as a bed. My old jumbo blanket wasn’t that jumbo and pilled like crazy, which was always a source of irritation for me.
I’ve spent a considerable sum on this endeavor, mostly on the wool needed. A wool that would provide a thick knit without pilling excessively or shedding like two labrador retrievers in the summer.
Ultimately, this is it.
Everything I wanted in a blanket, and more, was included in this XXL wool and this project. It took me about a year and a half to figure this out, but if you’ve already exhausted other options, this yarn and technique may be perfect for you.
Keeping my word, I will return to this site in the future to report on the blanket’s durability.
Tips & Tricks:
Taking a break is necessary with a project of this magnitude. Pick up the stitches from your fingers and safely store them in a long stitch holder until you’re ready to knit again. Stitch markers, which are used to mark the position of a certain stitch, are another option. Simply reverse the sequence in which the stitches were removed from your fingers to ensure that your join is always at your index finger.
Conclusion
I bet you didn’t know you could use your fingers to knit, too! With the knowledge you’ve gained from this post, you should be able to finger knit a blanket in no time. Using the double-wrap method and the flat knit stitch, you can cast on with either hand.
The size of the blanket will determine how much yarn is required. Knitting aids that are large and chunky are also useful. The information provided here should serve as a good foundation for beginning a finger-knitted blanket.
Nguồn: https://iatsabbioneta.org
Danh mục: Blanket


