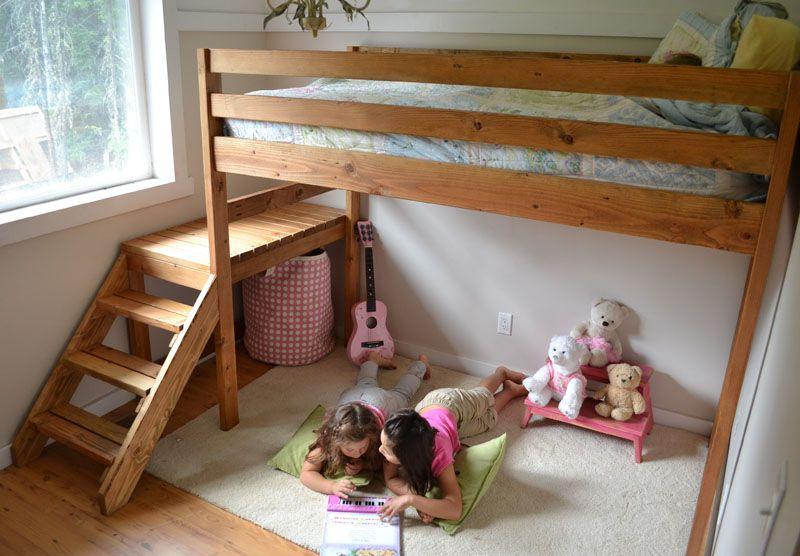
I recently created a bunk bed for my nephew that was custom planned and made. A few requirements were made, but I was given a lot of leeway in the design process. He envisioned it as being green, with shelves, lights, and a desk all integrated into the design. Of course, a bunk bed would be incomplete without a ladder.
I’ll show you step-by-step how I made this bunk bed ladder in this guide.
Bạn đang xem: How To Build Bunk Bed Stairs? Comprehensive Guide
For those who wish to make bunk beds like this one, you’ve come to the right place. I created easy-to-follow printable plans for the entire build. You can grab them here:
Materials and Tools
- First, if you want to make a bunk bed like this one, you’re in luck! An easy-to-follow set of building instructions may be found on my website here. You can get them from the following location:
- As a tape measure
- Glue for Wood
- Staining the wood
- Sand and Paper
- Filler for wood
- Finish Nails, 1 1/4 in.
Wood
- 2 x 6ft poplar poplar
- One 16-foot poplar.
Step 1: Determine the Height of the Ladder
Before I started building the ladder, I determined how high it had to be. In the end, this is all about the height of the upper bunk. 60 1/2′′ is the height of the one I made for my nephews.
Xem thêm : How Long Does It Take Bed Bugs To Die After Extermination?
In addition, I had to decide how much the ladder would tilt. Eventually, I settled on a 15-degree angle. To keep it out of the bathroom doorway, this looked like a reasonable quantity.
Step 2: Make the Side Rails for the Ladder
Cutting two 1x4s to 62 inches long with a 15 degree angle on each end was the first step in making a simple tabletop.
A jigsaw was then used to cut a straight line from point b to point a, as shown in this diagram.
Next, I calculated the number of steps in the ladder and the distance between them. For simplicity’s sake, I went with a five-step process. For the distance between the two objects, I multiplied 5 by 3/4 inch (the thickness of each step). That figure was taken from the rail’s length and then divided by 6 to get the total length of the rail (the number of spaces). This ended up being a little over 9 3/4 inches long.
To get this length, I used a spare piece of 14 cut at a 15-degree angle for either end. Then used it as a template to mark where each step would be.
I used a router (set to 1/2′′ depth) to cut our notches inside of the step markers on both rails.
Step 3: Add the Ladder Steps
Cutting the 16 into 4′′ wide strips was done on a table saw. Then cut it into five 15-inch-long halves. As soon as I finished cutting all of the steps, I glued down the rail notches using wood glue.
Xem thêm : What Are Bed Bugs In Spanish? What You Need To Know
Using the bunk bed ladder rails, I then secured each step into place.
I double-checked the top edge of the rungs on the ladder’s rear to make sure they were flush with the rails. This resulted in a somewhat longer front overhang.
I nailed the stairs to the rails with 1 1/4′′ finish nails after installing the second rail.
Finally, I ripped a 14-inch-long piece to a 2-and-a-half-inch-wide width. After that, I stapled and bonded it to the tops of the two rails, as indicated in the image below.
Because of this, I was able to attach the bunk bed ladder.
Step 4: Fill Holes & Stain
After constructing the ladder, I used wood filler to seal up all of the nail holes. Sandpaper was used to smooth down the ladder’s corners and sharp edges once the wood filler had dried.
The ladder was then stained with Minwax Rustic Oak, which I applied with a clean cloth.
Nguồn: https://iatsabbioneta.org
Danh mục: Bed