A recliner’s bearings can be replaced by following the instructions in this article. The failure to do this maintenance on a regular basis can lead to more significant issues, making it a need for every homeowner.
- A Laypersons Guide To Pranit Recliner
- How To Close Your Footrest On A Recliner? Everything You Need To Know
- How To Assemble A Coffee Gilder Recliner Console? Complete Guide
- How To Clean Recliner Upholstery? Comprehensive Guide
- How To Convert Your Rocker Recliner Into A Regular Recliner? Complete Step-by-Step Guide
Steps Changing the Bearings on a Recliner
Before we begin, you must discover the screws that hold your chair together. The screws can be unscrewed with a screwdriver or a drill, respectively. You should be able to remove all of the parts in the vicinity of the bearing once they’ve been freed and removed.
Bạn đang xem: How To Change The Bearings On A Recliner? Complete Step-by-Step Guide
In the second step, make sure all of the bearings are in good operating order. If you discover that one of them isn’t working well, you should get a new one.
As soon as the old bearing is removed and the new one is placed, tighten everything back up until there is no more movement between any parts.
The screws should not be overtightened, as this could cause more harm than benefit. Your chair should be back to normal in no time if all the screws and bolts are properly tightened.
If it continues to make noise or shake excessively even after you’ve made repairs, you should check to see if any more pieces are loose or have come loose.
After the repair is completed, sit on the recliner seating unit and check to see if it moves at all. During testing, if the seat continues to move, you will need to return to the vehicle and make more adjustments.
How do you Fix a Broken Recliner Mechanism?
1st Tip: A recliner mechanism lets you go from a sitting position all the way to fully reclined. Rockers and reclining chairs are other names for these chairs. Each armrest has two pulleys that are connected to gears at the base of the chair through one motor and two cables.
A faulty recliner mechanism can be fixed by ensuring that all screws are securely fastened, removing any debris or dirt from the gears if necessary, lubricating exposed joints to reduce friction during movement, and testing the seat to ensure that there is no movement at all.
How do you Lubricate a Recliner?
Lubricating a chair begins by finding the joints that have worn out over time. It is possible that some of these components need to be replaced if there is no movement whatsoever. If you want the greatest results, use only a small amount of grease, and avoid getting any on your clothing or other furnishings while doing so.
Should I oil my Recliner?
As soon as you hear the creak of your chair, check the gears and oil them immediately. Cleaning the bearings with a cloth before applying lubrication can help prevent this from happening.
How do I Remove a Recliner?
Bolts anchoring a chair to its pedestal must be loosened in order for it to be removed. Using a screwdriver or a wrench, loosen the screws holding the recliner to its pedestal, and then raise it out of the way.
How do I Make my Recliner Quieter?
As soon as you hear the creak of your chair, check the gears and oil them immediately. Cleaning the bearings with a cloth before applying lubrication can help prevent this from happening.
Furniture polish containing beeswax can also be used to protect your furniture from dampness and rust.
Can Lazy Boy Recliners be Restuffed?
If you want to re-stuff a Lazy Boy chair, you’ll need to buy the components and stuffing directly from the manufacturer. If you need any new parts or fillings, you’ll need to get in touch with lazy guy first to get them.
How can I Fix an arm on my Recliner?
Step 1: If the arm of your chair is loose and moves around, use a screw or nail to repair it. The first step is to collect the measurements of how long the hole should be and mark it with chalk so that you know where to drill.
Step 2: Insert the screw or nail to secure the loose arm once the new hole has been drilled.
Tip 3: If you don’t have access to screws or nails, you can also use glue and a clamp to make this fix. Before tightening the clamps, first drill a hole for the fastener and then insert adhesive into the drilled hole. Remove the clamps from the joints 24 hours after finishing the project.
Using a metal bracket, which can be purchased at any hardware store for roughly $20-$25, is the final method for repairing the loose arm. Make sure to measure the arm before purchasing one. It will simply be screwed into place by two screws on each side of your recliner’s wood frame.
It’s best if the arm stays there, but if it doesn’t you can use a small nail that goes through the wood frame and into the bracket to hold it in place. If this doesn’t work, you can try using adhesive to keep it in place.
Xem thêm : Belleze Swivel Glider Faux Leather Rocker Recliner. Helpful Information!
And now you know how to do a recliner’s bearings yourself!
How to Fix Recliner Chair Mechanism- The Details Guide
There are several things you need to be familiar with before you attempt to fix the mechanism on your own. Now it’s time to get down to business and get your hands dirty. The mechanism of the recliner may be worn out at times. Even if there are no visible evidence of wear and tear, the best course of action is to replace the mechanism. To begin the process of repairing the recliner chair, you must first determine the source of the problem. You can learn more about repairing the mechanism of your recliner chair by reading the entire article. You may also use these instructions to fix the mechanism on a lazy boy reclining chair.
How to Remove a Recliner Chair Mechanism?
When transporting a recliner, it may be necessary to remove the back and reinstall it. Even while numerous manufacturers provide their own recommendations, the underlying concepts are the same regardless of who you ask. You must first determine whether the recliner will fit in the new place by measuring its dimensions. Remove the locking tab from your chair if it has one by using a screwdriver. Remove the panel from the back of chairs with bolted-on backs so that the bolts can be seen.
- The recliner chair should be moved to an open area. To make it easier to remove the chair’s back, roll the chair onto its front. As a result of the recliner’s utilization of Velcro snaps or strips.
- If you ever decide to replace them, be sure to affix them firmly to the frame’s bottom. After that, locate the loop-and-hook to remove the tape that is holding the fabric in place.
- You’ll notice the recline mechanism when you remove the leather/fabric from the chair.
- The metal tabs can be found now. Take a close look at the recliner’s lowest place and look for thumb screws.
- Turn the screws anti-clockwise with a flat/standard slotted screwdriver.
- Avoid injuring the threads by not squeezing them too hard. The screws must, of course, be installed in a secure spot.
While pressing down on the metal locking tabs on the recliner’s bottom, lift it up and away from you. The mechanism can be unlocked with the help of this metal locking. After then, use your hands to pull it straight up. If you’re having trouble removing the brackets from the sides, try shifting them side by side.

How to Re-install a Recliner Chair Mechanism
Reinstalling the recliner’s back is a simple task. Brackets should be positioned at a modest angle to each other. You may find this back frustrating at first, but with practice, you’ll get the hang of it. It’s a lot of work, especially when one bracket slides over the other. You can now recline the chair back to its original position after ensuring it is properly aligned. Adjust the levers, add screws, and attach tabs to complete the operation. As a result of this procedure, the back will be safely secured at all times.
How to Fix Recliner Chair Tension Springs?
A recliner chair that uses a tension spring system. Changing things up when they don’t work is the best way to get things back on track. However, before you go out and buy a new tension spring, look for a replacement. Keep the spring in good condition and strong enough to last a long time. Don’t forget to contact a manufacturer if you can’t find the spring for your chair’s unique model.. Additionally, you can contact the manufacturer for more information.
Turning over your recliner is the quickest approach to locate the problem. The frame under the seat will be on display in this manner. Also, make sure the backrest is erect before proceeding any further. There may be clips/tabs on both sides if the spring is still there. Remove the broken or old spring with a pair of pliers. It’ll make it easier to remove the tension spring from the frame with this. You must wear eye protection in order to avoid injury.
Using a screwdriver, grasp both ends of the spring and pull apart. To separate the springs, an alternative is to employ nickel. A washing machine is also a viable option. Attach the spring to the frame after that. Pulling the spring requires the use of pliers. After that, remove all of the nickel from between the coils. But first, make sure the spring is securely fastened on both ends. A sturdy pair of pliers is essential for a secure hold.
Make sure the recliner is upright after you attach the replacement spring. Tilting the spring back on the brackets is the simplest technique to see if it is working. Try a different set if they don’t provide enough resistance. Relax and appreciate it if you’re used to the tension spring resistance. You won’t need to hire a professional if you follow the advice in this article. Before you begin, make sure you know whatever type of recliner system you have. A gliding recliner, for example, has a restricted range of motion. To replace the tension springs, you may need the help of a professional.
How to Fix a Recliner Pull Handle?
You’ll need the correct tools to disassemble and repair your recliner handles. If you don’t have a typical hex key and some screwdrivers and some Torn bits, you’ll need a replacement handle. Aside from that, make sure you get the correct handle by consulting the model number provided by the manufacturer. After checking with the manufacturer, you can buy the replacement kit there if you have any questions. If the chair is still covered by the manufacturer’s warranty, you may be eligible for a free replacement. To replace the pull handle on a lazy boy recliner or any other brand of recliner, refer to the following instructions.
Get The New Recliner Pull Handle HERE
Make sure the footrest is erect before you begin the operation. The chair should be flipped upside down only if the seat belt is securely fastened. An especially heavy recliner may necessitate some assistance. Locate the chair’s anchoring mechanism or screw. Check the screw at the bottom of it on most models. In certain cases, it’s on the inside of the chair, near the armrests.
- Remove the screw driver from the mechanism and begin removing the screws.
- Remove the recliner chair’s old handle if you have one.
- Keep them in a safe location after unlocking them since you will need them again when you replace the handle.
- Your new handle is now ready; simply reinstall the screw where you removed it previously.
- Also, use a screw driver to tighten the screw.
- To avoid tearing the chair’s fabric, hold the handle firmly but gently.
- Remove it and check for the ornamental area, which is normally located below the handle.
- You can use this method to get to the bottom of the chair’s cable.
- The end of the cable that connects to the mechanism should not be overlooked.
- Finally, grab the head rest and handle of your recliner and turn it back to its upright position from the floor down.
A new decorative plate must be installed first before replacing the handle. Next, insert the new handle in the same way as the previous one. So, that’s where you’ll put the mechanism clip again, right? Make sure that the handle doesn’t fall off by putting the screws back in the wooden component. Once you’ve finished, it’s time to put the handle through its paces. Pull the handle while sitting in the recliner chair. Stretching the legs can also help keep the chair feeling like new. The measures outlined above are simple to follow and will save you a significant amount of money in the future.
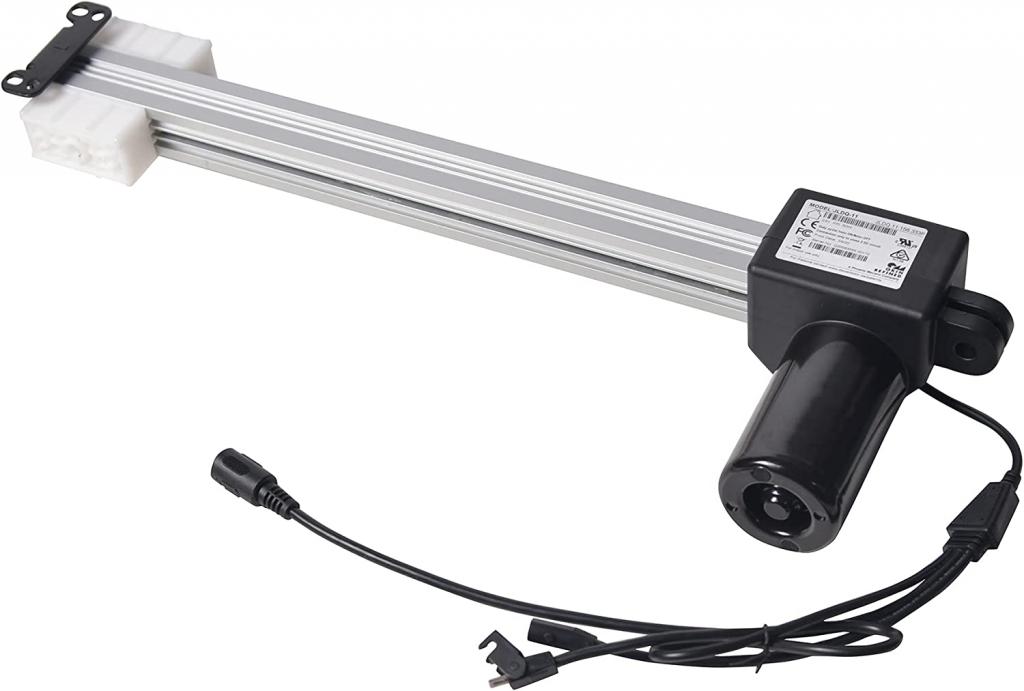
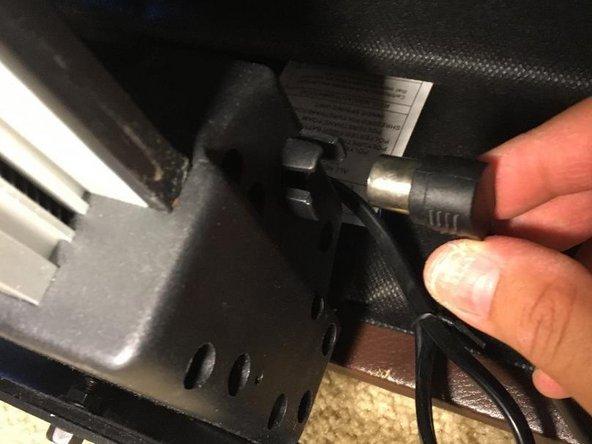
How to Fix Power Lift Recliner Motor?
When it comes to comfort, nothing beats an electric power lift recliner. The power lift recliner motor can be fixed if your chair doesn’t perform as expected.
- The mechanism of your reclining chair might be damaged by simple power surges or overloads.
- If the recliner stops in the middle, there’s a serious electrical problem that needs to be fixed.
In order to discover the disconnected piece, you may need to disassemble and reassemble the unit.
But if you’re mechanically inclined, you can fix the problem by yourself — pay attention to details. When using an electric recliner, take care not to tangle the cords around the base. All electrical components should be documented during the inspection. The power supply, activation button, massage motors, and lift motors are just some of the components. You’ll get a clearer idea of the entire group if you make a list. Fixing the lift motor only to discover that other parts are defective is a waste of time and money.
Mark the brackets with a marker because the motor is on the bottom. Reassembly will be a lot easier thanks to this method. Next, remove the motor drive linkage nuts and bolts, but leave the bolts in place. After that, remove the motor from the bottom rail by removing the two Torx bolts (2). Keep these two screws in a separate location because they are so small. Removing the rear rail is as simple as removing the Torx head screws that hold it in place. The motor can now be taken out of the vehicle.
Remove the four Torx head screws that hold the drive linkages to the motor. It’s worth mentioning that out of the four, and two screws have a large washer. Reinstalling the right and left drive arms is a good place to start. Keep in mind that a washer is required on the two back screws. Everything is now ready for the motor to be installed. Make sure that the pigtail is tucked below your chair’s backrest. When attaching the motor, use two Torx screws. Remember the two short screws as you tighten the front of the motor using Torx screws. They’ll come in handy later. To proceed, connect the remote’s hand wand to the chair’s motor.
How to Fix a Recliner Chair Back?
The driving links are secured to the motor by four Torx head screws. In addition, two of the four screws have a huge washer on them. Reinstall the drive arms on the right and left sides of the computer. Two screws at the back require a washer, so don’t forget about that. The engine is now ready for installation. You begin by ensuring that the pigtail is positioned at the back of the chair. The two Torx screws can be used to fasten the motor to the rail. Remember the two short screws while you tighten the motor’s front cover using Torx screws. A recliner motor plug is required for the next stage.
In a reclining chair, there are three sorts of backs: bolted on, lever-locked and tabbed. The brackets were secured to the back using the locking lever. The backs of these people swung down. After that, you’ll need to secure them to the seat’s metal posts. To keep locking tabs and latches in place, the back was pressed down. You must first loosen the bracket fasteners, then tighten them back up again. Use a screwdriver instead of your hands because it is more efficient.
Recliner chairs with bolted-on backs have the back below the panel. Before you begin, familiarize yourself with the specifics of the task at hand. Remove the bolts/screws with a flathead screwdriver on some models. It’s much easier to separate the back and the base this way. Fasten the brackets if the back is too loose after you’ve put it on.
Turn the chair upright after you remove the back. The side of the arms should be above the slots when reinstalling the back. In order to ensure the back is aligned with the brackets, you should gently lift it. Lift the recliners to discover the brackets for a three-leg high-leg recliner.. Another crucial point to remember is to keep the back aligned with the rest of your body.
Xem thêm : How To Make A Slipcover For Your Recliner? Perfect Information For You
To see if you’ve reinstalled the back correctly, simply shift it to the side. The brackets are not correctly fitted if they move. A slotted screwdriver should be used to press the lever to its lowest position. If you’re not careful, you could injure yourself by mishandling a lever that’s loose. Locking each bracket is also necessary. If you’re having trouble repairing the back of a reclining chair, speak with a dealer for assistance.
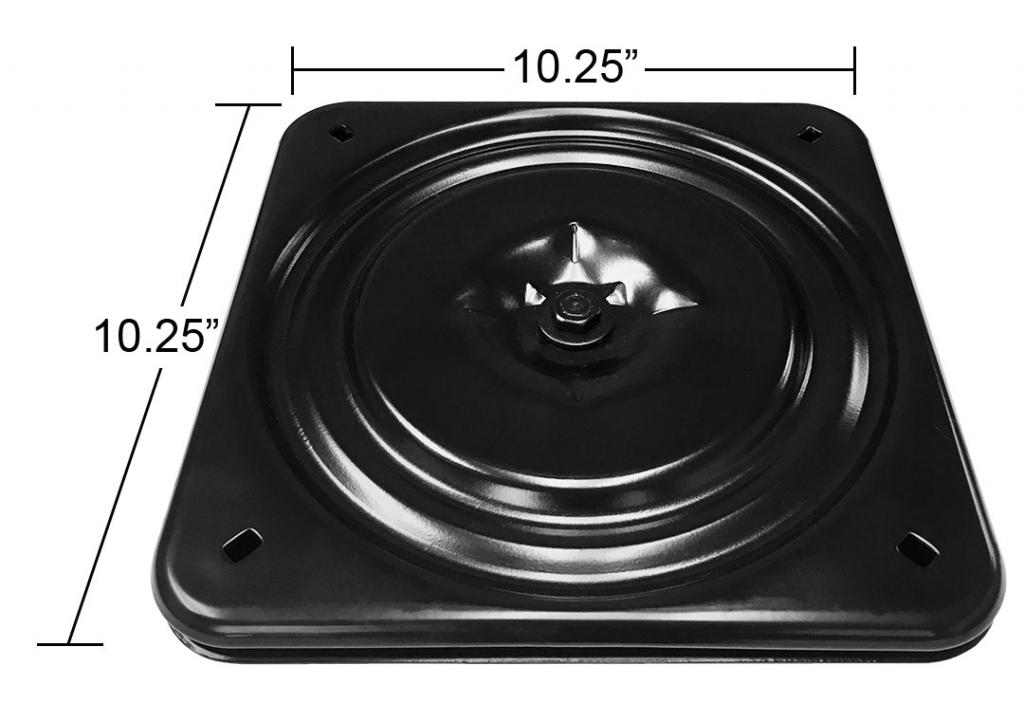
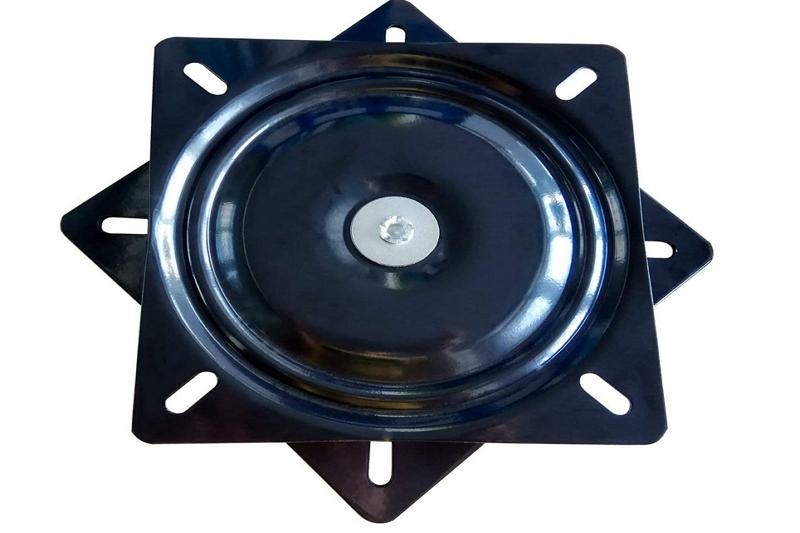
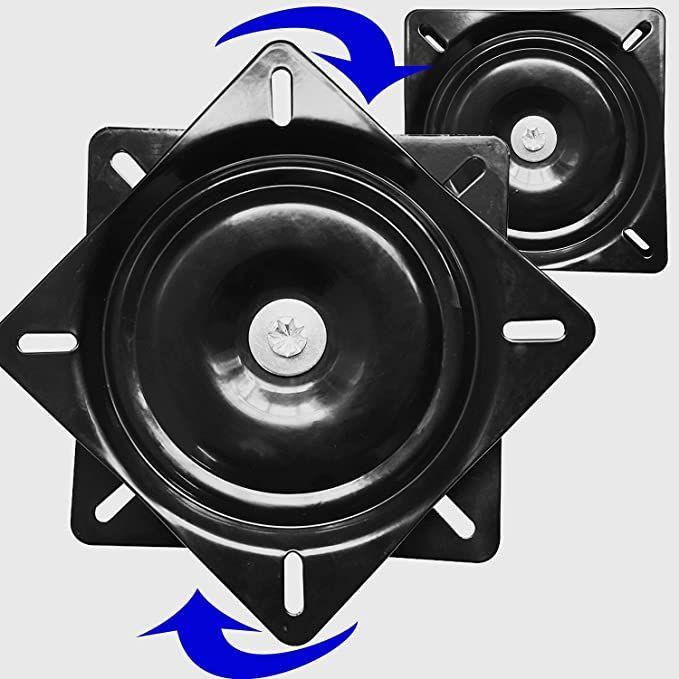
How to Fix the Swivel Plate Mechanism for Recliner Chair
The swivel base of a recliner may be damaged by the recliner’s movement on the surface. Depending on how frequently the seat is used, you may notice a distinct pattern of wear and tear on the upholstery. There are a few things you can do to ensure that the swivel plate is in excellent shape. However, before you begin any repairs, identify the chair’s model number. Swivels are available in manual and motorized versions of recliners. Each demands a unique approach to fixing.
You can consult the manufacturer’s manual for advice on any part that has to be replaced. To remove the swivel base, turn your recliner over so that you can see the bottom. Turning the chair on its side was the final step in this project. The goal is to view the base of the column at the bottom of the column. Use a lubricant if you see any rust.
The swivel and the base are typically held together by nuts in most models. To disassemble the system, you’ll need a wrench. A little lubricant will help if they’re too stiff. It’s a good idea to keep the nuts and bolts separate. To separate the components, just pull the base away from the support. The swivel problem may be solved by just tightening the nuts and bolts. As a general guideline, you should make sure that the base of a repair part can sustain as much weight as the manufacturer recommends. The quantity of ball bearings in the unit should also be taken into consideration.
A swivel base can be attached to an existing column, or it can be attached to a separate column. Using a hammer to strike the interior column is possible. The removal process is simplified as a result of this work. Make that the column’s internal components are undamaged before replacing the swivel. Similarly to the removal operation, the new swivel plate mechanism must be aligned to the base’s holes. Lock the nuts on the bolts by inserting them into the holes. Tighten them up using a wrench. When you’re finished, it’s time to put your skills to the test.
How to Replace Cup Holder of a Recliner
Some recliners have plastic cup holders, while others have touch LED cup holders. Drinks can stay cool while you watch your favorite movie or game on these coolers. There’s nothing wrong with the cup holder’s ‘click’ button if it makes a sound. However, if you are unable to hear the sound, your cup holder is broken. You should contact the manufacturer to make sure you obtain the right size. Remove the element of uncertainty by taking measurements of the inner and outer diameters. Consider the cup and bottom heights, the materials used, as well as the color, before making your selection.
Before anything else, you must remove the cautionary sign. After that, remove the base’s four screws and preserve them in a secure place. Carefully reverse the inclination with the assistance of others. To remove the cable ties, cut them. Unplug the two cables from the lounge and disconnect the lounge from the wall. Place the wires at the rear of the lounge after unzipping the dust cover. Finally, remove the cup holder by pulling it out from the top. Reattach the arm with the new cup holder. Keep in mind that the wires must be re-inserted into the Velcro loop at the end of the project. Cable ties can be used to hold the cables to the frame. They won’t get tangled up if you use these two strategies together.
Zip up the dust cover and then cut the surplus cable ties. Afterward. You can get the seat back on your feet with a little help from a friend. Reconnect the cup holder’s four screws at the base. If you overtighten the screws, you risk destroying the threads in the nuts. Finally, swap out the plastic cup and the warning label. Check to make sure it doesn’t protrude.
How to Replace a Recliner Mechanism Release Trigger
Taking care of your recliner’s release mechanism is an easy DIY project. The first step is to flip it over so that the bottom is visible. Socket extension, wrench, and screwdriver are all you need for this task. Start by releasing the cord from the trigger first. Keep track of which adjustment hole you removed because there are several. It can be helpful to label it once you’re done so that you can readily locate it. The trigger is kept taut by a fill-up bolt and a coil spring, both of which are visible.
A little tension spring, a plastic bushing, and a bolt should be included in the assembly as a whole. Replace the nut if it gets rusted or wears out. Before you acquire a new cable, you must take into account the length, height, and breadth of the current cable. An 88cm cable has an outer spring length of 12.5cm, which is the standard. Consider a 0.5-1″ margin of error when using manual measurements. There should be a 5mm barrel on the cable’s connector (S-shaped). Contact the manufacturer if you’re unsure of the item’s dimensions. Additionally, the materials used in the construction of a cable are important. For the majority of chairs, a spring end with a diameter of 90mm will work just well.
Put the cable back in the hole you withdrew it from to reinstall the trigger. Once you’ve done that, screw your nut in. The ratchet is the best tool for tightening the nut since you can find it easily. Make sure the cable is plugged in as well. The recliner should be in an upright position once the job is done. To make sure it’s working properly, run it through its paces. Your seat’s reclining mechanism will make this process much easier.
How to Fix a Recliner That Leans to One Side
There are numerous possible explanations for the slanting of your recliner. Over time, the wooden frame may become brittle or the linkage mechanism may fail. The unevenness of the floor or the lack of padding can cause your chair to lean to one side. Fortunately, all you need is a little basic information to get your seat back in shape. To tighten the bolts, nuts, and screws, you just need a few tools.
Make sure the footrest is locked before you begin. In order to see what’s underneath the chair, you’ll need to lean it forward. Thumbwheels are available for chairs that have an adjustable recliner tension. The exact location of the wing nuts/thumbwheels may vary, but they are all attached to the tension springs, so they can be rotated to alter the tension. Rotate it counter-clockwise to amp up the strain. Anti-clockwise rotation is all that’s necessary for a free hand. In order to achieve an equal amount of strain on both sides, you should aim to equalize the tension. A pair of pliers can loosen up a tight mechanism.
To keep your chair in good working order you may need to repair some of the screws and springs. Locate and remove the attachment points. A wood filler is a good solution for a loose screw-wood contact point. A matchstick or a toothpick can also be used for this. It is possible that the springs’ mounting points are worn out if they’re attached to metal.
Smooth elasticity is required in the springs. Stretching at the same level is also important. The screw holes should not be larger than the springs if they are mounted to the wood. Replace the upholstery at this point if necessary.
How to Fix a Recliner Footrest
You may quickly remedy an issue with the footrest of your recliner. When you repeatedly slam the footrest of your recliner down, it can be irreparably damaged. If a recliner footrest is stuck in one position, does not lock in place, or does not stay up, it will be ruined. You will need a screwdriver, bolts, lubricating oil, and screws to remedy the problem. To fix or adjust a lazy boy power recliner footrest or any other brand of recliner chair footrest, follow the instructions below.
Lubrication may not have been applied to the recliner. The screws and nuts could loosen as well, so be careful. First, turn the recliner upside down. You need to check if the screws/bolts are rusted or loose. If you see any that needs to be replaced or tightened, then do so. Other than that, you can change rusted screws with new ones. Once you ensure everything is in order, lubricate the bushings/joints on the footrest. Then, try to move the arm up and down. Finally, use a towel to remove the excess grease.
If the chair is stiff, it’s likely that there is no lubrication in the mechanism. The screws and nuts could come loose as well. To begin, flip the recliner over. There may be rust or loose screws or bolts that need to be checked. Don’t be afraid to replace or tighten any that you notice. You can also replace rusty screws with new ones. Lubricate the footrest bushings and joints once you’ve checked everything. When you’re ready, try moving the arm up and down. To finish, dab the surface with a towel to remove any remaining grease.
What’s wrong with the footrest? The footrest will become stuck if the ratchets don’t operate. When it comes to dealing with a problem, there are a variety of options. A wrench, a screwdriver, and a replacement ratchet are required. To begin, flip the recliner over. Dismantle everything that might get in the way of your ratchet. Make sure the bar isn’t broken by taking it out and inspecting it. Remove the screws holding the ratchet in place to replace it. Grab the new part and put it in if necessary. Screw everything down to make sure it’s all in the right place. Verify that the footrest may be raised and lowered freely.
Conclusion
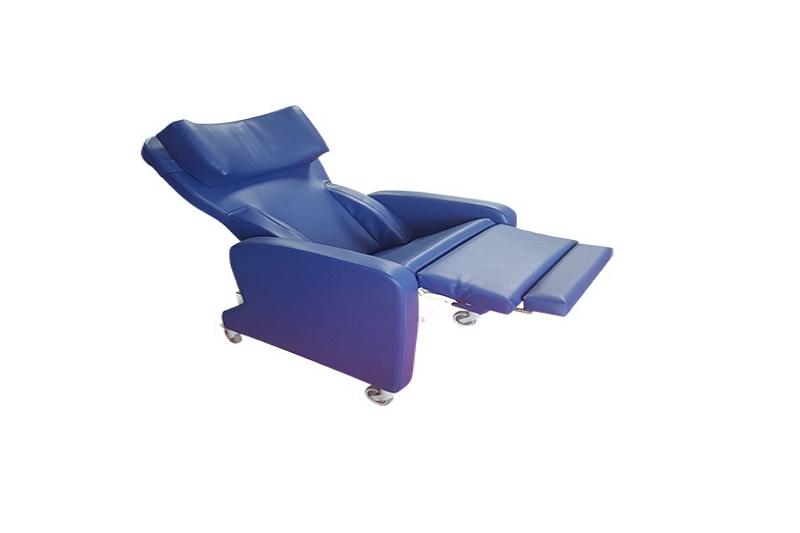
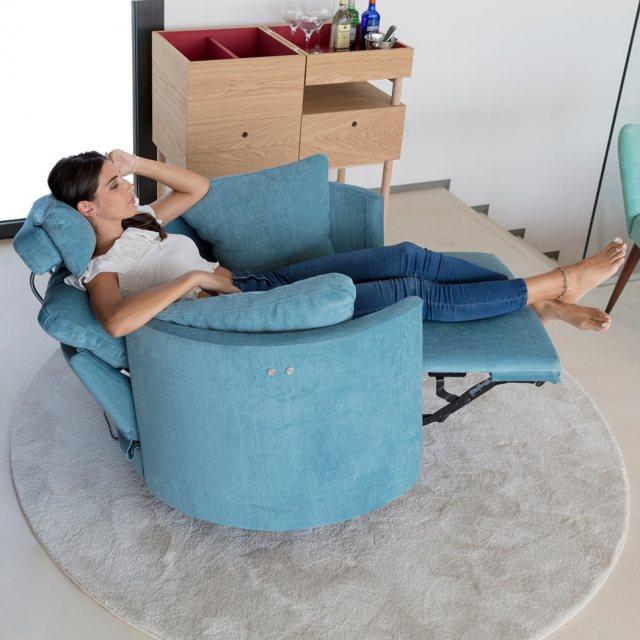
Recliners aren’t just decorative accents; they’re made to provide relaxation and rest. Repairing a reclining chair is simple if you are familiar with the chair’s features and eccentricities. Repairing a recliner is rather simple, even if you’ve never done it before. Get your hands on the necessary equipment and get to work. If this post on reclining chair mechanism repair helped you, please let us know in the comments. Remember to tell your friends and family about this.
Nguồn: https://iatsabbioneta.org
Danh mục: Recliner