You were attempting to figure out how to make self-watering small greenhouses out of ordinary materials, right? In the event that you must leave your gardening duties behind, you should ensure that your plants are well protected. When you’ve spent so much time tending to your baby plants, you don’t want them to die when you return from your vacation.
You may want to look at some of the most often asked questions regarding watering plants in a small greenhouse.
Bạn đang xem: How To Use Household Items For Self-Watering Mini Greenhouses? Comprehensive Guide
What are the Household Items that I Can Use for Self-Watering Mini Greenhouses?
Your plants needn’t be babysat while you’re gone, because you may use common home objects to establish self-watering ways for your plants while you’re away.
Glass Bottle Setup
Instead of tossing your empty wine bottles, use them to water your plants while you’re away from home each day. In order to improve your pot or planter’s aesthetic appeal, you may even turn a wine bottle into a decorative accent. It’s just a matter of checking if your bottle has a cap rather than a cork.
Setup is relatively simple and works well for plants that demand regular attention… For around five days, this procedure will be effective. Use an aluminum bottle with a top, nails, a hammer and pliers to get started.
Using pliers, remove the plastic film that’s inside the bottle cap, then drive the nail through the cap with the hammer to secure the bottle to the wall Make five small holes from the inside of the cap, taking care not to bend it. Afterwards, you’ll need to fill the bottle with water and put the cap back on, then dig a hole in your garden and place the bottle in that hole, with the cap side up.
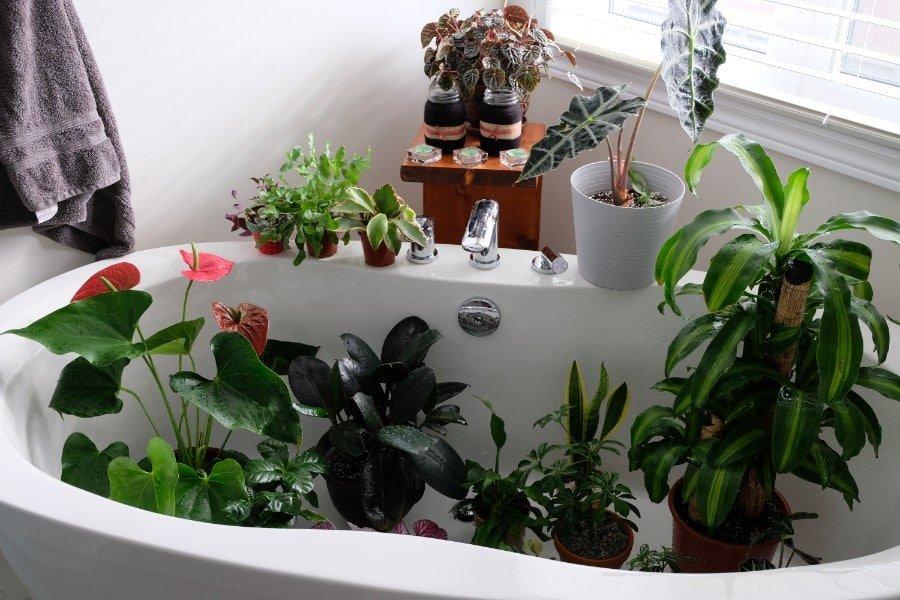
Houseplant Bath Solution
You shouldn’t be surprised to learn that you can wash your plant kids just like you would your dogs. Using the long-lasting houseplant bath solution is a good idea if you plan to take a week-long trip. For tropical plants and those that don’t require a lot of sunlight, this method works well.
In order to begin, you’ll want some potted plants that are easy to remove from the water and a towel. To avoid your pots or plants from scratching the surface of your sink or bathtub, add a few inches of water to the sink or bathtub before laying out your towel over the water. As a last step, you can put your plants in a sink or tub to check for proper drainage.
Plant Saucer Method
Despite its simplicity, this approach falls short when dealing with plants that require extra care. Succulents and other low-water-demanding cacti thrive in this environment. If you use this strategy for three days, your plants should be alright.
A saucer and a drainage pot are a must-have. Saucers should be the same size or slightly larger than the pot they are to be used with. When utilizing a saucer, the primary purpose is to provide enough space for water to remain in the pot while yet allowing it to contact the bottom.
The next step is to fill the saucer halfway with water and add your plant to the pot. Keep an eye on it to observe whether or not it gets any moisture from the saucer’s water.
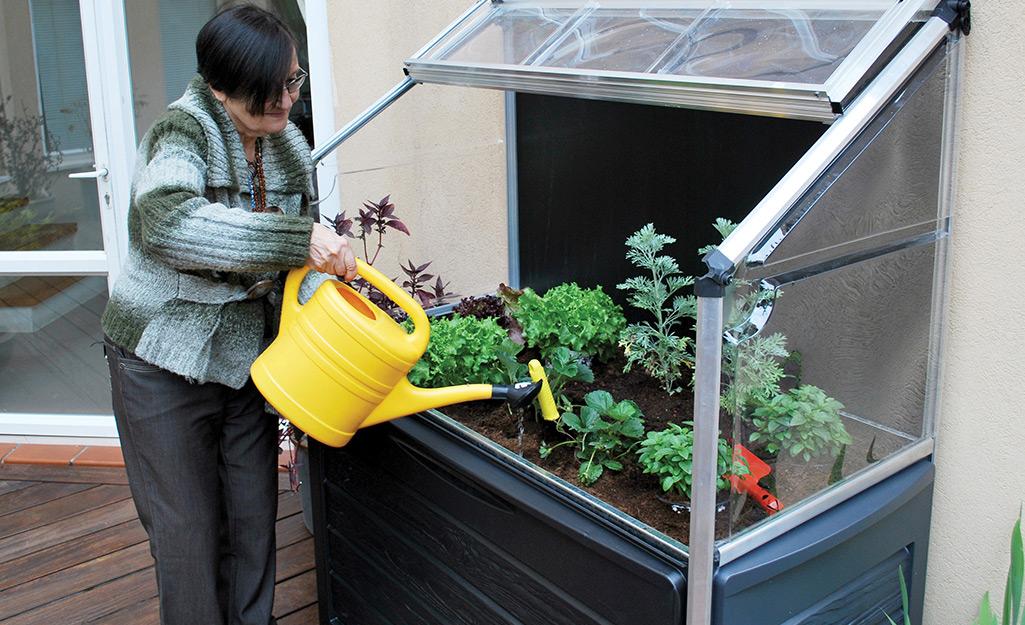
What is the Best Time to Water a Greenhouse?
Early in the morning, as soon as your growth medium has dried out, is the best time to water the plants in a micro greenhouse. The leaves will have time to dry out before the day comes to an end. By 4 p.m., if you see symptoms of wilting, avoid the temptation to water the plants.
Does Spraying Water on Plant Leaves Help?
Definitely. Spraying water on foliage is an effective approach to remove dust, grime, bugs, and fungal spores. Water spraying should be used sparingly, but if the leaves are left wet for an extended amount of time, the plant becomes susceptible to disease-causing organisms that flourish in a damp environment, so take this into consideration.
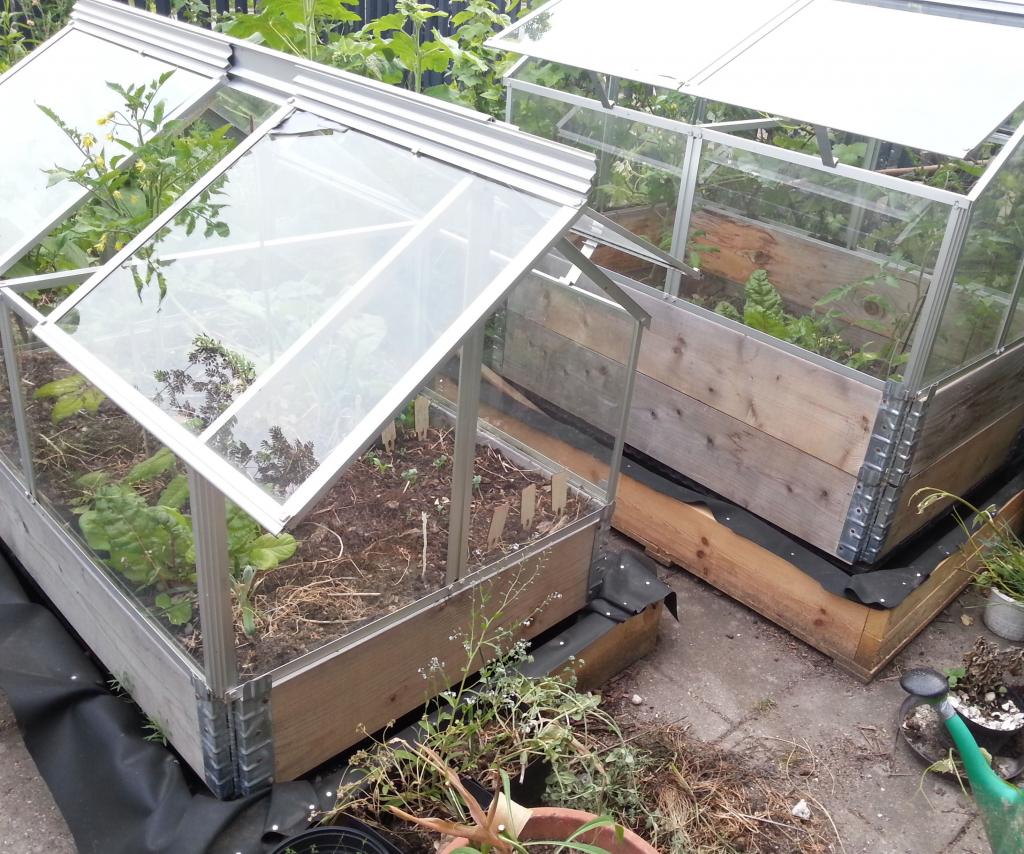
Is Mini Greenhouse Gardening a Great Idea?
Yes! People who don’t have enough room in their backyard to grow a huge garden, or those who have limited living space, can benefit from mini greenhouse gardening. Because a compact greenhouse is portable, you can quickly relocate it if necessary. You can easily move the small enclosure around if you want your plants to receive more shade or sunlight, for example.
Another perk of tiny greenhouse gardening is that you may regulate the conditions in which your plants grow. Mini greenhouses, for example, allow you to manage the temperature and humidity levels inside to maximize the growth potential of your plants. Your plants will be protected from the elements, as well as from pests and animals that could harm them.
Knowing How to Use Household Items for Self-Watering Mini Greenhouses
After learning how to make self-watering little greenhouses with household materials, you can finally enjoy the vacation you’ve always desired. When it comes to tiny greenhouse gardening, don’t be afraid to spend the money. Your tiny greenhouse is waiting for you.
What type of irrigation systems are there?
When deciding on a watering strategy for your greenhouse, it’s important to weigh the pros and cons of your options. Using this method, you may evaluate which one is best suited to your and your plant’s watering requirements.
Self-watering trays and capillary mats
Although this watering technique is the simplest, some manual labor is required. They are an excellent option for newbie growers and those with tiny greenhouses. For plants that don’t like water coming from the sky, this may be the ideal means of irrigation (e.g. orchids).
Self-watering trays provide a steady supply of water from the bottom up. They have a water compartment that releases moisture to the soil and planted plants above as long as there is water available. Capillary mats collect water and release it slowly in some of them. The potted plants can be placed on this wet mat and have access to water when they need it.
An automatic water supply is provided by self-watering trays. For as long as there is a supply of water, the soil and the plants are kept wet by a water reservoir. Capillary mats collect water and release it gradually in some of them. This damp mat can be used to keep the potted plants from drying out.
- It saves time and effort.
- Effortless and cost-effective
- Intuitive to set up
- Consistent supply of water
- Better plant growth can be achieved with the use of this product.
- Overhead or excessive watering can cause illness in plants.
Cons
- Irrigation systems can’t be used with all types of growing media.
- Gnats may be attracted to the capillary mats because they can generate algae.
- To flush out nutrients, plants may still want top-side watering.
- This isn’t a self-running program (still need to refill manually)
(Over-head) sprinklers
Crops that can withstand damp leaves usually benefit from this irrigation method. Spray ranges can be varied using nozzles attached to pipes that are positioned above the plants. As with lawn sprinklers, sprinklers can also be installed in the ground, but they are more commonly mounted to the ceiling in greenhouses.
Using a sprinkler system saves time, but it must be monitored frequently to ensure that it is operating correctly. As a general rule, watering small transplanted plants with overhead sprinkler systems is the best option.
Pros
- It’s cheap and simple to set up.
- Achieving high and frequent irrigation is possible.
- Simple to automate or manually control
- On soils with a medium-coarse texture, it is effective.
Cons
- Overhead watering and damp leaves create an ideal setting for the spread of plant diseases.
- It is possible to clog sprinkler nozzles with low-quality water.
- There may be a high operating cost.
- Soil recharging may necessitate repeated treatments.
- Heat and sunshine can cause water to evaporate, which raises the cost of water
- Distribution of water (everything gets the same amount of water; there’s no way to tailor it to certain greenhouse regions.)
Misting (spray) system
Suitable for big greenhouses for seedling propagation, this method is ideal. A greenhouse with a lot of seeds that need to be watered often should employ this method.
Misting devices only emit a few water droplets at a time (mist). Water is consumed much more quickly and significantly more heavily by sprinklers, which is why they are less commonly utilized. It’s possible to operate misters for a longer period of time or have them automatically spray every 15 or 30 minutes (depending on your needs).
Xem thêm : How To Tell When To Harvest Baby Greens Small Greenhouse? Ultimate Guide
Having a misting system installed in a greenhouse can help keep the temperature down during the summer months or in hotter climates. Misters are also ideal for tropical plants, as they help to keep the humidity level high.
Pros
- It’s possible to time and automate
- Maintains the greenhouse’s temperature
- Low to medium-sized initial expenditures
- The ideal solution for greenhouses that require frequent hydration.
- Perfect for greenhouses in tropical climates
Cons
- Wasteful and inefficient if not adequately managed
- Distribution of water (everything gets the same amount of water; there’s no way to tailor it to certain greenhouse regions.)
- Because of the high humidity, certain plants may not be able to thrive.
- Diseases resulting from over-watering and a damp atmosphere may occur.
Drip irrigation systems
The drip system is the best option because it is adaptable to any size and can be used for a variety of different applications. There are many emitters (heads) on a hose, which dispense water at predetermined intervals throughout the day. On the surface or buried in the soil, a drip irrigation system can be used to water crops. Efficiency dictates that the heads be within walking distance of the plants.
This device keeps plants from drying out by releasing drips of water over time. This also reduces the amount of water used. Because it requires water pressure, a solar-powered pump from a water butt is commonly used in conjunction with it, and it can be fully automated.
For greenhouses of any size, the drip system is quite handy because it can be easily scaled up or down.
Pros
- It is possible to automate and program based on a wide range of variables
- Using less water (no evaporation, water on leaves)
- Because you can fine-tune the amount of water delivered, you get better water distribution.
- Adjusting, closing, or opening emitters are all options.
- collected, processed, and repurposed water
Cons
- To run the pump, you’ll need electricity.
- It can be difficult to keep the system clean and working properly.
- Water collection, treatment, and reusing will require additional resources.
- To get started, it may be more expensive.
- Nozzle clogging is a possibility.
Soaker hoses
Drip irrigation is a close relative of this method of watering. Soaker hoses can also be used to water plants from the ground up. However, these tubes lack emitters. Small amounts of water are regularly released into the soil by the porous substance.
If you don’t want to plan the nozzles based on the distance of your plants, this is an effective alternative. However, you can’t control the amount of water in individual regions. Raised beds will benefit from this watering system, but individual pots will not.
Pros
- The installation process is straightforward.
- Low-cost to operate.
- Inexpensive
- Preparation isn’t required.
- As there will be no evaporation, be careful with water.
- Tool at the faucet allows for automation of these processes.
- A clog isn’t a problem
Cons
- There will be no alterations made to the water distribution system.
- Restrictions on how you can use it
- It must be placed on a level surface.
- This could be a difficult task to maintain and repair
Off-grid solar-powered irrigation systems
It’s possible that you’ve avoided installing an irrigation system because you don’t like using electricity to run it. That’s absolutely fine with us! Irrigation operated by solar panels does not require any water or electricity. These plants are fully self-sufficient, making them ideal for a modest greenhouse or container garden. It’s still possible to connect it to a water hose in the event of an extended dry spell.
A rain barrel is attached to a drip irrigation system, which uses the sun to pump water through the hose at regular intervals throughout the day. Solar-powered irrigation systems
Pros
- Fuel and electricity bills are eliminated.
- Friendly to the environment
- a reduction in the amount of time spent on repairs and maintenance
- after installation, there are no emissions of greenhouse gases.
Cons
- When it’s dark, it’s impossible to run a water pump.
- Initial costs are high
- Because the efficiency isn’t quite there yet, a lot of area is needed.
- Winter is a time of reduced output.
Automated vs manual: 4 Reasons to switch to an automated irrigation system and 3 reasons NOT to choose automation
To save time and money, many farmers are looking for a stress-free watering system. To learn more about the benefits of installing an automated irrigation system, continue reading.
Automated irrigation systems are timer-controlled and deliver the same amount of water to your plants at regular intervals. Watering by hand might take a long time on huge construction sites. Automated systems are also useful for those who are overworked during the week.
Pros of automated irrigation systems
1. Saves time
Automatic irrigation is popular for this very reason. Once it’s set up correctly, it will perform its job and you can spend your newfound time on other things.
Manual watering is no longer necessary, and your plants can be watered without your presence.
2. Focus on caring for plants and harvesting
To be sure, watering is an important component of caring for plants; nevertheless, there are many other ways you might use that time. There are still numerous duties to be completed when it comes to greenhouse gardening. So, automating irrigation is a terrific way to free up some of your time!
3. Improves efficiency
Automated systems offer accurate coverage, so you don’t have to worry about your plants being over- or under-watered. Watering can be scheduled to occur daily, weekly, or just when there is little evaporation.
Many systems can be outfitted with smart moisture sensors as well. Real-time precipitation rates are measured and activated only when your soil has dried up.
4. Cost-effective
Your plants will be watered at the right time and the right amount thanks to an automatic system. Water consumption is reduced as a result of this practice. It is important to keep in mind, however, that your choice of irrigation system will have a significant impact on this.
Cons of automated irrigation systems
1. Relatively expensive
The most significant drawback of an automated system is its high cost. Depending on the size of your greenhouse and the amenities you choose, these systems can be fairly pricey. While there are inexpensive timers available for $25 or less, there are always more expensive and better options available (phone operated, soil analyzer, etc).
2. Rigorous and time-consuming installation process
It may take some time to install an automated irrigation system (depending on the system). Some are simple to install (on the hose), while others necessitate hiring a plumber to dig up the area and connect the piping to your greenhouse’s water system.
It could take days or even weeks to complete this treatment. The landscape will need to be repaired afterward. A well-installed automated irrigation system is a long-term investment that will pay dividends for years to come.
3. Faults may cause water wastage and pests to thrive
You’ll waste a lot of water if you don’t set it up correctly. Diseases and pests can thrive in an overwatered environment. This can be avoided, of course, if your greenhouse is properly set up and checked after each regular watering for the first couple of weeks before planting.
So, which greenhouse irrigation system is the best?
Now, we hope you’ll be able to come up with the answer on your own. If not, here are the most important points to remember. Since the water is delivered from below, drip irrigation and soaker hoses are frequently preferred. In terms of water management and precision watering, they are superior. The drip system can be used for a variety of tasks. To sum up: If you’re searching for a flexible solution, the drip system can be worth a try.
Xem thêm : How To Propagate Catmint? Complete Guide for Beginners
While it can (but need not) increase water usage, overhead watering also increases the risk of plant disease and pest infestation.
Your greenhouse may be too hot or too humid for your tropical plants to thrive without a misting system, so you may want to consider this option.
All watering systems can be automated (either powered or off-grid) so that crops can be watered without any effort on your part.
The key to a successful greenhouse irrigation system is finding the proper solution for your specific needs. There is a limit to how much you can grow and how much money you can spend on an irrigation system in a greenhouse.
Do Self Watering Planters Really Work?
Yes, but only if you know how to use them.
A container labeled “self watering” does not, in fact, water itself. Using planters that have a reservoir of water in the bottom, it is able to water the plants. A soil “foot” or a fabric “wick” connects the reservoir to the plant’s root zone.
The roots of plants in a soil foot system extend down into the foot to collect water. Water is pulled into the soil of the main pot by capillary action in a wick system. If there is water in the reservoir, the plants will have access to water. Using this method, you can water your plants less regularly while still maintaining their health.
Make sure the soil is evenly moist when you initially fill your planter. In order to have a strong root system, water the plants from the top down until they are established. Mulch keeps the soil surface from drying up too rapidly in larger containers (particularly outside). As a result, the planter performs better.
As long as you keep the water level in the reservoir at a reasonable level, your plant should be fine.
Are Self Watering Planters Good?
Count me in! Any plant, from a fast-growing tomato plant in the backyard to little house plants, can benefit from a self-watering planter. All you need to do now is choose the proper pot size and design for your anticipated plant development. For those who want to get their feet wet in urban farming, these pots are a perfect starting point.
Unlike with closed pots or containers that sit in a drip tray, there is no risk of accidentally drowning a plant. The overflow drain is activated if you overfill the sink. Add a drip tray or water your pot outside if you have a habit of watering it too much.
Are Self Watering Pots Good for Succulents?
Maybe. There isn’t an ideal solution if you wish to utilize a self-watering container, as they depend on keeping the soil moist. Using a dirt foot type will work just well. To avoid overwatering, take sure to let it to air dry in between waterings.. To reduce soil moisture, it’s also a good idea to keep the soil foot as small as possible. For more information, see the following:
DIY Self Watering Planters
Soil foot design is what I’d like to focus on in this section. You’ll need the following to create your own self-watering planter:
- such as a 5 gallon bucket set and plastic storage tub
- Soil “foot” container: a little basket, pot, or strainer.
- pipe for irrigation
- supports such as wooden blocks
- screening the irrigation pipe with burlap, mesh, or landscape fabric
- Duck tape and screws
- power tools such a drill and utility knives, as well as a saw
The thrift store has a secondhand storage container for $3. There are amazing prices to be had after the holidays on containers. You’ll need a container with a lid, or two containers of the same type that nest inside each other. To recap, we want a reservoir created into the soil where our plant grows, with a soil foot extending down into it.
An old nursery pot with drainage holes was reduced to fit the bottom of the plant chamber as the soil foot. Regardless of what you choose, make sure there are holes in it for water to enter.
We use a PVC pipe with a 2′′ diameter to water our plants. Replace PVC with a tube of your choosing if you don’t want to use it. You’ll want to be able to easily pour water into the tube if it has a large enough outside diameter.
An example of how the parts are put together may be seen in the video below. If you’re having trouble viewing the video, check to see if you’re using an adblocker.
Container Assembly
- Keep your blocks in mind when cutting your lid to ensure that it fits snuggly inside of your container. This is 3.5 inches if you use 2×4 lumber on its side. Make an opening for the soil foot and a watering pipe in one corner.
- Screw wood blocks into the lid’s underside.
- Adapt a watering pipe by cutting it to length. Keep in mind that it must protrude above the soil and mulch. Burlap both ends of the pipe to prevent bugs and soil from getting in. If necessary, remove the cover to water the plants. Watering pipe can be held in place until you are ready to fill the planter with water by taping it to the corner with duck tape.
- Place the self-watering container’s lid on the bottom. Fit the soil foot into the pot or basket. Duck tape or wadded burlap can be used to fill up any gaps around the borders. We don’t want the soil to flow into the water reservoir below the lid or into the soil foot.
- Punch or drill two holes in the container’s side just above the reservoir’s level for drainage. When strong rains or overwatering occur, this enables for the drainage of excess water.
- Make sure the earth is packed in tightly, then fill the rest of the foot. Fill the rest of the container with a high-quality potting mix. Soil mixes work well since garden soil is too heavy for container plantings.
- Make sure to water thoroughly from the top of the soil before you plant anything. If desired, apply an organic fertilizer or compost as a last coat of protection. Mulch the soil to keep it from drying out.
- Plants need a few weeks to get acclimated to their new surroundings, so water them from above. After they’ve settled in, turn on the water supply and fill up the watering can.
Tips for Root Veggies, Potatoes and Other Plants That Prefer Drier Soil
Root vegetables like carrots and tubers like potatoes are more susceptible to disease if the soil is excessively damp. Root rot will quickly develop in succulents that are kept in moist soil. There are a few things to bear in mind while using a self-watering planter with these plants.
- Reduce water supply to the plants by limiting the size of the soil foot to 10-15 percent of the base.
- To reduce wicking, use a lighter soil mix or add some sand to your foundation mix.
- Between waterings, allow the reservoir to dry up completely.
Popular Self-Watering Planter Options
Here are some of Amazon’s most popular self-watering containers, ranging in size from the smallest to the largest.
Planter, 12-Inch Lucca Self-Watering
A few of these planters are in my possession. With an overflow port, you can see how much water is left in the tank. Floral and vegetable specimens smaller than twelve inches can be accommodated by this size pot
Potted Vegetables on a Trellis
Large enough to accommodate a mix of short and vining plants or numerous medium-sized plants. For those who have a sheltered growing location, this would be a fantastic patio planter. It has wheels, so you don’t have to lift it if you need to move it.
Elevated Cedar Planter (23″ X 49″ X 30″) by CedarCraft Self-Watering
If you prefer to grow your food in a raised bed rather than in the ground, this CedarCraft self watering planter can help. Water level is indicated by a 6-gallon reservoir.
Remember that plants need at least as much room to develop below the surface as they do above the surface. It’s all too simple to overfill a container, which leads to congested plants as they grow older.. The recommended spacing for typical garden crops is included in our garden planner package.
What’s Your Favorite Way to Grow in Containers?
Self-watering containers are my favorite. For years, we utilized store-bought containers. Our home-made alternative is far more affordable, yet it works just as well. It’s sprouting Swiss chard, which we put there. Self-watering containers are the greatest way to keep plants from drying up in our windy conditions. When it’s been a while since I’ve watered my houseplants, they come in handy. (I’m guilty of forgetting about the plants hidden away in the corners of the home, which is why we have so many.)
Is container gardening something you do? Let me know if you have any tales or tips to share.
More Gardening Tips
Common Sense Gardening has more than 100 gardening articles on the site, organized by category. They are as follows:
- Small Spaces, Big Flavors
- Tips for Growing More Food in a Smaller Space
- A Beginner’s Guide to Gardening – 10 Steps for Newbies
Nguồn: https://iatsabbioneta.org
Danh mục: Garden


