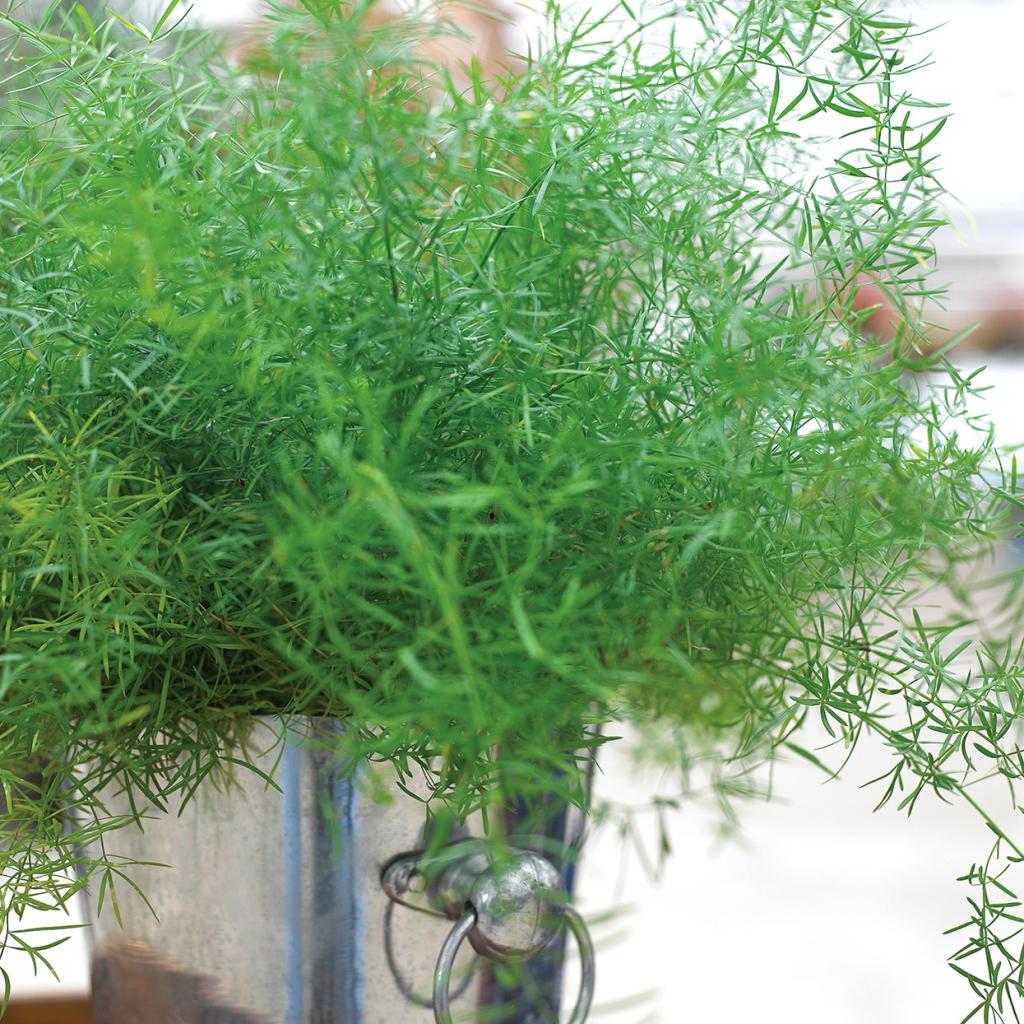
You can grow asparagus ferns indoors or out in the garden. They are closely related to the common garden variety of asparagus, but they feature fluffy fronds with delicate needles. This is what sets them different and makes them desirable plants to grow in your garden or house.
Basic Plant Information
Countless types are available for you to experiment with. The cascading ones are by far the most popular.
Bạn đang xem: How To Divide Asparagus Fern? Basic Plant Information
asparagus densiflorus “Sprengeri” and asparagus densiflorus “Meyersii,” with its eye-catching plumed fern. There are some noticeable variances in appearance between these two types, but the maintenance recommendations for both are generally the same..

If you’re interested in growing asparagus ferns, know that zones 8 through 11 in the United States are ideal. Keep in mind, though, that your fern can grow in hardiness zones 9b to 11.
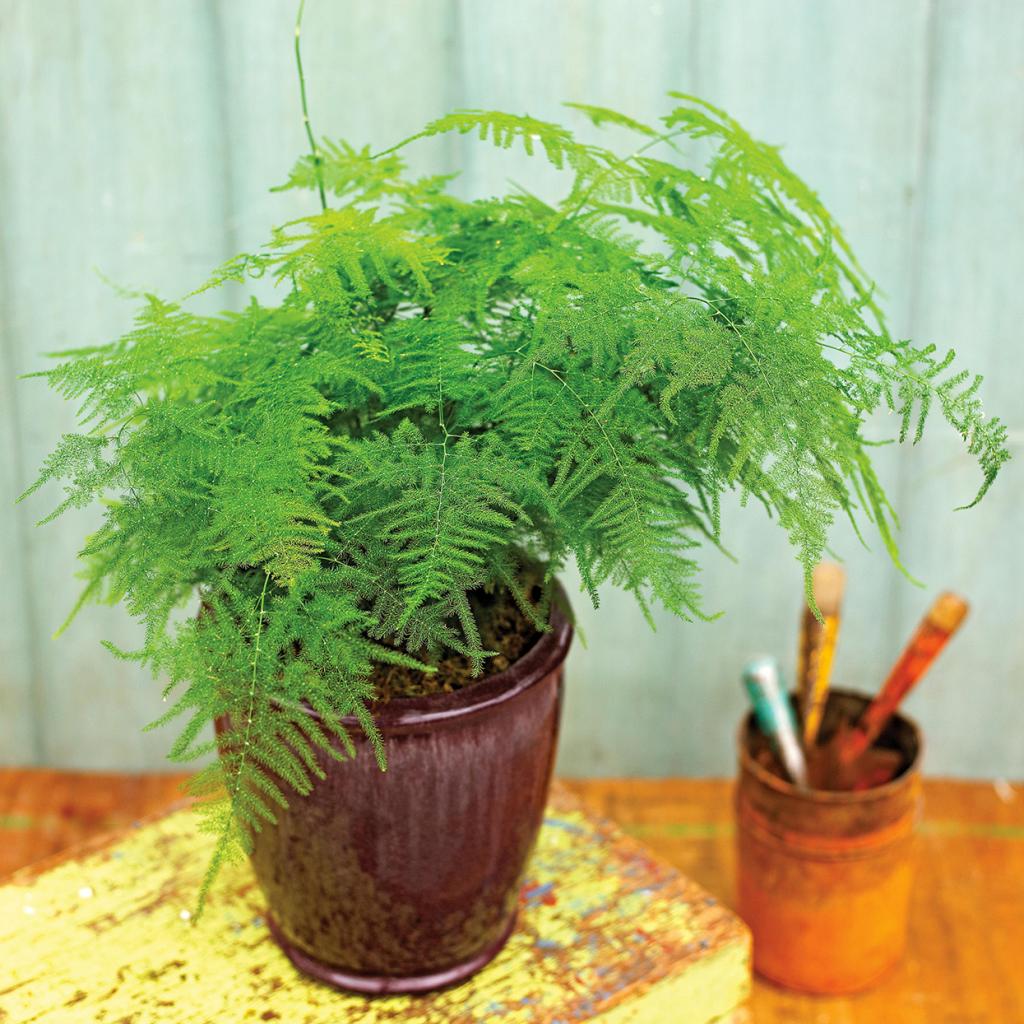
Keep in mind that you can cultivate your Asparagus fern both outdoors and indoors. They don’t require a lot of attention and work nicely in containers. The only thing to remember is that a good fern will eventually outgrow its container due to its extensive root system.
Detangling the Roots
It is necessary to make some effort to untangle the tangled root ball when the roots become too large for the pot. The good news is that even novice gardeners may do this task. A few basic steps are all that is required.
You’ll need the following items:
- Clean and sharp shears or a knife
- Knife with serrations or hacksaw
- Soapy water in a bath
- Bleach
- Ferns in fern pots
- Houseplants need potting soil to grow
Wearing gloves while handling Asparagus ferns is a must. It’s possible to get harmed by the microscopic, sharp spines on their leaf.
Asparagus fern-root balls can be detangled by following these steps:
1. Inspect the Plant
Before you do anything else, check your Asparagus fern. Observe the plant’s center at the soil level to get a sense of how it’s progressing. During the spring, when your fern is growing new leaves, this is the optimum time to accomplish this. See what happens if you give your plant a thorough watering. Water should soak into the soil, but if it runs down the sides of the pot, your fern has packed roots. If the soil soaks up water at a glacial pace, be extremely wary.
The roots of asparagus ferns prefer to be somewhat crowded, however this is not a desirable scenario to be in. A densely packed root ball makes it difficult for the plant to absorb all of the necessary nutrients because water and oxygen can’t get through to the mass. If the roots aren’t untangled, it might cause the root ball to dry out and the plant to die.
2. Prune Your Plant
Next, you’ll need to trim your Asparagus fern’s branches. Use shears that are free of debris and have just been sharpened. You get to decide how much pruning you want to do. A few inches above the soil level is the ideal height for trimming a fern, but others prefer to cut all the stems back to that height. In the spring, when you’re trying to revive your huge Asparagus fern, excessive pruning is not recommended. Dead fronds should be removed all the way to the soil while pruning.
3. Remove Your Fern from the Pot
It’s time to get the roots out of the way. Once the fern is out of the pot, you’ll be able to proceed. Grasping the plant by its main stems is the best way to do it. Be careful not to damage the roots by squeezing too hard. Lift the plant gently out of the pot once you have the stems in your hands.
It may be difficult to uproot the plant if the root ball is too tightly packed. Thump the side of the pot with your hand while still holding the root ball in your other hand if this happens. Use this method to get the fern out of the pot.
4. Clean the Pot
Make sure you’re working on a flat surface when you take your fern out of its pot. During this period, thoroughly clean the pot with soapy, warm water. If you wish to put the fern back in, be sure to thoroughly rinse it. For best results, soak it for 10 to 15 minutes in a bleach and water solution containing 10% bleach. Allow the saucepan to dry completely after thorough rinsing.
5. Examine the Root Ball
Spend some time examining the root ball in detail. Root pruning may be necessary if you want to replant the plant in the same pot after removing the tangled root ball. Shears are the best tool for removing around an inch of the root ball at a time. Remember that Asparagus ferns can benefit from root pruning and are hardy plants.
You can also cut the root ball into four or five one-inch deep vertical slices if you wish to move the plant to a larger pot. Always cut from top to bottom with a clean, sharp knife. It is also critical to carefully space the cuts. A considerable portion of the densely packed root ball will be sliced open, allowing for healthy new growth.
6. Divide Your Fern
If you wish to divide your fern, now is the time to do so. The fronds of your plant can be divided easily by separating them at the soil level. To remove the root ball, make a vertical cut across it. Use a good knife or perhaps a hacksaw to cut it out. One of them will yield two or three more plants. A deep root system ensures that the clipped ones will not pose any danger.
7. Repot the Plant
Remove any old potting soil from the plant’s surviving roots before repotting it. Use your fingers to avoid damaging the plant. It’s up to you whether you want to uproot it or leave it in its current pot. It’s a good idea to remove as much of the twisted root ball as possible before reinstalling the previous one. The individual pots should be moved to the new pots if you’ve divided your plants.
Xem thêm : How Warm Should it Be Before You Can Put Plants Outside in a Mini Greenhouse?
For houseplants, it is best to use a high-quality potting soil. The plant and potting soil should be added slowly. As with its initial pot, be sure to keep the fern’s soil level the same. Keep your Asparagus fern in its customary place after planting it.
How to Divide an Asparagus Fern
To begin, give the fern plenty of water to keep its roots healthy. After that, take the plant out of the ground. Allow your blade to dry after cleaning it with rubbing alcohol. Once you’ve decided how many parts of the root ball you want to chop apart, collect up the fern fronds. Cut through the root ball with a sawing motion by inserting your blade into it.
Steps for Dividing Your Asparagus Fern
When dividing your asparagus fern, timing is the most important issue. Early spring is the best time of year to split your fern because the plant is in its dormant growing season.
In order to avoid any unnecessary stress or injury, it’s best to split it now, when the plant is dormant and dormant at this time of year.
Step 1: Watering
I water my asparagus fern a lot the day before I plan to divide it so that the roots are well hydrated. When you cut a tree, this also protects the root system from stress.
A lot of water is what I’m referring to here. When I dip my finger in the soil after watering it, and the top 2 inches feel moist, I know the soil is well hydrated.
Step 2: Remove It From the Soil
Remove the fern from the soil, whether it is in your garden or a pot. Asparagus fern can be removed from a pot by flipping the pot over and keeping your hand over the fern.
For this reason, I don’t want to disrupt the roots or displace a lot of soil by shakily shaking the plant out of its pot.
As much of the root as possible should be preserved.
If your asparagus fern is outside, you can use a trowel to soften the dirt surrounding it. Pull your plant out of the ground using your hands.
Step 3: Sanitize Your Blade
It’s easy to overlook the necessity of thoroughly cleaning your blade before each use. The ferns I had separated suffered bacterial or fungal diseases because I forgot to clean my blade.
My plants perished because I didn’t do anything to prevent their demise, and I would hate for the same thing to happen to you.
A cotton ball saturated in rubbing alcohol can be used to scrub your knife’s serrated blade clean. The asparagus fern will not be infected with any germs or fungi as a result of this.
My knife is always dry before I use it.
Step 4: Gather the Fronds
After that, I gather the fronds and check to see that I have enough roots, stems, and leaves in each portion of the root ball, whether I divide it in half or in quarters.
Having adequate foliage means that the section will be able to grow and photosynthesize without difficulty in a new pot.
Twist-ties make it easier for me to gather the fronds and make sure each one has enough of greenery. This method is more easier than simply dividing the fern.
Step 5: Divide Your Asparagus Fern
My asparagus fern is now ready to be divided. The blade of my knife is inserted into the ground. I use a back and forth sawing motion to cut the root connections between the frond sections.
To help disentangle the roots, I’ve had to resort to using my fingers.
Step 6: Transplanting and Beyond
Each of my half or quarters is transplanted into a new well-draining container with well-draining soil. Soil should be flush with the asparagus ferns’ crowns when repotting.
In addition, I immediately water all of my new ferns and make sure that the top inch of soil is moist for the first two weeks after planting. I water less once the roots have grown in.
Xem thêm : How To Revive Dying Petunias? Comprehensive Guide
These transplants are likewise grown under 50 percent shade, with 25 percent shade being introduced progressively.
How to Split an Asparagus Fern
Within the USDA hardiness zones 9 to 12, Protasparagus ferns (Protasparagus densiflorus) thrive as both houseplants and outdoor ornamentals. In order to keep their bushy, healthy appearance, they should be divided and replanted every few years if they are planted in perfect conditions. In order to avoid damaging the plant’s roots, it is best to split asparagus ferns in the spring while the plant is dormant, so that the new root system may be established fast.
1.
The day before you want to split your asparagus fern, give it plenty of water to keep its roots hydrated and stress-resistant. Spritz the soil with water until the top 2 inches are soaked.
2.
It’s time to get rid of the asparagus fern’s pot. Flip the pot upside down with your palm over the plant. Shake the pot till the plant comes out. Don’t disrupt the roots or loosen too much soil by overdoing it.
3.
To prevent the spread of fungus or bacteria to the asparagus fern, use a cotton ball soaked in rubbing alcohol to sterilize the serrated knife blade. Before using the blade, allow it to dry thoroughly.
4.
So that each division can photosynthesize once it is repotted, divide the asparagus fern’s fronds into equal pieces. Use twist-ties to hold the frond sections out of the way as you cut through the roots.
5.
Using a serrated knife, make a vertical cut through the earth in the middle of the two sections. Sever the roots by repeatedly reversing the blade. Use your fingers to gently separate any knotted roots.
6.
Use 2 parts coir to 2 parts loam to 1 part perlite or coarse river sand to replant each division into a new pot. When planting, place the divisions in the pots so that they are level with the soil around them.
7.
After planting the asparagus fern divisions, be sure to water them thoroughly. For the first two weeks, keep the top inch of soil damp but not soggy. Allow the soil to dry out on the surface for a day or two between waterings until the plants are established.
8.
For the first few weeks following transplant, place the divisions in 50% shade to prevent them from being stressed. Acclimate them gradually to 25% shade, which is great for asparagus ferns.
Why Divide Your Asparagus Fern
With frequent watering, well-draining soil, a well-draining pot, and bright, indirect sunlight, an asparagus fern can rapidly and easily outgrow its planter.
The sight of a plant outgrowing its pot is like a “congratulations; you cared after me well, mum” from your plant.
However, if your plant outgrows its pot, it may begin to die out in the centre because there isn’t enough room for the roots. Your fern will have lesser leaves in this instance.
These are all indications that you need to divide it or plant it in a larger container.
Every three to five years, you should divide or repot your asparagus fern so that it continues to produce rich green foliage, gorgeous white blooms, and berries.
Because the roots of an asparagus fern are hardy and will quickly form a new root system if manhandled, dividing the ferns is a simple process.
Frequently Asked Questions about Dividing an Asparagus Fern
Can you split an asparagus fern?
Asparagus ferns can be split or divided. When a plant’s root ball is divided, it grows new and stronger roots in a short period of time.
How do you divide a large asparagus fern?
You’ll need a hacksaw or a sturdy knife to chop through the roots of a huge asparagus fern. Water the soil, take the plant from the soil, sterilize your blade, gather the fronds, and then cut and divide the asparagus fern.
The Final Divide
The process of dividing an asparagus fern for repotting is simple, and even novice gardeners need not be frightened.
Once transferred into soil, the asparagus fern quickly establishes a new root system and begins to produce.
Nguồn: https://iatsabbioneta.org
Danh mục: Garden


