When starting seedlings in a greenhouse, do you really require humidity domes? Not always, but it’s necessary if you want the best outcomes. While it may seem simple to begin growing plants on your own, there are a plethora of factors to consider.
Things your plant needs to live when you start planting in a greenhouse. Soil, temperature, sunlight, and humidity are a few examples.
Bạn đang xem: Humidity Domes When Planting Seeds In A Greenhouse
Having a humidity dome will help you get better results, such as a high germination rate when planting seeds. As far as greenhouse seed sowing goes, here is the place to find out if you need humidity domes or not.
Humidity Domes Defined
Humidity domes are plastic structures or add-on equipment used to cover propagators and seed trays in greenhouse farming. Plants may grow higher under a domed environment, and the material isn’t simply for looks.
The dome is able to raise the humidity and temperature levels of the interiors because the plastic is flexible and inexpensive. In other words, if your greenhouse has the correct temperature for these plants, the humidity dome will help them flourish even more.
The optimal temperature for successful germination is between 50 and 65 degrees Fahrenheit on average. The domes are meant to be used indoors because most homes aren’t this warm. Temperature and humidity levels can be controlled and stabilized with the use of these equipment.
Should I Use A Humidity Dome On Seedlings?
To minimize confusion, humidity domes are mostly used for gardening, but they can also be used for other purposes. If you don’t use them, they will provide you with alternatives so that you may generate the finest possible product even if you don’t. Humidity domes aren’t necessary for growing seeds. The seeds may germinate without the dome, however it is possible that the dome will increase the rate of germination for these particular seeds.
They can also reduce the amount of time and effort required to maintain the soil moist enough for the seeds to germinate.
Does A Humidity Dome Need Holes?
Humidity domes, in my opinion, don’t require any holes at all. The dome’s primary function has always been to increase humidity by trapping air moisture beneath the cover.
Vent holes in the dome can tell you if the humidity level is too high. Mold can form in the soil or on your seedlings if there is a lot of moisture in the air. When you’re planting seeds that take longer to germinate, the holes in the humidity dome may be more appealing.
If you want to create a personalized vault, you can place the holes anywhere on the humidity dome, not just on the top or sides. Having the proper levels of humidity balances the act in such a way that excessive moisture in gardening is warned against.
When there is a lack of humidity, the soil may dry up, disturbing your seedlings and lowering germination rates.
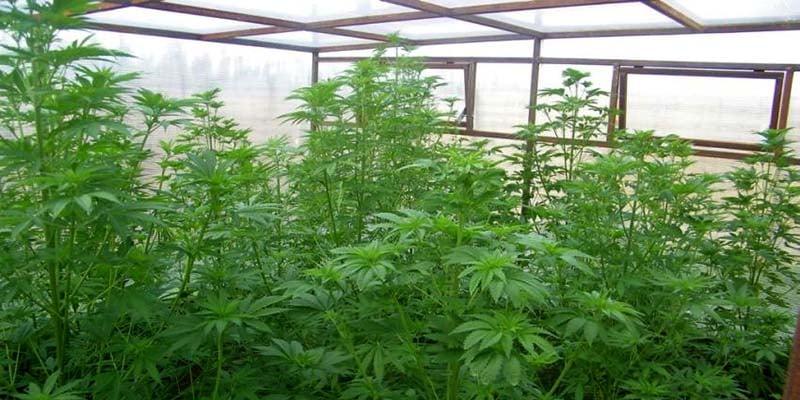
Will Seeds Germinate In A Cold Greenhouse?
Greenhouses allow gardeners and farmers to control the humidity and temperature necessary for seed propagation and seedling growth. The gardener can begin seeding at any moment because you have a regulated environment. greenhouses have a lot to offer when it comes to growing food.
At the very least, if you’re planning on starting seeds in the greenhouse for spring transplants, you should do so at least eight weeks before your area’s “last expected frost date.”
There are seeds that must not be germinated in temperatures above 80 degrees Fahrenheit if they are to succeed even further. The greenhouse’s temperature must be closely monitored as well. When the sun is out, greenhouses are warm, but they might get a little chilly at night. You can always get more information about these standards from other sources.
What Temperature Should A Greenhouse Be At Night?
The ideal temperature for greenhouses is 75 degrees Fahrenheit or 24 degrees Celsius at night (90 degrees Fahrenheit, or around 32 degrees Celsius during the day). Cooler temperatures have been shown to produce better results with vegetables, depending on the nature of the crop.
In general, plants cultivated in cooler temperatures produce more branches and flower buds than those in warmer climates.
To completely comprehend and make an informed decision about whether or not you need a humidity dome in your gardens, it is important to know about humidity. The amount and percentage of water vapor in the air has a direct impact on the humidity in a greenhouse, therefore this is relevant in gardening.
When starting seedlings in a greenhouse, do you need to utilize humidity domes? When it comes to gardening and horticulture, understanding humidity is essential since it has a direct impact on how well plants do.
Because greenhouses may be tailored to the specific needs of each gardener, controlling humidity levels will be much simpler. Choose from a variety of different sizes to fit your needs. Protecting your plants from changing weather conditions, such as high winds, low temperatures and ground frost, is possible with the correct greenhouse.
Is There A Need To Have Humidity Domes?
Is it necessary to utilize humidity domes in a greenhouse to grow seedlings?
If you don’t have one, seeds will still germinate, but you’ll get a better result if you have one. This item is designed to save you a lot of time if you wish to cultivate seeds in a more expeditious manner.
Most commonly, plastic humidity domes cover seed trays or other containers that contain your culture medium, such as soil. The dome’s principal function is to keep moisture in the air beneath the cover.
Seed germination is accelerated when the soil is sufficiently moist. These humidity domes come in a variety of forms, from the smallest to the largest. Vents that may be adjusted to control the quantity of humidity that is trapped are available on some models.
Does Humidity Domes Need Holes?
The openings for the vents might be located on the top, side, or virtually anywhere else. Seeds can only thrive if they are kept at the correct humidity level.
Humidity domes don’t need a hole in the ceiling. The excessive levels of humidity are mostly the result of leaks in the building’s ventilation system.
Always keep in mind that overdoing it can be dangerous. Mold can grow in the soil if the humidity is too high.
Lack of humidity can cause soil to dry up, which diminishes the seed’s ability to germinate and finally kills it.
When starting to sow seeds that take longer to develop, it’s better to have vent holes.
Are Lights Necessary For Humidity Domes?
No, this is not the case. The sprouting of seeds occurs on their own. It is possible for seeds to germinate and grow even if they are buried a long way below the surface of the ground. The direction in which the seeds grow is determined by gravity.
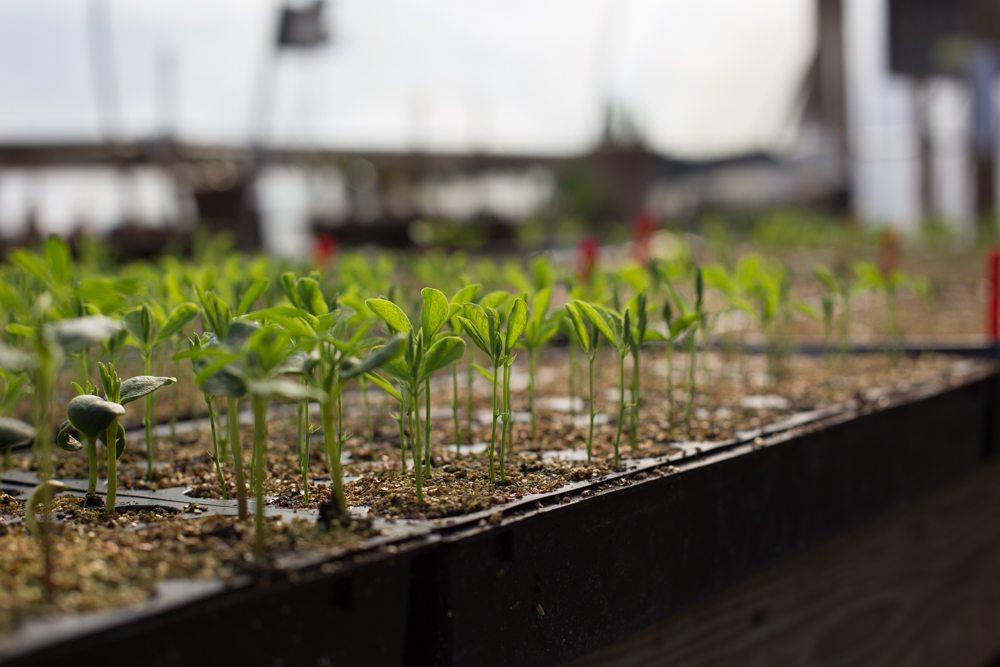
The rules, on the other hand, will be revised after the germination process is complete. Seedlings, like all plants, have a fundamental set of requirements that must be met in order to survive.
In order to grow, seedlings must be exposed to low quantities of light. If you do this over an extended period of time, the seedlings will grow lengthy legs as a result of the constant stretching they must do to find a light source.
To avoid this, place your seedlings in an area that is well-lit. Reduce the temperature, water volume, and humidity gradually.
After the germination phase, white LED lights are an excellent choice for growing seedlings indoors.
When Is The Right Time To Take Off Humidity Domes?
Humidity domes should be removed once seeds have sprouted into seedlings. It varies greatly from plant to plant, and it might take anywhere from a few days to a few weeks to complete the transition.
When the humidity dome is left unattended for a lengthy period of time, fungi, mold, and other adverse conditions might develop.
Another option is to grow all of the plants together by planting them in groups of the same kind.
Making Humidity Domes When Planting Seeds In A Greenhouse
A humidity dome can be purchased at any time, but if you want something unique and inexpensive, you can create your own.
Make your own crowns from recycled materials at home with this simple tutorial.
Xem thêm : How To Get Cactus To Bloom? Comprehensive Guide
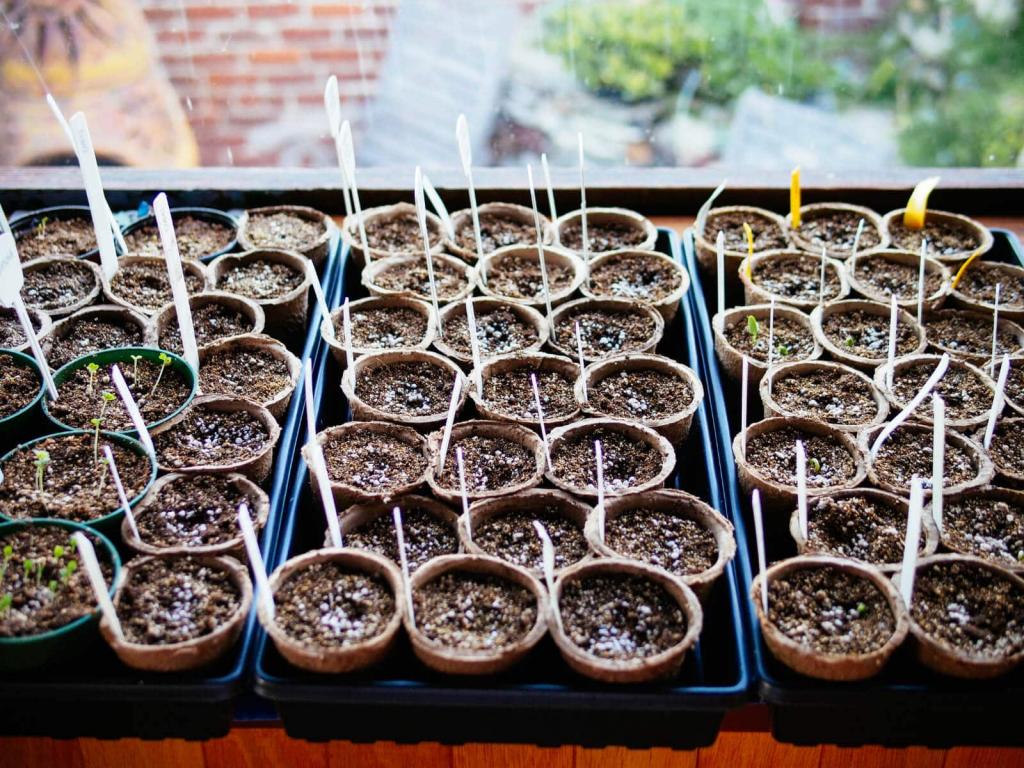
Finding and filling in any empty containers or pots is a simple operation. The seeds need to be sown in the correct manner.
Water the ground enough to keep it from drying up, but don’t go overboard.
It’s an excellent idea to use plastic wrap to cover the pot. Rubber band the wrap to keep it in place. This is a simple and effective way to grow your favorite seeds in a dome.
Another option is to use a plastic bag and a wet paper towel to remove the odor. Instead of soil, we’ll be using paper towels as our growing medium. Wrap the paper towel lightly around the seeds before putting them in the paper towel.

Benefits Of Humidity Domes
In addition to speeding up seed germination, humidity domes protect seeds from pests by limiting the kind of seeds that can germinate. A humidity dome built from existing crowns is one such example.
Do You Need A Humidity Dome For Seeds?
Seeds do not necessitate a humidity dome. A humidity dome isn’t necessary for seed germination.
A humidity dome, on the other hand, has numerous advantages when it comes to beginning seedlings, including:
- It’s easier to germinate seedlings faster when the soil and air beneath the humidity dome are kept warm. Tomato and pepper seeds germinate more quickly when the soil temperature is higher.
- Humidity domes protect seeds from pests and illnesses that move through the air, regardless of whether you’re starting seeds indoors or in a greenhouse.
- Higher Germination Rate – a humidity dome keeps the soil warm and moist, which gives seeds the optimum conditions to sprout. The seeds are more likely to germinate, resulting in less waste.
When attempting to re-seed elder plants, a higher germination rate is advantageous.
See my post on the shelf life of seeds for further details.
What Is A Humidity Dome?
To keep the growing medium (soil) and seeds moist, a humidity dome is utilized on top of a container. Plastic or glass are common materials for humidity domes.
The dome is normally clear so that the seedlings may get the light they need to grow. A humidity dome acts as a tiny greenhouse by trapping heat in the air and soil beneath it.
The primary function of a humidity dome, on the other hand, is to retain moisture in the air and soil beneath it.
Because of the retained moisture, the dome’s relative humidity rises significantly. Seed germination is encouraged because the growth media is kept moist.
For seeds to germinate, a relative humidity of 98 percent is ideal. Under a humidity dome, achieving this amount of humidity is significantly simpler.
Check view my article on the ideal humidity level for plants if you need to raise the humidity (and how to achieve it).
Your own humidity dome is an option if you’d rather not buy one (more on this later). Humidity domes are available in a variety of shapes and sizes, including:
- Round Humidity Dome – also called cloches, there are often used to protect a single plant from cold and pests. However, you could also use a cloche as a humidity dome, such as this one from Gardener’s Supply Company.
- In order to safeguard a single plant from the cold and pests, a round humidity dome, which is also known as a cloche, is frequently employed. However, you could also use a cloche, like this one from Gardener’s Supply Company, as a humidity dome to keep your plants healthy.
- With this sort of Humidity Dome, you may install it over a wide range of seed trays.
There are many domes that will suit a 10″ x 20″ plant propagation tray (seed tray). Taller trays are better for propagating plants from cuttings.
Some humidity domes are as high as 7.5 inches in height. Visit the Bootstrap Farmer website for more information about humidity domes.
Adjustable humidity vents are standard on many humidity domes, allowing you to add or remove water as needed. Moisture levels under the dome may be easily adjusted thanks to these vents.
In order to help your seedlings adjust to the environment outside of the dome, this is a lifesaver (or plant saver). It also aids in reducing the amount of heat generated by the dome on the seedlings.
When To Open Vents On A Humidity Dome
The vents on a humidity dome should be opened if the temperature beneath it is too high for your seedlings to tolerate.
Tables from the University of California provide the appropriate soil temperature for seed germination for numerous common crops.
The humidity dome’s vents should be opened (or removed) if any seeds have grown.
To avoid mold, the Bootstrap Farmer recommends keeping the humidity dome on throughout germination (the time it takes seeds to sprout).
After removing the dome, if there are any seeds that have not germinated, use a spray bottle (plant mister) to precisely hydrate them.
Humidity domes often have vent openings on the top or sides. If you build a bespoke dome, you can place the vent holes wherever you like.
Seed germination requires a delicate balance of humidity, as is the case with many other aspects of horticulture.
Moldy soil or seedlings can be caused by excess humidity, as previously stated.
The soil will dry out, killing some of your seeds and lowering the germination rate if there isn’t enough humidity.
Do You Need Light To Germinate Seeds In A Humidity Dome?
For most seeds, germinating seeds in a humidity dome does not necessitate light. Science Focus reports that seedlings use gravity to guide their growth.
This means that most seeds don’t require light to germinate. It’s actually rather common for seeds to germinate in full darkness, far below the surface of the soil.
It’s not all that uncommon to find seeds that require sunshine (or a thin covering of soil) in order to grow. My piece about them can be found here.
After your seeds have sprouted, though, things take a turn for the better. In order to grow, seedlings require light, and they will do so in whatever way possible.
Seedlings will “stretch” as they grow towards the light if there is not enough illumination. In order to move closer to a weak light source, the seedlings will become “leggy,” or long and spindly, over time.
In order to avoid long and leggy plants, use grow lights after germination. Place the seedlings in a location that receives enough sunshine for them to thrive (such as a bright windowsill).
When transplanting seedlings outside, take cautious to adequately harden the seedlings off. What this means is that you gradually alter the seedlings’ exposure to various environmental conditions.
As a result, the seedlings are less likely to be killed or damaged by a sudden shift in their surroundings.
Check out this Penn State Extension article on seeds and seedlings for more information.
When To Remove The Humidity Dome For Seedlings
After the seedlings have sprouted their first set of leaves, you should remove the humidity dome, according to University of New Hampshire. According to the plant, it might take anything from a few days to a few weeks to mature.
Mold and other fungi can form if the humidity dome is left on for an extended period of time. Your entire seed tray is at risk if you do this.
Xem thêm : How Long Does The Marijuana Growing Cycle Take In Greenhouse
Keep an eye on the seeds every day to check if they’ve sprouted. When the seeds begin to sprout, remove the humidity dome.
Vent holes on the humidity dome can be adjusted if your seeds germinate at different times than expected. Although it is ideal to avoid this issue altogether,
This can be done by planting just seeds of the same kind in a dome. The seeds will all germinate at roughly the same time this manner.
After the dome is removed, you’ll need to “harden off” the seedlings, as previously explained. This implies that you progressively expose them to their new surroundings so that they are ready for the garden and the outside world.
How To Make A Humidity Dome
If you don’t want to buy a humidity dome, you can save on costs by making your own. In addition to the cost savings, there is the benefit of being able to customize your dome to the size and shape you want.
Making your own humidity dome can save you money if you don’t want to purchase one. Additionally, you’ll be able to make your dome any size or form you desire, which means you’ll save money in the process.
- Box with Plastic Wrapper
- Towels and plastic bags are included in this set.
- Plastic wrap with an egg carton
- Plastic Bottles and a Tray
- Stainless Steel Container with Lid
What works best for you depends largely on what materials you have at your disposal.
Humidity Dome From A Container & Plastic Wrap
Filling a pot or other container with soil is an easy approach to create a humidity dome. Ideally, the container should have drainage holes so that your seeds and seedlings don’t get soaked by the wet soil.
The next step is to plant your seeds at the correct depth and spacing. Make sure the dirt isn’t completely drenched before watering it.
Then, cover the pot in plastic wrap. Wrap the plastic over the container’s top so that the entire soil surface is covered.
To make the pot heavier, use a long piece of plastic wrap and tuck the ends beneath the pot. The plastic wrap can be secured to the pot with either an elastic band or a piece of twine.
Untie the elastic or twine and pull up the plastic to allow the air to circulate and dry out a little bit.
The soil will stay moister longer when planted in plastic containers. In order to learn more about the differences between clay and plastic pots, see my post on the subject.
Humidity Dome From A Paper Towel & Plastic Bag
A humidity dome can be made without the need of pots, containers, or soil. A damp paper towel and a plastic bag are all you need.
The first step is to dampen the paper towel, but not completely saturate it. Rather than soil, a damp paper towel will be used as a growing medium in this arrangement.
Using the damp paper towel, spread the seeds out on a flat surface, and then wrap the towel tightly around them.
Then, place the seed-filled paper towel in a plastic bag and seal it. Keep the moisture in the bag by sealing it..
The humidity in the bag will rise when the paper towel’s water evaporates. As a result, the bag’s relative humidity will rise.
This will help your seeds germinate in a warm, moist environment. Additionally, you may put the sprouted seeds in the garden or a larger pot without having to deal with the dirt mess!
Humidity Dome From An Egg Carton & Plastic Wrap
This humidity dome setup also avoids pots and containers. It only requires an egg carton and plastic wrap.
Using a humidity dome instead of a pot or container is another benefit. Only an egg carton and a roll of plastic wrap are needed.
After that, in each cell, put a seed. Each cell should be watered.
Using the plastic wrap, completely enclose the system (you can also use a plastic bag that seals, such as a larger freezer bag).
The seeds will germinate in the bag/plastic as with the other techniques indicated below.
Wet egg cartons may dissolve, making it difficult to transport them without breaking, which is the single disadvantage of this approach. To avoid this, place your egg carton on a tray so that you may quickly shift it when necessary.
Humidity Dome From A Tray & Plastic Bottle
If you have a small tray and a few plastic bottles, this is an easy humidity dome to make.
To begin, fill your tray with dirt. The water will spill out if you don’t leave enough room at the top for watering.
The next step is to sow your seeds. The soil should be wet but not soggy (a spray bottle works well for this).
Then, remove the bottle’s bottom (be careful not to cut yourself).
Finally, place the top of the plastic bottle over the dirt in which the seeds are buried..
You can use the plastic bottle’s cap as a humidity dome vent!
Humidity Dome From A Food Container & Lid
It is possible to utilize a food container with a lid as a humidity dome.
To begin, add dirt to the container’s bottom. Make sure there’s plenty breathing room at the top for air and water to get to the seedlings.
The next step is to sow your seeds. Keep the soil wet but not saturated with water.
Then, place the container’s lid on it and seal it up. After sprouting, seedlings will benefit from a transparent lid.
After your seeds have germinated, be sure to remove the lid and keep an eye on them. Keeping a lid on your seedlings as they grow taller will not be a pleasant experience for them!
Consider making something a little more robust if you’re handy. Please check out this instructables.com post on how to create a humidity dome for seeds if you’re interested.
Conclusion
Plants provide us with nutritious and healthful meals. A humidity dome isn’t necessary, but it will speed up the development of your seedlings and save you a lot of time.
When starting seedlings in a greenhouse, do you need to utilize humidity domes? You may, of course, purchase crowns, but creating your own version frees you from financial obligations while also allowing you to create exactly what you want.
It is our sincere wish that you have gained a great deal of knowledge from reading this post. The best of luck, and have fun with it!
Nguồn: https://iatsabbioneta.org
Danh mục: Garden