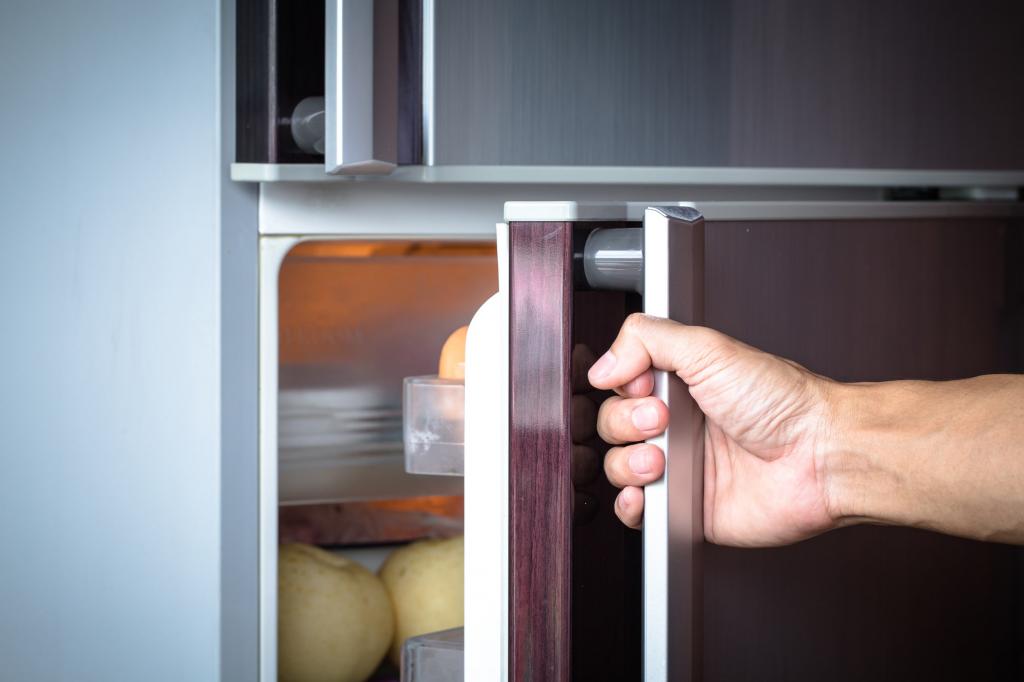
Many refrigerators on the market now have a single door that swings open on a single hinge. On the left or right side, these door hinges can be used: a right-hand refrigerator opens from left to right, while a left-hand refrigerator opens from right to left.
- How To Change Filter On Samsung Fridge Freezer? Comprehensive Guide
- How To Make A Kegerator Out Of A Fridge? Easy Step-by-step Guide
- How To Reset A Samsung Fridge Freezer? A Few Tips to Remember
- How To Reset Samsung Fridge Temperature? Step-by-Step Tutorial
- How To Fix A Fridge Seal? Troubleshooting and Repair Guide
Most Refrigerator Doors Are Reversible
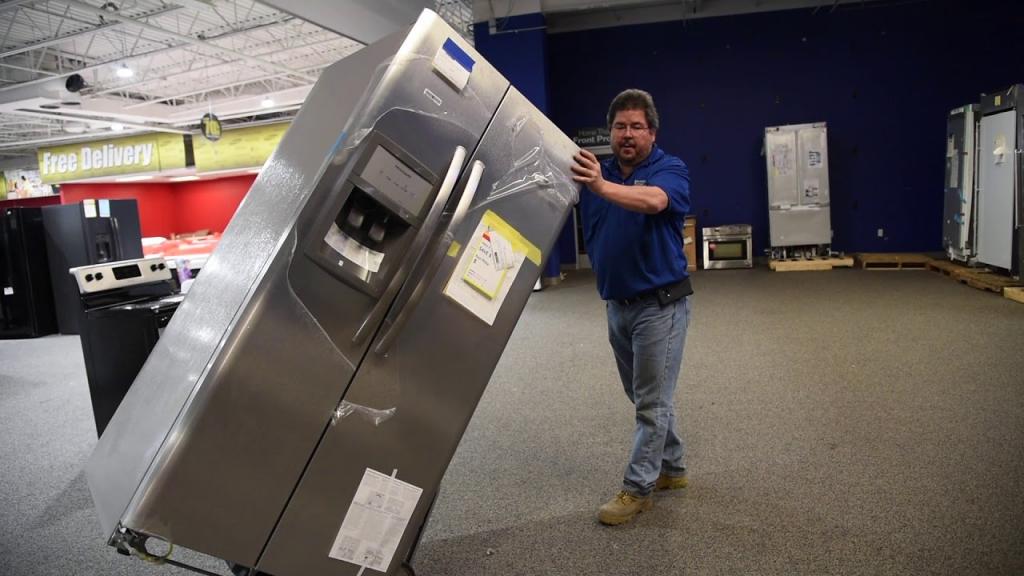
Refrigerators are typically shown on right-handed mounts at appliance showrooms. If you’re a right-handed person, it’s likely that you’ll naturally reach for the fridge door with your right hand, but not everyone is right-handed and not all kitchens are set up for a right-handed fridge.
Bạn đang xem: How To Switch A Fridge Door? 3 Easy To Follow Steps For You!
Reversible doors are common for refrigerators that don’t have built-in water or ice dispensers or through-the-door units. It’s important to double-check the door’s reversibility if the displayed configuration doesn’t work in your kitchen.
When shopping for a new refrigerator, opt for one that has a door that opens on the side that is closest to your kitchen. Otherwise, you can reverse the door by following the instructions in the product manual. This is usually a straightforward process that entails flipping the hinges and handles around. It is not uncommon to only need a screwdriver and a tiny wrench. Asking your shop to make the change for you before or after delivery is another option. Most of the time, this type of installation is completely free of charge and takes only a few minutes.
Install the refrigerator such that the door opens toward the counter, workspace, or stove in order to save time and make it easier to get food in and out. Do not hesitate to implement these easy modifications, since they can have a significant impact on your home’s convenience and comfort.
Keep in mind that the door of your refrigerator can be opened in the opposite direction at any time. You can typically adapt an older refrigerator to fit your needs.
Other Refrigerator Options
All refrigerator doors used to open from one side or the other at one point in time. The refrigerator’s tiny freezer compartment was always found at the very top of the appliance. This particular design of refrigerator is still available, although you may be better served by one with a French door.
It is commonplace to find double-door refrigerators with the knobs located close to one another and the hinges on the opposite ends. You can either open one door at a time or both at once. Because of its adaptability, the refrigerator may be more convenient to use in a smaller kitchen.
With a vast variety of shapes and choices, French-door refrigerators are just as versatile as their single-door counterparts. Some have water and ice right at the entrance, while others are made of gleaming stainless steel and have ingenious retractable shelves and digital thermostats.
- French-style doors are common on side-by-by-side refrigerators and freezers. Both the freezer and the refrigerator compartments on this appliance are designed to store frozen food.
- With a French-door refrigerator, you can reach the freezer on the bottom, which is generally accessed through a drawer-style door. For ice cream and other frozen items, the lower freezer has a little more room.
How can I reverse the door of my refrigerator?
A refrigerator’s efficiency is directly related to where it is installed. In addition, you may need to remove or reverse the refrigerator door for a variety of reasons, such as moving or fixing the appliance. You may find the details here.
If you need more information, look for a user guide or get in touch with a certified service center.
Note:
- Before any work is done on the floor, it is essential that you protect it. Towel, rug, box, etc.
- Before beginning the door reverse procedure, disconnect the refrigerator from the power supply and remove all of its contents.
- Ensure that the water supply is off before beginning the procedure.
- An electrical safety test should be performed prior to turning it on if practicable and legal.
- Make sure you don’t hurt yourself in any way while having the surgery done.
- Any installation job that necessitates more than one person should be performed by two or more people to ensure their own safety.
- Reversing the opening of the door should only be done by Samsung-approved Service providers, according to Samsung.
- The appliance manufacturer’s warranty does not cover any damage caused when attempting to reverse the door opening.
Required Tools (not provided)
Tools That Are Necessary You can expand your view by clicking here.
Note: Depending on the model, the placement of the waterline may be different.
Reversing the Doors
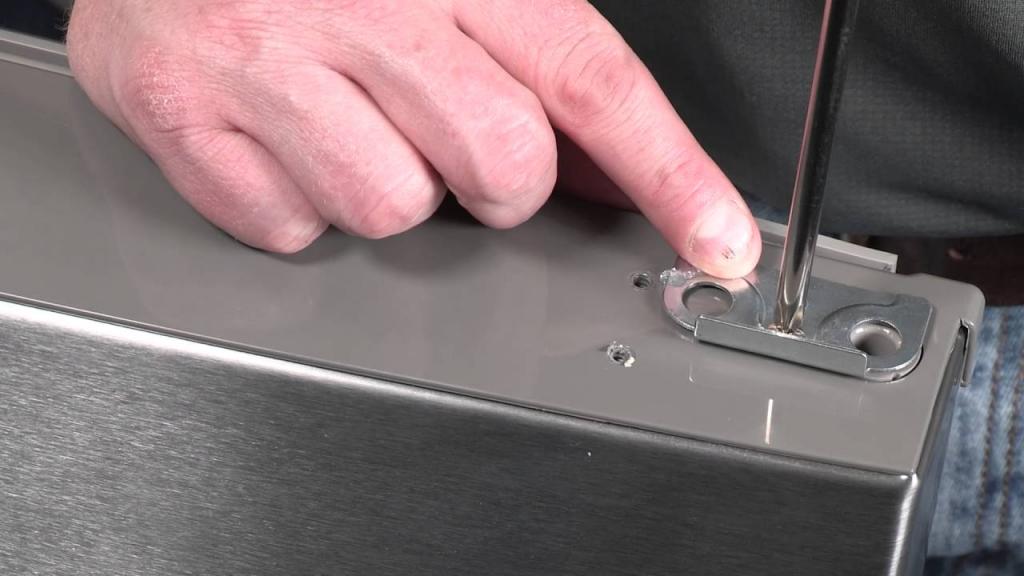
Using a little screwdriver, remove the hinge cover by unclipping the cover.
Remove the wire cover and the door to the cap. ” Afterwards, remove the housing and remove the wire connector inside.
Take off the upper hinge’s two screws.
Lift the fridge door straight up to free it from the middle hinge.
When dismantling the door, be careful not to drop it.
Use a Phillips head screwdriver to remove the screws from the center hinge.
Please support the freezer door, since it may tumble forward.
Lift the freezer door straight up to remove it from the bottom hinge.
Xem thêm : How To Reset A Samsung Fridge Freezer? A Few Tips to Remember
In a safe working area, gently lay the door down, taking care not to harm the door, and alter the position of the door’s top cap.
Relocate any screws or lever auto-closer levers that need to be repositioned.
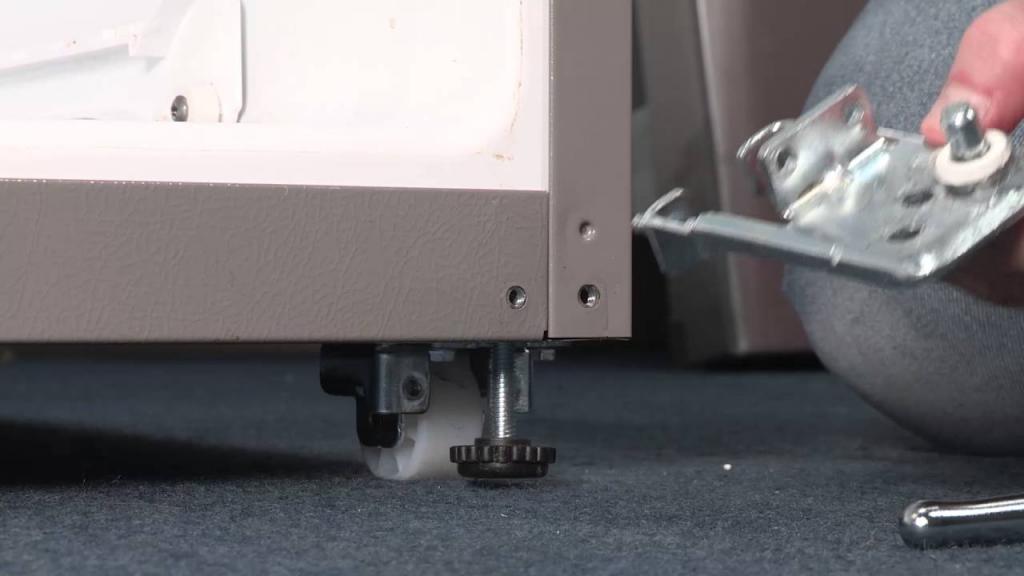
Twist the screw cap to the other side and replace the feet.
Change the position of the leg and hinge on the bottom of the frame. From top to bottom,
Place the freezer’s lid on top of its center hinge, and then assemble its bottom hinge.
Use the Phillips head screwdriver to assemble the middle hinge.
Directly switch the wires on the opposite side of the door. Insert the wire cover for the door next.
Lift the refrigerator to its feet.
Cap Space Door Assembled The door gaskets for the refrigerator and freezer should then be repositioned.
The gaskets for the refrigerator and freezer should be removed and then reattached after rotating 180 degrees.
Door gaskets must be positioned correctly. If not, there may be a noise or moisture that will negatively impact the unit’s functioning.
To assemble the fridge door, insert the Top hinge into the hole and then remove the Top hinge.
Insert the wire by reconnecting the wire connector. After inserting the cover wire door, put it into place on the top of the fridge door.
Put the cap control together by putting it all together as shown in Step 19.
Secure the entrances. Ascertain whether or not the entrances and exits work properly.
Immediately after the door reversing procedure is complete, do not plug in your refrigerator; wait at least an hour.
HOW TO REVERSE THE HINGES ON YOUR REFRIGERATOR
Consider the purchase of a new fridge. You take all the necessary measurements, research the products online, and then visit a few shops before settling on one. The door opens the incorrect way when it finally arrives. The door can’t fully open because of a pillar, wall, or counter. Your food is already in coolers; you don’t have time to prepare it. The situation appears hopeless, but help is on the way. Most top-freezer doors can be opened in either direction.
In just 20 minutes, using only three tools and a strong pair of hands, you can change the direction a fridge door opens. Do-it-yourself instructions are provided here. You can skip the first step if you’re working with a new fridge.
1. Unplug your fridge and empty the door shelves.
The last thing you want is to remove the doors and have a bounty of eggs, jars, and condiments make a mess all over your floor. It’s also a good idea to unplug the fridge so it won’t waste energy trying to stay cool without the doors on.
2. Gather your tools.
Taking the doors off your refrigerator could result in a splattering of eggs, jars, and condiments all over your kitchen floor. Unplugging the fridge will save energy because it won’t be trying to keep cool when the doors are open.
3. Remove the top bracket of the fridge.
Fortunately, this is a relatively straightforward process. Simply remove the bracket’s plastic cover by popping it off. Remove the bolts that hold it in place, then. After that, you should be able to easily remove the bracket.
4. Remove the freezer door.
This point, you should be able to remove the freezer door off of the central bracket without damaging it in any way. For the time being, delete it and store it somewhere else.
5. Remove the middle bracket and door hinge.
Remove the hinge from the bracket with your ratchet wrench and put it away for later. After that, start removing the bracket’s screws one by one. You may have to remove the fridge door to gain access to them. In addition, the lack of a hinge makes it simple to remove.
6. Remove the fridge door.
Xem thêm : How To Dispose Of A Fridge? A Step-by Step Learning Guide
Set aside the refrigerator door if you haven’t previously done so.
7. Change the position of the bottom bracket and hinge.
The bottom bracket and hinge can be transferred to the other side of the fridge now that both doors have been removed. Remove the bracket by unscrewing the hinge and removing the bolts. Finally, rejoin both sides of the bracket and screw the hinge back into place. Ensure that it is inserted into the bracket hole furthest away from the refrigerator.
The doors of some refrigerators may additionally feature additional brackets. It’s only a matter of flipping them over.
8. Move the door handles to the other side.
If the handles aren’t secured with screws on the door, check for plastic coverings that hide the screws. Once you’ve got them out of the way, the handles should come right off. Remove the handles, then uncover the screws and screw the handles back into place on the other side of the door. Hide the old screw holes with plastic covers, and switch the covers over the hinge holes as well.
9. Put the fridge door back on.
This is a rather straightforward process, and all you need to do is place the door on the bottom hinge. I don’t think there’s anything further to say about that.
10. Reattach the middle bracket and door hinge on the other side.
Install the opposite bracket, repositioning the fridge door if necessary. Reviewed.com’s test fridge didn’t require an additional step to screw in the hinge, as some other websites claim.
11. Put the freezer door back on.
Finally, you’ll be able to open the door by putting it on the middle hinge.
12. Reattach the top bracket.
Make that the doors open and close smoothly when you reinstall the bolts. This concludes the tutorial. To say goodbye to the awkwardly-placed door of your fridge is an understatement.
Depending on the brand and type of the refrigerator, these processes may differ slightly, but the overall concept remains the same. You may find out how to do this by checking the manual for your fridge. Let’s go to work on your fridge now!
Which Way Should Your Fridge Door Be Hinged
When opening a refrigerator door, it should be hinged away from the side you want it to face when you do so. Most of the time, you want your open fridge door facing the direction in which you’re going to return.
You won’t have to bother with a fridge door that gets in the way of getting to the fridge. Especially if your fridge is in a confined space or a nook, you’ll save time and effort by not having to open the other side of the door.
If you have your fridge placed side to side with a wall, the fridge door should open facing opposite to the wall. A bigger fridge would allow for more area to work with instead of crowding oneself into a limited space when utilizing the appliance. The technique for changing a fridge door is outlined in the following sections.
Steps To Switch A Fridge Door
Wait! Take your time before dismantling the fridge door, though. You must first ensure that the door hinges of your fridge may be changed.
The best way to know this is to read the user’s manual. An alternative way is to observe your fridge. See if you can find covered screw holes on the opposite side of the fridge door’s top hinge.
For this information, you should see the user’s guide. Another option is to keep an eye on the food in your refrigerator. You may be able to uncover hidden screw holes on the other side of the fridge door’s top hinge.
Step #1. Unscrew the hinges
The easiest approach to learn about this is to read the user’s guide. As an alternative, you can keep an eye on the food in your fridge. You may be able to uncover hidden screw holes on the other side of the fridge door’s hinge.
From the top to the bottom, remove the hinges one at a time. Having two doors, remove the top hinge first, then remove the hinge that connects the bottom door to the top door. Move on to the bottom hinge if you are done with the top hinge.
Step #2. Transfer the handles
You can skip this step if your fridge door does not have handles. Find the screws and unscrew them if it does. If you can’t find the screws right away, try removing the screws first.
On the other side of the fridge door, locate the screw holes for the handles. Because they’re likely to be covered, it’s imperative that you remove them first. After installing the handles, conceal the screw holes on the previous side where the handles were attached by using a piece of wood.
Step #3. Reattach the fridge door
All that’s left is to shut the fridge door after it’s all finished. However, this time, the hinge was on the other side of the door. Place the bottom door after attaching the bottom bracket and hinge. Finally, attach the final hinge and bracket to the uppermost door, and you’re done.
Return the covers that you removed either from screws or screw holes now. After that, check to see that nothing is loose. When it comes to fridge doors, you don’t want them to fall off. Congratulations! You’ve now figured out how to open your refrigerator door in a different way. The baby has to be swung around for a little.
Tip
True width and open-door width are two terms used to describe how wide a refrigerator actually is when the door is open. The swing of the door may be limited if the refrigerator is positioned against a wall or in a cabinet sized for the real width but not the open-door width. When determining where to put your refrigerator or which side to put the door on, be sure to measure both widths.
Final Words
By the time you’ve finished reading this guide, you should know how to open a refrigerator door. Thanks for reading this far in the essay. We truly value the time and effort you have put in.
Nguồn: https://iatsabbioneta.org
Danh mục: Fridge