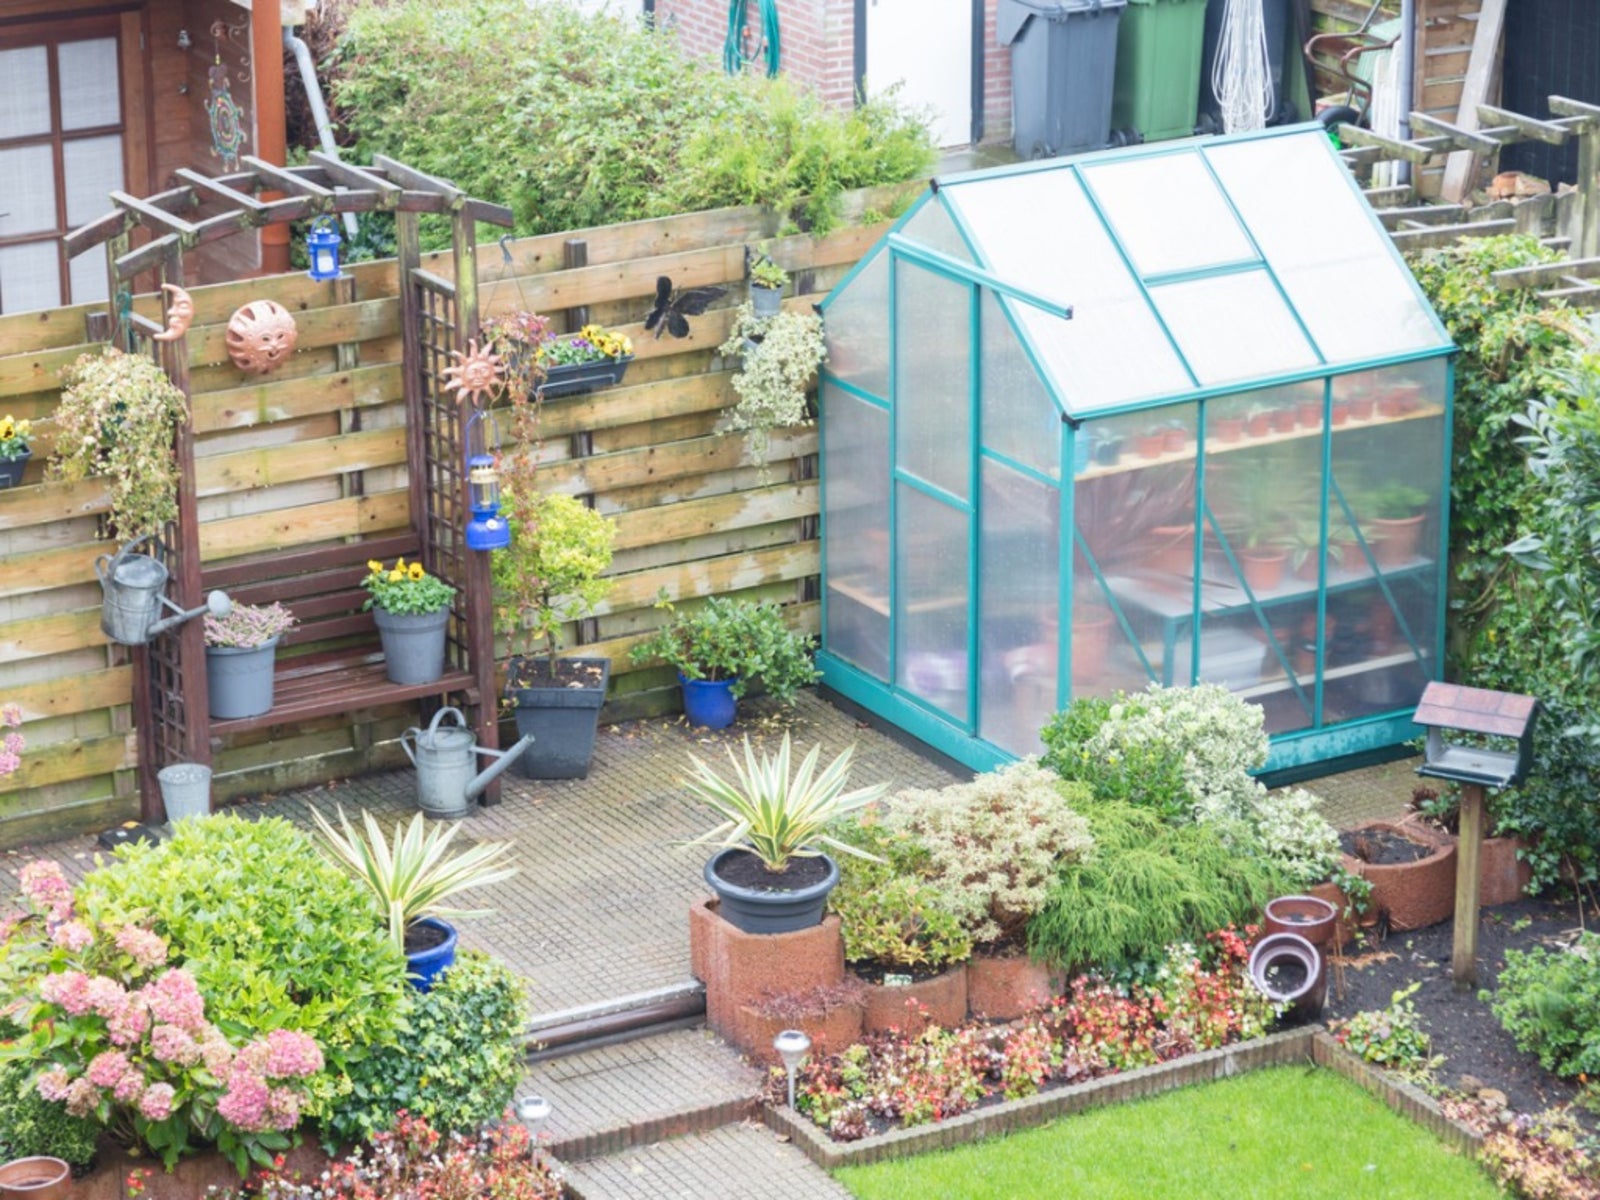
Plants, techniques of planting, and seasons must all be taken into consideration while starting vegetables in a little greenhouse. Mini greenhouses offer gardeners with limited room to extend their growing season and prevent problems caused by inconsistencies in the weather. As in a greenhouse, beginning vegetables correctly will only be feasible if you take the time to plan out everything.
- What Is Broccolini? How To Grow Broccolini?
- How To Transplant Coneflowers? Comprehensive Guide
- When to Start an Outdoor Mini Greenhouse in Northeast Iowa? Helpful Information!
- How To Grow Amaryllis From Seed? Step-by-Step Tutorial
- How To Prevent Mold With Seedlings In Small Greenhouse? Step-by-Step Tutorial
If you’re planning to produce veggies in a greenhouse, here are some things to consider. In this scenario, you must be aware of the seasons in your area and divide your crops into heat- and cold-tolerant ones. Finally, you can pick how to grow and maintain your plants in the greenhouse.
Bạn đang xem: How To Start Vegetable Plants In A Mini Greenhouse? Comprehensive Guide
The frost-free dates for your state’s hardiness zone might also assist you learn how to use your mini greenhouse for transplants or year-round.
How To Start Vegetable Plants In A Mini Greenhouse Correctly
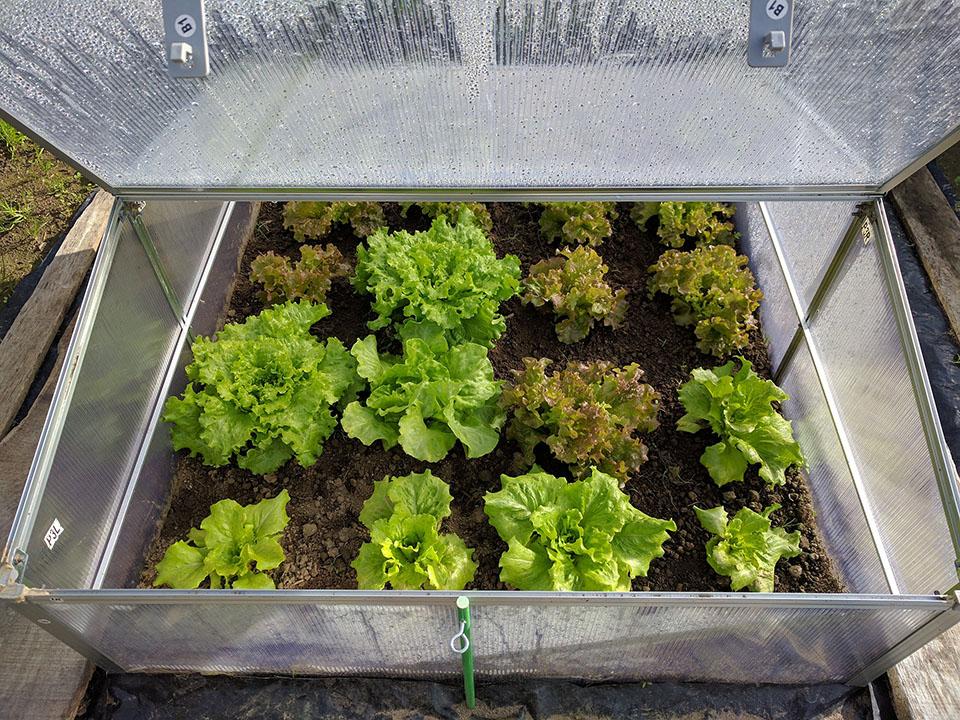
Best vegetables for a mini greenhouse
A little greenhouse’s first step is to identify which veggies can withstand both cold and heat, but that’s just the beginning. Choosing crops that can survive in a small area is an additional consideration because of the size of the plot. Keep in mind that overcrowding in the greenhouse can cause problems with plant development, pests, and disease.
In general, asparagus, beets, cauliflower, chilis, courgettes, cucumbers, eggplants, French beans, herbs, lettuce, onions, peppers, potatoes, radishes, salads, spring cabbage, squashes, sweet corn, and tomatoes are the ideal vegetables for a little greenhouse. Companion planting can assist maximize greenhouse space if it’s appropriate for each crop’s spacing. Check the crops that grow in your area and then determine when to plant them.
Self-pollinating vegetable types are another option. You can save room in a compact greenhouse by using self-pollinating crops, since you only need the plants. Insects aren’t necessary for pollination, therefore you’ll always have a productive garden, no matter how many there are.
Starting vegetables in a mini greenhouse
Starting with seeds or cuttings in beds or pots is up to you, depending on the type of vegetables you want to grow. When the weather permits, most gardeners use the little greenhouse to raise transplants before relocating them to the garden. In a greenhouse, you can start early, delay harvest, or extend the growing season, making it easier to plan and schedule.
You may plan when to start warm- and cool-season crops in the greenhouse after determining your hardiness zone. Before transplanting cucumbers, peppers, squash, and tomatoes into the garden, it is preferable to start them in the little greenhouse. There is no need to wait for the weather to warm up before beginning the growing season.
If you want to grow a strong crop of cabbage, greens, and cruciferous vegetables, start them indoors. As long as you maintain the appropriate conditions, you can start your vegetables from seeds in the ground or in containers. The compact greenhouse can be used for the entire life cycle of the plant, not just from seed to seedling.
Using A Mini Greenhouse Year-Round
In order to successfully grow vegetable plants in a compact greenhouse, it is necessary to have a general understanding of what to expect during the year. With appropriate preparation, you may utilize the little greenhouse all year round for your vegetables. To minimize any hiccups, you should also take into account other aspects that may be peculiar to your area, such as the weather.
Spring
The greatest time of year to grow plants indoors before transplanting them outside is spring. In the spring, you can start growing peppers, tomatoes, and even lettuces for the first few weeks of April. Seeds can be sown in the spring to provide a steady supply throughout the year.
Summer
Summers can be brutally hot, depending on where you live. Plants are shielded from harm in this situation by gardeners’ small greenhouses. Planting vegetables in a tiny greenhouse provides more control over temperature and ventilation than traditional outdoor methods.
Fall
Starting your salad crops in the fall is a great way to ensure a steady supply for the next winter months. Farmers in Maine, for example, may begin planting cruciferous vegetables as early as August. Plants can be started in a compact greenhouse in fall as long as the interior conditions are monitored.
Winter
Some frost-tolerant crops can also be started in the winter. In the winter, beets and other greens thrive in Oregon. The little greenhouse can also be used to shelter other veggies from frost during the winter months.
How to start seeds indoors: a step-by-step guide
Step 1: Gather your seed starting supplies.
- Seeds
- Cell trays or seed starting containers
- identifying characteristics of plant life
- Pre-seeding mixture (homemade or store-bought)
- a seed holder with a moisture dome (often called a 1020 plant tray or propagation tray, or use any DIY drainage tray with plastic wrap)
- Bottles of water that can be used to disperse mist
Your recycled newspaper pots are all set if you already made them. Seed starting pots and cell trays should be thoroughly cleaned if you plan to use them. 1
Also, you may reuse ordinary things like egg cartons, Dixie cups, and yogurt cups into seed starting containers. Drainage holes can be made by using a nail or an awl to poke a few holes in the bottom of the containers.
Step 2: Fill your pots or trays with seed starting mix.
Using a trowel or your hands, mix together your seed starting mix in a large tub or bucket and add a lot of water.
Make adjustments to the watering schedule as needed to keep the seed starting mix from drying up. Peat-based seed starting mixes are sluggish to absorb, so this may take a while. Ideally, you want the mixture to be moist, like sand.
Step 3: Sow your seeds.
Using two to four seeds, gently press them into the seed starting mix until they are snugly tucked in.
Your basil or mustard seedlings can be left exposed if they are little enough.
Vermiculite or seed starting mix can be used to cover larger seeds, such as beans or peas, or those that need darkness to grow (see the seed packets for details).
Step 4: Label your newly planted seeds.
Each pot should be tagged with a name. You won’t be able to recall where you planted your seedlings because they all look the same when they’re just a few days old.
Save your huge and gorgeous metal plant markers for the garden at this stage; cheap plastic plant markers work great and keep out of the way.
Step 5: Keep your seeds moist and warm.
Wet your seeds before planting.
You can also use an aluminum roasting pan or baking pan or even the plastic clamshell your salad greens came in to create your seed trays and then cover them with a humidity dome to keep them moist (or just plain old plastic wrap).
If your dome has vents, open them during the sprouting stage to allow for better air circulation.
Adding heat is now required. It’s not necessary for your seed trays to be in direct sunlight at this time; they can be placed in an attic, a bathroom, or a laundry room.
Low humidity will keep your seeds happy until they sprout if you keep your seedling pots covered in a warm nook. They’ll be depressed if it’s too humid. Only add more water if the mixture feels too dry to the touch before spritzing the seeds.
Xem thêm : List Of Fruit Varieties You Can Grow In Wyoming
The seeds will germinate between a few days to a few weeks. Your seedlings will appear to be sporting little seed hats when they emerge.
Don’t worry if it seems like germination (the process of a seed growing) is taking forever. Seeds usually germinate within three weeks of being planted in the ground (after that, try starting a new round of seeds).
Step 6: Give your new seedlings light.
Light is needed for the seedlings at this stage. Make sure your seedlings are in a position that gets a lot of sun by removing the humidity dome or plastic wrap (preferably a south-facing window).
Continue to keep the mixture moist but not overly soggy. Depending on how much sun and heat they receive, seedlings need to be watered every day or every other day.
For seedlings, the soil they’re growing in is shallow, which means that they don’t require a deep soak like larger plants.
In order to avoid damaging or displacing seeds, I prefer to use spray bottles or squirt bottles.
Step 7: Moving day! Transplant the strongest seedlings when they’re ready.
Your seedlings are ready for transplantation when they have their first “true set” of leaves.
Be careful when separating the roots if the seedlings are close together. You can keep all of them.
Fill a larger pot halfway with potting soil and plant the seedling there. The cotyledons (the first leaves that develop) should be held in place, and the roots should be avoided at all costs.
Compost tea or all-purpose fertilizer diluted in water can be used to mildly saturate the potting mix at this point. Focus on quality rather than quantity, and don’t get caught up in the minutiae.
To avoid the “leggy” look, make sure the seedling gets at least 12 to 16 hours of sunlight each day. If you’re experiencing leggy seedlings, you can learn how to solve this problem.)
Step 8: Harden off those seedlings.
To prepare your seedling ready for the outdoors, you may begin to harden it off11 by taking it outside for a few hours each day and bringing it back inside each night under indirect light.
Step 9: Transplant your seedlings outdoors.
It is possible to either plant your seedling directly into your garden or into a larger pot after the hardening off time.
Finally, in a few months, you’ll be eating the fruits of your labor!
Footnotes
We’re all guilty of being lazy at times. The importance of using clean pots cannot be overstated in the fight against damping off (an untreatable fungal disease that causes seedlings to suddenly keel over and die at the soil line).
Pots that had previously harbored sick plants should be thrown away or cleaned carefully. The nursery container you carried home may contain weed seeds and harmful bacteria, so don’t use any of the soil from that container.
In healthy gardens, you don’t need to wash your pots before reusing them again.
These humidity domes and trays are the strongest and thickest I’ve tested over the years, and they can be reused for several seasons without bending, flexing, or cracking like other manufacturers. back
It’s easier to start with a pre-wetted mix because peat-based mixes are more difficult to evenly wet down if they dry out in pots. When dry, peat actually repels water, despite its tremendous water-holding capacity when wet. This is baffling.
If you don’t have time to make your own seed starting mix, I recommend this reliable brand. To germinate and grow into healthy seedlings, seeds just require a simple mixture of perlite, vermiculite, and peat moss (or coco coir). back
When it comes to certain types of plants, light can speed up the germination process by as much as 50% (the process of a plant sprouting from a seed). back
The seeds will eventually sprout as a result of the dampness. back
So that your seeds stay moist and warm, this generates a greenhouse effect. This is essential for seed germination. Temperatures between 75°F and 90°F are ideal for germination of most annual vegetables. Ragweed can germinate at temperatures as low as 40°F (4°C).
Seeds can sprout in conditions that aren’t optimum, but the process of germination will take longer. back
My seed trays are conveniently located next to the floor heating vent in my living room. Even if you don’t have a refrigerator, you can place your tray on top of it to keep it cool, according to some gardening manuals. back
The seeds will decay if they are given too much water. Remove the cover or plastic wrap from your makeshift greenhouse for a few hours during the hottest part of the day to allow for better air circulation. Seeds, too, aren’t a fan of mold. back
A plant’s true leaves don’t appear until after the first set of cotyledons have emerged; these cotyledons are not leaves at all. They are part of the seed’s embryo and provide sustenance for the seedling until its real leaves begin photosynthesising. back
Compost tea or liquid sea kelp are two of my favorite go-to remedies. If you have decent soil to begin with, you don’t need to add any fertilizer. Over the course of a season, I was able to harvest enough healthy veggies to feed my family without the use of any fertilizer at all. back
Xem thêm : How To Grow Poinsettias From Seed? Complete Step-by-Step Guide
Your seedling will grow tall and weak as it expends all of its energy squinting into the sun. In order to slow down the initial growth and strengthen the stem, I like to run my hands across the top of my seedling gently to simulate a breeze. Brushing your teeth a couple times a day is all that is required. back
During the process of hardening off, you gradually expose the seedling to the conditions it will face in the garden. introducing it to the wind, the birds, and the bees. back
Why start seeds indoors?
For a variety of reasons, gardeners begin their own seedlings. In the first place, starting your own seeds allows you to plant kinds that are difficult to obtain elsewhere. Only a handful of plant kinds are available at your local garden center, but there are literally hundreds of species accessible as seeds as well. You can also save money by starting your own plants from seed packets. A package of seeds can cost as little as $1 and include as many as 12 seeds. You can combat the winter blues by cultivating a little garden inside, and I think it’s more enjoyable when you can watch a plant grow from seed to harvest.
What seeds are easiest to start indoors?
Seeds such as tomato, pepper, zinnia, marigold, and cosmos are good places to start if you’re new to seed beginning. All of these are easily germinated and soon grow. Try your hand at more difficult flora after mastering these.
When should I sow my seeds?
Timing is crucial when it comes to indoor seed beginning. Planting seedlings that are the right size for transplantation into a garden at the right time is a primary goal. Dates for sowing are influenced by:
- the average date of the last spring frost in your region;
- how warm or cold the plant likes it to be when it is developing;
- The rate at which a seed germinates and grows.
To get the best results from your seeds, you should plant them six weeks prior to your average last frost date. Determine your typical last spring frost date, mark it on a calendar, then count back one week at a time to determine your planting date.
How do I know my last frost date in spring?
If you don’t know, ask a knowledgeable neighbor or the employees at your local garden center. Other resources include The Old Farmer’s Almanac website and your state’s Cooperative Extension’s Master Gardener program. Despite the fact that the “average last spring frost date” is merely a guess, it serves as a good beginning point for your research.
These sad-looking seedlings, which are growing on a windowsill, are reaching out for the sun.
Can I grow on a windowsill or do I need special grow lights?
Growing seedlings under a sunny window sill is doable, but it’s far better to use artificial lighting. This is due to the shorter days and lower intensity of the sunshine in the early spring compared to the summer. On a windowsill, seedlings’ stems will bend toward the sun, resulting in long, thin stems. When transplanted into the garden, plants growing in a light garden will have thick, sturdy stems because of the constant, brilliant fluorescent lighting they receive.
Can I use garden soil to start seeds?
When utilized in small seed-starting trays, garden soil has a tendency to hold moisture and not drain well. Also, it may contain disease organisms that can harm or kill seedlings in their early stages of growth. Sow your seeds in an indoor seed starter mix like our Organic Seed Starting Mix, and you’ll receive the greatest results.
What type of pot should I use?
Although any container with drainage holes can be used to start seeds, seed-starting pots and trays specifically designed for this purpose provide the best conditions. Drainage holes let water to flow freely, which prevents the seeds from becoming rotted. Biodegradable pots are preferred by some, whereas reusable trays are preferred by others. All-in-one seed-starting devices with self-watering capabilities are practical and easy to use.
How deeply do I plant the seeds?
In most seed packets, you’ll find instructions on how deep to plant your seeds. Seeds should be sown two or three times as deep as they are wide as a general guideline. Seeds should not be sown too deeply. During germination, a seed has a finite amount of food stored within it. Planting it too deep means it will run out of food before it reaches light and develops large enough to begin producing its own. The seed packet should specify if a seed requires light to germinate. Sprinkle this seed over the top of the planting mix before it dries.
Which is better, watering from the top or from the bottom?
Soil surface disease problems can be reduced by using bottom watering instead of top watering. A top mist keeps the seedbed moist for enhanced germination of small seeds or seeds that are put on the surface. Water is supplied to the roots of plants through wicking fabrics found in self-watering seed-starting systems like our GrowEase Seed Starter Kit. You don’t have to worry about over- or under-watering when you fill the reservoir.
When do I remove the greenhouse cover on my seed starter?
Because of the cover, the greenhouse’s humidity is higher, which aids in the rapid germination of seeds. Remove the cover as soon as you notice the first sprout. This allows the seedlings to breathe, reducing the risk of disease.
How close should the grow lights be to the seedlings?
Keep the lights a few inches away from the seedlings’ tops in order to encourage strong, stocky development. As the seedlings grow, just elevate the lights on our grow light stands.
Do I leave the lights on all the time?
Keeping lights on for 14 to 16 hours a day is ideal for most seedlings. When the lights come back on, they need a period of rest and preparation (much like in nature). An automated timer simplifies this task.
Do I need to thin my seedlings?
After a few weeks, the seedlings may begin to crowd each other. It will be time to thin the seedlings at that point. For most gardeners, this is the most difficult step of seed beginning. Remove everything but the strongest seedlings in the vicinity. These seedlings have room to expand. In spite of your best efforts, attempting to remove seedlings and transplant them will almost always result in root damage, which will delay the plant’s growth cycle. Snipping off superfluous seedlings at the soil line is the best method for thinning.
When should I start fertilizing my seedlings
Cotyledons, the seed’s food storage structures, are the first set of leaf-like structures. False leaves can be distinguished by their resemblance to those of an older specimen. Fertilize seedlings when they reach a height of one to two inches, or after they have developed their second true set of leaves, whichever comes first.
How do I know when it’s time to transplant into larger pots?
Tomatoes, for example, can quickly outgrow their containers before you’ve even had a chance to transplant them into the yard. Gently remove one of the seedlings from its pot approximately a month after sowing or when they are about 4 inches tall. The roots should be transplanted into a larger container if they begin to crowd out the existing ones. Root crowding can limit plant growth and make it more difficult for plants to recuperate following transplantation if you wait too long to transplant. Our Pop Out Pots are excellent containers for transplanting.
What is “hardening off” and how do I do it?
Hardening off is simply acclimating plants to outdoor conditions. Seedlings grown indoors have been coddled — you’ve been giving them just the right amount of light, moisture and nutrients. Outdoor conditions are more challenging, with fluctuating temperatures and light levels, more variable soil moisture, and wind. About a week before you plan to set the seedlings into the garden, start hardening them off. Place them in a protected spot outdoors (partly shaded, out of the wind) for a few hours, bringing them in at night. Gradually, over the course of a week or 10 days, expose them to more and more sunshine and wind. A cold frame is a great place to harden off plants.
What Went Wrong?
Hardening off is the process of acclimating plants to their new surroundings in the garden. Your indoor seedlings have been spoiled; you’ve provided the perfect balance of light, moisture, and nutrients for them. Changing weather circumstances, such as shifting temperatures, varying light levels, and erratic soil moisture, make outdoor gardening more difficult. Harden off the seedlings about a week before planting them in the garden. Spend some time with them outside in a wind- and rain-free area, then bring them inside at night. Over the course of a week or ten days, gradually increase them exposure to sunlight and wind. Plant hardening off is a breeze in a cold frame.
Poor seed germination rate. Many popular vegetables and annual flowers are easy to germinate, but a few species have a reputation for being difficult to start. As a rule, seed packets will make this distinction (with the suggestion to sow extra seed). Make sure you’ve given the plants enough time to germinate before moving on to the next step. Before sowing, label each pot with what kind of plant it is and when it was sown (found on the seed packet). Some seeds can take up to two weeks to germinate. Overly moist or cold soil can cause seeds to decay, resulting in poor seed germination. An alternative to a Heat Mat can be found in the second scenario.) A lack of moisture in the soil could have prevented seeds from sprouting. A single dry spell after they started developing may have wiped off their delicate new roots before they even had a chance to sprout. Bad germination can also be caused by old or improperly preserved seed.
Putting a stop to it. Some of your seedlings may keel over after a few days, as though a little lumberjack had felled them at the soil line, which is an indication of damping off. The stem is being attacked by soil-borne fungus. You won’t be able to save the seeds and they won’t grow back. Start from scratch with new containers and seed-starting mix that is sterile and clean. Make sure the room is well-ventilated by placing a fan in the area. A 10% bleach solution can be used to sterilize previously used containers (1 part bleach to 9 parts water.) Read the article Damping Off for additional information.
Growth of mold and algae. Mold or algae growth on the planting mix or on the outside of biodegradable pots is likely if you detect fuzzy white growth or slimy green areas. Both are innocuous to the seedlings, but they suggest that the seed-starting mix is overly damp, which is not good. Do not overwater it and use a modest fan in the room to improve air circulation..
Seedlings that are pale, spread out, and have weak stems. An insufficient amount of light, either in terms of intensity or length, can lead to “leggy” seedlings that eventually die. Plants should be placed under grow lights with the lights a few inches above the plants’ tops, and the lights should be left on for 14 to 16 hours each day. Overcrowding and excessively warm indoor conditions might also result in languid plants. Plants with pale, fragile stems can be the result of under-fertilization.
leaves with a bluish tint You may need to give your seedlings a nutrient boost if their leaves are pale green, yellowish green, or purple. Fertilize seedlings when they reach a height of one to two inches, or after they have developed their second true set of leaves, whichever comes first. Apply a water-soluble fertilizer every week for the first few weeks, diluted half-strength. After that, you can increase the frequency of application to full strength. Dilution rates should be followed to the letter.)
Conclusion
If you want a productive garden but don’t have a lot of space, a compact greenhouse is the perfect answer. However, you should consider asking yourself “how to start vegetable plants in a little greenhouse?” before you begin planting. The success of your micro greenhouse will be determined by the planning and tactics you adopt at the beginning.
Choosing the proper plants, the right method of planting, and the right seasons are all necessary for a good start in the greenhouse. The little greenhouse is a bit scary at first, but it provides year-round productivity.
Nguồn: https://iatsabbioneta.org
Danh mục: Garden


