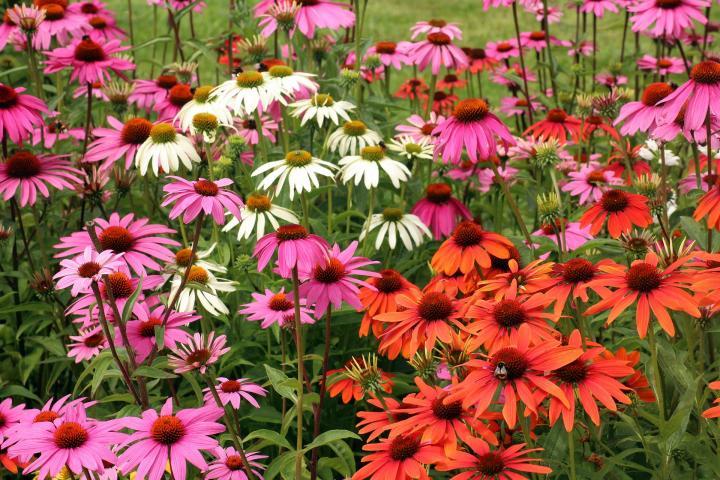
Coneflowers (Echinacea spp.) are ideal additions to sunny gardens because of their bright daisy-like blooms and capacity to attract bees and butterflies. Depending on the species, you can grow these perennials in USDA plant hardiness zones 3 through 10. In spite of its drought-tolerance and low maintenance needs, it is recommended that coneflowers be divided about every three to four years. Make sure your plants are transplanted at the proper time of year to ensure their survival.
- How To Grow Dogwood Trees From Seed? Things You Will Need
- Which Gives Better Light For Growing Plants In A Greenhouse Fluorescent Or LED?
- How To Harvest Marigold Flowers? A Few Tips to Remember
- How To Grow Mums From Cutting? Things You Will Need
- How To Divide Shasta Daisies? 3 Easy Step-by-step Guide
What You Need To Plant Coneflowers
You’ve decided that coneflowers are a must for your garden (we agree). Now it’s time to get ready for planting day! Coneflowers are hardy plants, and planting them in your garden doesn’t require a lot of prep work for most gardeners. Here’s everything you’ll need to plant coneflowers in your garden:
Bạn đang xem: How To Transplant Coneflowers? Comprehensive Guide
When it comes to gardening, you’ve made the decision that coneflowers are an absolute must-have (we agree). Preparations for planting day can begin now. For the majority of gardeners, coneflowers are easy to grow and don’t require a lot of time and effort to get started. Everything you need to get started planting coneflowers in your garden is here.
After much consideration, you’ve concluded that coneflowers are an absolute necessity for your landscape (we agree). It’s finally time to get ready for planting day! For the majority of gardeners, coneflowers are easy to grow and don’t demand a lot of time and effort. This is everything you’ll need to get started planting coneflowers in your garden:
Composting Compost’s helpful bacteria, carbon, nutrients, and drainage are especially appealing to coneflowers. It’s as simple as adding a few handfuls to your current soil.
Watering can. Make sure you have a full watering can before you plant your new coneflowers.
Where to Plant Coneflowers
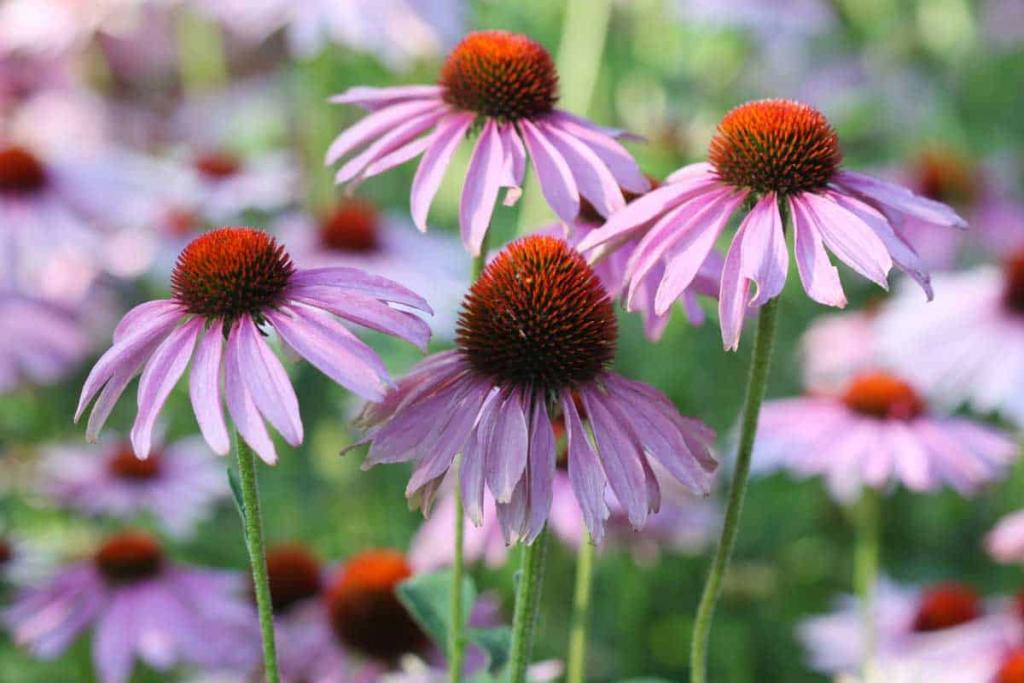
In the wild, coneflowers thrive in full sun, as they are native to wide prairies and forests. Plant your coneflowers in an area where they will receive plenty of direct sunlight all day long. Most coneflowers do fine with some shade, but the more sun they get, the better!
Coneflowers prefer soils that drain quickly. Soggy soil, standing water, or thick clay should not be a problem for your coneflowers when they are planted in the ground. If your soil is lacking in drainage, add compost, perlite, vermiculite, or sand to it.
Coneflowers thrive in all kinds of soil, but one thing is for sure—they do not like boggy, mucky or constantly wet soil. coneflowers are perfect drought-tolerant plants for low-maintenance gardens. For those who live in areas where the soil is rarely allowed to dry up, these may not be suitable.
Coneflower Spacing
Coneflowers flourish in different sorts of soil, but one thing is for sure—they do not tolerate marshy, mucky or persistently damp soil. coneflowers are ideal drought-tolerant plants for low-maintenance landscapes. For those who live in areas where the soil is rarely allowed to dry up, they may not be the best choice……….
There is one type of soil that coneflowers will not grow in: wet, muddy, or swampy soil. As a low-maintenance plant, coneflowers are ideal for the garden. However, if you reside in a region where the soil rarely dries up, these plants may not be the best option.
Steps to Plant Coneflowers
Follow these instructions to plant your coneflowers:
Coneflowers should be placed in a strategic spot in your garden after careful consideration. It should be able to develop, and have a lot of sunlight. Soggy soils can be avoided if the location is dry and devoid of standing water.
Choose the type of coneflowers that are best suited to your garden and your garden goals. 2. Echinacea that’s both traditional and eye-catching? Naturalistic Ratibida, or? Don’t worry about making the wrong option; in the coneflower family, you can’t go wrong!
Xem thêm : How To Grow Dogwood Trees From Seed? Things You Will Need
The size of your pot will dictate the depth of your hole. In order to backfill the hole with some compost mixed with your native soil, you’ll need to dig it deep and wide enough.
Carefully remove the coneflower from the pot. Do not yank on the plant’s stem or leaves when removing it. Get the plant out of the pot by its roots and dirt by squeezing the pot. If the roots are “root bound,” gently peel them apart with your fingertips.
Use your original soil and compost as well as your coneflower’s hole to fill it in. A natural, organic fertilizer may also be necessary to get it off to a good start.
It’s time to water your newly-planted coneflower! When planting perennials for the first time, a good rule of thumb is to water them well. How often you need to water the plant once it’s been planted depends largely on the weather where you live. Watering should be done once or twice weekly until the plant becomes established, at which point there should be little to no extra watering required (coneflowers like well-drained soils and are drought tolerant).
When to Plant Coneflowers
The best time of year to plant coneflowers is the spring, after the danger of a deep frost has passed. It is best to plant coneflowers in the spring so that they have time to develop their deep root structure. During the summer, they’ll be able to bloom more fully. Planting in the early fall might be just as good as planting in the spring. Plant your coneflowers at least a few weeks before the first expected frost date in your area so that they have enough time to establish healthy roots before the winter arrives.
Morning and evening are often the best times of day to plant perennials in your yard. It’s not a good idea to plant in the afternoon heat because the high temperatures can harm your new plant.
If you’re planting in the summer on a hot day, make sure to give the plant lots of water so it can survive the heat until the weather cools down. To avoid sun damage, you can even think about placing it in a shady spot. When planting in the summer, pick a gloomy day if at all feasible.
Transplanting Coneflowers
Early spring is the optimum time to transplant or relocate coneflowers, when the earth has softened. The best time to move them is early October, when temperatures are cooler and the sun is less intense than at the height of the summer. In the summer, it’s not a good idea to transplant coneflowers.
After three or four years of growth, you can divide your coneflowers and replant them. Another option is to just shift the entire plant from one location to another. Coneflowers can be successfully replanted as long as you take care to transplant them at the proper time of year and have enough healthy root system to support the new plant.
Because coneflowers have deep tap roots, plants are able to withstand drought. The roots of Echinacea purpurea can grow up to 5 feet deep! Make sure to dig deeply and salvage as much of the root system as possible when transplanting and dividing your coneflowers. In order to ensure the health of your transplant, you should be able to achieve roughly a foot of root growth.
Once your coneflower plant has been divided and is ready to be transplanted, follow the “Steps to Plant Coneflowers” section above.
Growing Coneflowers from Cuttings
Cuttings can also be used to grow coneflowers. Dive down along the existing plant’s edge to find robust roots with healthy sprouts emerging from the top in order to grow from cuttings. To grow a coneflower from a cutting, you’ll need to cut a 1-3″ portion of root with a healthy sprout.
Using a mixture of sand and peat, keep this cutting watered and hydrated for a few weeks. You can transplant your cutting into a pot with potting soil once it has been growing new roots and new plant growth for a few weeks. If you haven’t already done so, wait a few more weeks before transplanting this new plant into a sunny spot in your garden.
Fall Division
Coneflowers can be divided and dug up in the fall. It’s easier to dig precisely because the clump is still leafy, allowing you to see the full extent of the plant. Once the plant has been pulled up, you can examine whatever parts of the plant did not perform well throughout the growing season and eliminate them. When the blossoms have gone, though, wait to do any digging. Zones 3 through 10 typically see this between the end of September and the beginning of October.
Spring Division
Xem thêm : How To Get Rid Of Tent Caterpillars? Comprehensive Guide
Coneflowers can be moved and replanted in the spring as well. You’re eager to get outside in the spring, and your coneflowers are thriving. As a result, coneflowers that are transplanted in the spring will swiftly establish new roots. The chilly, gloomy days of spring are ideal for transplanting. Don’t be alarmed if coneflowers don’t bloom right away when you transplant them in the spring; it’s possible to receive flowers that year. The majority of coneflowers bloom throughout the months of April and May in zones 5 through 7.
Summer Division
In the summer, it’s not a good idea to dig up and move your coneflowers. In full bloom, plants devote the majority of their energy to flower production, which means they will be less able to establish new roots. A recently transplanted plant can be killed if it is exposed to hot, dry conditions during the summer. If you must relocate during the summer, pick an overcast day. Cut back all of the blossom heads before or after transferring the plant to facilitate root development. Provide a screen, such as a mesh netting, to shield the plant from the sun for the first week or two after transplantation.
Making the Move
Using a shovel, make a 6-inch wide circle in the earth around the parent plant when you’re ready to remove it. Do not disturb the roots by digging shallowly. Lever the plant out of the ground using the shovel. Large clumps should be lifted out by a buddy or split into sections to make it easier to lift. When the clump is out of the ground, use a shovel to split it into pieces. If possible, you want to make the portions roughly 8 inches wide. Trim away any diseased or dead portions that are found. They are now ready to be transplanted to different parts of the garden. At a minimum, the parts should be separated by at least four inches. Make sure to thoroughly hydrate your transplanted divisions.
Tip
Coneflowers need companion plants like shasta daisies or lantanas.
Purple coneflowers can be used in wildlife gardens to attract birds and butterflies, as well as other pollinators.
Warning
Coneflowers appreciate dry soil, so don’t overwater.
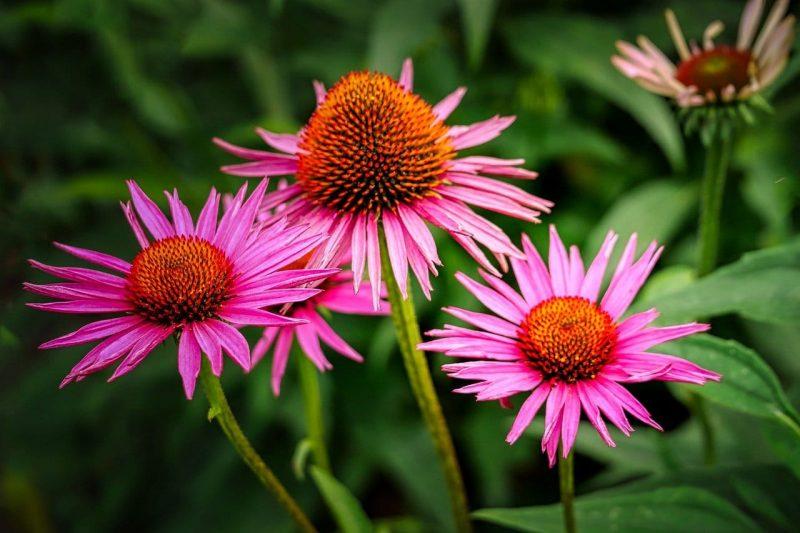
As the purple coneflower, Echinacea is a sun-loving plant that produces beautiful lavender blossoms that attract pollinators. Rust colored cone appears in the center when the petals droop. Coneflowers are popular for use in flowerbeds and borders since they are easy to grow and require little upkeep. Coneflowers are self-seeding perennials, so you’ll see more of them in your garden each year. Despite the fact that coneflowers can be grown from seed, most are acquired as seedlings and placed into the garden once the risk of frost has been eliminated.
Coneflowers thrive in full sun and well-drained soil. Using a tiller or shovel, add 4 inches of compost to the soil and tamp it down.
- As the purple coneflower, Echinacea is a sun-loving plant that produces beautiful lavender blossoms that attract pollinators.
- Despite the fact that coneflowers can be grown from seed, most are acquired as seedlings and placed into the garden once the risk of frost has been eliminated.
Apply fertilizer to the soil by raking it into the ground. Slow-release 12-6-6 fertilizer, around 2 pounds per 100 square feet, is recommended.
You should make holes that are twice the diameter of your potted seedling’s container. Plants should be separated by three feet.
Grip the plant by the stem, just above the earth, and pull it straight out of the ground. Pull it out of the container with care.
Make sure that the soil surrounding the bottom of the root ball is loose enough to allow the plant to be placed in the hole so that the stem emerges at the same level as the soil. Gently pat the earth into place after filling the hole.
- Apply fertilizer to the soil by raking it into the ground.
- Grip the plant by the stem, just above the earth, and pull it straight out of the ground.
After planting the coneflowers, be sure to water them properly. After that, only use water when it’s extremely dry.
Mulching with organic material will help preserve moisture and reduce weed growth around your coneflowers.
Nguồn: https://iatsabbioneta.org
Danh mục: Garden


