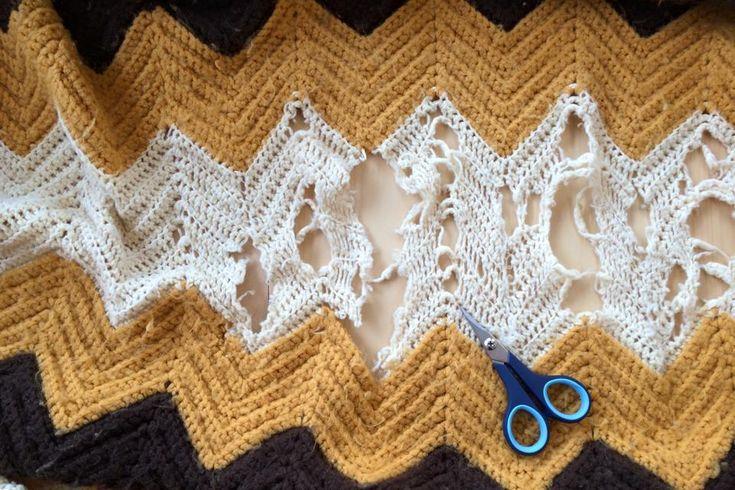
The ability to fix a crochet blanket is not universal. We hope that this post will serve as a resource for you while you work through your blanket issues, and we’re happy that you found it since we’ve put up some instructions and tutorials to help.
- How To Make A Ring Pillow? Complete Step-by-Step Guide
- How To Make A Recliner Headrest Cover? A Step-by Step Learning Guide
- How To Draw Blanket Folds? Complete Step-by-Step Guide
- How To Get Rid Of Green Algae? Complete Step-by-Step Guide
- How Many Tables Can Fit Under A 20×20 And 20×30 Tent? A Must Read!
Things You’ll Need
- Different sized crochet hooks
- Similar yarns
Things To Put In Mind Before Repairing A Crochet Blanket
Crochet blankets, in contrast to those readily available in stores or online, often carry sentimental value.
Bạn đang xem: How To Repair A Crochet Blanket? Easy Step-by-step Guide
Crochet items are commonly passed down from generation to generation. However, with regular use, even the most durable of these blankets will wear out and tear.
You can do it yourself, or you can take it to the craft store. In case you’ve decided to do it on your own, here are a few considerations to bear in mind.
Your blanket may not look flawless
It’s important to keep in mind that even after repairs, a blanket may not have the same brand-new appearance. Don’t give up if the end result isn’t exactly what you had in mind.
Xem thêm : Why Do Dogs Pee On Beds? Helpful Information!
Although it may be helpful to work with the same yarn color, it’s quite acceptable if the stitches don’t line up perfectly.
A repair may take a considerable amount of time
If the damage isn’t too severe, fixing it might only take a few minutes. However, unless you’re a master of crocheting, the repair will take up a lot of your time.
Before you can begin making one of these blankets, you’ll need to research the specific crochet pattern that was utilized and then select an appropriate yarn color.
Have patience; the wait will be well worth it in the end.
Determining the crochet stitch
A granny stripe pattern cannot be stitched. We prefer a less noticeable fix over the more noticeable one.
When you take the time to carefully select the crochet stitch you will use, you may give your blanket a completely new and stunning appearance. Keep in mind that while perfection is not required, being as near as possible to the original would be appreciated.
Broken yarns need replacement
Xem thêm : How Can I Keep My Sheets On My Bed? 8 Ways to Keep Bed Sheets Tight
Some unraveled yarns can be mended by reattaching them with glue, but if the thread is completely worn out, you may need to cut out the row entirely.
There are others who think that changing up the colors and types of stitches used add to the blanket’s overall aesthetic appeal. If you’re not happy with the result, you can redo the row with yarn of the same color.
Do not use a sewing needle and thread to repair
If you’re used to working with fabrics or canvas, you won’t recognize a crocheted item. Needles are useless for mending holes in anything since they will only lead to a shoddy patch job.
Re-crocheting the area and making the necessary repairs, such as restitching the entire row or adding yarns to disguise the defect, is always the best option.
How To Repair A Crochet Blanket
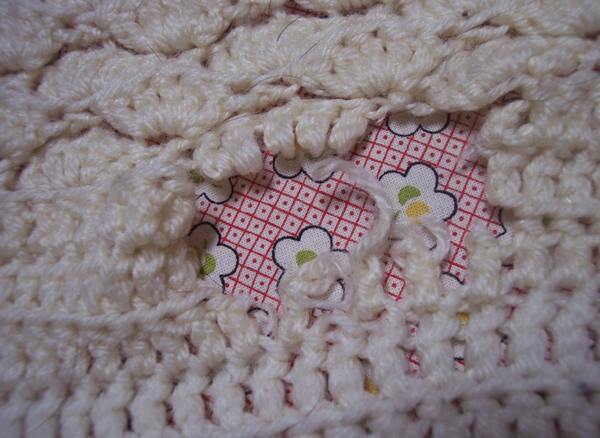
Method 1. Fixing tears
- First, get your strong glue ready.
- To stop the tear from getting any looser, step two is to glue over the frayed areas.
- Third, conceal the glued area by stitching the two edges together with thread of the same color.
- Fourth, reinforce the stitching around the patch to prevent it from unraveling and breaking again.
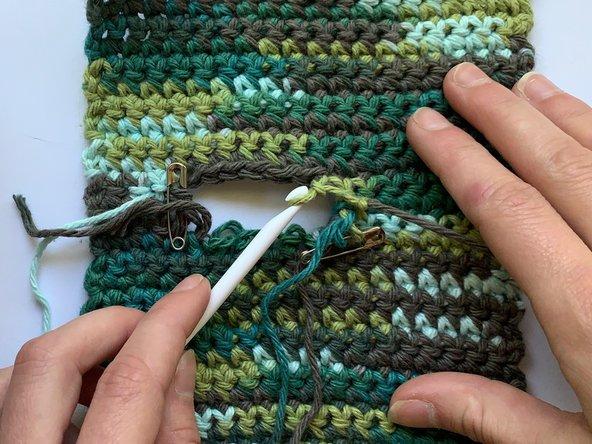
Method 2. Re-stitching
- First, get everything you need, such as yarns of the same color and fiber, the right size hook, and the blanket, ready to go.
- The second step is to spread out the blanket.
- Third, assess the wear and identify the crochet technique employed. Consider the construction of the stitch and use yarn of the same or similar shade.
- The fourth step is to locate the final damaged stitch in the row and secure the needle in the suspended loop above it. Make sure the thread is not frayed and the location is secure.
- Cleaning the area by picking up and throwing away yarn and other threads that have come loose is Step #5. Discard any threads that have become frayed so that fresh ones can be sewn in. When adding new stitches, be sure to choose a sturdy, well-secured stitch. If the ends are undamaged and securely attached to other stitches, then you can leave it as is.
- To complete Step 6, you will re-stitch the row using the same crochet stitch as before, all the way to the end of the damaged section. Stitch the hanging loops of threads on either side of the problem together. Be sure you stick to the blanket’s established design.
- Seventh, customize it with your favorite yarn color and stitch pattern. It is recommended to keep adding links until the desired effect is reached. For future safety, double check your stitching to ensure a solid row.
- In Step 8, after mending the broken section of the row, you will weave in the ends. Make sure there aren’t any loose ends or loop trails, and double check the quality of each stitch.
Conclusion
You can rest easy knowing that your beloved blanket will never again need replacing because you now know how to fix it yourself.
You can’t get the same cozy feeling from a conventional blanket that you would from a crocheted one. As a beloved heirloom, it will be passed down from generation to generation.
Nguồn: https://iatsabbioneta.org
Danh mục: Blog