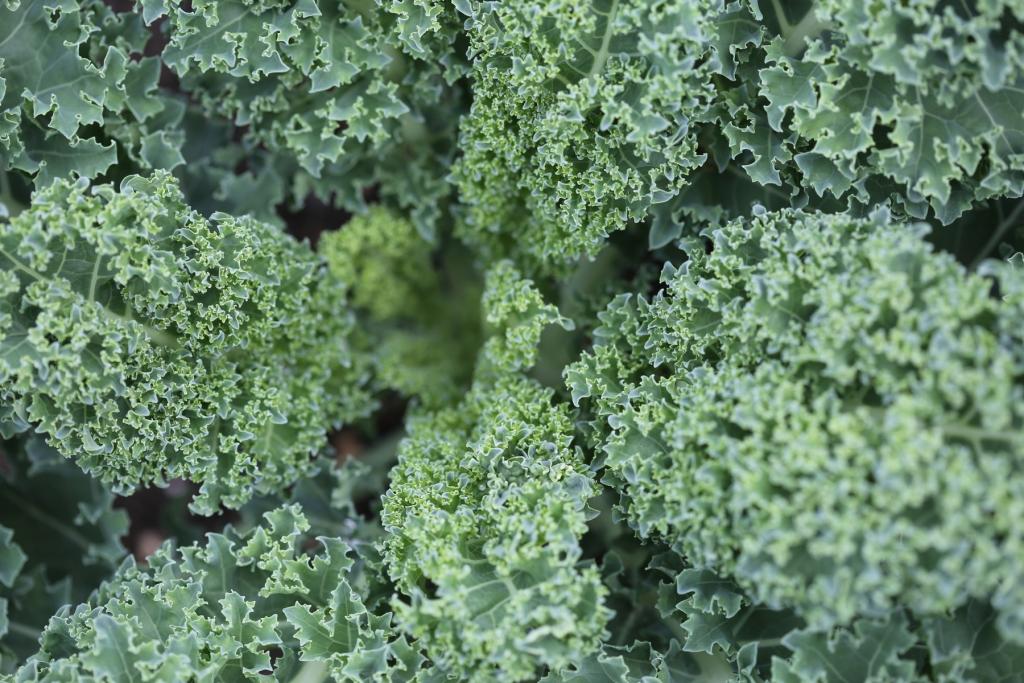
It only takes four subjects to learn how to grow kale in a greenhouse to receive your fresh supply of the finest green superfood. How to grow kale in a greenhouse is a question that can be promptly answered and taught to other gardeners thanks to the greenhouse’s indoor settings. Kale can be grown indoors in a variety of ways, including square foot gardening.
However, why is kale becoming increasingly popular as a greenhouse crop among gardeners? Aside from being a trendy smoothie ingredient, kale has many other uses. You can grow it in a greenhouse, which makes it easy even for novice gardeners, to combat infection.
Bạn đang xem: How To Grow Kale In Greenhouse Successfully? Comprehensive Guide
Definitive Guide On How To Grow Kale In Greenhouse
Growing kale successfully in a greenhouse necessitates a thorough understanding of how and where to plant it, when to water and feed it, and how to harvest it. In order to have a healthy harvest from your kale plants grown indoors, you need to be consistent with these four easy-to-understand concepts. You can begin incorporating fresh kale into your diet once you’ve mastered the following facts.
Where and when to grow kale
To get the best output from your kale plants, place them in a part of the greenhouse where they will receive six hours of direct sunlight each day. Also, the soil you use should have a pH between 6 and 7.5, and it should be rich in nitrogen, phosphate, and potassium as well as other essential nutrients. Seeds or transplants can be used to start kale in the greenhouse, depending on which method is more convenient for you.
Kale seeds should be sown in the middle of June to August, according to the Michigan State University, while transplants can be started in March to July for planting out in April to August, according to the university. To germinate, it takes around ten days, and to grow from a transplant, it takes about a month. In terms of spacing, each plant should be given one square foot of space, while alliums and herbs can be used as companions.
The optimal temperature for kale
Kale can withstand frost if the greenhouse temperature doesn’t reach 75°F, which is colder than most crops. You should not have any difficulty cultivating mature kale plants if you live in growth zones 2 to 8. According to Cornell University, kale’s flavor is enhanced by frost.
One reason to sow and transplant 4 to 5 weeks before the latest frost date is due to the plants’ ability to withstand cold weather. Some plants are able to withstand temperatures as low as 10°F without losing their leaves, but others will die if they are exposed to temperatures as low as that. Because you’re growing your kale in a greenhouse, you won’t have to worry about it getting to this point of extreme cold or heat.
Keep in mind that kale thrives in chilly weather, while high summer temperatures might have a negative impact. In the summer, keep an eye on the greenhouse’s temperature. If you don’t, you’ll end up with poor-quality crops that have a bitter taste and slow development.
Watering and feeding kale
The growing season is a critical time for watering your plants, as is the case with most greens. Giving one to one and a half inches of water each week is the proper dosage. Avoid overwatering plants by keeping the soil moist to a depth of one inch below the surface.
After the first frost, these water requirements will be reduced. In the greenhouse, what about feeding the kale? During the growing season, once-monthly feedings with a balanced fertilizer should be sufficient.
Composting in the spring or fall is also recommended by the University of Minnesota to increase soil quality.
When to harvest kale
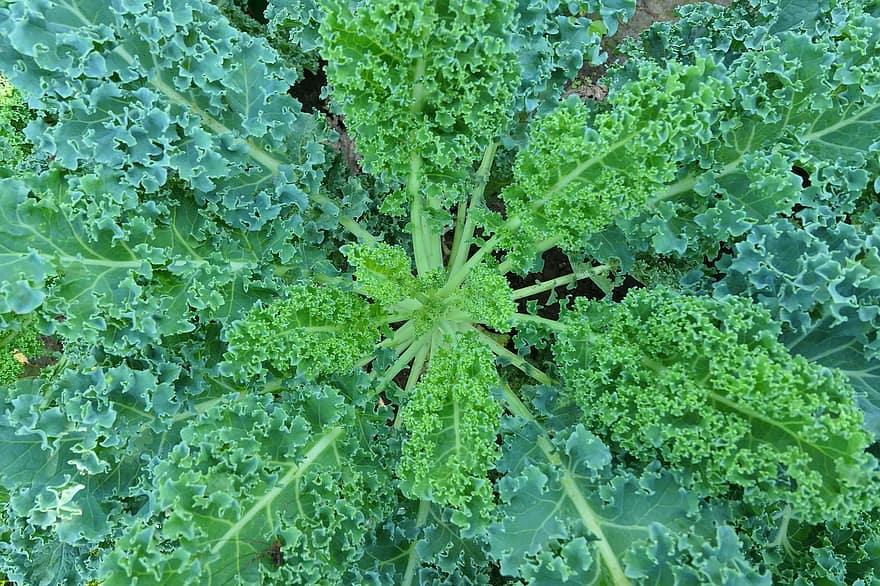
When the kale leaves are the size of a hand, it’s time to harvest it. Make sure to remove leaves from the base first if you plan on harvesting during frost, as those that touch the ground will be useless later on. Pick a fistful of leaves each time, regardless of how tattered or yellow they are.
It’s important to avoid selecting the top of your kale plant because it’s grown every year. Or else it will cease to function and stop producing. Because the plant continues to develop until 20°F, you can lengthen your harvest.
When to Grow Kale
When grown in the 60-70°F range, kale is at its healthiest and yields the best results. Like other members of the brassica plant family, such as cabbage, cauliflower, and broccoli, it is classified a ‘cool season crop’.
There are two separate growing seasons for kale in most areas: spring and fall. Kale, on the other hand, can continue to thrive for up to a year or more in moderate areas with mild summer temperatures or no winter frost. If you live in an area where the weather begins to cool down, kale is an excellent fall crop. This is due to the fact that kale is more sensitive to cold than heat. It’s true that kale leaves taste better in cold weather, and have a sweeter flavor after a light frost.
Hardy kale can endure temperatures as low as 10 degrees Fahrenheit, which is more than most leafy greens can manage in the dead of winter. Even in the winter, kale can be left out in the garden! Kale, on the other hand, can swiftly “bolt” – or begin to blossom and go to seed – in extremely hot weather. The quality and size of the leaves degrade, and they grow more bitter as a result. Even if temperatures are still low, spring’s increased sunshine hours may cause winter-grown kale sown in the fall to bolt.
Planting Kale: Seeds or Starts
Kale can be grown from seed or from seedlings, either from a nursery or from seedlings started inside. If you’re starting with seeds or seedlings, the best time to grow kale will vary depending on your local climate. There is a planting calendar for every USDA hardiness zone available here if you don’t already have one.
Kale seedlings can be planted outside in late winter or early spring, as early as three or four weeks before your typical frost date. There is no need to wait until the last minute to start your seeds indoors. Frost covers or cloches can be used to protect seedlings from hard frosts after planting.
Plant kale 6 to 8 weeks before the first typical fall frost date in your zone for a fall crop. Late July in most regions is a good indicator. However, kale can be grown into the winter in areas with mild winters (zones 8 through 10).
Kale seeds should be sown around 14 to 12 inches deep in light, well-draining soil. During germination, keep the soil damp but not wet. If you’re starting your seeds indoors, make sure to give them plenty of light. Seeds that are directly sown outdoors may not germinate as quickly or consistently. Pests are more likely to attack sprouts that are smaller than a centimeter in diameter. Check out this guide for more information on how to start and grow seedlings inside.
Plant kale seedlings 12 to 18 inches apart in the outside garden. The stem of tall seedlings can be buried up to their first set of leaves if they have been sufficiently hardened off. After planting, be sure to water well.
Optimal Kale Growing Location
Soil Conditions
Xem thêm : How To Grow The Fuchsias In A Greenhouse? A Few Tips to Remember
Moderately rich and regularly moist soil is ideal for kale, which flourishes there. In addition, the soil must be able to drain freely. If you want to grow Kale successfully, you should prepare the soil by adding old compost and/or a natural fertilizer that is well-balanced before you plant the crop. Kale plants will thrive in soils rich in nitrogen, phosphorus, potassium, minerals, organic matter, and beneficial microorganisms. When growing kale in a container, make sure the drainage holes are big enough.
Sun
When growing kale, it’s preferable to place it in a location with full to partial sun. A minimum of 6 to 7 hours of direct sunlight per day is recommended for kale plants to thrive. If you’re planting kale in the spring, you may want to choose a place that receives some afternoon shade to keep the kale from overheating. Your kale will last longer before it “bolts” and goes to seed as a result of this additional protection, as well as choosing the proper type. When it gets darker and darker, the more sunlight there is! The back (north side) of garden beds is where I prefer to plant kale because it can soon grow too big and shade out the shorter plants.
Kale Varieties
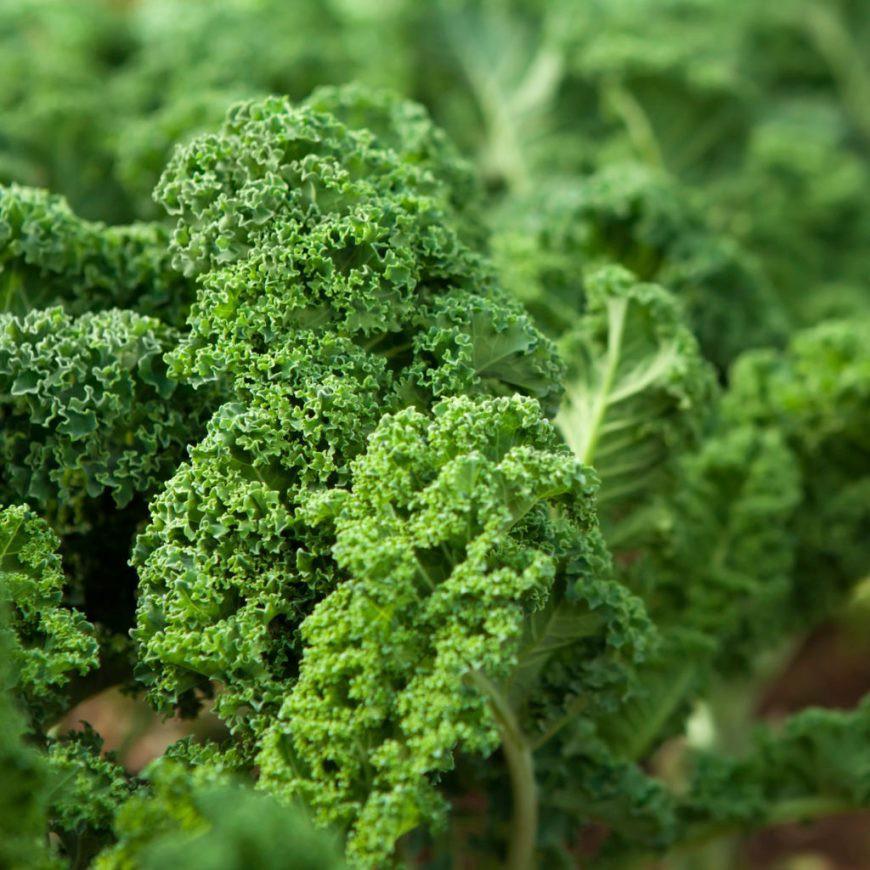
Within each of the general kale kinds, there are numerous cultivars to select from. Lacinato kale is our go-to, but we also grow a variety of other varieties. Try growing a few different kinds to find what you enjoy and what works best for you in your region. Experiment!
- Dark green leaves with rich frills adorn the curly kale plant. Grocery stores often carry curly kale. These kale plants are extremely cold-tolerant, and they produce a lot of kale. There are several types of curly kale, including Blue Curled Scotch (Dwarf Blue), Dwarf Blue (Vates), Winterbor (Redbor), and Vates (Winterbor).
- In Italy, it is called Lacinato or Tuscan Kale, and it has long, narrow leaves that range in hue from dark green to bluish. Lacinato kale has also been termed “dinosaur kale” or “dino kale” because of its rough, scale-like leaves. Cavolo nero, or black kale, is another name for it. Tuscan kale is the most probable variety of kale to grow to a height of several feet, resembling a miniature palm tree. Kale chips benefit greatly from the flattened leaves. Among the many choices are the traditional Tuscano, the extra-dark Black Magic, and our favorite, the purple-veined Dazzling Blue.
- Russian kale resembles a giant arugula or an oak leaf lettuce in its shape, with wide, mainly flat leaves with fringes on the edges. There are some who claim that Russian kale is the sweetest and most flavorful kale. In contrast to several other varieties, this one can maintain its tenderness even as its leaves grow to be rather huge. Russian kale cultivars include Red Russian, Green Russian, and White Russian.
- Cavolo Nero (Portuguese Kale) A less-known kind of kale from the Mediterranean, this kale features paddle-shaped leaves with prominent white veins. It’s more like collard greens than the traditional kale we’ve all come to know and love. Portuguese kale, which is more heat-tolerant than other kale cultivars, is a close relative of collard greens. Tronchuda and Beira are two types of Portuguese kale, which is also known as sea-kale or Portuguese cabbage. Traditional Portuguese kale soup relies heavily on this ingredient.
- Other: Kale comes in a wide variety of forms, including hybrids and heirloom types. ‘Madeley’ kale, for example, is one of our favorites, but it doesn’t fit into any of the previous categories. When grown for ornamental purposes, ornamental kale can be eaten as well.
Ongoing Care
Water
Kale thrives when it receives a steady supply of water at a reasonable temperature. It’s important to keep the soil moist at all times, but not wet. Raised beds and in-ground gardens retain moisture better than potted gardens, which lose moisture more quickly. Kale grown in containers may therefore need additional irrigation. Adding mulch to the soil’s surface helps retain moisture and protects the roots and soil from temperature fluctuations.
Fertilizing throughout the season
Compost and slow-release fertilizer should be added to the soil prior to planting. We water our seedlings with a dilute seaweed extract soon after transplanting to offer them a modest nutritional boost as well as to alleviate any possible transplant shock they may be experiencing. Every few months, we start using homemade compost tea (produced from worm castings) to water the garden beds. Once the kale plants are six months old, a fresh top-dressing of compost mulch is recommended for extra long-lived kale (if you intend to keep them around a bit longer).
Extending the Season
Kale’s growing season can be extended in a variety of ways, whether it’s into the hotter summer months or deep into the winter. Choosing the right kale variety for your climate and the season you plan to grow it in is the first step. Kale varieties such as Premier and Portugese, for example, are noted for their ability to withstand high temperatures. As a result, when the weather warms up following spring planting, they take longer to bolt. Dazzling Blue has also proven to be a heat-tolerant plant for us.
Kale seedlings are more vulnerable to cold and snow than mature plants and should be protected from the elements. Domed cloches, frost row cover and other similar solutions can be used to protect crops from the cold. Even mature kale plants can benefit from an extra layer of frost protection during prolonged cold periods, which can lengthen the plants’ winter lifespan in the worst areas.
Harvesting Kale
30 days till the harvest is ready (baby greens) Over the course of 50 to 65 days (mature leaves)
I could be wrong, but I believe this is the point at which some kale cooks may err. Kale, on the other hand, HATES to be picked! Quite frequently, and only in little doses. The more you harvest, the more leafy growth it produces, and the taller and larger it grows – so don’t be afraid to go for it!! Kale leaves that are kept on the plant for an extended period of time become tougher and more abrasive.
By selecting a few of the oldest leaves from the plant each week, harvesting kale can be done efficiently (or as needed). The oldest leaves are located toward the base of the stem, which is closer to the earth than the middle of the plant. Remove individual leaves off the main stem by cutting or tearing them carefully. As soon as the kale seedlings have sprouted, you can begin picking baby greens. Leave at least a few leaves behind. Photosynthesize and keep growing with those!
It’s never a good idea to remove the entire plant at once unless you’re done with it for the year. It’s not going to regrow. Keep in mind that you should avoid picking leaves from the middle of the plant. The terminal bud is where new leaves begin to form, and it is referred to as such. If you cut the kale’s terminal bud, it will stop generating new leaves or branch off and produce branching offshoots and just little new leaves.
Any time of day when the air is cold and kale plants are at their strongest is ideal for harvesting Finally, place the leaves in an airtight container or bag with a spritz of water to keep them from drying out. Once the kale has been used, it is washed.
Common Kale Pests
Aphids, cabbage worms, flea beetles, harlequin bugs, and cabbage worms are some of the most prevalent pests that attack kale. Sap-sucking aphids induce leaf curling, while the first three cause leaf holes or lacing. On the underside of kale leaves, or in the central cluster of new growth, kale bugs lurk. Slugs, snails, and other soil-dwelling pests, such as cutworms, may prey on seedlings that are susceptible to damping off, which can be caused by slugs and snails (or sudden seedling death).
If powdery mildew and downy mildew are present, they appear as white or yellow fuzzy spots on the leaves of kale. Kale roots can also be attacked by root-knot nematodes, which are soil-borne parasites. Stunted, distorted, and/or exhibiting telltale knobby roots are all possible symptoms of the disease.
Kale can be a bit of a challenge to grow, but we’ve found it to be fairly hardy. Aphids and cabbage worms are the most common pests in our area, but they may be easily controlled in an organic manner – especially if you take preventive measures or discover the problem early!
We employ a variety of organic pest control methods, including covering crops with insect netting, companion planting, regular inspections and hand-picking pests, blasting aphids off with water, and hand-picking cabbage worms. If the infestation has progressed, you may need to use bacillus thuringiensis (for caterpillars) or a DIY soap spray (for aphids). The leaves of tomatoes and squash can benefit from neem oil, but I prefer not to put it on our leafy greens because it leaves a slight oily film.
Eating & Preserving Kale
Enjoy kale fresh and cooked
kale is one of the most adaptable vegetables you can cultivate. ” Kale is a staple in our diet, and we eat it nearly every day! Everything from sauerkraut to roasts to frittatas to quiches to frittatas and quiches with eggs… you name it, you can use it. Anything goes with chopped Kale, as long as you don’t go overboard.
The tenderness of baby kale leaves makes them ideal for salads. The first step to softening older kale leaves is to massage them. So you can use them in salads and other raw dishes as well! Kale can be cooked easily by sautéing it with a splash of olive oil, a pinch of salt, and a sprinkling of pepper. I love it on its own, but it also pairs well with other seasonal produce.
Making your own kale chips is a tasty and easy way to get more kale into your diet. You may use a food dehydrator or an oven to create them, and then season them to your heart’s content. They’re adored by all ages, including the little ones! Crispy kale chips can be made using this recipe. For a week, they’ll be crunchy if you do it right!
De-stemming kale
Kale leaves are toughest when they have the fibrous stem removed, therefore this is what we do. However, unless it will be cooked for an extended period of time to soften it, it should be avoided until absolutely necessary). Remove the leaves from kale by holding the stem end in one hand and the leafy base in the other. Then pull them in different directions to remove them.
Ways to preserve kale
My family eats kale raw or cooked, and we don’t save much of it. It’s still possible to do so if you’d want! Check out our recipe for Super Greens Sauerkraut if you’re interested in fermenting. However, I don’t recommend using kale as a sole ingredient in kraut because it can become too mushy in the process. To make the dish more flavorful, try pairing it with greens that are more crisp and crunchy like cabbage.
Kale can be frozen and used at a later time. Although the texture isn’t ideal for eating raw, it’s fantastic for adding to soups, smoothies, and stews. Cut or rip the kale leaves into chip-size or smaller pieces after washing and de-stemming. Then, either use a salad spinner, pat them dry, or dry them out in the open air for as long as possible. Ziplock bags or reusable silicone bags like these can be used to store the kale in the freezer. To avoid clumping, divide it into portions that are appropriate for your planned usage.
Growing Kale Indoors
If you don’t have the space for an outdoor garden or simply wish to grow your own food in the dead of winter, you can accomplish so by gardening indoors.
Pests and even some diseases can be reduced by growing kale indoors.
Aphids and other pests can be kept at bay by using a sterile potting mix and clean seeds or transplants, as well as using sterile soil. Keeping your kale in a well-ventilated area and avoiding overwatering can also help to prevent disease.
Choosing a Variety
While any variety of kale can be grown inside, a dwarf variety may be the best option. Kale can grow to a height of three feet and a width of more than two feet depending on the variety. It can be a little intimidating to see anything of that size.
It is common for dwarf cultivars, such Dwarf Blue Curled, to grow little more than a foot in height and a foot in width. Kale that doesn’t take up a lot of space can help alleviate some of the stress that comes with gardening.
Choosing a Location
Indoor kale cultivation can be more successful in certain households than others. Kale requires up to eight hours of direct sunshine each day to grow properly. When it comes to kale, it may be tough to find an area in your home that provides it with the amount of natural light that it requires to thrive.
This video from The Wisconsin Vegetable Gardener shows you how to build up a home grow space. This video provides information on how to choose the right bulbs for your plants and how to use the right kind of light to get them the sunshine they require.
If you’re growing kale indoors under artificial light, make sure the lights aren’t on all the time. Doing so would not only cost you a lot of money in the long run, but it will also harm your plants. The best method to ensure that they have enough light but not too much is to turn the lights on in the morning before you leave for work. When you arrive home at night, turn the lights back off.
Indoor Kale Soil, Water and Other Needs
Growing kale indoors takes more than just a bright light source. It also needs enough room, food, and water to survive. There are other considerations that must be taken into account, such as the temperature.
Kale is a cool-loving vegetable, so keep that in mind when preparing it. Once it’s been exposed to a couple of frosts, it often tastes even better. However, kale doesn’t taste as good if your home is too hot, so it’s crucial to keep the temperature at a reasonable level.
harvesttotable.com suggests temperatures of 60-65 degrees F during the day and 50 degrees F at night for winter crops like kale. Keeping plants on a windowsill might give you a similar effect in your own house. There is also the possibility of growing them in the basement under light.
Kale can be grown at room temperature if you don’t have a basement or if your windows don’t get enough light. If you can, keep your home at or below 70 degrees Fahrenheit.
Choose a container for kale that has holes in the bottom for drainage and is large enough to allow the kale to grow without difficulty. A pot with a diameter of at least six inches is recommended, while a bigger pot of eight or twelve inches may be preferable.
When you plant the kale, use a vegetable-specific potting mix. Using garden soil will cause the container to clog up and become difficult to drain. In addition, it may be contaminated with diseases and lack the nutritional value that your kale needs.
Keeping the kale well-watered will ensure that the soil never dries out completely. Old Farmer’s Almanac recommends a tea made from seaweed and fish emulsion if you are concerned that your kale isn’t getting enough nutrients from the soil.
Growing Micro Kale Indoors
If you’re want to get your hands on microgreens, especially micro kale, you’ll have to shell out a lot of money. It’s only that they’re quite inexpensive and easy to cultivate at home. You may want to produce micro kale instead of full-sized kale if your indoor growing area is restricted.
In order to cultivate sprouts, you’ll need a container that is both shallow and wide. Use a dedicated growth tray or recycle a clean plastic container like the tiny box pre-washed salads are often sold in.
Mix some potting soil into the tray or packet, then add a few inches of water. Then, add about a half-inch of potting soil on top of the kale seeds. After the seeds have been sown, water the soil.
You can either place the tray in a bright window or grow it in a dark room. Placing the dish four inches beneath an artificial light source is recommended. Harvest your micro-kale in two weeks if the soil is moist.
Conclusion
Kale is one of the most often consumed green leafy vegetables in the United States. It’s easy to grow kale indoors, where you have more control over the climate, if you want to learn how to grow kale in a greenhouse, too. When growing kale, it’s important to know where and when to plant it, how to care for it, and when to harvest it.
A good and high-quality harvest should be easy to get if you focus on these four areas. Remember the kale’s needs for soil quality and spacing, location, feeding and watering, and optimal temperatures. ” Even if you live in a chilly climate, you shouldn’t have any problems growing it because it is frost-resistant.
Still, keep the greenhouse temperature at the ideal level for kale growth and productivity. Even though kale is technically a biennial, most gardeners in all USDA plant hardiness zones treat it as an annual. Ultimately, it’s up to you to determine the best time of year to cultivate your crops in your area.
Nguồn: https://iatsabbioneta.org
Danh mục: Garden


