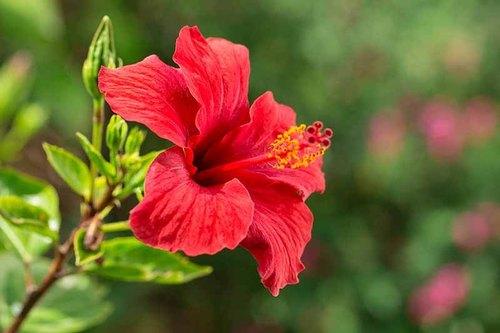
A wide range of sizes, shapes, and colors are available in the perennial hibiscus plant’s blossoms. Hardy hibiscus plants can be used in the garden, yard, or even as a houseplant because of the wide variety of varieties available.
- Ultimate Guide to Choosing a Best Flowers To Grow In New Mexico
- How To Reproduce Phalaenopsis Orchids? Comprehensive Guide
- Greenhouse Temperature Difference: 12 Tips On Choosing The Best Greenhouse Site
- How To Propagate Dianthus? Comprehensive Guide
- How Long Do Azalea Bushes Bloom? Perfect Information
Learn About Hibiscus
How to Sow
If seeds are started indoors and moved outside after the first freeze, you can grow hibiscus from seed, but it is also possible to use plants or bare roots.
Bạn đang xem: How To Start Hibiscus Seeds? Comprehensive Guide
In-House Seed-Sowing:
- Use a seed starting kit to start hibiscus seeds indoors 10-14 weeks before the final spring frost date.
- To expedite germination, soak seeds in water at room temperature for about eight hours.
- In a seed-starting formula, plant seeds 1/4 inch deep.
- At a temperature of 70-75 degrees Fahrenheit, keep the soil moist.
- Germination takes 14-21 days.
- On a sunny windowsill or grow seedlings 3-4 inches under fluorescent lights that are on 16 hours a day and off 8 hours a night, providing ample light. As the plants get taller, raise the lights. It is impossible to utilize incandescent bulbs in this operation due to the excessive heat they produce. Do not leave the lights on 24 hours a day for most plants.
- A starting solution (half the strength of a complete indoor houseplant meal) can be used to feed seedlings when they are 3-4 weeks old, following the manufacturer’s instructions.
- When seedlings have at least two pairs of true leaves before transplanting to the garden, you may need to transplant them to 3 or 4 inch pots if you are growing in small cells so that they have enough room to develop strong roots.
- Hardening off” seedlings before planting in the garden is necessary. For a week, place young plants in a covered area outside to acclimate them to the outdoors. For the first several days, keep them out of the direct sunlight and wind. Cover or bring containers indoors if frost threatens at night, then re-examine them in the morning. To decrease transplant shock and scorching, the plant’s cell structure is hardened off by this technique.
In the Garden, You Can Plant Potted Plants
- The area should be in full sun, with rich, wet organic soil that is well-drained.
- Remove any rubbish from the soil and softly rake the bed so that it is as level as possible.
- All gardens benefit from the addition of organic matter (leaf mold, compost, well-rotted manure), but newly developed neighborhoods require it.
- Reduce transplant shock by planting on a cloudy day or in the late afternoon.
- For each plant, create a hole that is large enough to accommodate the root ball in its entirety.
- Remove the plant from its pot and carefully remove the root ball with your hands.
- Set the root ball’s apex at the same level as the soil around it. Soil up to the root ball’s brim. Using your hand, press the soil firmly to the ground.
- Mark your location with a plant tag.
- To save water and keep weeds at bay, make sure the soil is well-watered and then add a thin layer of mulch (1-2 inches thick) on top.
Gardening with Bare Root Plants:
- The area should be in full sun, with rich, wet organic soil that is well-drained.
- Make a hole big enough to fit the bare root of the tree.
- When planting, place the plant’s crown at or slightly below the surface of the soil. A 45-degree angle is a good starting point for the roots when spreading out from the crown. From the top, roots should extend out like fingers, not clump together. A cone-shaped mound of earth can be built in the bottom of the hole and the roots can be dispersed around it. The crown should be nearly level with the ground when placing the roots.
- Get rid of air pockets by tamping down the soil around the roots. Top growth and leaves will begin to emerge at this point in time. Ensure that the soil is in good touch with all of the roots under the crown.
- Make sure the roots and dirt are completely submerged in water.
- Before adding mulch, wait for new growth to form.
How to Grow
- Prevent weeds from taking over your garden during the spring and summer. You may control weeds in your garden by cultivating frequently or using mulch to inhibit their sprouting.
- Soil moisture and temperature stability are further benefits of mulching. An organic mulch of shredded leaves or old bark provides a natural look and improves the soil as it decomposes over time for perennials. Mulches should never be placed on a plant’s stems in order to prevent rot.
- Perennials need careful irrigation to get off to a good start. At least once a week, give your plants a good watering to encourage the growth of new roots. At least an inch below the surface of the soil, the soil should be moist. It’s easy to check this simply placing your finger in the ground. Water early in the morning so that all of the leaves have time to dry out before the sun comes up. For most perennials, one inch of rain or irrigation a week is advised. Rain gauges can be used to see if you need to add water.
- When plants are just beginning to grow, they may need some protection from severe winds and bright sunshine. The quality of the air is also critical.
- A mild fertilizer can be administered after new growth appears. Protect the plant’s crown and foliage from burn injury by keeping granular fertilizers out of the growing area. Slow release fertilizer should only be used at modest rates, as greater rates may promote root rots.
- Staggering hibiscus to keep them upright in the wind is sometimes necessary.
- Keep your plants blooming by “deadheading,” which means to remove the wasted flower heads.
- After a fall heavy frost, remove and dispose of any leaves.
- A second (1-2 inch) layer of mulch should be applied after the ground freezes in the fall in colder climates. Protection is enhanced by the use of evergreen boughs (such as those found on Christmas trees). In the spring, remove all of this mulch.
- Plants should be divided when they grow overcrowded, their bloom size begins to shrink, or they lose their vigor. In the spring, divide hibiscus. You’ll need a sharp knife or spade to remove the large clumps from the ground into several smaller ones, each with multiple growing eyes and a lot of roots. Cut back the stems and remove any dead or diseased sections of the plant. If you have extra divisions, you can either keep them for yourself or give them away to other gardeners, depending on how much space you have available in your garden. Immediately or as soon as feasible, plant the divisions and water thoroughly.
In this article, we’ll walk you through the simple process of starting Hibiscus from seed. During the months of March through September, you can begin planting Hibiscus seeds. As long as you are patient, you may grow an impressive array of Hibiscus in a matter of weeks.
Pots
You’ll need a few tiny pots to germinate Hibiscus seeds. A diameter of 3–4 inches is a good starting point. Prevent root rot by using pots with holes in the bottom that allow water to drain.
Potting Soil Mixture
For 100% germination, start with a potting mix of 90% coco peat, and 10% Organic compost. This mixture works great for Hibiscus.
Plant Seeds
Xem thêm : How To Grow Ground Orchids? Information on Ground Orchid Care
Start with a potting mix of 90% coco peat and 10% organic compost for 100% germination. For Hibiscus, this combo works perfectly.
Water the soil once the seeds have been sown in each pot. Within six to ten days, seeds should begin to sprout.
Use Transplant Tray as a Greenhouse
A plastic container with the lid closed can be used to store the pots. As a result, the seeds will germinate more quickly. A greenhouse-like climate is created by the plastic container, which helps the soil retain moisture for a longer period of time.
Light Requirements for Seed Germination
The closed container should be kept from the direct sun. Keep pots in a bright environment with indirect light.
Watering Seeds
Direct sunlight should not be allowed to reach the closed container. Ensure that your pots are in a well-lit area, but not in direct sunlight.
Move Seedlings to Bright Indirect Light
Remove the lid from the container once your plants have sprouted and are showing signs of growth. Place your pots in an area that receives bright indirect light.
Transplant to Individual Pots
Seedlings can be transplanted into individual pots when they are 6-8 inches tall.
Fertilize
Diammonium phosphate fertilizer and vermicompost should be applied to your Hibiscus plant once a year, between March and September. You can fertilize your Hibiscus every 30 days to guarantee that it blooms at its full potential.
Growing Tips
- Perennial flower seed heads are not trimmed back by many gardeners until the new foliage grows in the spring. This serves as a winter food source for wildlife.
- Don’t worry if some of your hibiscus blossoms fall off, there will be plenty more in the future!
Common Disease or Cultural Problems
Leaves and midribs of some plants develop small, round, reddish brown spots with white or gray centers called Alternaria Leaf Spots (Alternaria alternaria). The stems may wilt as a result of the lesions. Warm, rainy, or extremely humid weather exacerbates this condition. Avoid getting water on the foliage, advises Burpee. Keep your hands away from damp plants while removing sick plant pieces. Give the room a lot of ventilation. Fungicide recommendations can be obtained from your local Cooperative Extension Service.
When a plant’s buds fall off owing to a lack of nutrients or water. Burpee recommends: regular watering and fertilization.
Xem thêm : How To Store Easter Lily Bulbs? Common Question And Answers
During the winter months, many plants die in the suggested zones Plants might die in the winter if the soil is too wet or lacks drainage. Make sure your plants are in a well-drained soil, according to Burpee. Choose kinds that are one zone colder than yours when picking container-grown plants, and place them in a protected part of the yard with a thick layer of mulch.
Root Rots: Seedlings and mature roots can be affected by a variety of diseases. Burpee suggests that sick plants be removed and disposed of. The soil should be well-drained. Get advice from your local Cooperative Extension Service.
When the plant’s leaves turn yellow and fall off, it’s known as yellowing. Not to worry, this happens to elder leaves multiple times a year, says Burpee. New leaves will emerge once the old ones fall to the ground.
It is possible for insects to transfer viral infections that result in distorted or cupped foliage that is speckled. The plants lose their energy. There is no cure, according to Burpee. Remove and destroy any plants that are infected with the disease. Aphids and other insects that spread the disease should be regulated. When working in the garden, exercise caution and don’t touch any plants until you’ve cleansed your hands or gloves after coming into contact with any diseased plants. Immediately wash your hands after working with any plants.
Common Pest Problems
Aphids, which feed on the undersides of leaves and can be green, red, black, or peach in appearance, are disease-carrying sucking insects. Ants are attracted to the sticky residue they leave behind on vegetation. Natural predators such as lady beetles and wasps that feed on aphids should be introduced or attracted to your garden, according to Burpee’s advice. With a powerful spray or insecticide soap, you can also get rid of them.
When it comes to Japanese beetles, Burpee advises hand picking them in the morning and washing them in soapy water later.
Mealybugs are flat, wingless insects that are 1/8 to 14 inch long and emit a white powder that hardens into a waxy shell. On stems, branches, and leaves, they form cottony masses. Leaf and stem sucking insects that result in stunted growth. In addition to attracting ants, the honeydew that they exude can develop a dark sooty mold. Apply soap and water to affected areas and try to remove the bugs. Insect predators like lacewings, ladybugs, and parasitic wasps can also keep tabs on these pests. Pesticide recommendations can be obtained from your local Cooperative Extension Service.
As little as a grain of pepper, spider mites are an invasive pest. Red, black, brown, or yellow are all possible colors. As they consume plant sap, they remove chlorophyll and inject poisons that form white spots on foliage. The plant often has apparent webbing. They turn the leaf yellow and stippled, causing it to dry out. They thrive in arid circumstances and are a fast-growing species. Burpee’s Recommendation for You Is… Using a powerful spray every other day can help control spider mites. Try insecticide soap or hot pepper wax. For miticide advice, contact your local Cooperative Extension Service.
Black or straw colored, these small, needle-thin insects are known as thrips. Attack the flowers, leaves, and stalks of plants by sucking their juices. Leaf surfaces will be stippled, tarnished, or silvered with flecks of discoloration. Thrips are capable of transmitting a wide range of illnesses from one plant to another. To deter many thrips, Burpee recommends placing sheets of aluminum foil between rows of plants to deter them. Remove weeds and other detritus from the bed after the frost has set in, then plant your seeds. Pest management information can be obtained from your local Cooperative Extension Service.
FAQ
Is it possible to clip hibiscus flowers? If you cut the flowers, you won’t have them for long.
What’s causing the leaves to yellow and drop off? Hostas shed their old foliage during the growing season to encourage new development.
Nguồn: https://iatsabbioneta.org
Danh mục: Garden


