Choose whether you want to store your easter lily bulbs indoors or out. Winter doesn’t have to spell the end for this popular gift plant if you follow the advice provided below. Reblooming Easter lilies is quite frequent these days, especially if the weather permits it.
If you take good care of your Easter lilies, they will live a long time. If you don’t have a location where you can be certain the bulbs will be secure and stable, you might want to think about using a greenhouse. Alternatively, use the following methods to ensure that your bulbs are healthy and thriving in the future.
Bạn đang xem: How To Store Easter Lily Bulbs? Common Question And Answers
Introduction
Store lily bulbs over the winter in extreme cold and wet conditions to keep them in peak condition all year long. As a result, they’ll be in peak condition when spring comes around again.
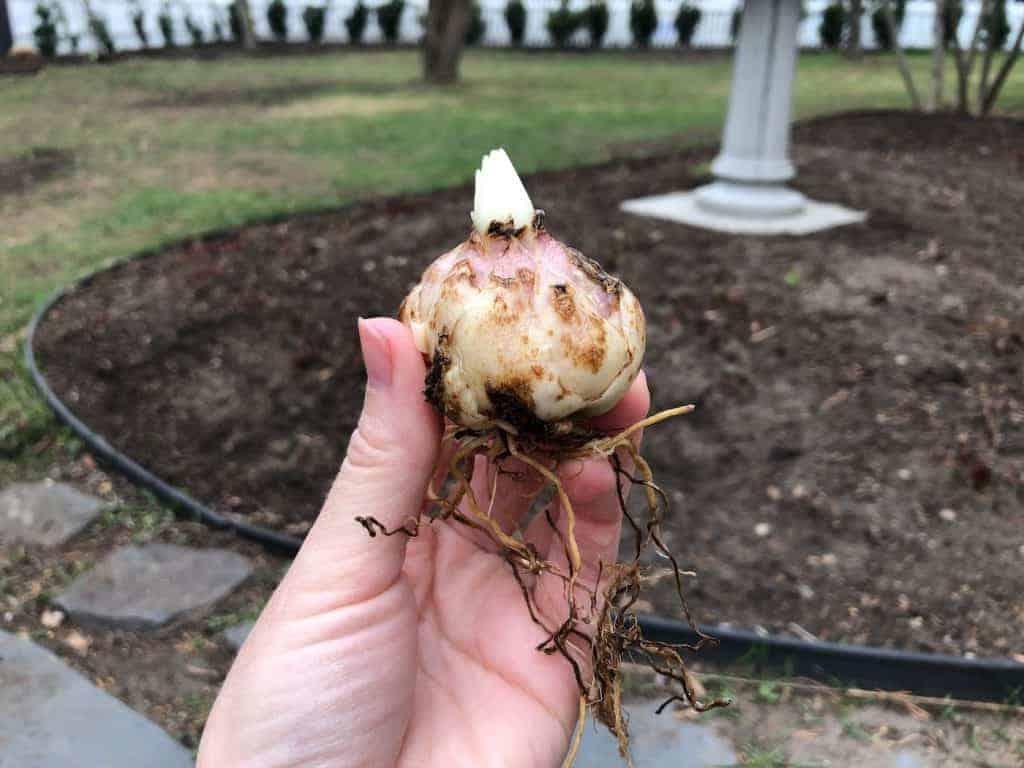
The root of the lily is a rhizome. Bulky in appearance as well. Swollen underground storage organ (corm) produces the plant. On the other hand, it isn’t a genuine light source. As a result, the scales form an almost impenetrable band. As a result, they are joined to a basal plate at their lower end. Nonetheless, we refer to them as bulbs for convenience’s sake. The bulb is planted in the earth and begins to produce roots. The location of each bulb should be marked if you wish to remove them from the ground.

During the spring, summer, and fall, the natural beauty of a flowering lily is something to witness. They’re the most rewarding flowers to grow in your backyard. It’s also important to safeguard a certain type of plant from the elements. Particularly in places where it’s bitterly cold or drenchingly rainy.
Overwintering lily bulbs is a simple task. Using the procedures outlined herein is the best course of action.
Freezing Lilies
If you’re surprised to learn that lilies can survive frigid conditions, you’re not alone. However, the temperature should not fall below 77 degrees C. As well as no more than a few weeks.
Wet Conditions
Long-term exposure to damp circumstances will cause the lily bulbs to rot. They will perish as well.
The following Spring, no lilies could be found. It was too moist for your lily bulbs this winter. Too much moisture in the storage facility or the area where the plants are cultivated might have an adverse effect on the quality of the product. As a result, the bulb begins to decompose. Lily bulbs benefit from naturally occurring drainage provided by garden or landscape soil. Unless the area is permanently damp.
Methods/Timing
Bulb storage in a region that keeps extremely cold might be as simple as mulching the bulbs. It’s necessary to dig them up every fall if you live in a moist area throughout the winter months. Alternatively, you can treat them as annuals. Moreover, it is necessary to replace them annually.
Storage methods for lily bulbs are numerous. Having a terrific time. The best course of action is to begin the winterization process. In addition, keeping lily bulbs for the winter is a good idea. Quite the contrary, in fact, in the middle of September or early fall!
First: Cut the Stem
Cut the lily stem approximately three to four inches above the soil level for bouquets or fading blooms. All leaves should also be removed, as a last step. Similarly, the stem should be left alone. As a result, the lily is compelled to supply additional development to the bulb. Before the plant goes into hibernation, it will begin to produce new bulblets.
Don’t forget to label the bulb’s position, either.
Second: Grow
Until the fall, leave the bulb alone to grow.
- If you’re using a container, make sure it’s in the shade during the day. Similarly, do not overwater the potting mix.
- Again, moisten the soil or potting mix but do not overwater raised beds or gardens.
- Apply a low-nitrogen, high-mineral fertilizer to the soil at the base of the plant. This season’s Power Grow Fall combination is the greatest!
- Allow the stem to become brown or decay so that you can remove it.
Third: Removing the Bulb
Once the stem is cut, leave the bulb in the ground as long as feasible. The first week of November marks the time when we begin to remove our bulbs. This may not be possible in your area, though. if you live there.
To dig and lift your lily bulb, select the proper instrument based on its depth. Be cautious to dig a good distance away from the bulb before using any power tools. The bulb is the most crucial thing to remember.
Xem thêm : How To Grow Tomatoes Commercially? Comprehensive Guide
To begin, gently insert the instrument a few inches into the soil. Make sure to check for the bulb with your hand as you progress. In the meantime, keep searching for the bulb.
Soften the soil or potting mix around the bulb and roots once the bulb has been found. It’s best if you use your hands for this. Once you’ve done that, pull off the bulb by the roots if you can.
Fourth: Cleaning the Lily Bulb
At low pressure, spray water from the hose. Wash the bulb, too. Remove as much soil or potting mix as possible from the pots or planters. Place the lily bulb in a place where it will not burn the scales as it dries. Also, allow the bulb to dry out without washing it off.. After that, simply clean with a gentle brush. First and foremost, I prefer to wash with the outdoor hose.
Bacterial infections can be prevented by removing all of the soil that clings to the surface. As a result, improper storage might lead to bulb damage or destruction. Remove any scales that are damaged, old, or infected. When everything has dried, apply a fungicide and let it sit for a few minutes. For example, garden sulfur or fixed copper.
Storing
Remove Debris from Bulb
In order to protect your bulbs from bacterial infections while they are in storage, remove all of the soil that is visible to the naked eye. During this period, you should also remove any damaged, old, or diseased scales, and then dust the area with a fungicide after it has dried.
Preparing and Storage
Small Quantities (<10)
For the winter storage of lily bulbs, prepare a moist potting mixture. And a bulb and root area that is well ventilated. Make certain that it is damp, not dripping wet this time around. Garden soil should not be used. Fill a plastic bag with vent holes halfway with your damp potting mix. Make sure the bulb(s) are in the bag in the most upright position you can get them. Partially open the top of the container.
Over the winter, lily bulbs should be stored in a cool location. As an example, think about the vegetable bin in the fridge.
Large Quantities (>10)
Make sure the box you’re using to store big quantities of lily bulbs has adequate air vents to keep the bulbs fresh all winter. Boxes made of wood or plastic are ideal. A moist potting mixture should be prepared. And a bulb and root area that is well ventilated. Make certain that it is damp, not dripping wet this time around. Garden soil should not be used.

Fill half of the container or box with wet potting soil. The bulbs should be positioned vertically. Potting mix can be used to fill in the rest of the gap. Also, keep lily bulbs in a cool spot over the winter. Indoors is preferable. Lily bulbs can be stored in containers outside during the winter months if they are covered with plywood. Make sure the plywood is attached to the container. Make sure there’s enough moisture in the air on a regular basis. Keep the bulbs out of the freezer for no more than 14 days at a time.
Summary – Storing Lily Bulbs Over Winter
Lilies, as a whole, are a hardy bunch. In addition, they’re well-equipped to deal with most of the challenges that come with cold weather.
Despite this, they’re vulnerable to rot in extreme cold, moisture, and dry circumstances. Especially the decorative and orienpet types from highland places.
Overwintering lilies, on the other hand, is a breeze with a little forethought and minimal intervention.
Provide Good Drainage
In damp weather, planting lilies in their bulb form. Similarly, if you live in a location that has a lot of rain throughout the winter months. I think it’s a bad concept. As an alternative, you can improve the soil’s drainage. Add plenty of pumice or perlite grit to the soil. Small boulders placed beneath the bulb also help with soil drainage.
Mulching/Burming
Low mound or burm may even make sense. In addition, avoid planting your bulbs near a high water table by burying them in the ground. Consider using a huge cloche to cover the bulb’s surrounding region. In addition, a flimsy plastic tent will do. In addition to a thick layer of autumn mulch, such as straw. Grass cuttings are the same way.
Dormancy
Lily bulbs, even when stored through the winter, are never truly dormant. They perform better when they are kept in the ground for a brief while. Make sure to plant the bulbs as soon as possible if you have room and the suitable conditions.
Storing vs. Potting
You won’t be able to plant anything for a couple of weeks. Small pots or buckets are ideal. Once again, use soil-free potting soil. Keep moist as well.
Xem thêm : How To Fertilize Dahlias Correctly? Ultimate Guide
Bulb to bulb, they’ll fit. This is only to keep the roots alive and well. The ideal place to keep lily bulbs over the winter is in a cool place like a basement, garage, or cellar. After that, if you have the time, plant anything. As a result, the spring
Guide On Storing Easter Lily Bulbs Indoors And Outdoors
You can either store easter lily bulbs indoors or outdoors. Easter lily bulbs need special care if you want to utilize them in the future. This comprehensive guide will show you how. You won’t have any problems if you follow the guidelines for both indoor and outdoor storage.
Gardeners and bulb suppliers might benefit from understanding how to properly preserve Easter lily bulbs. The bulbs will be ready for potting in the greenhouse by the end of the fall. The lilies will be in bloom in time for Easter if this strategy is followed.
Indoors
Step #1. Digging
In colder regions, you may need to store easter lily bulbs indoors all winter long if you want to keep them alive. To avoid injury and assure their life, begin lifting them off the ground at this time. Make it easier for yourself by snipping off three inches of your plants’ leaves before digging out and lifting the bulbs.
Dig around the bulb with a spade after clipping the foliage to prevent damage. You won’t have to worry about damaging the bulbs’ roots by doing it this way. As soon as you’ve lifted the bulbs, run water over the dirt to wash it all away.
Step #2. Drying
Inspect the bulbs first because some may exhibit signs of disease or be damaged and decaying before doing anything else. Avoid the spread of any disease among the healthy bulbs by discarding the afflicted ones. Always discard sick bulbs because composting them increases the risk of infection spreading.
When you’re left with only healthy bulbs, spread them out on a tray to dry. Don’t be tempted to use heat on fungal illnesses, as this might actually make them worse. Controlling the greenhouse temperature and humidity will also help prevent these issues.
Step #3. Storage
There are many places where you can store them in a cool, dark area for drying and mold prevention. It’s possible to apply fungicidal powder to the dried plants before placing them in paper bags or a vented cardboard box.
To avoid the spread of dampness and rot, you can water the bulbs if they become too dry. However, make sure there is sufficient space between the bulbs to do so safely. After the danger of frost has passed, you can then plant the bulbs in the spring. Because of this, the ground must be workable.
Outdoors
Step #1. Let the foliage die
The bulbs may not need to be taken indoors in some areas throughout winter. Easter lily bulbs can be left outside for a long time without harm. To be clear, this only applies if your region never gets any snow, ice, or rain during the winter months.
Easter lilies should be allowed to wither and die before being stored for the winter. Stop watering after the blooming time to encourage them to die back. If you want to assist your bulbs save energy for the winter, don’t cut the dead leaves.
Step #2. Keep the bulbs from sitting on wet soil
Maintaining the environment can help the easter lily bulbs grow. To begin, make sure that the soil is well-draining, as this can promote rot. Improve the soil’s structure and elevate the ground level above each bulb by adding perlite to the soil prior to planting.
The mound serves to keep the bulbs off the moist ground during the winter. The bulbs should be mulched as well for further protection. Using four inches of straw in the fall before the ground freezes is recommended by experienced gardeners.
Conclusion
Growing easter lilies in the beginning of winter doesn’t have to be a hard experience. Easter lily bulbs can be stored either indoors or outdoors to provide a year-round supply of blooms. If your area has a mild climate, you can let the foliage die and keep the bulbs in the ground over the winter.
To avoid rot, all you need to do is cover the ground with mulch and make sure it’s well-drained. As an alternative, gently remove the bulbs from the ground and store them in an airtight container indoors until you are ready to plant them. Before storing your bulbs, take sure to remove any infected or broken bulbs and spray them with fungicide.
Your bulbs will last longer if they are properly cared for and regularly watered. Always keep them out of harm’s way and guard against the spread of diseases like fungi. It’s best to keep easter lily bulbs indoors during the winter months if you live in a place that doesn’t get significant rain or snow or freezing temperatures.
Nguồn: https://iatsabbioneta.org
Danh mục: Garden


