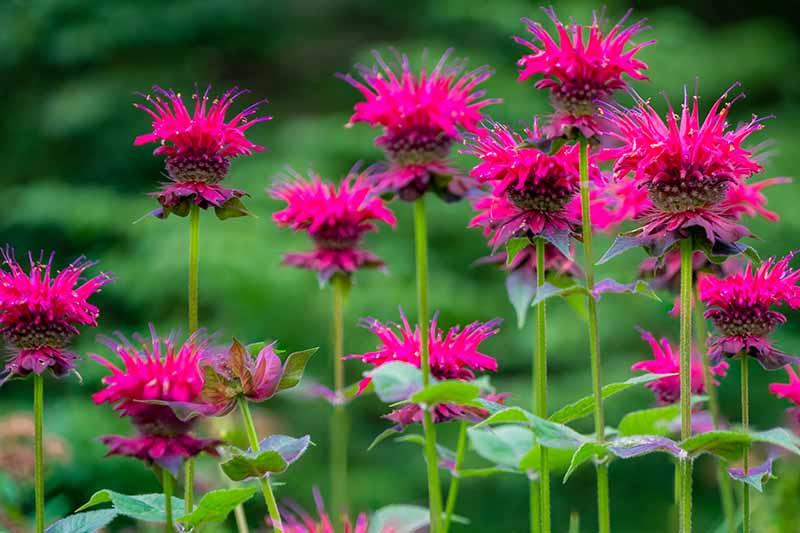
If you’re looking for an easy-to-grow plant, you can’t go wrong with bee balm (Monarda species).
I like this because it is a plant that one can never have too much of—unless it starts taking over other plants in the garden!
Bạn đang xem: How To Propagate Bee Balm? Complete Guide for Beginners
It’s only natural that you’d want to spread the word about bee balm after seeing its spectacular, long-blooming display of blossoms that look like fireworks.
By establishing connections with suppliers, we make it easier for you to locate the right products. Our links may earn us a profit if you make a purchase through them.
If you have a lot of older plants in your yard, you may want to help them out a little in terms of reseeding and revitalizing them, as they tend to become overcrowded and lose their vitality as they get older.
Digging up your Monarda and dividing it can revive mature plants, giving them more room to develop and allowing you to distribute fresh plants to friends and neighbors if you so desire.
Why not share these natives with the pollinators?
Continue reading to learn how to grow bee balm from seed, cuttings, and divisions.
3 Ways to Propagate Bee Balm
Bee balm can be propagated most easily through division, in my opinion. Digging and replanting the roots and rhizomes are both required steps in this process.
Monarda plants can be multiplied by seed or by rooting and transplanting stem cuttings.
Choosing to propagate from cuttings or divisions rather than seeds is the best option because you know precisely what you’re getting.
For those who don’t get it, I’ll try to explain
A clone is a reproduction of a parent plant that shares the same genetic makeup and other traits.
Seeds collected from a hybrid cultivar will produce plants that are distinct from the ones you already have in your garden.
To put it another way, hybrids aren’t true to seed.
You’ll get bigger plants faster by dividing older plants rather than starting fresh ones from seed.
Perennials that have been divided will have more room to spread, which is good for the health of the entire plant.
By Division
My bee balm plants are often propagated this way.
It’s easy to divide fresh growth since the rhizomes of bee balm spread quickly on their own through special underground stems known as rhizomes.
After two to three years, you may see that the core of the clumps of bee balm has begun to deteriorate, with areas that aren’t developing as well as they could.
Reduce overcrowding and revitalize aging plants by dividing them.
Early spring is the optimum time of year to take divisions, when fresh shoots are emerging from the soil.
Using your shovel, begin digging around the outside of the clump.
Using a 45-degree angle, slide the shovel under the roots and pull it upward. Complete the full circumference in this manner.
After loosening up the root mass, you should be able to slide your shovel under the roots and pry the mass up.
You might also use your hands to pull the root ball out of the ground.
Make sure to remove all of the soil from the clumps you’ve just dug up and divide them into smaller clumps.
You can use a sharp garden knife to cut through thicker roots or simply break them apart.
If the clumps are to be this small, what size should they be cut down to? Two to three shoots should be left in each separated clump with a six-inch-wide root system intact.
Xem thêm : How to Plant Easter Lily After Blooming? Garden Guide
A good time to remove any damaged stems or foliage that appears unhealthy as well as any dead roots or stems is now.
When you divide up your plants, it’s also a good time to check on their overall health. Root rot may be present if the root system you excavate is covered with slime.
To get rid of the sick roots, cut them out and dispose of them. You may also wish to enhance drainage in the planting area by modifying the soil.
Even though this plant prefers a moist environment, wet feet are no match for the Monarda.
Bee balm also hates dry roots, so make sure to replant your fresh divisions as soon as possible.
The aggressive nature of these plants necessitates careful consideration while relocating them, since their rhizomes can easily take over other plants.
In our guide to controlling bee balm (coming soon!), you can learn more about this.
It’s also a good idea to mulch newly planted trees and shrubs to help them retain moisture and prevent the growth of weeds.
This product from Bonide is available at Home Depot and would be an excellent choice for transplant fertilizer, as is the case for the majority of plants that need to be transplanted.
Prevent transplant stress by stimulating root development with IBA Root Stimulator, a component of this 4-10-3 (NPK) fertilizer blend. To ensure proper application, dilute the concentrate and follow the manufacturer’s recommendations.
From Seed
With strong germination rates and the ability to use store-bought or gathered seed, seed-growing is a simple process.
When saving seed from your own plants, wait two weeks after the blooms have done blossoming before harvesting the seed.
Help! My bee balm has no blossoms on it! Weird things have been happening.
Some reasons your plants aren’t flowering include the following.
At this point, the dried flower heads should be ready to use as compost.
It’s important to remember that the seedlings of hybrid plants, which are the result of cross-breeding between two or more different species or cultivars, will not always look like their parent plants.
To collect the flowers, just bend the plants over and place a paper bag beneath the flower heads for easy collection. Release the seeds by gently but swiftly shaking the plant. The seeds should fall into the bag if they are ready.
Close the bag by rolling it up at the opening and storing it on its side in a dry and well-ventilated area with the seeds spread out.
Afterward, store them in an airtight jar in the refrigerator for about a week. When you’re ready to plant your seeds, I recommend keeping them in the refrigerator until you’re ready.
We’ll go over a couple different methods for planting your seeds shortly.
Because the seeds are so little, they should be sown only a quarter inch below the surface of the soil. A typical rule of thumb is to plant seed 2–3 times deeper than the width of the seed in soil.)
Until the seeds sprout, keep the soil equally moist. At a temperature of 60 degrees Fahrenheit, this process should take anywhere from 10 to 40 days.
Germination may be slower or less consistent if you plant your seeds in an area where temperatures frequently fluctuate, such as in an area where it rains.
The following are some possibilities for seeding:
1. Plant in a Cold Frame in Early to Mid-Spring
Seedlings should be carefully selected and placed in separate four-inch pots or in their permanent location when they have two sets of genuine leaves.
If you can keep the soil continuously moist, you can plant them in their permanent location.
When they’ve had some time to develop deep roots and the rainy season is about to begin, I find that they’re easier to transplant.
When I live in Southern Ontario, the rainy season begins in late August.
2. Plant Directly in the Ground
A nursery bed or permanent planting can only be done in an area that has been cleared of weeds. After the last frost, sow seeds 1 inch apart.
Xem thêm : What Are The Optimal Temperatures In A Greenhouse For Growing Petunias
Tweak the spacing of seedlings once they have at least two pairs of true leaves or transfer them to their final place.
3. Plant in Flats in a Warm Indoor Location
Planting flats of seeds in a heated greenhouse or placing seed starting trays in a sunny window 8 to 10 weeks prior to the last frost date in your location are two examples of this.
In a seed-starting mix that is lightweight and sterilized, plant about three seeds per cell.
To ensure that the strongest plants are kept, trim them down to one per cell once their first genuine leaves have appeared.
As soon as the seedlings have two sets of true leaves, you can either move them permanently into the cold frame or into four-inch pots as indicated in the previous section.
Keep the planting area weed-free and well-watered during the first season, regardless of how you sow your seeds.
From Stem Cuttings
If you just have a few huge plants and wish to propagate a certain kind, cuttings are an excellent option.
Take cuttings from the tips of new growth in the spring. There should be six-inch-long cuts made just below a leaf node.
It’s springtime for taking new growth cuttings, therefore now is the time to do it! Cuttings should be around six inches long and the cut should be made directly below a node on the leaf.
I suggest using a humidity dome or a clear plastic bag to hold potted plants above the cuttings in a bottom-watering tray.
The corners of the tray can be decorated by taping pencils or dulled sticks, for example.
If you see roots sprouting from the bottom of your pots in two to four weeks, your cuttings are ready to be transplanted.
Instead of water, I prefer to use 3 percent hydrogen peroxide, which is readily accessible in most pharmacies and department stores.
To avoid decaying, this keeps them from failing.
Until you plant them in their permanent location, remove the bags and place them in a sunny window or greenhouse until they are rooted.
How To Propagate Bee Balm For Beginners
Option #1. Seeds
Collecting seeds
Seeds of bee balm are easy to germinate and can be used to grow the plant. Even if you don’t have any bee balms in your garden, you can still get their seeds by purchasing them. Two weeks after the bee balm flowers have done flowering and dried off, the seeds can be harvested.
To collect the seeds from the flower heads, simply bend the plants. Remember, however, that compared to cuttings and division, reproducing bee balm from seeds will not provide you the special trait of the parent plant. The seeds can either be dried in a sealed jar for a week or seeded indoors or outdoors, depending on your preference.
Sow indoors or outdoors
When you start bee balm seeds in the greenhouse, you won’t be pushed back by the weather. Sowing directly in the garden outside is possible, but you should keep in mind that changing weather conditions will either prohibit or delay germination. Early spring is the best time of year to start bee balm seeds, and they can be transplanted around October or the beginning of rainy season.
You can check your calendar to see when the latest frost date is, and then plant the seeds. When the young plants have true leaves, thin them out to a distance of 24 inches apart. The greenhouse can, however, be used to start seeding eight weeks before the first date.

Option #2. Cuttings
Taking cuttings
Cuttings can be used to root your favorite bee balms, allowing you to acquire a close match to the original. When your bee balms begin to sprout new leaves in spring or mid-summer, you may begin harvesting 6-inch cuttings. To cut below a leaf node, you’ll need a sharp, sterilized knife, just like when taking cuttings from other plants.
Both the part and the parent plant should be free of disease. Don’t forget to remove all the leaves except the ones at the very top of your cuts once you’ve obtained them. Rooting hormone powder can also be used to speed up root formation.
Rooting
In the greenhouse, bee balm cuttings can be easily rooted since the temperature can be controlled more easily. The best temperature for cutting bee balm is between 60 and 70 degrees Fahrenheit. As long as the plastic bag isn’t touching the stem of the plant in the container, it’s fine to utilize this method.
This will help to keep the soil moist and damp, which is good for root growth. Once the bee balm cuttings have taken root, you can remove this cover. The plants should be kept out of direct sunlight in a well-lit area until the weather is more steady outside.
Option #3. Division
Bee balm can also be maintained by division, the final technique of propagation. Bee balms should be divided every two years in the early spring, according to researchers at Iowa State University. To slow down their quick spread and grow new plants, use this method.
It’s important to remember that bee balms will need to be rejuvenated after a while, and they are also more susceptible to overcrowding than other plants.
Lifting
When you see fresh shoots on your old plants, it’s time to divide them. Dig around the cluster with a shovel to make it easier to lift. To loosen the perimeter, slide under the roots and lift outward. Lift or pull the root ball by hand by sliding under the cluster and prying upward.
Dividing and preparation
Remove as much soil as possible from the clump once you have it. Your bee balm’s roots are likely to be thicker than those of other plants, making it easier to divide the clump with a knife. A minimum of two shoots with adequate root system should be present in each cluster.
Remove any and all roots and stems that are dead, rotten, or damaged prior to planting. Plant the divisions as soon as possible to avoid drying out the roots. However, some gardeners prefer to transplant the divisions in their original spot.
Conclusion
When it comes to starting your own bee balm plants, it’s a breeze. Bee balm can be grown from seeds, cuttings, or division, and each method has its own advantages and disadvantages. Regardless of which approach you choose, greenhouses are beneficial because of their steady conditions.
Until the bees are well-established, try to keep the area damp and away of direct sunlight by using bee balm. Before transplanting, make sure that the weather outside isn’t too extreme.
Nguồn: https://iatsabbioneta.org
Danh mục: Garden


