For orchids to thrive and blossom, proper care is essential. As comparison to the humid seasons, orchids require more water during the dry season.
- When To Start Flower Seeds In A Greenhouse For Spring Planting? Helpful Information!
- How To Propagate Annual Vinca? Complete Guide for Beginners
- How To Propagate Dianthus? Comprehensive Guide
- What Kind Of Plant To Put In Small Greenhouse? Garden Guide
- How To Grow Poinsettias From Seed? Complete Step-by-Step Guide
However, if this water is not well regulated, it can be damaging to the orchid, particularly to its roots.
Bạn đang xem: How To Save An Overwatered Orchid? Comprehensive Guide
Plants that have been overwatered will eventually die, which is something we gardeners certainly don’t want to happen.
Overwatering can kill a plant, therefore I’ll show you how I prevent it in this article.
How to Save an Overwatered Orchid
In order to rescue an overwatered orchid, follow these steps:
In the winter, water your orchids once a week; in the spring and summer, water them 1-2 times a week. Overwatering orchids can cause the plant to droop and become ill, and if it isn’t saved in time, it can die. As a result, how can you salvage an orchid that has been over-watered?
To rescue the overwatered orchid, remove it from its container and trim away any rotten roots. To resuscitate the orchid, use hydrogen peroxide to disinfect the pot and roots, and then repot it in fresh potting soil. To avoid overwatering, water orchids only once every seven days.
If the orchids are happy and healthy, they can bloom twice a year. Orchids may not thrive as well as they should if their pots are too wet. Overwatering orchids can be avoided if you notice the indicators of overwatering as soon as possible.
Signs of an overwatered orchid
Many people believe that orchids, which are native to rainforests, require a lot of water in order to thrive. This, on the other hand, is completely incorrect.
Orchids’ native environments are dense rainforests, where they receive little or no rainfall. Thus, they have evolved to flourish in moderately wet environments and display apparent harm when overwatered. You may be overhydrating your orchids if you see these symptoms:
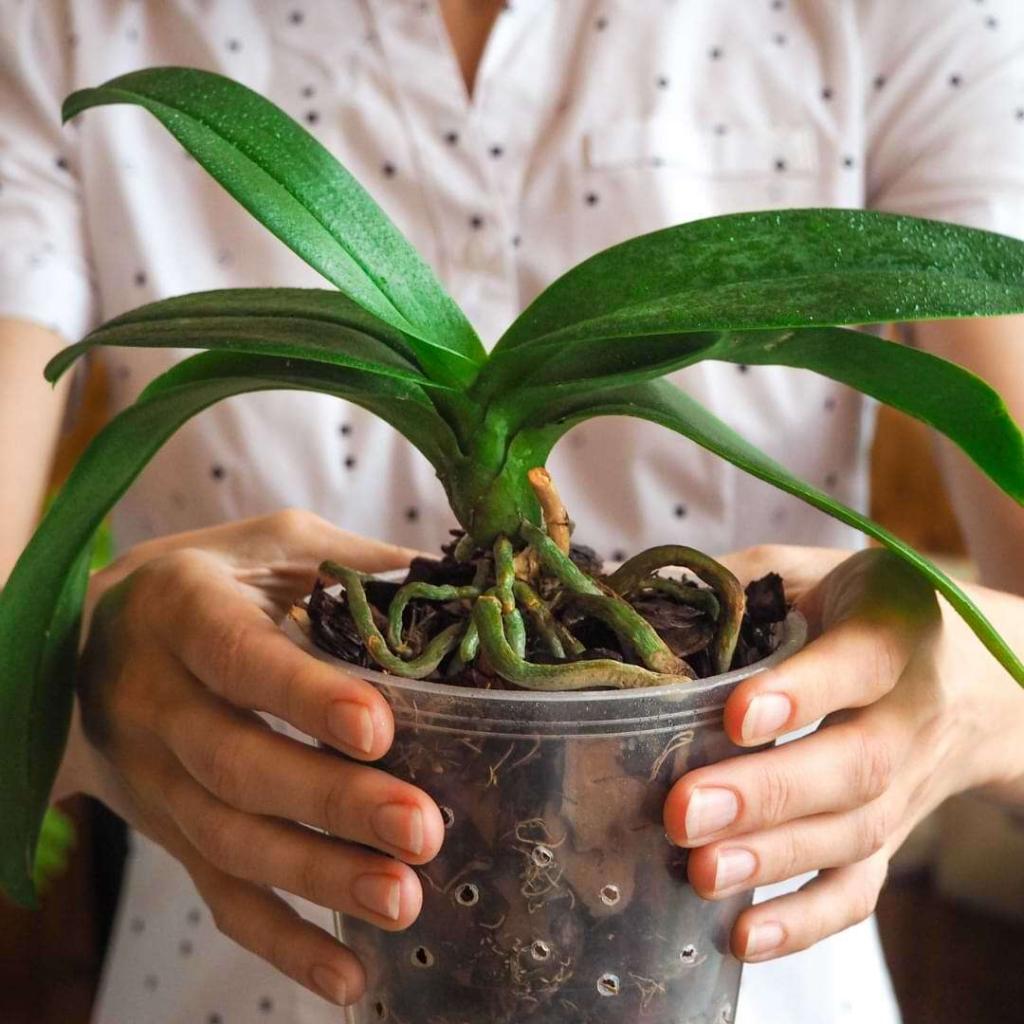
Rotting roots
Overwatering can be seen in the roots of an orchid, which are wet, spongy, and black when removed. Excess moisture in the soil causes the roots to rot because the orchid’s roots are unable to absorb any more water once they are saturated.
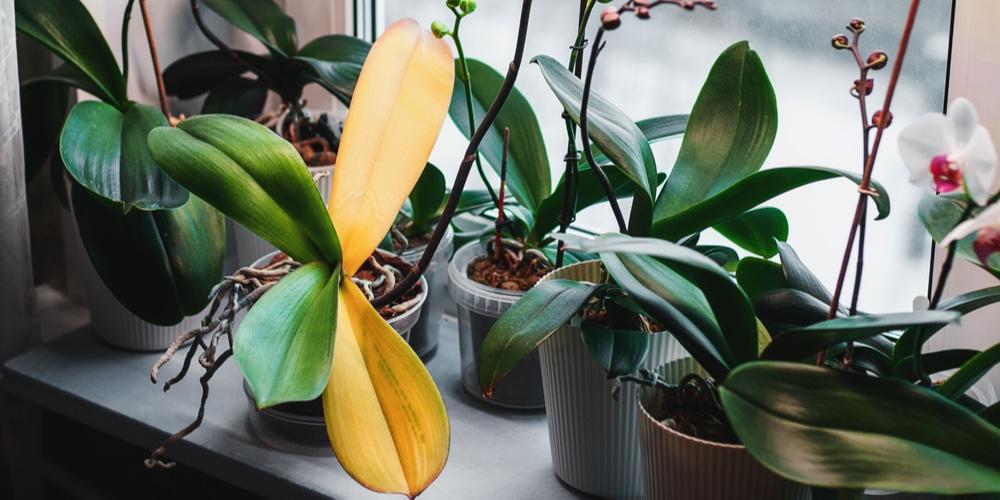
Drooping leaves
Drooping leaves and discolouration are very common symptoms of orchid disease. Suffocation in the root zone is frequently a cause of limp leaves and yellow patches on the leaves.
In addition, overwatering can cause the orchids’ base leaves to decay, which is a common problem. These low-lying orchid leaves frequently have dark, damp areas of tissue on the underside.
Poor overall plant health
You may be overwatering your orchid if it’s growing slowly or has pleated new leaves. These are both symptoms of overwatering. When an orchid’s buds begin to dry out, this is another sign of over-hydration.
Can an overwatered orchid be revived?
If you identify the signs early enough, you can save an overwatered orchid. Remove the plant’s decaying roots and repot it in a new pot with a fresh potting mix. It’s possible that you’ll have to buy a new orchid to replace the one that’s dying because of root rot if the overwatering problem has been going on for a long time.
Think about how long you can keep a healthy and happy orchid alive, as well as how often it will flower.
How to save an overwatered orchid
Overwatering your orchid can be avoided with proper care, especially when it comes to watering. Once every seven days, if the pot is large enough (like 7 inches), you can water the orchid. Keep the soil moist by watering the plant every 4-6 days in smaller pots – about 4 inches in diameter. The top 1-2 inches of soil should be let to dry out between waterings to avoid overwatering.
An overwatered orchid can be saved by following these steps:
1. Remove the orchid from its pot
Remove the orchid from its original location by pulling it up by the roots. This should be simple if you’re growing the plant in your garden. It’s also possible to remove your orchid’s roots from its container by gently tiling the pot to one side. Remove the soil mix from the pot after removing the orchid. Brush off any substrate that is still stuck to the roots of the orchid.
2. Prune off rotten roots
After that, use a knife or shears to remove the decaying roots. It’s easy to tell whether a root is rotten since it’s brown and spongy. Before cutting away the rotten roots, ensure you sanitize the pruning shears using rubbing alcohol. We also recommend pruning at least 0.5-inches back into the healthy sections of the roots.
3. Prepare a new substrate
Remove the rotting roots by cutting them off with a knife or shears. Infected roots can be distinguished from healthy ones by their yellowish brown hue and mushy texture. In order to get rid of decaying roots, disinfect the pruning shears with rubbing alcohol beforehand. At least 0.5-inches back into the healthy roots, we also recommend trimming.
Water the bark mixture lightly to moisten it, then drain any excess water from the bottom of the pot before adding it to the pot. The substrate will be ready for the next step as a result of this process.
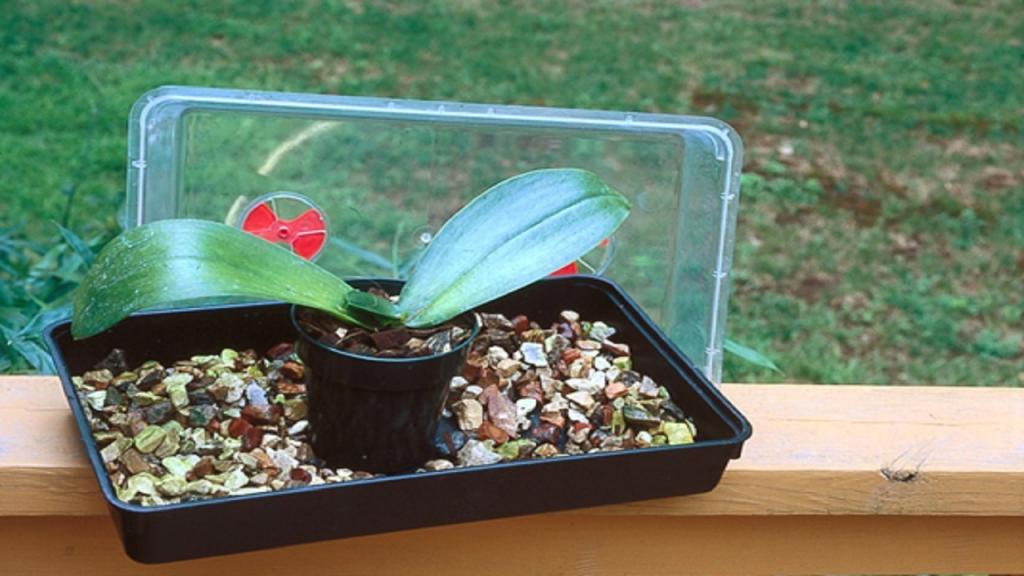
4. Repot the orchid
Xem thêm : How To Water Calandiva? A Few Tips to Remember
Fill about half of the pot with the bark mix, making sure it is evenly distributed. Incorporate the orchid into the pot by placing the roots on the moistened substrate in a horizontal position. Then, pour some more of the damp bark mixture around the orchid’s roots. It’s important to completely encase the roots.
5. Water the orchid accordingly
Drainage saucer should be returned to its original position after repotting the orchid before putting the pot back on top of it. It’s best to wait to moisten the bark mix until it dries up completely on top of the substrate. Temperature conditions can affect how long this process takes.
To prevent the bark mixture from sticking to the pot’s bottom when the top layer has dried, add a generous amount of water and let it to soak in for a few minutes before adding more. As long as the top two inches of the substrate aren’t dry, you can stick to a generous watering plan. Also, after every watering session, be sure to empty and replace the drainage saucer.
Does overwatering cause orchid bloom to fall off?
Floral ornamentation and scent are two of the reasons why orchids are so popular. Overwatering is one of several potential causes of orchid buds falling off. Known as bud burst, overwatering causes orchid flowers to die and fall off.
Orchid blooms can also fall off due to other factors such as the end of the bloom season and changes in light and temperature. Check the leaves for darkening and drooping to be sure your orchid blossoms are fading and dropping off due to waterlogging.
With collapsing buds and limp, yellowed leaves, it is clear that you have overwatered your plants. Adopt the orchid revival process outlined in the preceding section to keep your flowers from falling off in the future due to excessive water.
1. Determine If the Orchid Is Overwatered
To salvage an overwatered orchid, the first step is to inspect the roots. The roots, leaves, buds, and blooms are all indicators of overwatering.
This is due to a variety of circumstances, including nutrient deficiencies and disease, that could be causing the orchid to fail. Your prized orchid may perish if you attempt to solve an issue that doesn’t exist.
2. Removing the Orchid from the Pot
Prior to removing the orchid from its pot, I let it an extra 30 minutes to dry off. My orchid’s roots will be much easier to remove now.
I then carefully remove the orchid from its pot with my own hands.
A few roots may have gotten tangled in the pot and need little more wiggle room.
I’m very careful when moving the orchid to avoid damaging the roots in any way. As a result, I’ll have a better chance of my orchid taking to the new pot and medium.
This phase necessitates a great deal of patience. Rather than squeezing the orchid’s leaves together and risking damage, I prefer to withdraw it from its pot while holding it as close to its base as possible.
I immerse my orchid’s roots in warm water for 15-20 minutes to remove obstinate rooting medium fragments.
Water that is between 32 and 43 degrees Celsius (90 to 110 degrees Fahrenheit) is ideal since it allows the orchid roots to be more flexible.
To avoid crown rot, it is essential that the crown of the orchid is kept dry. To remove any water that may have gotten in, I use a dry tissue paper towel.
3. Trim Off Rotten Roots
Using sterilized scissors or a razor blade, I remove the majority of the bad roots from the plant. Because there will be so few healthy roots left, it’s critical that you don’t destroy them.
In order to protect the orchid’s leaves, I make careful to hold the plant’s base.
4. Apply Rooting Hormone
Dip ‘n Grow is a liquid rooting hormone that I use to aid in the growth of new roots. This prevents the orchid from suffering more damage by allowing it to regrow its roots.
Additionally, the rooting hormone encourages leaf growth. Let the rooting hormone dry for about two hours as well.
5. Repotting the Orchid
Finally, I repot the orchid in a medium that has been pre-watered. To encourage water uptake, it’s a good idea to skip a day of watering the orchid.
As new roots are created by the orchid, I try to keep it in a shady area to minimize evapotranspiration.
How to Know If the Orchid Is Overwatered
The best way to tell if you’ve overwatered an orchid is to look at the plant’s characteristics.
One of the most important characteristics of an orchid is its ability to bloom as expected.
The roots are sturdy and white, with juicy green tips. They appear healthy.
Xem thêm : How To Grow Daylilies In Pots? Easy Step-by-step Guide
In addition, the potting soil and roots must be kept moist but not soggy. As a result of over-watering, the roots of the orchids grow damp and begin to decay.
Odonates that have been overwatered have fewer healthy roots and an abundance of brown and mushy ones. Too much water is bad for roots, especially since they need to breathe.
If the potting media is wet or smells bad, it should be avoided.
Overwatering causes the leaves of orchids to turn yellow or darken, and some may even dry up. Some leaves’ undersides may also begin to decay.
In addition, the orchid will begin to resemble a sickly plant. The plant’s stem becomes brittle, and it appears to be nearing the end of its life cycle.
Prematurely, the buds begin to fall off as the blossoms mature.
Why Should You Save the Overwatered Orchid
Decide whether or not to save the orchid that was overwatered.
Consider the following before making a decision on whether or not to conserve the orchid:
Does the Orchid Look Healthy?
Another possible cause of orchid disease or pest infestation is overwatering.
To begin with, it’s possible the plant was unfit for human consumption. I should let the plant to die out on its own in this situation.
The Amount of Effort I Have Put Into the Orchid
During the time I spend tending to the orchid, I develop a close relationship with the plant.
It’s a hobby and a source of healing for me, therefore I’m growing it. I’d rather save the plant in this situation.
Cost of Reviving the Plant
The cost of repotting the plant will be taken into account if I need to do so. Repotting plants can be more expensive than simply purchasing a new one.
To save money, I’d rather buy a new one. I’ll have to keep the plant if it’s cheaper to save it.
How to Properly Water Orchids
The watering requirements of different orchids vary. They need a constant supply of moisture as well as a period of time when they are completely dry.
The growth rate of orchids slows down during dormancy periods since they aren’t actively photosynthesising. This means that they use less water during their rest period.
An orchid that has soft, thin leaves indicates that it needs a lot of water. Pseudobulbs that are more complex and succulent demand less water.
Plants will tell you if they’re thirsty. In between watering schedules, it’s critical to provide time for the soil to dry out.
Some orchid species really prefer a dry environment over a wet one. I make sure to water the plant thoroughly and allow it to drain freely via the container’s perforations.
Effects of Overwatering
Overwatering can cause the following problems:
- A buildup of salts in the potting medium might result in root burn.
- Prior to flowering, the flower buds become yellow and fall off.
- As expected, the flowers did not bloom.
- Premature flower petals dropping off the stem
- Falling leaves.
- Leaf color shifts
- Roots decompose over time.
Frequently Asked Questions About How To Save An Overwatered Orchid
Is root rot purely caused by overwatering?
It is possible that the root rot is a sign of over-nutrition. In addition to pests and diseases, root rot can be caused by other factors.
Are there alternative solutions to prevent overwatering?
Automatic watering pumps are available in modern systems, allowing you to program watering times. Sensors in the pumps ensure that the medium is kept at the correct moisture level.
Conclusion
Morning and midday are the optimum times to water orchids.
Increasing the frequency of watering will not compensate for the lack of nutrients or speed up the growth of your plants.
Nguồn: https://iatsabbioneta.org
Danh mục: Garden


