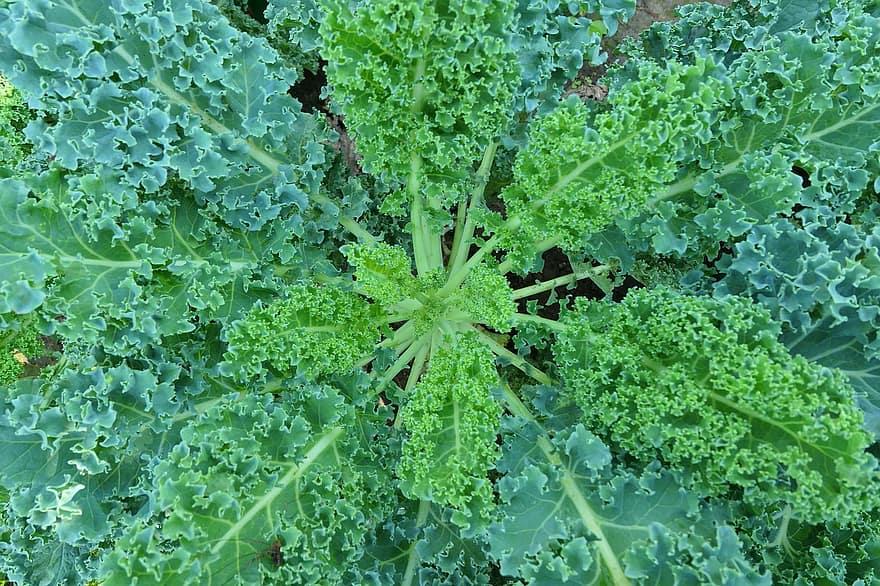
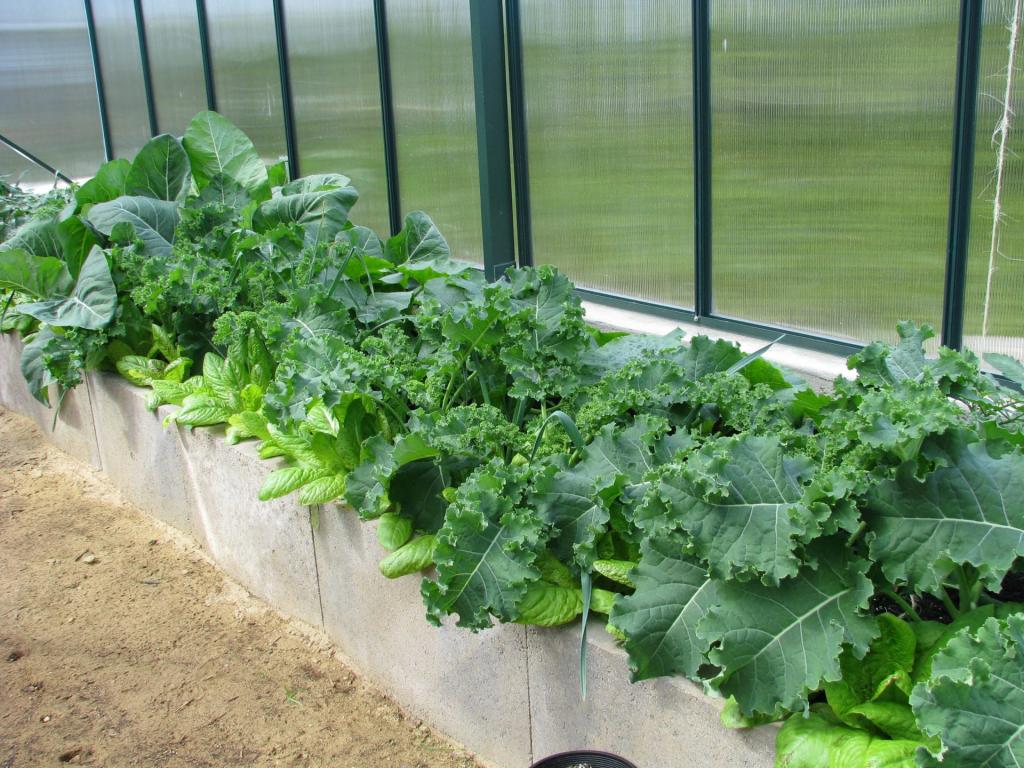
Do you want to learn how to produce kale in a greenhouse for your garden? Because kale thrives best in cold temperatures and you’d like to grow it all year round, a hobby greenhouse is an excellent place to plant it. Gardeners can establish their own microclimate in a greenhouse. You can grow kale in a temperature-controlled greenhouse even while it’s sweltering outside.
Kale is a reasonably simple crop to grow, and here’s a quick guide to the process: Kale does best when grown in full sun, with some afternoon shade. Nutrient-rich soil provides the ideal environment for their growth. Keep your kale plants 16 inches apart if you’re planting them in the ground. Kale plants should be watered frequently, fed with plant food, and harvested every few weeks during the growth season.
Bạn đang xem: How To Grow Kale In A Hobby Greenhouse? Step-by-Step Tutorial
Step #1: Prepare the Soil
Kale is a relatively easy plant to grow and can survive in virtually any soil, with the exception of extremely dry ones. The quality and taste of your kale harvest can be greatly improved by proper soil preparation, just like with other plants. Before sowing the seeds, add organic manure to the soil.
For sowing directly into the soil
The seedbed should be free of rocks, roots, and other debris, so remove them from the soil. To improve the soil’s aeration, rake it. Once you’ve finished digging your trench, carefully plant your kale seeds in it. Apply a little layer of dirt and water to the seedlings.
Cloches or netting may be necessary to protect your seeds from birds and other pests if you aren’t growing them in a greenhouse. This is why you should grow your kale in a hobby greenhouse rather than a home garden.
For sowing into seed trays
Fill seed trays with dirt and compost before scattering seeds on top if you prefer this method. Place the tray in the greenhouse and cover the seeds with compost. Keep the soil wet but not saturated by watering sparingly.
Step #2: Transplant Kale
In around two to four weeks, you should have kale seedlings ready for transplant. Kale may take longer to grow in cold conditions, so keep this in mind. Even if there aren’t any seedlings after six weeks, you can always sow more.
To get the most out of your seed tray-grown kale, you’ll need to transplant it into the right environment. Even while kale prefers full sun, it can still thrive in partial shade.
Step #3: Harvesting Kale
Kale leaves can be harvested throughout the growing season, but when the leaves are as big as your hand, the plants are ready to be harvested. Picking leaves at the base of the plant is best, although yellowed or slightly wilted leaves should be discarded.
If you want your kale to produce more leaves, don’t take too many leaves the first few times you pick it. Your kale will taste better if you wait until after the first frost. It’s advisable not to wait if the weather is mild and will not change in the near future.
Reasons Why a Hobby Greenhouse is a Great Option
It is preferable to grow kale in a home greenhouse rather than in the open air. Here’s why:
Reason #1: It protects your plants from common kale pests
Pests can still attack kale, despite its reputation as one of the most pest-resistant plants. Some of the dangerous insects that would love to eat your kale leaves include cabbage aphids, cabbage worms, flea beetles, and harlequin bugs. The chance of attracting these bothersome insects is reduced if they are housed in a greenhouse.
Reason #2: It keeps your plants safe from harsh and unpredictable weather
Excessive heat, wind, rain, and storms can all impede your plants’ growth. It’s far easier to produce kale when it’s kept in a greenhouse, even in unreliable weather. Remember that a month’s worth of hard work can be wiped out in a single storm.
Reason #3: It’s perfect for gardeners with limited space
To cultivate your own food but lack room, you can use a hobby greenhouse. Kale and other vegetables can be grown even in small spaces. For most people, a six-foot-tall greenhouse is more than enough space for their gardening needs. If you want a smaller size, there are smaller options available. Tabletops and balconies are ideal locations for a small hobby greenhouse.
Reason #4: It’s great for those who want to learn about greenhouse gardening
In comparison to larger, more permanent greenhouses, hobby greenhouses are less expensive. If you’re interested in learning more about greenhouse gardening, this is a great option.
Kale background
In the Brassica plant family, kale is a cultivar (a kind of plant generated via selective breeding). Some of the more well-known Brassica vegetables include: broccoli, cauliflower, bok choy (also known as Chinese cabbage), and cabbage (also known as Chinese collard).
Because of their high content of vitamins, minerals, and anticancer phytochemicals, the Brassica family of plants has recently received a lot of attention.
Early kale dates back to around 2000 B.C. in the eastern Mediterranean region. In European records, Kale first appears in the 13th century. Kale didn’t arrive in the United States until the 19th century.
The incredible nutritional profile of kale became well-known in the 1990s, which marked the beginning of kale’s ascension to the ranks of legendary vegetables.
The 411 on kale botany
The kale plant is a biennial. As a result, it has a lifespan of two years. Biennial plants establish roots and produce leaves in their first year of life. Late winter is the time when the leaves fall off and are replaced by new growth.
Biennial plants flower and set seed in the spring of their second year.
In the first year, most gardeners remove their kale plants in the late winter.
Growing basics
In order to flourish, all plants necessitate a few essentials. A garden’s foundation is built on the right balance of water, sunlight, macronutrients, and soil pH.
Nutrient requirements
Do you know what your NPK stands for?
What the hell are you talking about?
For a gardener, the letters NPK are quite significant. Nitrogen, phosphorous, and potassium are their chemical names. “Macronutrients” in soil include nitrogen, phosphorous, and potassium.
The amount of each of these macronutrients in your garden soil will vary based on a variety of factors. Each plant requires a distinct amount of each nutrient in order to thrive.
Here, Kale is a laid-back sort of guy. As for macronutrients, it prefers them in modest levels.
pH requirements
The acidity and alkalinity of soil are measured using the pH scale.
Hydronium ions in the soil are responsible, but we gardeners don’t need to be concerned about that.
On a scale from 0 to 14, the pH of soil can be calculated. Neutrality is defined as a score of 7 out of 10. It is considered acidic to have an acidity level of less than 7. Alkaline is defined as having a pH of 7 or higher.
Soil with a pH between 5.5 and 7 is ideal for most garden veggies. Kale thrives in a pH range of 6 to 7.5.
Water requirements
A lot of water is needed during the growing season for Kale.
In the absence of recent rain, it’s prudent to water your kale plants.
One to one and a half inches of water per week is suggested for kale.
When watering your plants, you don’t need to physically count the amount of water you use. It’s important to strike a balance between rehydrating the plant and drowning it.
Your kale will thrive if the soil is moist for at least one inch below the earth’s surface. After the first frost, kale’s water needs are reduced.
Sun/Shade
Kale does best in full sun, however this is not always the case. Kale plants need at least six hours of direct sunlight each day. The yield of kale will be reduced if you grow it in conditions with less sunshine than six hours a day.
Temperature & frost-tolerance
Among the many uses for kale, this is a standout. Kale actually benefits from a light frost.
Kale will still be around when the rest of your garden has faded away.
Kale can withstand temperatures as low as 10 degrees Fahrenheit. Wow, that’s a real tough guy!
Even if they won’t grow any further, the plants will keep the leaves that are already on them.
Xem thêm : How To Grow Ginseng Hydroponically? Comprehensive Guide
To avoid losing any leaves that are on the ground during the first frost, it is best to begin harvesting at the base of the plant.
Plant Spacing
Kale plants thrive in rows that are 12-18 inches apart.
Intercropping (filling in the gaps between plants) with spinach, chard, or onions is a great way to add interest to your garden.
Kale is a fantastic vegetable to grow in pots in a sunny place if you don’t have much garden space.
Prepping the garden bed
It is impossible to overstate the importance of proper garden bed preparation.
For the following year’s garden, October is the ideal time to begin planning.
Do this, and you’ll reap the benefits of a healthier garden that will demand less effort in the long run, as well as a more delightful summertime experience.
Soil tests
Get a soil test kit or visit your local agricultural extension office in the fall to get an accurate reading.
There are a wide number of soil test kits available, each with a different level of complexity and price. pH is the only parameter that can be measured by many test kits. Finding a pH and soil macronutrient test kit comes highly recommended by me (NPK).
Take a soil sample to your local extension office, and they’ll arrange for it to be sent to a lab. This is another alternative.
Amending the soil
Adding material to your plant beds to rectify any deficiencies detected in the results of your soil test is the next step.
Listed below are some common garden macronutrient amendments:
Try adding: if your soil is nitrogen-deficient:
- Meal made from human blood
- Emulsion of fish
- Well-rotted manure
Try adding: if your soil is deficient in phosphorous
- Bonemeal
- Phosphate rock
- Superphosphate
Add potassium to your soil if it’s low:
- Greensand
- Seaweed
- Ash from wood
You may dramatically improve the health of your garden simply by adjusting the pH level.
Sweetening the soil (raising the pH) can be achieved by adding:
- Cementary Limestone
- Rock made of dolomite
- Ash wood
Soil pH can be lowered by adding:
- Organic matter with an acidic content (pine needles, peat moss, leaf mold)
- Sawdust that has been sitting around for a while.
- Sulfur that can be used in farming
Mulch
Soil testing and amendments should have been completed by now, in an ideal world, by the end of the fall season. “Putting the garden to sleep” is currently in full swing.
A thick layer of mulch is all that is needed to ensure that your soil retains all of the nutrients that you’ve worked so hard to cultivate.
I prefer to mulch my vegetable beds with a thick layer of composted leaves, although straw or well-rotted hay are also good options.
All you’ll have to do in the spring is remove the mulch and plant your lovely kale plants.
Kale Varieties
Now that you’ve read this guide, you’re well-equipped to grow some fantastic kale in your own backyard.
So, what kind of kale should you plant in your backyard?
Kale comes in a plethora of types, each with their own unique set of benefits. All kale types have the same nutritional profile and growing requirements.
Heirloom vs. hybrid
Heirloom seeds are open-pollinated seeds that produce plants that are exactly like the parent kind. They have been saved and handed down through the ages in this manner. The seeds of heirloom varieties can be saved by home gardeners and replanted the following year.
Seeds that have been purposely cultivated to combine the best features of multiple plant kinds have been called hybrids. In order to generate plants that are different from the parent plant, you must save the seeds of the parent plant. In other words, be on your guard!
Vegetables grown from heirloom seeds tend to be more flavorful and nutritious.
Certain diseases are better tolerated by hybrid plants because of their innate resistance.
Most Popular Kale Varieties
Several Kinds of Kale
Details
Kale, Redbor (also known as Russian Kale)
Heirloom, deep purple/red hue, curved leaves, moderate flavor
Kale from Siberia
Heirloom cultivar with a pale green color and excellent cold hardiness.
Kale with a reddish tinge from the Russian region
Heirloom variety with pale green leaves and purple stems, delicate leaves and stems
Kale known as Lacinato/Dinosaur Kale is available.
Italian cultivar with dark green leaves and a moderate flavor that can withstand heat and cold heirloom
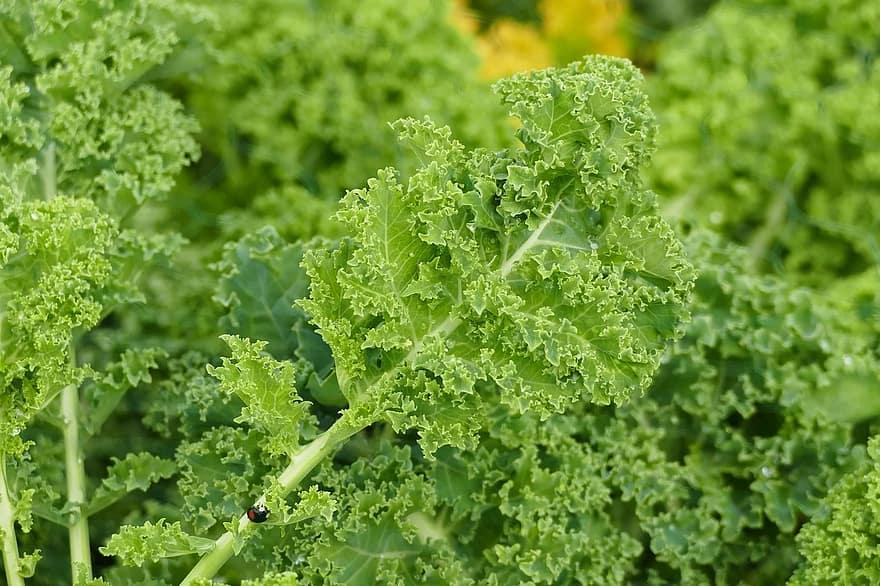
Kale with a wavy texture
Wavy leaves and woody stems characterize the most common type of kale.
The Winterbor Kale
It’s a heritage cultivar that’s sturdy enough to grow in containers and produces an abundance that lasts for months.
Growing kale from seed
Both direct seeding into the soil and transplanting kale from flats can be used to cultivate this food. Varied gardeners have different motivations for deciding on the method they use to grow their crops.
Direct seeding
Xem thêm : How To Get Blue Roses? Comprehensive Guide
When you put your seeds straight into your garden bed, you’re using this technique.
Plants can be started more quickly and with less waste if you use this technique instead of using pots.
For a summer crop, spread kale seed in the garden after the last spring frost; for an autumn crop, sow it in the late summer.
Plant seeds 14-12 inch deep, with a spacing of 12-16 inches between each one.
You’ll need these things if you decide to direct seed:
- Seed
- Ruler
- Composting rake
- Sticks to use as markers for your rows
- Using a hose or sprinkler
- Biological Waste Management (optional)
Prior to planting your seed, remove all mulch from the row. Using a rake, level the ground. If you plan on planting two rows of plants 12-16 inches apart, you’ll need a large enough area.
Row marking and seeding can be accomplished in a variety of ways.
Here’s a one: Make a hole about 14-12 inches deep in the dirt where you want to start planting seed. Make a second hole the same depth as the first one, measuring 12-16 inches. Your row should be completed in this manner. Use a stick to indicate the beginning and finish of each row.
Afterwards, go back and fill in all of your holes with seed. There are countless things that can go wrong with seeds and seedlings that prevent them from developing into healthy plants, so I always plant three seeds each hole.
Before I cover the seeds with soil, I make sure all of my holes are full of seeds. Using garden soil or compost as a seed cover is a viable option.
Direct seeding: watering
Using a hose or watering can, thoroughly wet the seeds after they have been planted and covered with soil. Beating your chest with your hands while shouting, “Kale, oh yeah!” You can’t go wrong with kale.” I’m kidding, but it never hurts to try!
If it’s not raining, water your seeds every day. Allowing the soil to dry out between waterings is quite acceptable. Part of what aids in the seed covering cracking is the wet-to-dry-and-wet cycle. Germination should be seen in five to seven days if all goes according to plan. When seedlings have two genuine leaves, thin them to one plant per hole.
Planting seeds in pots
Before putting the seeds in the garden, another option is to grow them in pots. More control over water, temperature, sun, and other variables is possible with this technique. Start kale seed early if you have access to an area of your home that gets plenty of sunlight or if you use grow lights, or if you have a greenhouse.
Planting seeds in pots calls for the following supplies:
- Planting in small pots (approximately 2 inches in diameter)
- Soil mixture for planting seeds
- Seeds
- Ruler
- Pots should be placed in a bright, sunny area.
- Sticks of Popsicles
- Ink that lasts forever
- Water
Keep at least a 14-inch space at the top of the container while filling it with soil. Make an indent with your finger at a depth of 14-12″ inches below the surface of the dirt. Fill each of your holes with around three seeds. A layer of dirt and water is all that is needed to make this work. Using a permanent pen and popsicle sticks, label each container with the plant variety and date.
Put your pots in the sunlit area you’ve chosen for them. Keep your potted plants well-watered by giving them a daily drink.
Your seedlings will be ready to be transplanted into the garden when they have at least two true leaves and all threats of frost have gone. So that seedlings aren’t stressed by direct sunlight, this should be done on an overcast day or close to sunset.
You can also wait a few days before transplanting your seedlings outside to harden them off.
Plant seedlings in rows 12-16′′ apart in the prepared bed. Seedlings need to be well-watered at all times.
General Care During the Garden Season
When it comes to cultivating kale, it isn’t difficult. You’ll be able to harvest kale for months with only a little bit of effort.
Watering, Weeding, Mulching, Feeding
It’s best to keep the soil around the roots of your kale plants moist to a depth of around one inch. Too much watering is detrimental for plants because it weakens their root systems, making them more vulnerable to disease and pests.
Weeding can begin as soon as your seedlings reach a height of a few inches. Running a hoe through the rows is less likely to harm the plants at this size.
Give your plants a nice soak and then pile on the mulch once you’ve weeded. Leaves or untreated straw are both acceptable substitutes.
Partially composted leaves are a favorite of mine. Find out where your town’s leaves are disposed of in the fall by contacting your town hall. Leaves may be picked up for free and used in your garden as a fantastic resource.
Mulch should never come in contact with the roots of your kale plants.
Weeds will be considerably suppressed, and moisture will be kept in the soil.
Every month during the growing season, a well-balanced fertilizer can be applied to the plants. You may feed your plants a variety of methods, including fish emulsion, which I prefer. If you buy fertilizer, read the instructions on the packaging.
Compost can be applied around the base of your kale plants and watered in well once a month if you produce your own. The closer you get to first frost in the fall, the less fertilizer you should apply.
How to harvest kale
Kale can be harvested in two ways. Harvest individual leaves as they get ripe, or complete heads after they have grown. Both methods work. Single leaves are the most typical method of harvesting. From the bottom up, harvest.
When you get your first frost, your plants will stop growing, but the leaves they already have will remain in tact throughout the winter.
Frozen leaves will rot if they are in contact with the ground.
Use row covers or huge buckets to protect your plants and lengthen the harvest if you live in a chilly region.
Common kale pests
A few of the most common kale pests you may come across include:
- loopers of the cabbage
- bugs, fleas
- honeybees and harlequin beetles
- aphids (aphids, aphids…)
For cabbage loopers and harlequin beetles, you can remove them from your plants by hand.
Flea bugs and aphids cannot do this. You can use row covers to protect your plants from both early and late frosts, as well as from pests.
Pest control can also make use of a variety of organic sprays and preparations.
Saving kale seeds
Semen will be produced in the second year of kale growth because it is a biennial.
Allow your garden plants to survive the winter.
When the seed pods have formed and dried, harvest the pods or the stems with the seed pods attached to them, according on your preference. When you’re ready to harvest the seeds, simply place the seed pods and stems in a plastic bag and shake it vigorously to release the seeds.
Related Questions
Is kale a perennial?
The kale plant is a biennial. Biennial plants spend the first year of their lives putting down roots and developing leaves. They blossom and set seed in their second year before dying. Seeds for several perennial kale variants are available for purchase from plant breeders working on the project.
Can I grow kale from cuttings?
Cuttings can be taken from kale by snipping off a small, healthy leaf right above the leaf node and replanting it. Place the stem in a container of prepared soil and cut it at a 45° angle. Keep the plant well-watered and in indirect sunlight for the first three weeks until the roots begin to form.
How do you grow kale indoors?
It is possible to produce kale indoors if you can imitate the light and temperature needs of an outdoor environment. Light and heat can be provided by south-facing windows or grow lights, as well as appropriate warmth. Water levels must be carefully checked and maintained.
Final Thoughts on How to Grow Kale in a Hobby Greenhouse
Now that you’ve learned how to grow kale in a greenhouse, the next step is to gather your supplies and get started. In any climate, you can grow kale and other sorts of crops, no matter where you live in the United States. To get the most out of your kale seedlings, follow these guidelines.
Nguồn: https://iatsabbioneta.org
Danh mục: Garden


