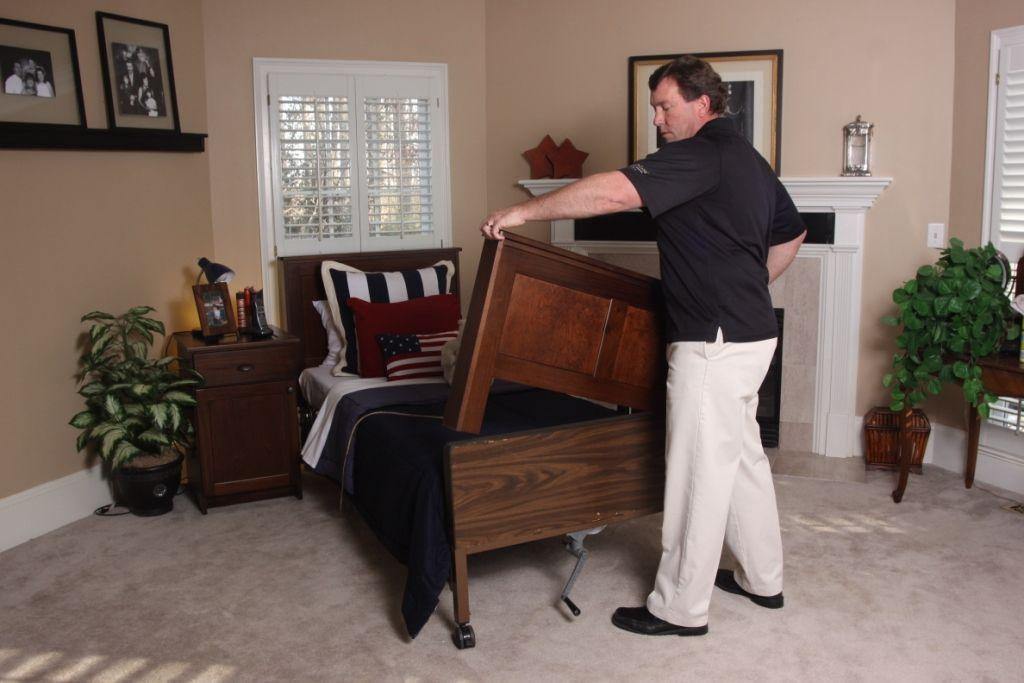
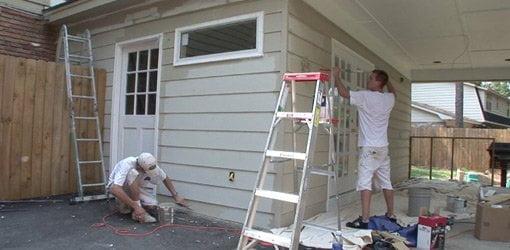
It is possible to increase the size of a house by enclosing a garage and converting it into an additional room. Carports can add great value to a home if they have ducting run to them and the correct number of wall sockets installed, and provided they are constructed in accordance with local building codes.
The Framing of a Partially-Framed Wall
Bạn đang xem: How To Enclose A Carport To Make A Room? Easy Step-by-step Guide
THINGS YOU WILL NEED
- The aforementioned tape measure
- 2 x 4-inch boards
- Plywood
- Sheetrock
- Hammer
- Cement
- The preferred type of flooring
- The choosing of exterior wall covering (siding, stucco)
- Make sure the carport’s floor is sanitized. Build a form of 2 by 4-inch planks to hold the concrete in each location that is not butted up against a cement pad. To keep the shape in place, place stakes outside of it. To ensure that the cement floor is level with the rest of the house’s flooring, get a cement dealer to come in and pour it. Make sure you follow the manufacturer’s recommendations for curing the cement.
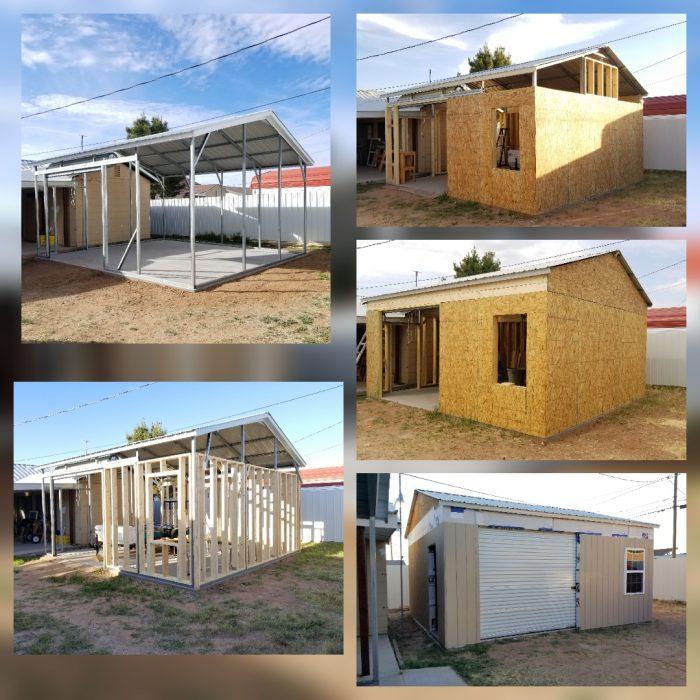
- The carport’s dimensions are its width, length, and height. Build the walls’ frameworks first. 2 by 4-inch planks should be used to build the walls. A 16-inch gap between the wall studs is ideal. More than one frame is required for lengthy walls, which are constructed from 2 by 4-inch boards fastened together at the top and bottom. Every three feet, place a chair between the studs.
- Lag bolts should be used to secure the frames to the cement floor. If necessary, use 2 by 4-inch boards to reinforce the walls. Long screws should be used to fasten the frame’s top to the car port’s existing roof.
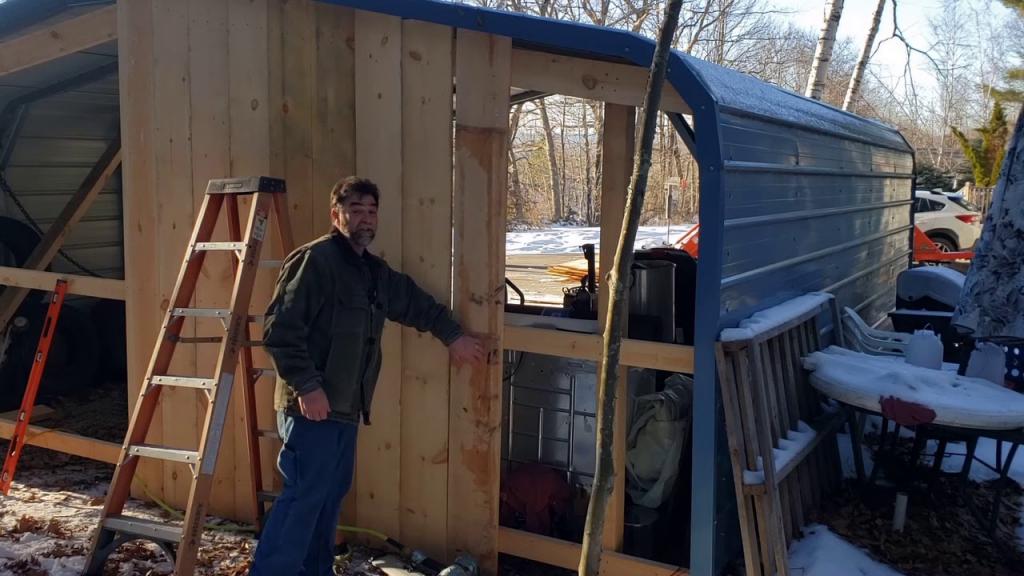
- The exterior walls should be covered with plywood and then a siding or stucco of your choice. Install the windows if you made the frame to include them.
- The outlets must be wired if additional outlets are being installed. If you live in a county or state where an electrician is required, you may need to employ one. Do-it-yourselfers in most states are required to have an electrician sign off on their work. Install insulation between the studs.
- Glue drywall to the insides of the frame sections. Do the drywall a color scheme. Finish by laying down your preferred type of flooring (carpeting, tiling, wood floors).
The Drip Cap
- It is possible to increase the size of a house by enclosing a garage and converting it into an additional room.
- Lag bolts should be used to secure the frames to the cement floor.
- If necessary, use 2 by 4-inch boards to reinforce the walls.
- Install insulation between the studs.
- Do the drywall a color scheme.
Not Cleaning the Floor
When enclosing a carport, many people make the mistake of neglecting to clean the floor. This must be completed prior to beginning work. Having a dirty floor will at the very least delay the project, if not cause further issues.
Read on to find out more. Our daily video of the day
Not Building a Concrete Pad
In order to build a concrete pad for your carport, you will need to excavate the space and excavate it yourself. Your building’s base will be made of concrete. For any building project to run well, the concrete pad needs to be absolutely level.
Once the area has been excavated, wooden planks should be used to build a frame that will hold the concrete in place while it dries. Stakes driven into the ground can then be used to keep it in place.
It is important to evaluate the thickness of your concrete surface if you plan to build on top of it. If it isn’t, you’ll probably have to dig it up.
Not Using Marine Grade Plywood
Exterior plywood must be utilized to cover the exterior of the construction. In order to avoid warping or damage due to damp or moist circumstances, this should be done Use only exterior-grade plywood when building a structure. As soon as it begins to rain or become damp, this will begin to flex and delaminate.
Before you can hang your chosen wall covering, you’ll need to secure the plywood to the frame. If you’re utilizing siding, plywood will add added strength and durability to the building.
Not Adding Wiring Before Drywall
Before you hang the drywall inside the new building, make sure all the electrical outlets are connected. That way, the electrical outlets are flush with the wall and appear to be of the highest quality. The time to plan and install these outlets while the walls are still bare is ideal.
When enclosing a carport, the most common mistake individuals make is not planning adequately. To ensure that you’re receiving everything and that you can complete the job in a logical order, you should have an overarching picture and strategy in place. Attempting to guess and steer your way through this type of undertaking is futile. You must put in a lot of time and effort in advance, as accurate measurements are essential.
Fluorescent Garage Lighting: 3 Wiring Tips
Fluorescent fixture wiring is essential while working on garage lighting, whether you’re replacing an old ballast or installing a new fixture.
1. Turn off Electrical Power
When the power is on, never work on electrical wires. Even the most skilled experts are cautious about taking risks that could result in serious injury or even death. Work on a garage lighting fixture with the power disconnected before you begin. Unplug the light or turn off the corresponding circuit breaker in your home’s electrical panel.
2. Connecting Wires
The red wire from your circuit breaker box is connected to the ballast of the fluorescent light fixture when connecting the two. The fixture tube holder is connected to the ballast through a second red wire. Connect the second tube holder to the black wire coming from the breaker box. At the end of each of these wires, you’ll need to bare the wire ends approximately a half-inch.
3. Fluorescent Wire Colors
Color-coded wire sheaths are almost usually used to help you connect the correct wires to the correct connections in fluorescent wiring.
Steps In Enclosing A Carport To Make A Room
Do you feel the desire to add more square footage to your house?
Xem thêm : How To Clean A Couch Pillow? Complete Step-by-Step Guide
Then, I’ll tell you exactly what to do. How do you turn a garage into a living space?
Enclosing a carport requires consideration of the following:
Step #1. Prepare the carport
Your carport’s floor must be thoroughly cleaned before you can begin any other work in it.
Take a closer look at the part that isn’t encased in cement.
Finally, use two four-inch boards to help hold the concrete down.
I’m confident that this will help you build a more solid foundation.
Stakes from the exterior of the form can be used to hold it in place more effectively.
If you don’t have a lot of building knowledge, you might want to consider hiring a cement dealer to do the pouring for you.
If you don’t want uneven flooring in your new room, don’t attempt this task if you’re not skilled enough.
Step #2. Get the measurement of the whole carport
The second stage entails figuring out the dimensions of your carport.
After that, a two-by-four-inch board can be used to construct the wall frames.
You should keep in mind that sixteen-inch spacing between wall studs is required.
Experts recommend that you do so, therefore you must do so as well.
If your wall is particularly lengthy, for example, you would almost certainly require two or three distinct frames.
The two by four-inch planks must be nailed across the top and bottom to hold it together.
A chair should be placed between the studs every three feet as a marker.
Step #3. Bolt the frames
The next step is to fasten these frames using lag bolts after collecting the correct measurements.
To secure the top structure to the carport’s roof, you’ll need long screws.
Xem thêm : How To Make A Blanket Fort Over Your Bed? Comprehensive Guide
These bolts will act as a backup lock, allowing the space to endure the ravages of time and the elements.
Step #4. Cover the walls up
When it comes to the walls, plywood should be your first choice of material.
You can then add another material, such as siding, on top of it.
This is the finest place to add windows if you designed them into the walls in the first place.
Make sure that each window is properly secured so that you don’t have to keep re-doing the same thing.
Step #5. Wire the outlets
I’m sure you want electricity in your room, am I right?
This is the sixth step you must complete, and you can even add additional outlets to your system if you so desire (depending on your preference).
Either hire an electrician or learn how to install the wiring yourself if you’re confident enough.
Having an electrician complete the work is mandatory in several states.
So, to avoid a ruckus, check to see if you, an electrician, are permitted entry into your country.
Remember to add insulation between the studs so that your home will be warm and comfortable in the winter.
Step #6. Do finishings and touch-ups
After you’ve completed all of the outside work and wiring, you may as well decorate the inside of the space with paint or wallpaper.
You can use carpets, tiles, or wood flooring to cover up the cement on the floor (which mainly depends on your taste).
The following measures will make your room appear more attractive and warm when you’re staying in.
Conclusion
So, how do you turn a garage into a living space?
To summarize, an unused carport can be converted into a useful living space.
A more solid foundation for your upcoming space might be provided by enhancing the roof system.
Nguồn: https://iatsabbioneta.org
Danh mục: Blog