Green peppers can be grown right in the kitchen with the help of potted plants. In our container garden at Pepper Geek, we’re always adding to our collection. Every year, potted pepper plants transform our porch into a mini-forest.
- How To Use Grow Light In A Small Greenhouse? Comprehensive Guide
- How To Get Cactus To Bloom? Comprehensive Guide
- How To Propagate Creeping Phlox? Complete Guide for Beginners
- How To Use Household Items For Self-Watering Mini Greenhouses? Comprehensive Guide
- How To Remove Aphids From Kale? Helpful Tips To Remember
A new hobby like growing your own peppers can be a lot of fun. As a kid, it was a revelation to me that I could preserve the seeds from a pepper purchased at the shop and grow them into whole plants in my garden. It’s fascinating, entertaining, and reasonably priced, all at the same time.
Bạn đang xem: How Many Bell Peppers Per Plant? All Questions Answered!
Growing bell peppers in pots is easy when you follow the steps outlined here. Banana, jalapeño, serrano, and a slew of other peppers are all covered in this handbook. But if you want to plant super-spicy types, you should start here.
Growing Bell Peppers in Pots (Quick Steps)
You can learn how to produce bell peppers in pots quickly and easily right here. We’ll go over each step in greater depth later on in the article, but first, here’s a quick rundown of how to grow peppers in a container.
Grow bell peppers in pots with this guide
- Get your hands on seeds and supplies. You’ll need to buy bell pepper seeds as well as a pot, dirt, fertilizer, and stakes. On the first day, it’s best to have all the necessary materials.
- Sprout seeds in a warm, well-ventilated area. Indoors, use a seed starter mix that is light and fluffy to germinate pepper seeds. To get the seeds to sprout, keep them wet and warm.
- When seeds begin to sprout, give them some light. For seedlings, we recommend LED grow lights, but if you choose not to use them, a sunny window will do.
- Start the process of fertilizing the soil. To speed up the growth of your seedlings, start with a mild fertilizer feeding. Bell peppers will be ready to withstand full-strength after 3-4 weeks of growing. Here are a few suggestions for organic fertilizers.
- After a few weeks in a smaller pot, move to a larger one.
- Early flower buds should be removed. Even though the plants are still indoors, they may begin to bloom as they mature. After the plants have been in their final planting position for 2-3 weeks, we recommend removing any early blooms that have appeared on the plants.
- Plants need to be hardened off. When the risk of frost is eliminated and overnight temperatures consistently rise above 55°F, your bell pepper plants are ready to be moved outside. Begin gradually exposing your pets to the elements 2-4 weeks before taking them outside.
- Consistently hydrate your body with water. If you overwater your peppers, you’ll kill them! Ensure that the soil is moist but never soggy, and make sure that excess water is allowed to drain away from the roots of the plants.
- As the plants produce peppers, make adjustments to the nutrients. In order to produce a large number of peppers, bell peppers require less nitrogen and more phosphorus, potassium, and calcium as plants begin to fruit. Visit this page to learn more about boosting yields.
- Harvest peppers as they are mature. When a bell pepper has achieved its full size, it is ready to be picked. A gorgeous red hue can be achieved by picking them while they are still green. When they’re ripe, they’re sweeter and more nutritious!
Let’s dive into the nitty-gritty of growing bell peppers in pots now that the basics have been covered!
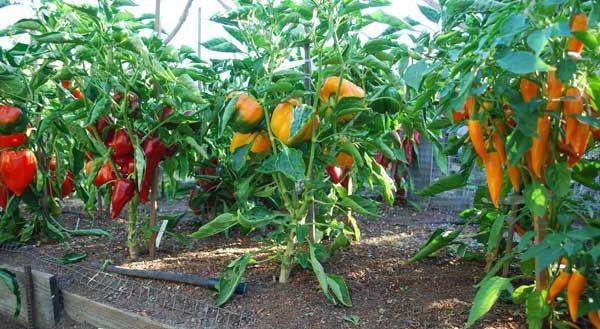
Growing Peppers in Pots vs. Ground
To begin, I’d like to discuss the advantages and disadvantages of growing peppers in containers. In addition to our in-ground garden, we also cultivate peppers in pots.
Benefits
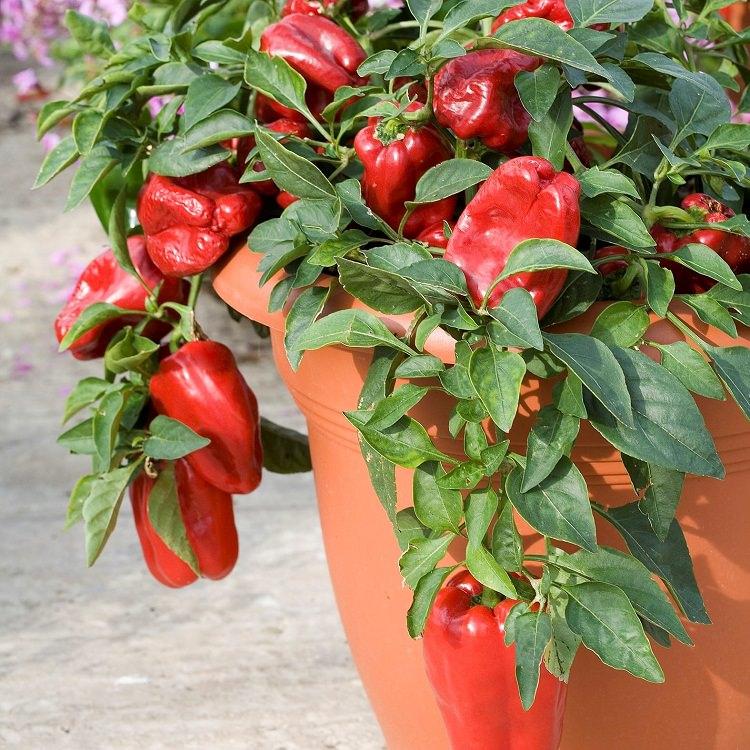
Improved portability, less weeding, and a more pleasing visual appearance are all advantages of growing in pots. If you have a sunny balcony, you may be able to grow bell peppers in a container!
There are also a wide variety of attractive pots to add some class to your container plants. In addition, there will be no weeding all season long because of the reduced size!
Drawbacks
In addition to requiring more regular watering and a larger footprint, growing peppers in pots also results in lower yields. Even though potted plants may be moved around easily, the smaller soil volume usually means more watering and lower pepper yields. As a result, we underestimate the size of mature pepper plants.
We always recommend starting with one or two potted pepper plants because the cost of entry is so inexpensive. Be realistic about how much space you have to devote to the plants so that you don’t end up with an overcrowded balcony.
Supplies
You’ll need a few things before you can start growing bell peppers in pots. Everything you’ll need to get started can be found here.
Find out what you’ll need to cultivate peppers in this guide.
Seed Varieties
The first step in producing bell peppers from seed is to choose the kinds you want to try. There are a wide variety of bell peppers to choose from.
Pepper seeds are available right here.
There is no need for fertilization if you want to buy pre-grown plants from a local garden center.
Containers (Size and Type)
A hefty one, to be sure. Bell peppers can be grown in what kind of containers? A container with at least 3 gallons of capacity is recommended. The larger the pepper, the better.
You’ll get better yields with 5-10 gallons of capacity if you have the room. Choose a container that is appropriate for the location where you intend to place the plant. However, smaller pots will not yield as many peppers as larger ones.
Every year, we repurpose our bright Saturn Bloem planter pots. Get your hands on some here.
If you’re recycling an old pot, be sure to fully clean it before using it again. If they contained plants that were infected with disease or bacteria, these organisms may spread to the new soil and plants. Here, you may learn how to use bleach in a safe manner.
For seed beginning, you’ll need a large pot and some seed trays. At any local nursery or home improvement store, you’ll find these items. They’re inexpensive and commonly sold in 6-cell configurations.
Bottom watering indoor young plants is made simple with the help of these strong pots.
Grow Lights
Bell pepper seedlings need a lot of sunlight to get off to a good start. Consider an indoor grow light if you’re starting from seed.
This is the light we prefer to use (see it on Amazon).
The best grow lights for peppers may also be found here. It’s possible to find long-lasting, low-cost choices.
Soil
You can use a seed-starter soil to get your garden started if you’re starting from scratch. Nutrients are absent from these soil combinations. The seedlings should be given a modest fertilization program as soon as they sprout in seed starter soil.
Choose a well-rounded soil from your local nursery if you are planting immediately outside (starter plants, etc.). There is no need to go overboard.
This is a simple process, so don’t overthink it. Potted pepper plants can be grown with MiracleGro, FoxFarm, or Espoma. Throughout the season, we will be fertilizing the bell pepper plants in order to ensure that they have everything they need to grow.
Fertilizer
Fertilizer is the final vital component. We’ve written an article because we get a lot of inquiries regarding the best fertilizers for pepper plants.
We recommend FoxFarm’s Fertilizer Trio pack on Amazon as a starting point.
Using these items is a breeze thanks to their easy-to-follow directions and painless fertilization process.
Planting Bell Pepper Seeds
The first thing you need to do is plant your bell pepper seeds once you’ve gathered all of your materials. Soil preparation is essential before planting any seeds.
When To Plant Bell Pepper Seeds Indoors
Knowing when to plant bell pepper seeds is the first step. This will all depend on where you fall on the hardiness scale. To find out the best time to grow peppers inside, check out our guide on when to plant peppers.
Basically, 6-8 weeks before the final likelihood of frost in your area, start indoor bell pepper seedlings. Our final frost date in Zone 6b is late May, thus we start our pepper seeds in the middle of March.
Your last frost date can be found by using Almanac’s helpful feature. The last likelihood of frost must be determined for regions with winters. Planting your seeds indoors will depend on this information.
How To Plant Bell Pepper Seeds
You can begin preparing your seed trays once the planting date has arrived. Germination is more likely if you follow a few simple steps.
The steps are as follows:
Xem thêm : How To Build A Marijuana Greenhouse? Where to Grow Marijuana?
Soak the soil before planting. It’s important to moisten and fully combine the seed starter mix soil before planting. If you squeeze the soil, it should stick together, but it shouldn’t drip water when you do so. As the seedlings grow, the soil is better able to absorb water because of this.
Soil should be inserted into the seed cells. Fill each seed cell with soil and compact it after it has been wet. Too much pressure on the roots can hinder their growth.
Seeds should be sown 1/4-inch deep. Each cell should have a quarter-inch layer of bell pepper seeds. For safety’s sake, we normally sow two or three seeds each cell. The weaker-looking plants can be removed once the seedlings have sprouted, leaving one in each cell.
Apply a small amount of water to the ground. Using a watering can or a spray bottle, water the seeds once they’ve been planted. Avoid moving the seeds around in the soil.
Fan yourself every day to keep yourself from overheating. All that’s needed is to maintain a warm (75-85°F optimal) and humid environment for the seeds. A humidity dome is included with the seed tray that we utilize. Until the seedlings appear, keep the lid open to allow air to reach the soil (3-7 days).
Spritz the soil’s surface to keep the seedlings moist without using a humidity dome. The bottom of the plant may need to be watered if the air is really dry.
Early Bell Pepper Plant Care
The long-term survival of your bell pepper plants depends on how well you take care of them when they are young. This calls for supplying enough amounts of light, food, and water to the area.
Lighting For Seedlings
Removing the humidity dome and turning on your grow lamp are the next steps once the seeds have sprouted. Grow lights aren’t necessary if the seedlings can get plenty of sunlight. A sunny window isn’t ideal (your plants may grow tall and lanky), but it’ll do for the time being!
Grow lights should be used to provide 12-15 hours of daily light and 9-12 hours of darkness for plants. To avoid curling leaves, keep your LED light 12-15 inches away from the foliage.
Fertilizing Seedlings
As soon as the seeds have sprouted, reduce the recommended strength of fertilizer by half and begin feeding the plants. Due to their diminutive size, the plants require fewer nutrients than their larger counterparts. At this stage, we use FoxFarm’s Grow Big fertilizer at half strength.
Watering Seedlings
When the first half-inch of soil is dry, water. Make sure the seed cells don’t fully dry up. A seed tray can be watered by pouring water beneath each seed cell. This method is called “bottom watering.” The perforations in the bottom will soak up water until the surface is dampened..
In order to avoid overwatering, do not remove excess water from the tray until you see that the surface has been wetted.
Transplanting Bell Peppers
At around 3-4 inches tall, your seedlings are ready to be moved to larger pots. Typically, this takes about two weeks. As an intermediate step before planting in a final container, these 3.5-inch pots are ideal.
Your final pots, if you want, can be transplanted directly from the smaller pots. As a rule, we propose a gradual increase in difficulty. By doing so, the plants appear to grow more quickly and robustly.
Steps for a successful transplant:
Preparation of potting soil is required. Use just enough water to wet the potting soil before planting. Make sure everything is well combined. Before planting, we prefer to add bone meal and epsom salt to the soil (especially if you are going directly into the full-sized pot).
Add soil to the new pots you’ve just purchased. Then, fill each pot with soil and gently pack it down. Labeling the new pots now will help you stay organized if you’re planting a variety of plants.
Each pot should have a little hole dug in it. Dig a hole large enough to accommodate the seedling’s root ball with your hands or a spoon.
The seedling should be inserted into the ground. Gently remove the seedling from the seed cell, including the dirt and all. To re-pot a plant, simply place the whole thing in the pot’s hole. Pack it down with earth after it’s been covered. Plants should be watered right afterwards and placed in a dark, well-ventilated area.
After transplanting, your plants may experience a slowdown in growth. After a week or so, growth should begin to take up again. The plants of bell peppers grow rapidly, so expect them to flourish shortly.
You should switch to full-strength fertilizer at this stage and use it as directed. When the transplanted plants are ready to be moved outside, they should return to the grow lights.
Moving Bell Peppers Outdoors
You should start moving your bell pepper plants outside as soon as Winter is over. Plant hardening off is the term for this procedure.
Learn how to properly harden off your peppers.
Direct sunlight can cause sunscald and heat stress on the plants. It takes time for plants to adapt to the sun’s rays because they are considerably more intense than grow lights.
The following is a general timetable for making the change:
- First week: 20 minutes of direct sunshine or one hour in partial shade.
- 1 hour of sunlight or 3-4 hours of darkness during the second week
- 3rd week: 1.5-2 hours of sunlight, or full day in shade.
- In the fourth week, permanently move the plant outside.
There is less time required for the move to a balcony that just receives morning solar light. It is important to be cautious when transitioning from indoors to the full sun.
Keep an eye out for sunburn or drooping leaves on your plants. Another advantage of growing peppers in pots is that you may bring them inside if necessary.
If the evening temperature is above 50 degrees Fahrenheit, bell peppers will be alright. Temperatures between 75 and 80 degrees Fahrenheit are ideal, but plants can withstand considerably higher temperatures.
Cover the plants or bring the pots indoors if the temperature is expected to drop below 40°F at night.
In chilly weather, you can cover your plants with a bed sheet or blanket. Just be sure to secure the cover with stakes or other supports so that the foliage is not crushed.
Caring For Bell Pepper Plants in Pots
Following a successful indoor-to-outdoor switch, you’ll need patience as your bell peppers grow. These are some of the most important things to keep in mind.
Plucking Early Flower Buds
After relocating outside permanently, you should remove flower buds for the first 2-3 weeks. This shifts resources away from fruit production and toward root and foliar growth. The peppers can be allowed to grow and mature after this period.
More information on plucking early flower buds can be found here.
Staking
Helping bell peppers stand their ground can be beneficial because of their height. In your final pot, drive a solid stake into the ground towards the base of your main stem. Velcro can be used to secure the plant to the stake. Find out more about pepper staking here.
Sunlight
In full sun, all pepper plants will grow to their full potential. This equates to about 12 hours of daily exposure to direct sunlight.
Peppers are particularly susceptible to sunburn in the hot afternoon sun when exposed to direct sunlight. Providing shade between the hours of 3 and 4 p.m. can help avert potential problems. If feasible, place the pots near an object that provides shade.
Don’t worry if you don’t have a place with full sunlight. Even in the absence of direct sunlight, bell peppers can continue to produce fruit. Pepper plants will grow with their leaves always facing the sun if this is the case.
Fertilizer
You can’t obtain the best results from your potted bell pepper plants with the fertilizer included in the potting mix. It’s best to use FoxFarm’s Trio of fertilizers and to follow the recommended application schedule.
In the early stages of plant development, Grow Big is used to promote strong roots and a large number of healthy leaves. For good flower development, then switch to a product like Big Bloom or Tiger Bloom
Nitrogen is essential for leafy growth in the early stages of fertilization. For fruiting, fertilizer at a later stage should have less nitrogen and more phosphorus.
Watering
Overwatering is a common problem with bell pepper plants. Overfeeding is a common mistake made by novice gardeners.
Xem thêm : How To Root Camellias From Cuttings? Step-By-Step Process
This is critical: Peppers prefer dry circumstances to wet ones.
Allow the soil to dry out between waterings to avoid the myriad problems that are caused by overwatering. Make sure the first several inches of soil are dry by using your finger to dig a hole in the ground.
Bell Pepper Plant Problems
Sadly, things don’t always go as to plan. A few frequent problems with growing bell peppers in pots are listed below.
Curling Leaves
Curled leaves are by far the most common problem. This could be the result of a variety of factors, but you shouldn’t be alarmed.
If you have this problem, check out our post on curled pepper leaves.
Yellowing Leaves
Pepper leaves turning yellow is another prevalent problem. Again, this can be caused by a variety of reasons. Make sure you are fertilizing to avoid nutritional shortage, which is the most common.
The yellowing of pepper plant leaves is described in detail in this article.
Disease and Pests
Leaf spot, mosaic virus and verticillium wilt are all common illnesses on peppers. Aphids, spider mites, and thrips should be kept an eye out for as far as pests are concerned.
Our article on pepper plant diseases has detailed information on each disease.
Flowers Falling Off/No Peppers
In the event your bell peppers aren’t bearing fruit, there could be a number of causes.
Flowers can wither and die under extreme heat. Poor crop yields can also be caused by overwatering.
Pollination failure could also be to blame. Make sure your plant’s blossoms are accessible to pollinators (bees, insects). If you suspect insufficient pollination, you can manually transfer pollen between blooms by lightly brushing your finger across each one.
Leaves Falling Off
It’s normal for pepper leaves to fall off during harvest. You can learn more about leaf drop here if most of your leaves are dying and dropping off. Cold weather, nitrogen deficiency, illness, and over-watering are the most typical reasons.
When To Harvest Bell Peppers
Your bell peppers are flourishing because you took good care of them. But when should you remove the peppers from the vine?
To produce ripe bell peppers, most plants need 75 days after being put outside. Allow the peppers to turn red while they are still on the plant.
Bell peppers of all sorts will ultimately become a darker shade of red when they’re fully ripe, but it’s not necessary to let them do so. As soon as the green bell peppers reach their full size, they are ready to be plucked.
Will green bell peppers turn red after being picked?
Bell peppers will not turn red once taken from the plant unless the plant has already begun to change the color of the peppers. The peppers should be kept on the plant to ripen in order to have a full red color.
How Many Bell Peppers Per Plant?
So, how many peppers can you expect to get from each plant?? This will depend on the environment in which it is grown.
Bell pepper plants typically produce 5 to 10 full-sized peppers per plant under optimal conditions. Depending on the type of soil, the size of the growing container, the amount of sunlight, and other variables, this might vary greatly.
There will be more peppers per plant if you use smaller pepper kinds, but because the bells are so enormous, there will be less peppers on each plant.

Having a shorter growing season means that your harvests will be lower. Even when it’s getting cold outside, your peppers will continue to grow if you have a lengthy summer.
What To Do With Fresh Bell Peppers
You’ll want to put your peppers to good use as soon as you start harvesting them. It’s not uncommon for us to end up with many more peppers than we bargained for. Fresh bell peppers can be used in a variety of ways, some of which are listed below.
Preserving Bell Peppers
It is simple to preserve your bell peppers for use all year round. To store for later use, we normally freeze sweet peppers whole, in zip-top bags.
Red bell peppers can also be dehydrated to manufacture paprika at home.
Cooking With Bell Peppers
Many different cuisines use bell peppers as a staple ingredient. They can be used in any of the following recipes:
- Cooking in a wok or frying pan
- Salsa
- Guacamole
- Peppers that have been stuffed.
- Stews
- Peppers that have been smothered in a smo
Make sure to tell us how you use your fresh peppers in the comments section below!
How To Get The Most Bell Peppers Per Plant
- Provide Enough Natural Light. Your bell pepper plant needs at least six hours of direct sunlight each day to thrive. Do not rely on partial sunlight.
- Soils with good drainage. The soil in which your bell pepper is growing must be of a high quality. It must be a soil that is rich in nutrients and well-drained. It is best to avoid overwatering your plants, as this will cause them to decay.
Compressed Organic Garden and Plant Potting Soil
See if it’s cheaper on Amazon
- Use a Deep Fryer. If you’re going to plant your bell pepper in a pot, make sure it’s at least 10 inches deep so the roots have room to spread out and grow.
- Cooler Weather. It is best to grow bell peppers in a climate that is warm. Because the plant is striving to conserve energy for survival, it will not be able to produce a high yield in a cold climate. When it’s too hot, the flowers die before they’ve had a chance to develop fruit. Only temperatures between 50 and 90 degrees Fahrenheit are acceptable.
- Maintain a Balanced Dietary Plan. To produce an abundance of bell peppers, the plant necessitates the appropriate balance of nutrients. Nitrogen deficiency causes the plant to produce a lot of leaves, but few fruits. Potassium and phosphorus levels in your soil should be high. Add a teaspoon of fertilizer when you plant, and another when the plant starts to bloom, to achieve these nutrient levels in your soil. Increased yields are expected to result from this.
- Take Care of Your Plant’s Watering If your bell pepper does not receive enough water, it will produce weak blossoms that have a low chance of surviving. A plant may not yield any fruit if all of its fruits are poor quality or if it has no fruit at all. Keep your plants healthy and vigorous by watering them at least once a week.
- Keep an eye on your plants at all times. Pull the weeds that are surrounding your bell pepper plants if you are a gardener. Nutrients that should be feeding the pepper plant are sucked up by weeds.
Bell Pepper Plant Yield
Now that we know how to increase the number of bell peppers per plant, we can go ahead and implement the suggestions listed above and sit back and enjoy a plentiful crop.
With bell peppers, you can make all the recipes you’ve always wanted to try. You can have stuffed, sautéed, and caramelized bell peppers all in one dish.
Increase Yield: Pepper Plants Requirements
Grow pepper plants correctly if you want a higher output. Growing bell peppers in pots or in the garden, this is an important consideration. Bell pepper plants require at least six hours of direct sunlight each day. They prefer fertile, well-drained soil. When growing bell peppers in containers, make sure the pots are large enough for the plant’s root system to grow around 8 to 10 inches down.
Texas A&M AgriLife Extension recommends spacing pepper plants at least 1 1/2 feet apart, so keep this in mind when deciding how many plants to grow. Bell pepper yields range from five to ten peppers per plant on average; however, some types produce a few more or fewer peppers. It is recommended that a family of four have eight to 10 plants in their garden.
Temperature and Nutrients for Peppers
Other factors should be taken into account if your bell pepper production per plant is lower than normal. Temperature is a significant factor. Temperatures below 50 degrees Fahrenheit at night aren’t ideal for growing peppers, which are warm-season crops. Both of these variables can lead to less pepper production or perhaps no peppers being produced at all if temps increase above 90 degrees during the day, according to Michigan State University Extension.
The number of peppers a plant produces is also influenced by the nutrients in the soil. Adding too much nitrogen results in a lot of foliage but few or no peppers. Potassium and phosphorus promote fruit set in plants. So, using a teaspoon each while planting and when the plants are in bloom should result in an improved output per plant of bell peppers. Dissolve one teaspoon of Epsom salts in one gallon of water and use it once every month to keep your plants blooming.
Watering and Other Tips
Peppers will have poor blossoms if they don’t get enough water, which is true for all plants. This indicates that there is either a scarcity of fruit or fruit of poor quality. This recommendation is made by the University of Minnesota Extension. The roots of the plant will grow stronger and healthier as a result of regular deep watering. Consequently, you will have a larger supply of peppers. In addition to a larger pepper crop, frequent fruit harvesting will increase your overall fruit yield. Picking frequently encourages the plant to produce more fruit, so be ready to collect peppers as soon as they ripen.
It’s important to note that pepper plants require constant weeding in order to maximize harvest. The result is feeble plants that may not yield at all, or may even be ill and dead, when weeds take over. Because they compete for nutrients and sunlight, weeds deprive plants of their vitality. It is possible for vining weeds to suffocate a plant by pulling it down. You’ll get happy peppers that bear loads of fruit if you keep your garden weed-free.
A Word on Pollination
The importance of pollination is often ignored. In the absence of pollination, plants will not produce fruit. By growing flowers or herbs like oregano, chives, or sage, you can attract bees and other pollinating insects to your garden. You can also use a little paintbrush or cotton swab to pollinate the blossoms, if that doesn’t work. Simply brush the pollen inside each blossom as you travel from one to the next. In the afternoon, when pollen is at its greatest, this is the optimum time to accomplish this.
Use a separate pollination tool for each kind of peppers if you’re saving seed from year to year and need a different pollination method for each variety. As long as the peppers are fine, cross-pollination will yield peppers that are substantially distinct from the parent plant.
FAQs
How many peppers does it take to grow a plant?
What I’m trying to find is the exact number of peppers I’ll need to start a plant from seed. You can see it in the garden now, but I’d like to transplant it from a pot. I’m aware that peppers come in numerous varieties, but I’m curious as to how many peppers a plant will yield in a year.
Many factors influence how many peppers a pepper plant will produce. How effectively you develop and care for the plant will have an impact on how hot or mild the peppers taste. It’s preferable to look at a variety of peppers and see what you believe you’ll be able to acquire, rather than rely on a basic formula. When producing peppers, the most important thing to remember is to provide them with adequate water and nutrients.
Conclusion
Please let me know if you have any questions about growing bell peppers in pots! Search our site if you have additional queries about pepper growing.
Nguồn: https://iatsabbioneta.org
Danh mục: Garden


