The roots of the turmeric plant, Curcuma longa, a member of the Zingiberaceae family, are used in curries and other dishes. Rhizomes can be used fresh or boiled and dried before being pulverized into an orange-yellow powder that is often used as a coloring and flavoring agent in food.
- How To Remove Stains From Bed Sheets? What You’ll Need
- Where Is The Fuse In A Window Air Conditioner? How to Remove Fuses?
- Why Do I Need to Reset My Air Conditioner? How To Reset Air Conditioner?
- How To Fix A Broken Metal Bed Frame? Step-by-Step Tutorial
- How To Make Tab Top Curtains? Important Tips to Remember
Southern India
1st March to 30th April
Bạn đang xem: How Do You Farm Turmeric? All You Need To Know
Introduction:
- Curcuma Long is a perennial herbaceous plant of the ginger family, and turmeric is a member of this group (Zingiberaceae).
- There are numerous uses for it in food and cosmetics manufacturing, including as a spice, dye, and medication.
- Many religious ceremonies rely on its utilization.
- Turmeric is widely produced and exported from India.
Location:
- Andhra Pradesh, Tamil Nadu, Orissa, Karnataka, Wet Bengal, Gujarat, Meghalaya, Maharashtra, and Assam are among the key states where turmeric is grown.
- 35.0 percent of the land area and 47.0 percent of the turmeric output is occupied by Andhra Pradesh.
Season:
India has two growing seasons for turmeric: February-May and August-October.
Climate:
- Herb native to the tropics and subtropics, it is considered a tropical perennial.
- It can reach elevations of up to 1,500 meters above sea level.
- With an annual rainfall of at least 1500mm, this plant thrives.
- It necessitates a wet and warm environment.
- In either rainfed or irrigated circumstances, it is cultivated.
Soil Requirement:
- Turmeric production necessitates a rich, friable soil.
- It thrives in sandy or clayey loams with a greater sand content that are well drained.
- A good organic status and a pH range of 4.5-7.5 are required for this plant to thrive in a wide range of soils.
Land Preparation:
- In Turmeric Farming, tillage operations should be kept to a minimum.
- Beds should have a height of 15cm, a width of 1m, and an appropriate length in order to provide at least 50cm of space between them.
- Rhizomes should be planted in shallow pits on the top of the ridges, and ridges and furrows should be prepared for irrigated crops, if possible.
- Pests and disease-causing organisms can’t grow and multiply if beds are exposed to direct sunlight.
- Polythene sheets used for soil solarization should be stored carefully after the job is finished.
Spacing:
- Rows of 25cm by 30cm pits are dug out of the beds using a manual hoe and topped with soil or dry powdered animal dung.
- Furrows and ridges should have a 45-60cm spacing between plants, while planting distances should be 25cm.
Varieties:
(days)
In terms of percentage,
The percentage (percentage)
In percentage terms,
(percentage) of
Sowing Time & Seed Rate:
- A well-grown turmeric crop can be harvested in 7-9 months, depending on the variety and the time of seeding.
- When pre-monsoon rains begin to fall in April and March, farmers can begin planting crops.
- 2500 kg of rhizomes are needed to plant one hectare of turmeric.
Irrigation:
- According to the soil and climate conditions, turmeric has to be irrigated.
- Depending on the amount of rain, 15-25 irrigations are given to medium-heavy soils.
- Light grained red soils necessitate 35-40 irrigations.
Manure & Fertilizers:
- Most farmers eschew the use of toxic pesticides and chemicals in favor of employing animal manure and other natural fertilizers to produce the best crop possible.
- During the process of planting rhizomes in the pits, well rotting cow dung and farm compost should be applied at a rate of 2-3tonne/acre.
Harvesting:
- From January to April, the crops are harvested.
- There are early and medium varieties that mature in 8-9 months.
- The crop is ready to be harvested when the leaves turn yellow and begin to dry out.
- When the rhizomes reach maturity, they are harvested by hand or in spade clumps after the leaves have been chopped close to the ground and the soil has been thoroughly plowed.
- Rhizomes that are harvested and cleansed are gathered together.
- The mother and finger rhizomes are separated prior to curing.
Storage:
- Turmeric leaves are used to cover the rhizomes in the shade of trees or in ventilated sheds.
- A layer of earth and cow dung has been applied on the top of the pile.
- Store the seed rhizomes in sawdust pits.
- Wooden planks with one or two aeration holes can be used to cover it.
Yield:
- Between 8000 and 10,000 kilograms of pure crop per acre can be harvested.
- High yields of 12,000 kilograms per acre can be achieved with extensive manuring and extensive irrigation.
Climate and soil
It is possible to grow turmeric in a wide range of tropical climates, from sea level to more than 1500 m above sea level, with an annual rainfall of at least 1500 mm under either rainfed or irrigated circumstances. No matter what type of soil you choose, the best results will be achieved in well-drained sandy or clay loam soils that have a pH range of 4.5-7.5 and are in good organic condition.
Varieties
This country has a wide variety of cultivars that go by various names based on where they are grown. Duggirala, Tekurpeta, Sugandham, Amalpuram, Erode local, Alleppey, Moovattupuzha, and Lakadong are just a few of the well-known cultivars in this region. In the following table, you’ll find a list of the best turmeric types and their most notable characteristics.
Table 1: Improved turmeric varieties’ characteristics
Natural resource to be used for planting
Peruvannmuzhi – 673 528, the Kozhikode district of Kerala is home to the IISR Experimental Farm, which includes lots 1, 2, 3, 4, 5, 15 and 16.
Tamil Nadu Agricultural University, Coimbatore, 641 003 (Tamil Nadu), Department of Spices and Plantation Crops
University of Agriculture, Kasba Digraj -416 305 Maharashtra (Sl. no. 8).
Sl. no. 9: Gujarat Agricultural University, Jagudan-382 701, Gujarat, Spices Research Station.
Orissa University of Agriculture and Technology, Pottangi – 764 039, Orissa, has a High Altitude Research Station.
This is the Tirhut College of Agriculture at Rajendra Agricultural University, Dholi in Bihar.
Cultivation
Getting the land ready
Early monsoon rainfall have prepped the land. For a good tilth, roughly four deep ploughings are required. Laterite soils require 500 kg/ha of hydrated lime to be spread and carefully ploughed. As soon as the first pre-monsoon showers arrive, beds with a width of 1.0 m, a height of 15 cm, and a length of 50 cm are quickly constructed. Forming ridges and furrows can also be used to prepare the ground for planting.
Planting
As early as April or May, when pre-monsoon rainfall is received in Kerala and other West Coast districts, the crop can be grown.
a source of food
Rhizomes can be grown from whole or divided mother and finger rhizomes that are well established, healthy, and free of disease. A hand hoe is used to create 25cm x 30cm sized trenches on the beds. Compost or well-decomposed animal manure can be used to fill the pits, which are then covered with seed rhizomes and finally with dirt. Row spacing should be 45-60 cm and plant spacing should be 25 cm for best results in furrows and ridges. Turmeric requires a seed rate of 2,500 kg of rhizomes per hectare to be successfully planted.
Fertilizer application and manuring
Fertilizer is applied by disseminating, ploughing, or spreading over the beds and pits at the time of planting, using 30-40 t/ha of farmyard manure (FYM). Table 2 shows the split doses of fertilizer to be sprayed at 60 kilogram N, 50 kg P2O5 and 120 kg K2O per hectare. When planting, use zinc at a rate of 5 kg/ha and organic manures such oil cakes at a rate of 2 t/ha. If this is the case, a lower dose of FYM may be prescribed. The use of FYM, biofertilizer (Azospirillum), and half of the necessary amount of NPK with integrated application of coir compost (@ 2.5 t/ha) is also recommended.
Turmeric fertilization timetable (per ha)
Mulching
Green leaves @ 12-15 t/ha should be applied as soon as the seedlings are established as a mulch to the field. After weeding, fertilizer application, and earthing up, repeat mulching @7.5 t/ha at 45 and 90 days after planting.
Irrigation and weeding
Once the plants have been established, they should be weeded every 60, 90, and 120 days depending on the intensity of the weeds in the area. For an irrigated crop on clayey soil, roughly 15 to 23 irrigations are required, but for sandy loams, about 40 irrigations are required.
Xem thêm : How To Fix A Noisy Bed? Comprehensive Guide
The use of a variety of crops
Coconut and arecanut plantations can grow turmeric as an intercrop. It can also be grown in combination with chilies, colocasia, onion, brinjal, and cereals like maize, ragi, and so on..
Plant protection
Leaf splotch
Small, oval, rectangular, or irregular brown spots emerge on one or both leaves as a result of Taphrina maculans leaf blotch. These spots soon turn dirty yellow or dark brown. Additionally, the foliage turns yellow. The rhizome output is diminished and the plants’ look is burnt in severe cases. Spraying mancozeb 0.2 percent can control the sickness.
Spot on the leaf
Known as leaf spot, Colletotrichum capsici causes brown patches of varied sizes on the upper surface of young leaves. There are a variety of shapes and sizes to the spots, with white or grey in the center. It’s possible that two or more spots will combine in the future, resulting in an uneven patch that will cover nearly the entire leaf. After a while, the afflicted leaves begin to wither and fall off. Unfortunately, the rhizomes don’t do well. Zineb 0.3 percent or Bordeaux mixture 1 percent can be used to treat the condition.
The decay of the rhizome
Pythium graminicolum or P. aphanidermatum is the bacterium that causes the illness. The pseudostem’s collar becomes fragile and waterlogged, causing the plant to fall over and the degradation of the rhizomes to begin. The disease can be prevented by spraying mancozeb 0.3 percent on the seed rhizomes 30 minutes before storage and sowing. Mancozeb 0.3 percent should be sprayed on the beds as soon as the disease is discovered in the field.
NEMATODE INSECTS
These worms are the root knot nematodes (Meloidogyne species) and the burrowing nematode (Radopholus similis). In Andhra Pradesh, root lesion nematodes (Pratylenchus spp.) are common. Use only nematode-free planting material in areas where nematodes are an issue. Nematodes are less likely to multiply if the soil is rich in organic matter. In order to combat nematode infestations, use Pochonia chlamydosporia @ 20 g/bed (at 106 cfu/g) during the sowing process.
Pest insects
Shoot the shit
Turmeric’s most dangerous pest is the shoot borer (Conogethes punctiferalis). It can cause significant damage to plants. The larvae burrow into pseudostems and feed on the insides of the plants. A bore-hole on the pseudostem through which frass is expelled and a withered central shoot is an indication of insect infestation.. With a wingspan of roughly 20 millimeters, this moth has orange-yellow and black markings on its wings. The color of fully-grown larvae is light brown with a few bristles. During the months of July to October, apply a 0.1 percent malathion spray every 21 days to keep pests at bay. Spraying must begin as soon as the first signs of pest infestation appear on the innermost leaf.
Scales of rhizome
Rhizomes are infested in the field (during the final stages of the crop) and in storage by rhizome scale (Aspidiella hartii). The rhizomes of adult (female) plants bear round, light brown to grey scales (approximately 1mm in diameter). Infested rhizomes become shriveled and dehydrated, which hampers the plant’s ability to germinate. You can use 0.075 percent quinalphos (for 20-30 minutes) before storing the seed, as well as prior to seeding. Infested rhizomes should be thrown away or stored in a garbage can.
a few nuisances
Leaf-eating beetles, such as Lema spp., make extended parallel feeding markings on leaves during the monsoon season. Shoot borer can be controlled with a single application of malathion (0.1 percent) spray.
Infestation by the lacewing bug (Stephanitis typicus) causes the foliage to turn yellow and dry up. Post-monsoon pests are more prevalent in the country’s drier areas, where they are more likely to spread. The pest can be controlled by spraying 0.05 percent dimethoate.
Leaves turn pale and dry out as a result of an infestation by Panchaettothrips indicus (Panchaetothrips indicus). Post-monsoon pests are more prevalent in the country’s drier areas, where they are more likely to spread. Dimethoate (0.05 percent) is an effective pesticide that can be sprayed on the area to be treated.
Organic Production
Plan of conversion
Only the second crop of turmeric can be marketed as organic because it has been under organic treatment for at least 18 months. If the organic farm is being developed on land where chemicals were not previously utilized, the conversion period may be shortened if sufficient evidence of the area’s history is available. As a general rule, it’s preferable to use organic methods over the entire farm, but this can be done in a phased manner when the farm is spread over a big region.
Agri-horti and silvi-horti systems can successfully recycle farm waste by growing turmeric alongside coconut, arecanut, mango, Leucaena, rubber and other crops. Trap crops or green manure/legumes crops can also be cultivated in rotation, allowing for effective nutrient accumulation and pest/disease management. When using a mixed agriculture system, it is imperative that all crops in the field are cultivated using organic methods.
A appropriate buffer zone with a clear border must be maintained to prevent non-organic farms in the vicinity from contaminating organically cultivated plots. This isolation belt’s crops cannot be considered organic. Agricultural runoff and chemical drift from nearby farms should be kept to a minimum in sloppy soils. Soil and water conservation measures must be taken to reduce runoff and erosion by making conservation pits in the interspaces between beds on the slope. Deep drainage trenches must be dug in low-lying fields to prevent water from standing.
Practices in management
Traditional cultivars that are resistant or tolerant to disease, pests, and nematode infection should be employed in organic farming. As long as there are agricultural wastes and crop residues, such as green lopping and grasses, that can be composted (including vermicomposting), soil fertility can be maintained at its highest level. Chemical fertilizers, insecticides, or fungicides of any kind are prohibited in organic farming. At 45-day intervals, apply 40 t/ha of farmyard manure, 5-10 t/ha of vermicompost, and 12-15 t/ha of green leaf mulch. In order to meet the needs of phosphorus and potassium in the soil, lime/dolomite, Rock Phosphate, and Wood Ash must be used. A limited use of mineral/chemical sources of micronutrients through soil application or foliar spray can be allowed when the inadequate circumstances of trace elements become yield limiting. It is also possible to increase the productivity and fertility of the soil by supplementing the soil with oil cakes such as Neem Cake (2 t/ha), composted Coir Pith (5 t/ha), and compatible Azospirillum and phosphate-soluble bacteria.
Insect pest and disease management in an organic system is mostly accomplished by the application of biopesticides, biocontrol agents, and cultural and phytosanitary techniques. When applied in 21-day intervals from July to October, Neemgold (0.5 percent) or neemoil (0.5 percent) is efficient at preventing shoot borer damage.
A variety of biocontrol agents, such as Trichoderma or Pseudomonas multiplied in suitable carrier media like coir pith compost, well-rotted cow dung, or quality neem cake, can be applied to the soil during planting and at regular intervals to keep the rhizome rot disease under control. Spraying a Bordeaux mixture 1% can be used to control other foliar diseases, but only 8 kg of copper per hectare per year should be used. The neem cake and Pochonia chlamydosporia bioagents discussed earlier can be used to monitor the nematode population.
Certification
This means that in order to preserve the vitality of organic ingredients during the entire process of processing, organic farming requires processing technologies based on mechanical, physical, and biological processes. All processing components and additives must be derived from organic farming and have the appropriate certifications. The certification procedure permits the use of non-organic raw materials subject to periodic re-evaluation where an ingredient of organic agriculture origin is not accessible in sufficient quality or quantity.
In order for a product to be labeled as “organic,” it must meet the standards set out by the National Organic Standards Board (NOSB). There should be no mixing of non-organic items and organic ones, save in the case when they are clearly labeled or physically separate.
When an independent body certifies and labels a product, it provides a guarantee that the production requirements are met. Small and marginal farmers in India will benefit from the government’s efforts to establish an indigenous certification system and to issue legitimate organic certificates from approved certifying companies. The certification bodies will appoint inspectors to conduct audits of the farm’s operations, which will be carried out through the use of documents and on-site inspections. In order to be certified, farms that cultivate both conventional and organic crops must keep meticulous records of everything they do. Also available for groups of producers and processors with similar production systems that are located close together is a certification scheme for groups of producers and processors.
Harvesting
When the crop is ready for harvest, it usually takes 7-9 months following planting between January and March. It takes 7-8 months for early varieties to reach maturity, whereas it takes 8-9 months for medium types and 9 months for late variants.
Xem thêm : How Long Does It Take For Cucumber Seeds To Germinate? Comprehensive Guide
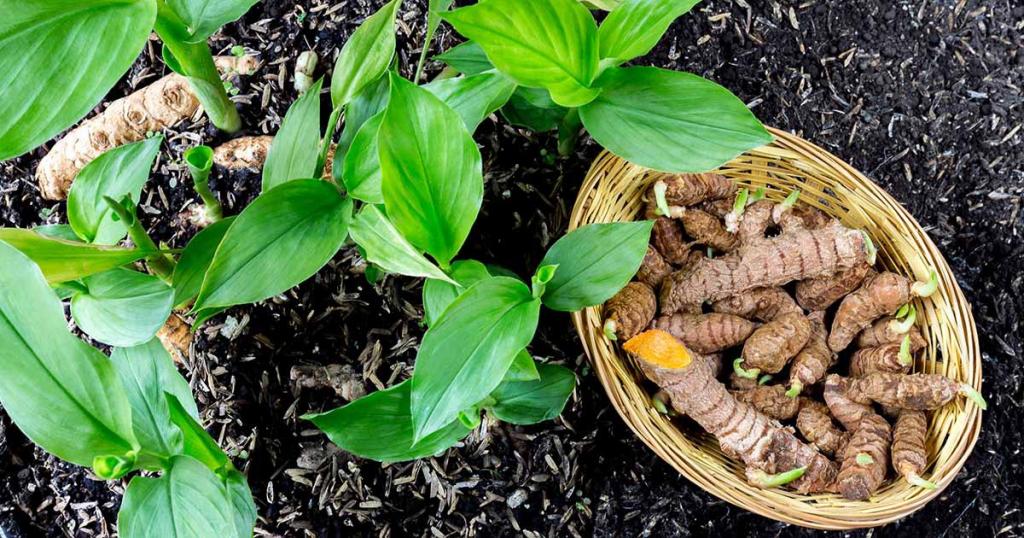
By hand plucking or with a spade, the rhizomes are harvested from the cultivated area. The rhizomes are cleaned of dirt and other debris that may have accumulated on them during harvest.
Processing
Curing
Dry turmeric is made from fresh turmeric that has been cured. The mother rhizomes are separated from the fingers. It’s common practice to save mother rhizomes for use as seed. It is necessary to boil and dry fresh rhizomes for curing.
The cleaned rhizomes are immersed in just enough water to bring them to a boil in the traditional method of curing. When foam and white vapors arise, the boiling process is halted. When the rhizomes begin to soften, they should be boiled for 45-60 minutes. The final product’s color and aroma are strongly influenced by the point at which the water is removed from the fire. Color can be ruined by overcooking, while undercooking causes the dried product to be hard.
The cleaned fingers (about 50 kg) are placed in a perforated trough of 0.9 m x 0.5 m x 0.4 m in size constructed of GI or MS sheet with an expanded parallel handle in the improved scientific method of curing. After that, 100 liters of water are put into the perforated trough containing the fingers to completely submerge them in the turmeric. It is boiled to the point where your fingers are pliable. Lifting the trough and allowing the water to drain back into the pan allows you to remove the cooked fingers from the pan. Turmeric rhizomes can be boiled and used to cure fresh samples. After harvesting, turmeric should be processed within two or three days. Rhizomes should be stored under shade or coated with sawdust or coir dust if processing is delayed.
Drying
Using bamboo mats or a drying floor, the cooked fingers are laid out in 5-7 cm thick layers in the sun to dry. As a result, a thinner coating is not recommended, as the cured product’s color may be compromised. Rhizomes need to be heaped or covered with aeration material at night. The rhizomes need to be thoroughly dried for a period of 10 to 15 days. Using cross-flowing hot air at a maximum temperature of 60oC, artificial drying produces a good result. Curcumin slices dried artificially have a more vibrant color than those dried outdoors, which are more prone to surface bleaching. According to the variety and location of the crop, the dry product yield might range from 10% to 30%.
Polishing
Scales and root fragments can be seen on the outside of dried turmeric. Manual or mechanical rubbing of the outside surface smooths and polishes it, improving the look.
The dried turmeric fingers are rubbed against a hard surface in order to polish them by hand. In the new technology, the enlarged metal mesh on the sidewalls of a hand-operated barrel or drum is mounted on a central axis. The abrasion of the surface against the mesh as well as the mutual rubbing against each other as they roll inside the drum contribute to the polishing process. Power-operated drums are also used to polish the turmeric. Turmeric that has been polished has a yield ranging from 15 to 25 percent of its raw material.
Colouring
The price of the product is influenced by the color of the turmeric after it has been processed. It is possible to use turmeric powder (combined with a small amount of water) as a last polishing touch.
Seed rhizomes should be preserved
Turmeric leaves are commonly used to cover rhizomes for seed storage in well-ventilated rooms. Strychnos nuxvomica leaves, sawdust, and sand can also be used to preserve seed rhizomes (kanjiram). With one or two apertures for ventilation, hardwood planks are to be used to cover the pits. If scale infestations are found, the rhizomes should be soaked for 15 minutes in a solution of quinalphos (0.075 percent) and then in mancozeb (0.3 percent) to prevent fungus damage during storage.
Since I’ve never grown turmeric before, this post serves as both a resource and a blueprint for what I hope to do when the time comes.
That was a topic I covered in my book The Year-Round Hoophouse: A Gardener’s Guide to Gardening All Seasons. Temperatures of 55 degrees Fahrenheit (13 degrees Celsius) and increasing are required in our zone 7a climate for ginger to thrive. After that, it takes up residence in the area for five months, during which time we harvest it before it gets too cold, in October (it has no frost tolerance). We decided to give up on growing ginger at the end of the day. If we had been selling our crops, we could have made a lot of money from it. Instead than attempting to make a profit, we are supplying food to our intentional community (Twin Oaks). Our ultimate goal is to provide as much of our food as possible with a year-round array of nutritious organic crops. A long-term supply of nutrients is essential. When it comes to crops, fast-growing ones are more valuable than slower-growing ones. Cindy Conner’s “Bed Crop Months” notion is more relevant to us than the $/sq ft. price per square foot. If you’re looking to get the most out of your meals, you should eat a lot of vegetables that are rich in vitamins and fiber. So, what is it about turmeric that makes it so appealing?
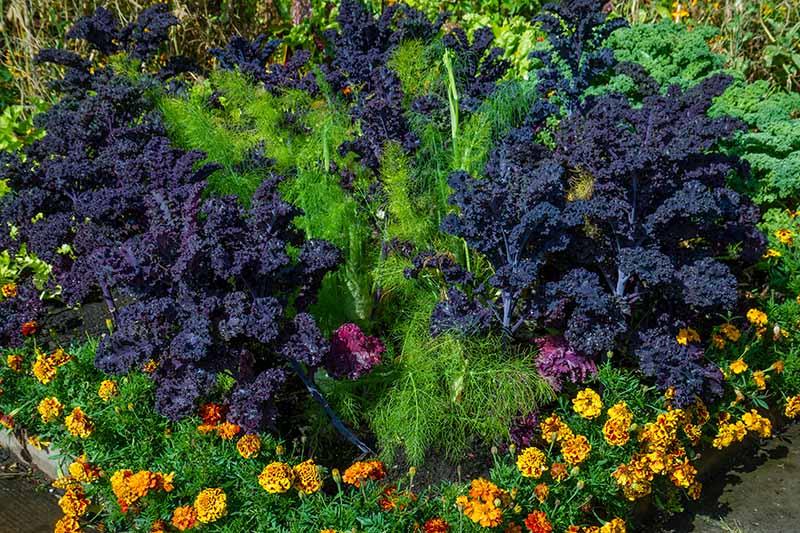
Turmeric and carrots grown in a hoophouse in the ground.
About Turmeric
My guest, a farmer, gave me two “hands” of turmeric roots. I asked my hoophouse crew colleagues if I may grow a few turmeric plants next year because it has medical potential and (for me) novelty appeal. We have a long-standing reputation of accommodating the crew’s smaller special projects. It is our first time producing carrots in the hoophouse this season. Carrots are grown in hoophouses by a number of farmers I’ve spoken to. Carrots, which can be stored and used as a winter food source, are easily grown in the fall on our property. In the hoophouse, what do we have to gain? We’ll find out soon enough.
In our hoophouse, if we want to grow turmeric to maturity, it will take us from late April until October. Both crops will be ready to harvest by the end of October, just in time for winter greens planting.
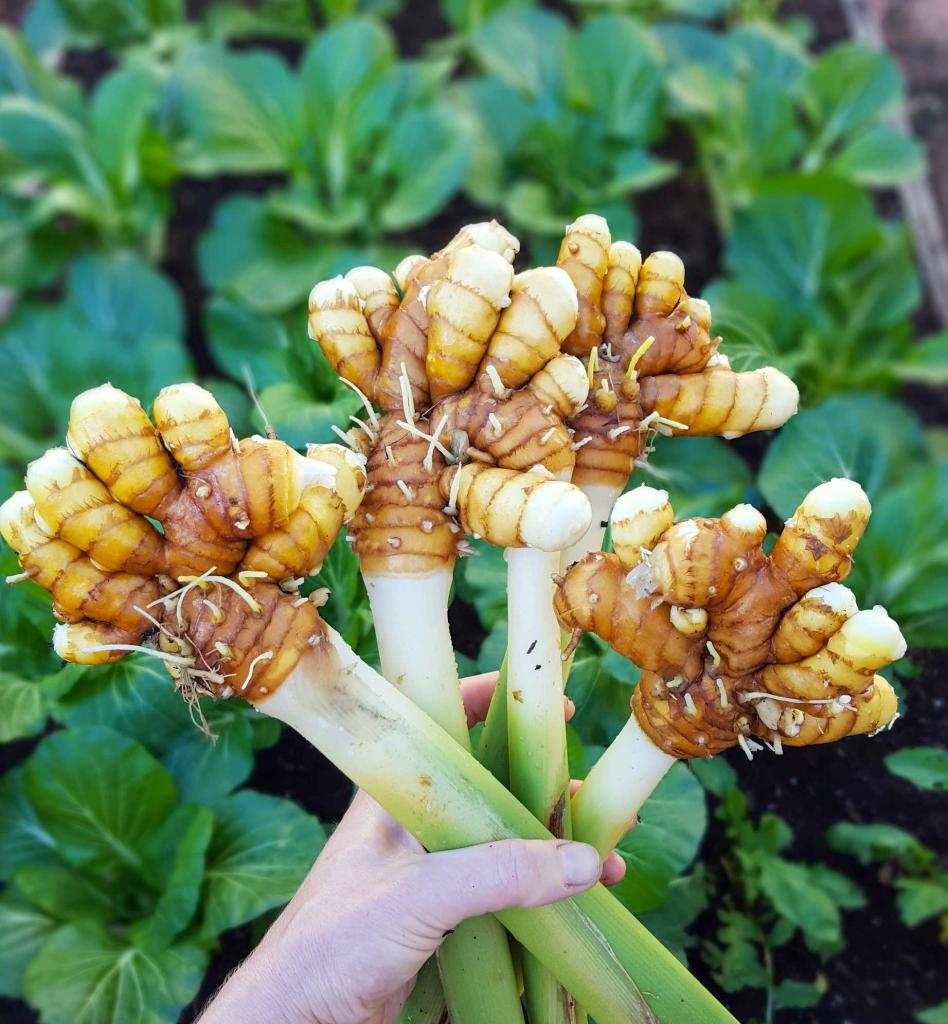
When compared to ginger, turmeric roots have a brighter orange hue. The market for turmeric is smaller than the market for ginger, which is easier to grow. Unlike ginger, turmeric requires less feeding and just requires a light hilling if the roots appear above the earth as they grow. After 8–10 months of growth, turmeric plants go dormant, allowing the roots to be stored for regrowth the following year.
Turmeric hoophouse bed for good health.
Using Fresh Turmeric
The flavor of fresh turmeric, whether grated or sliced, is earthy and slightly zingy, and it doesn’t need to be dried and powdered before it can be used. As a vegetable, it can be eaten raw or cooked like potatoes. Make tea out of it by grating it and doing so.
With a mandolin or other powered kitchen slicer, slice it as thinly as possible. Drying will be more evenly distributed if the pieces are all of the same thickness. A coffee grinder can be used to grind dry materials. Many Asian-inspired recipes are flavored with the yellow spice powder. There are remarkable therapeutic properties in turmeric’s curcumins (reducing inflammation). Put it in a pill and take it for therapeutic purposes.
Buying Turmeric Roots
It’s possible to buy fresh turmeric root in Hawaii from companies like Hawaiian Clean Seed, Puna Organics and Biker Dude. A tropical root called galangal is available from Fool’s Paradise Farm in North Carolina, formerly known as Qualla Berry Farm. These fresh turmeric varieties: Hawaiian Red, Indira Yellow, BKK and Black will be available from now until the end of the year.
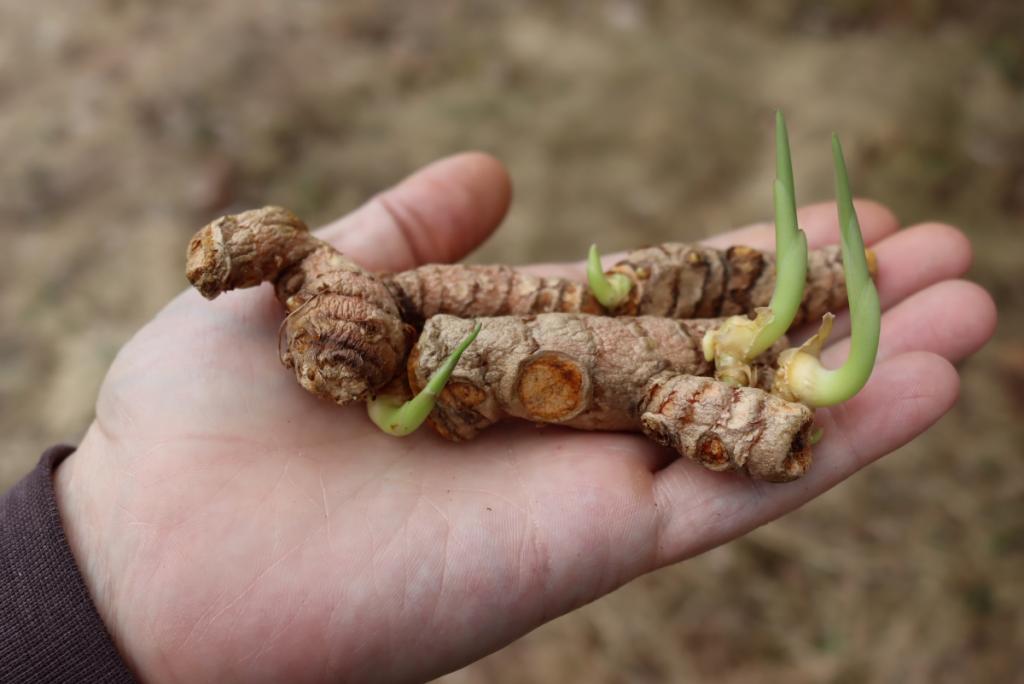
If you need to cultivate turmeric, you can use fresh roots from the grocery store, but they may have been sprayed with a sprouting inhibitor first. Pick strong, robust roots with many knobby leaf buds when purchasing turmeric rhizomes (if you can see them in person). A hint that they’re about to sprout is the presence of a faint green tint on the knobs.
Turmeric-filled hoophouse in the quonset hut design in North Carolina
How to Grow Turmeric
The optimal time to plant turmeric is in the late winter and early spring. To cure the rhizomes, cut them into 2′′ (5 cm) pieces and store them at room temperature for a few days Each seed portion weighs 30–60 grams (around 1–2 oz). Allow the root pieces to soak in warm water for a few hours before planting. Add 2–3 inches (5–7.5 cm) of potting soil to the base of the plants, and water thoroughly. To sprout, place the root crates in a plastic tent or a germination chamber on a seedling heat pad. Avoid over-watering the crates when the soil is dry. Sprouting roots might take anywhere from 2 to 4 weeks. Remove them off the heat mat if this occurs.
When the risk of frost has passed, transplant your turmeric plants into the hoophouse. The seed spacing is 6 inches (15 centimeters). Before planting, add some compost to the soil in order to increase its nutritional value. The shade in the afternoon is a boon. During the growing season, feed the turmeric plants every two to three weeks. A weekly watering of around 1 inch (2.5 cm) is sufficient in the heat. When fully grown, the plant will reach a height of 2’–3′ In late summer, turmeric plants may produce blossom stalks.
In the state of North Carolina, turmeric is being grown in the open air. A hoophouse is a good option for a garden.
Harvesting Your Turmeric
Prior to the first forecasted frost, plan to harvest your frost-sensitive plants. It’s likely that the plants have already begun to die back. When collecting the roots, be sure to wear gloves to prevent yellowing of your hands. Cut the leaves slightly above the roots and remove the plants from the ground. Snap the roots apart if necessary.
It’s possible to start your own seed collection once you’ve grown a few crops. Do not immediately replant bits you have saved for future use. Until late winter, keep these roots in an unwashed plastic bag or box in the refrigerator. One producer in North Carolina has recorded overwintering turmeric plants outside in warmer years, although it is still recommended to move them within for the season.
Nguồn: https://iatsabbioneta.org
Danh mục: Home