“When do I remove seedlings from my hobby greenhouse?” is a question that requires a comprehensive response. Things can move quickly even in a small hobby greenhouse. You’ll learn how to remove seedlings from the greenhouse, as well as other gardening techniques, in this book.
- How To Grow Mache? Everything You Need To Know
- When To Apply For Growing Spaces Greenhouse In Kind Grant? Helpful Information!
- How To Grow Pole beans In Pots In A Small Greenhouse? Step-By-Step Guide
- How To Remove Fake Flowers From A Cactus? Step-by-Step Tutorial
- How To Prepare A Greenhouse Petunia For Planting? Ultimate Guide
When Can Seedlings Get Removed In The Greenhouse
Growing plants in a greenhouse is a dream come true and a nightmare come true. If the greenhouse doesn’t have the proper equipment and supplies, the seeds won’t grow well. Starting today and every week until the weather warms up enough to work outside in March, gardeners must put seeds into flats.
Bạn đang xem: When Do I Remove Seedlings From Hobby Greenhouse? Gardening Tip
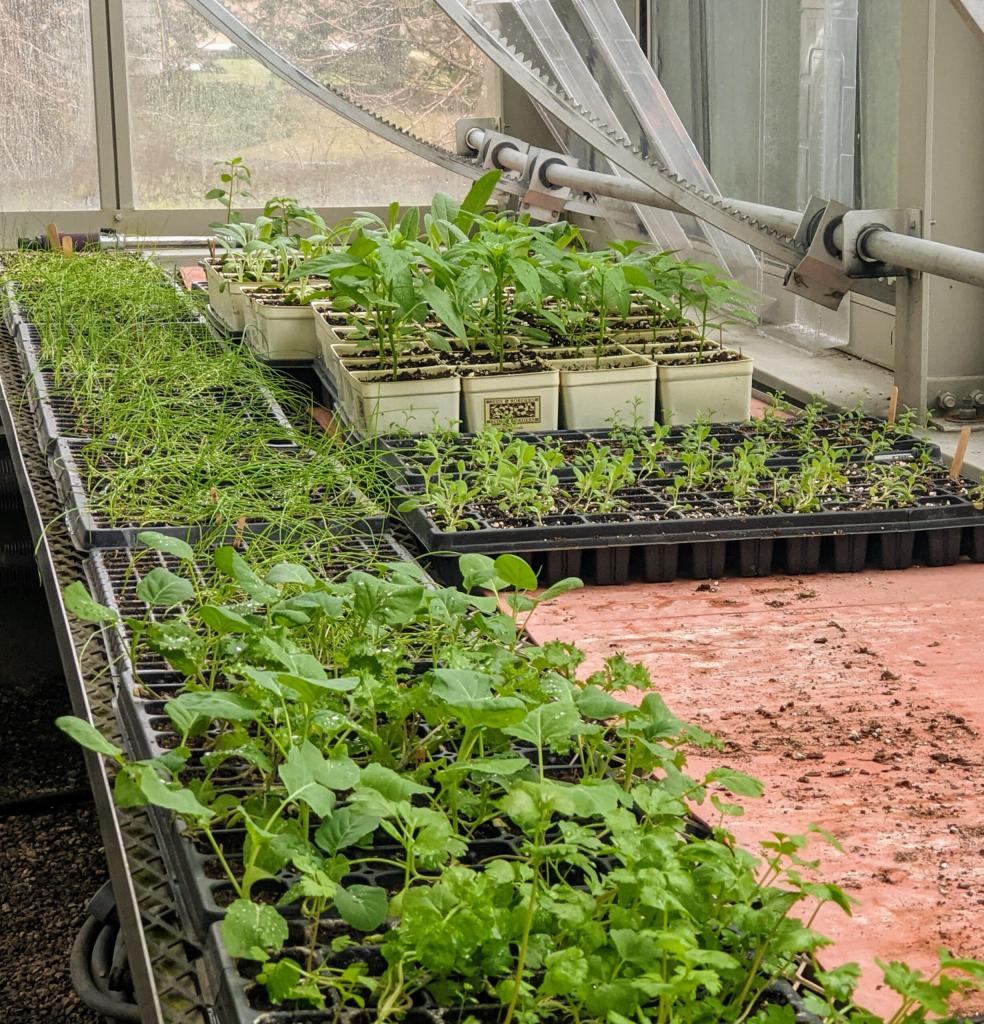
Starting from seed isn’t difficult, but it does demand a lot of attention and patience, even from the experts. Maintaining and filtering between weak and strong portions is essential in the early stages of growth, when they can be transferred to larger containers and flats.
Caring For Your Seedlings
Seedlings will have various growth stages. Regardless of how beautiful the seeds may look, the gardener may not be able to guarantee germination, so multiple seeding must be planted in each tray cell starting. In this way, each cell has a higher chance of establishing itself.
Various stages of seedling development are possible. Each tray cell commencing should have many seedings in order to ensure germination, no matter how lovely the seeds may be. Each cell has a better chance of taking root this way.
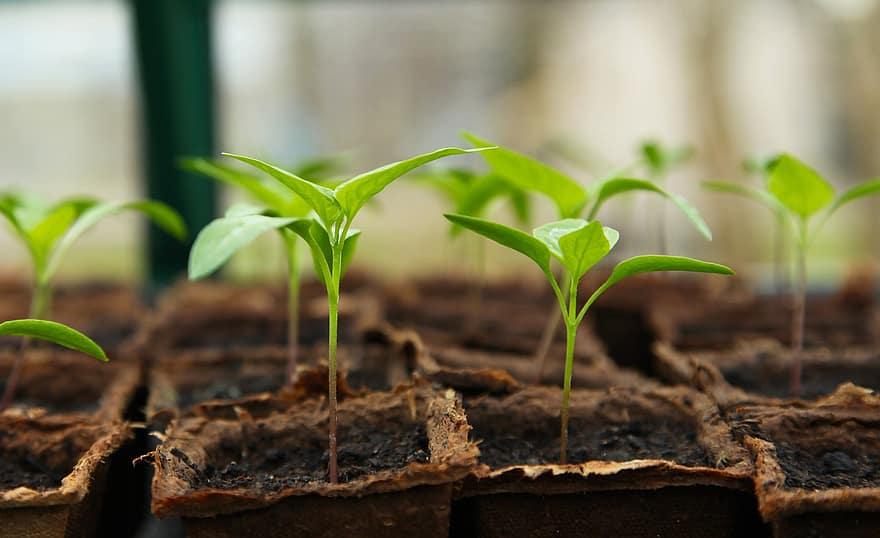
Seedling mixes should be light and quick to drain in order to be of the highest quality. They must have moss or vermiculite in them. These are intended to promote strong, healthy development. However, when it’s time to remove the seedlings, what should you do?
Removing Seedlings In A Greenhouse
Gardeners can begin seeding at any time of the year in the greenhouse because the temperature and humidity are controlled. However, if they begin planting in the spring by, for example, transplanting or removing seeds from the greenhouse to the outdoors, keep in mind that you must begin seeding six to eight weeks before the last expected frost in your area.
During the day, temperatures should not drop below 27 degrees Celsius, and at night, they should not go below 13 degrees Celsius for successful germination. Keeping an eye on the temperature within the greenhouse is essential.
During the day, greenhouses are supposed to be warm, but at night they might turn a little chilly. The seedling heat mats may assist keep your seeds warm in the soil’s fluctuating temps. Ventilated greenhouses must also be inspected on a regular basis.
When Should You Remove The Seedlings From The Propagator?
The propagator is another tool that can be used to remove seedlings from the hobby greenhouse. You can remove the propagator’s bag and cover as soon as the seedlings are visible through the compost.
Turn your pot or tray while growing on a windowsill to keep seedlings from gravitating toward the source of light. The following are additional steps to keep in mind.
- It’s best to remove the propagator’s bag and top as soon as you see your seedlings sprouting out of the compost.
- The seedlings must be transplanted one at a time into smaller pots or trays with compost once the first set of leaves has developed.
- Before you start spreading, make sure you have enough space for the seeds and seedlings to thrive. You should harden off your plantation now so that you are ready to plant when the cool weather finally ends.
How Long Must You Keep The Seedlings Covered?
The seedlings must be covered while being removed from the hobby greenhouse. There are specific actions to take in this regard.
Between five and twenty full days is ideal. You must guarantee that the seeds are checked every day and that the plastic dome is removed as soon as the seed germination occurs. If you’re growing a variety of crops, this might take anywhere from 10 to 20 days. At least five are required.
When you ask, “When Do I Remove Seedlings From Hobby Greenhouse?” you must take the necessary step of removing the seedlings from the greenhouse and you can use heating mats to offer the proper amount of heat down below to assist sprout the seeds.
In order to avoid weakening your plants, you need to switch the mats off after the seeds have sprouted.
Give seedlings a good start
Spring seems closer when you plant a package of seeds in the depths of winter, thanks to the scent of damp soil. However, in practice, spring may be months away, and many plants starting from seed must be cared for indoors until the garden is dependably warm. For this, you’ll need to provide a conducive setting for them to thrive in.
Fluorescent bulbs suspended by chains allow me to raise the light level as the seedlings grow in a three-tiered stand. Strong and sturdy plants can be achieved by keeping lights about an inch or two above the plants’ surface area. Phototropism causes seedlings to reach for light, which weakens and spindles them if there is no good light source.
When seedlings have one or two sets of genuine leaves, it’s time to start fertilizing. Water-soluble fertilizers like Miracle-Gro are commonly used by gardeners, while fish emulsion or seaweed products are excellent organic alternatives. It doesn’t matter how often you feed your pet. The middle number in the N-P-K formula is the phosphorus I like to use instead of nitrogen or potassium as a liquid fertilizer. Strong root development is aided by the added phosphorus. From the bottom, I can water and fertilize my plants.
Pot on, pinch back, and toughen them up
Potting on seedlings before planting them in the ground is necessary whether you start your own seeds or buy seedlings from a garden center or mail order. Tomatoes and peppers, which must be planted after the earth has warmed up, are prime examples of this. Seedlings will quickly decline if their roots are packed and congested. Because of this, you should move them to larger pots, where root growth can keep pace with leaf growth. When a small plant has outgrown its six-pack, it’s time to move on to larger containers. Pull separate roots using your fingers or the eraser end of an old pencil when splitting up seedlings that were begun in a tray. Label the transplants carefully.
Fast-growing seedlings can thrive in ideal conditions. Auxin, a plant hormone, is found in the terminal bud of seedlings and aids in growth by loosening the cell walls. Auxin, on the other hand, inhibits seedling growth in the lower lateral buds. Side shoots will sprout if the terminal bud and the auxin are pinched out. As a result, there are more blooms and fruit on the plants. I pinch back seedlings when they are about 3 or 4 inches tall and have a healthy supply of genuine leaves. Just use your thumb and forefinger and you’re good to go.
Toughen up your seedlings while they’re growing indoors by giving them some gentle treatment. Run your hand over the small plants’ tops on a regular basis. The seedlings will benefit from this brushing or stroking.
The timely art of hardening off
Preparing seedlings for the garden by hardening them off is an important step in the growing process. Young plants that have been nurtured indoors may suffer if they are exposed to cold temperatures, wind, rain, or even direct sunlight. As a result, exposing seedlings to these circumstances gradually is the preferred method. Plants are often hardened off for a week or two by placing them in a shady spot outside during the day and bringing them back inside at night. They gradually expose the seedlings to greater durations of direct sunshine.
Moving seedling trays in and out and in and out throughout the day can be a time-consuming task. To help seedlings adjust to the outside world, I’ve found a cold frame to be an essential tool. For the first few nights, I’ll bring seedlings inside, but after that, they’ll spend the night in the cold frame with the lid lowered to keep them warm. The cold frame’s cover can be opened during the day, yet it still provides wind protection.
The key to hardening off is to create safe havens for yourself. Consider locations like a shady porch, the side of your house, or beneath some shrubs for shelter from the rain and wind. To safeguard your seedlings from extremes like torrential rain or a sudden drop in nighttime temperatures, monitor the weather.
Plant on an overcast day
You should sow seedlings on a dreary and dark day in the garden. It’s even better if it’s only a little drizzle. Planting seedlings in the scorching midday heat should be avoided even if the weather forecast calls for sunny skies. Start early in the morning or wait until the end of the day to sow a few seeds.
Using your fingers, loosen the roots of the seedling from its pot if necessary. Make sure to remove as much of the peat pot as possible without damaging the seedling’s root ball. Once the peat pot is in the ground, it’s critical to remove the top to prevent moisture from wicking away from the roots of the plant.
After they’ve been transplanted, provide shade and protection from the wind and sun for a few days. Overturned containers, row covers, or shade cloth can be used as temporary shelter for the roots while they are able to establish themselves. Until they are well-established, water the seedlings every third day or more frequently if the weather is exceptionally hot.
For some plants, further pest protection is needed. Most seedlings should be protected against cutworms with cutworm collars. Many gardeners use floating row coverings to prevent cabbage butterflies and other moth larvae from laying eggs on their cole crops.
Make sure to eliminate any debris that could provide slugs with a place to hide. Check the bedding at night with a flashlight and hand pick the perpetrators if you suspect slug damage.
In little time at all, seedlings will become strong, healthy plants. In the meanwhile, the seedlings will benefit from a close eye and some tender loving care.
Greenhouse Set-up
Remember that a greenhouse is, in reality, a structure before you begin to plan on adding one to your property. As a result, regulations on where and how a greenhouse can be built may be in place.
The covenants of your Homeowners’ Association should be checked if you live in an area with one. Even in the backyard, many homeowners’ associations forbid the construction of a greenhouse. Other local rules may also define where the structure can be erected on your land, what infrastructure (such as power) is required, and which permissions are essential.
Xem thêm : How To Winterize Mandevilla Vines? Complete Step-by-Step Guide
It’s not fun, but it’s a necessary part of the process.
After determining the location and infrastructural needs for a greenhouse, the fun begins: deciding what and how to create your greenhouse structure.
Size and Structure
What’s the ideal size for a greenhouse in your yard? That being said, you should plan ahead for what you want to develop in the area. If you’re mostly going to use it for seedlings, a smaller area can be just right for you. You’ll need more space and larger containers if you want to overwinter tropical plants.
It’s a good idea to estimate how much room you’ll need and then design a greenhouse that’s one size larger than that. It will be tough to expand the greenhouse after it has been installed. Choose the greatest building that your budget and available space will allow.
Lee constructed Sheri an 8’x12′ greenhouse when she first arrived in Atlanta. In the episode of Growing a Greener World, you’ll see this space. However, Sheri quickly discovered that it was too small after using it successfully. Lee just upgraded to a larger greenhouse measuring 13’x20′ instead. Sheri will make her debut in the new digs in 2019. However, she realizes that it won’t be long until this new area of the house is overrun with plants as well.
Her husband ordered kits for each of Sheri’s three greenhouses. It is far easier to build a greenhouse from a kit than to build it from scratch, as there are many economical and well-made options available.
If you live in a humid climate, you should avoid using wood to construct a greenhouse. Wood is susceptible to warping and eventually decomposes. If you can, stay away from utilizing wood.
Using PVC tubing to build greenhouses is a more long-lasting choice. UV-resistant PVC, on the other hand, is susceptible to brittleness and decomposition due to its frequent exposure to the weather. Plastic, on the other hand, is cheaper and lighter than metal. For those who plan on moving their greenhouse, plastic structures are a viable option. Keep in mind that, if you live in a location with a lot of wind, your lightweight, plastic greenhouse could fall over at any given time.
A metal framework is the most long-lasting. It’s easy to find aluminum kits, and they’re available in both unfinished and powder-coated varieties. Sheri strongly suggests purchasing a powder-coated kit, which is a bit more expensive. Aluminum in its raw state was originally her and Lee’s choice. As the paint cracked or wore off, they realized that painting it themselves and maintaining it frequently would be more time-consuming than they anticipated. For many years to come, a powder-coated finish will be durable and low-maintenance.
It is difficult to obtain steel-built kits and they are the most expensive. Steel greenhouses, on the other hand, are long-lasting and strong.
There are a number of kit providers that offer glass, polycarbonate (twinwall), and triplewall pane alternatives.
Glass is dangerous and should not be used. Regardless of where you live, hail or other falling or blowing debris can instantly break glass panes.
Sheri advises installing triple-walled windows. As a result, they enable more light to penetrate through the panel, keeping heat more effectively than glass or twinwall. In the event that triplewall is out of your price range, then twinwall may be a better option.
Flooring
Choosing the right flooring for your greenhouse is more important than you may believe. Pests can easily invade your plants if the ground is left bare, therefore it’s best to keep it that way. Wet soil is an invitation to disease germs, and the muddy and uneven floor makes it more difficult to clean.
Using bark mulch on the surface is another alternative that should be avoided by gardeners. Bark mulch is fantastic for the garden, but it might cause pest problems if used in a closed environment like a greenhouse. Bark mulch also makes it more difficult to control fungal issues in humid greenhouses.
Pea gravel is an excellent and cost-effective choice. On hot days, you can mist the gravel with water to keep the area cool while you stand on it. Pea gravel is less appealing to critters, so you’ll have less pest issues as a result.
Sheri prefers crushed marble as a surface material. A more expensive option, but one that results in a smoother surface due to the interlocking of the smaller pieces. Similar to pea gravel, the white marble can reflect the sun to increase light throughout the winter months, reducing insect and disease risk. Consider using crushed marble in your greenhouse if you have the funds.
Placement
The greatest location for a greenhouse is the one that gets the most sunlight. A minimum of six hours of winter sun exposure is required for the building and, by extension, the plants that reside there. The structure should be placed so that the front or the end faces east. It’s possible to have complete southern exposure on the longer side all winter long. A greenhouse that receives afternoon shade during the summer is preferable.
Even if you build your greenhouse out of wood or metal, it’s a good idea to put it on a base. The structure will be more stable and last longer as a result.
Greenhouse Must-Haves
It doesn’t matter how big or little your greenhouse is, or whether you purchased a kit or constructed it from yourself – there are some essentials that must be included. This is a list of the features that are absolutely essential:
Ventilation
It’s time for the big show. Maintain the greenhouse’s air circulating to keep the temperature stable and avoid the spread of fungus and other diseases. There are always pockets of hot and cold air in greenhouses. The health of your plants will be harmed if there are any air pockets, but fans will move the air around and eliminate that problem.
Proper ventilation calls for two to five fans per square foot of space. Because oscillating fans move the most air, you’ll need fewer of them.
Large fans should be attached to the greenhouse’s gable, according to Sheri. She’s found that using two oscillating floor fans in her greenhouse works great.
For ventilation, the upper panels can be opened to let in fresh air…. Automatic ventilation systems are often included in most kits. Warm air from the greenhouse can be released through these panels, which are filled with a type of wax that expands as temperatures rise. These devices can be purchased to be added to your roof panels if you are constructing your own construction.
The roof panels should not be opened manually on hot days. Temperatures will climb swiftly as we all get crammed into our schedules. The first time you get preoccupied and neglect to open the panels to let the extra heat out, your plants will die soon.
Temperature Monitor
Keep an eye on greenhouse air temperatures with the help of a variety of monitors on the market. Alarms on the better versions are wirelessly linked to another device in your house or to your smartphone or another device. Your gadget will sound an alarm if the monitor detects a temperature change that is outside of the acceptable range. Things that demand your immediate attention can be alerted even if you are occupied indoors.
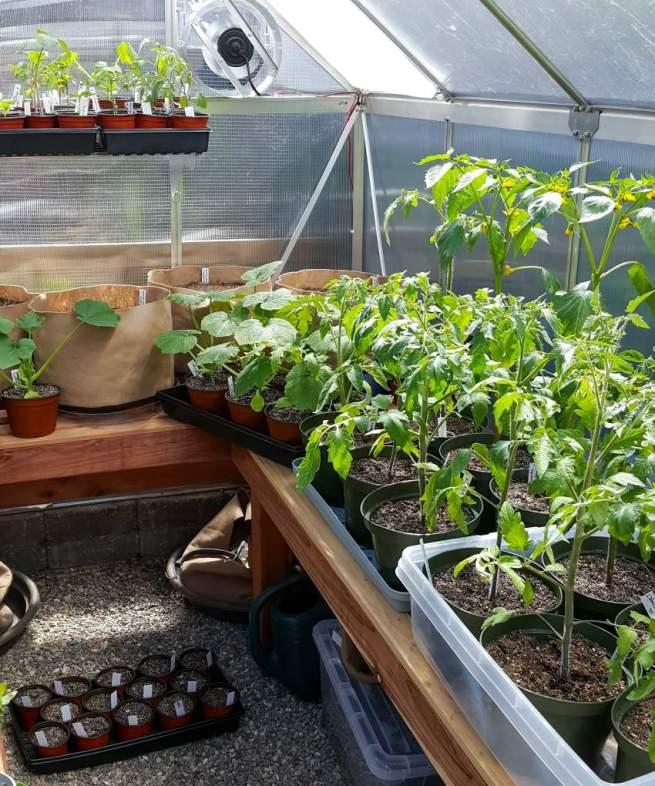
Heat
If you plan to grow seedlings in the greenhouse, you will need heat mats. Seedling trays sit on these warming mats to increase the soil temperature. Warm soil is key to seedling health, and even when the air dips as low as 30 degrees F, your seedlings will continue to thrive in warm soil. Just bear in mind that not all heat mats are created equally.
Heat mats are necessary if you wish to cultivate seedlings in the greenhouse. Mats like these help raise the warmth of the soil around seedling trays. Because healthy seedlings flourish even in temperatures as low as 30 degrees Fahrenheit, it is imperative that your soil be kept warm. Remember that not all heat mats are created equal.
Heating mats won’t do the job if you plan to cultivate tropical plants or commodities like tomatoes in the greenhouse. If you want to grow fruit from those plants, you’ll need a heater. If you prefer to control the temperature of your home with a thermostat, you can do so with a heater.
Electricity
They all need electricity in order to function. In order to power the greenhouse, you’ll either have to install outlets (which many government standards mandate) or utilize an extension cord from your home or office.
In the last several years, new solar-powered heating items have been brought to the market. I’d love to hear about your experience with these solar choices if you don’t want to deal with running energy to the greenhouse. Let us know what you’ve learned in the section below.
Shade Cloth
Xem thêm : How Long Plants Can Stay In Different Sized Trays? Comprehensive Guide
When the greenhouse’s light intensity is too high, it will be difficult to grow plants. Temperatures can rise to levels that even the best ventilation couldn’t keep up with. Put some shade cloth on your patio or deck. Various densities are available, and it is simple to operate, making it a useful tool for controlling the temperature in your greenhouse.
Nice-to-Have
Plumbing a water supply into the greenhouse is an excellent idea, even if it isn’t really necessary. A garden hose can be used if this isn’t an option for you. Just make sure you don’t leave your garden hose out in the cold throughout the winter.
Greenhouse Don’ts
Your plants will thrive in a greenhouse that is well-managed. Inadequate sanitation and a lack of proper sanitation encourage pests and diseases to quickly spread and multiply. Keeping pests and illnesses out of the greenhouse is relatively simple, but once they’re inside, it’s very impossible to get them out.
Take Precautions
In order to help a friend’s ailing plant, Sheri consented to break her own greenhouse rule. She suddenly saw the error of her ways. Whiteflies were hiding in the friend’s plant, and before long, the greenhouse was filled with them.
Avoiding taking in plants from friends and family is one of the most effective preventive measures you can take. Before transporting new plants from a nursery into the greenhouse, they should be thoroughly inspected. Any new plant should be kept in quarantine for several days before being introduced to the greenhouse. Trust me, it will take far longer to fix a problem that should have been avoided in the first place.
To avoid the transmission of disease germs, use only new pots and soil. You can use old soil in your garden and landscape beds, but you should stick to new soil in your greenhouse. For pots and trays that are to be reused, use a solution of one part bleach to nine parts water.
A Few More Sage Greenhouse Tips
If you ever find yourself dealing with a pest infestation, treat the greenhouse with the same level of caution as you would the garden. For flying greenhouse pests, yellow sticky traps are a typical advice. Unfortunately, not just pests are at risk from these poisons.
There are a variety of beneficial insects that may be found on yellow sticky traps that are nice to have in the greenhouse. Using these traps, Sheri was able to get rid of her whitefly problem, but she discovered that even a wren had become trapped and was unable to escape.
Insects are drawn to the color yellow, which is why these traps are yellow. Sheri has used a petroleum jelly-coated index card as a safe alternative (aka Vaseline). A tiny layer of Vaseline is smeared on yellow index cards or white index cards that she buys or colors. Gnats and other small pests are trapped in the goo, but larger species, such as ladybugs, can escape.
Sheri employed an interesting approach to help warm the greenhouse in her early days of farming in Colorado. She covered barrels in black paint and poured water inside. The sun warmed the water during the day. The barrels’ warmth was gently released into the greenhouse during the night as temperatures dropped, allowing the plants to survive another day thanks to the elevated air temperature.
It is not necessary to offer additional light to seedlings if your greenhouse receives at least six hours of full sun per day. Sunlight is all that your seedlings need to sprout and flourish. It’s vital to remember that your success will be mostly determined by the weather. Seedlings won’t get enough light if your area gets a lot of gloomy days. Observation and attention are essential in all aspects of gardening.
This year, I’ve noticed that my seedlings do better with 24 hours of light than I have in the past. Learn more about the significance of light length and quality by watching a recent episode of the popular PBS science series, The Science of Light.
It is possible for greenhouse air to become overly humid for some growers. That shouldn’t be a cause for alarm. Humidity shouldn’t be an issue if you have proper airflow. As long as the humid air remains circulating, the plants will enjoy it – as long as the air isn’t stagnant.
If you decide to make the investment in a greenhouse, see the first year as a learning experience. Depending on your local weather, the location of your greenhouse, and other factors, each structure’s ambiance will be unique. Sheri advises journaling. Even after twenty years, she still keeps a log of her greenhouse activities. During the first year, this is especially vital.
Sheri keeps track of the highs and lows of the temperature in the greenhouse, as well as the length of time it took for her seeds to germinate and other pertinent information. An annual review of your accomplishments and failures through journaling is a terrific method to learn from your past mistakes as well as build on your current strengths.
What’s the next step in your greenhouse experimentation? We all benefit from hearing about other people’s struggles and triumphs, which is why I’m asking for yours in the Comments section below.
To listen to our exchange, go to the top of the page and click on the Play icon in the green bar right below the page title (it’s at the top of the page). She continues to share anecdotes from her hobby greenhouse experiences, and you’re sure to pick up a few new ideas for your own greenhouse gardening.
Tips for ordering seeds and supplies
Pollination
Determine how your favorite plants are pollinated before planting anything in a greenhouse. Tomatoes, strawberries, and lemons are all self-pollinating plants, although they bear superior fruit if pollinated by insects or the gardener. Pollen can be liberated from a plant’s fruit by using little bees, a delicate paintbrush, or an electric toothbrush.
Pollen dies and fruits don’t form at temperatures higher than 91 degrees Fahrenheit (32 degrees Celsius). Tomatoes like Marbonne and Margold, which are heat-tolerant (greenhouse) varieties, can be found in catalogs. Only plants that are indeterminate (also known as vines), which keep growing and producing fresh blooms throughout their life span, are necessary. Use a vibrating electric toothbrush to lightly brush bloom clusters to help male pollen fall and meet sticky female pieces in the warmest days of summer.
Parthenocarpic
A hobby greenhouse’s success hinges on the usage of just one word: persistence. Look for it in the catalogs, especially under the cucumbers and zucchini sections.
The fruit of a parthenocarpic plant is seedless if it is grown with other parthenocarpic plants. Cucumbers can also be described as Monoescious or
Insects transporting pollen from male to female flowers on the same plant (Monoescious) or from male to female flowers on other plants (Gynoecious) are required for pollination (Gynoecious.) If you don’t want to use a paintbrush to transport pollen between the sexes, these seed-producing varieties in your greenhouse won’t bear much fruit.
Sweet Success, a parthenocarpic cucumber, does not require any pollination assistance or pollination at all. Lisboa F-1, Piccolino F-1, Salad Bush, and Iznik are also William Dam parthenocarpic cucumbers.
There are “greenhouse” cucumber types in the catalogs that require warmer settings. If you’re willing to heat your greenhouse, you can grow these earlier than May. I stick to using parthenocarpic seeds since I also cultivate cool-tolerant arugula and spinach at the same time, and I’m not interested in greenhouse parthenocarpic seeds.
It includes parthenocarpic cucumbers such as Corinto (which is parthenogenetic), Diva, and Nokya, as well as greenhouse-grown varieties Quirk, Excelsior and Picolino. Beit Alpha, China Jade, and Muncher are all classified as parthenocarpic by Rare Seeds.
Short Days/Bolting
A short growing season and a chilly temperature are typically prerequisites for old-school spinach varieties like my old favorite Bloomsdale. In a chilly greenhouse in a northern environment, this means September to April. This makes them ideal for use in your greenhouse throughout the fall, winter, and early spring seasons. However, in extremely cold climates, they do enjoy an additional fabric cover to keep them alive throughout the winter. (
As soon as they’re big enough to yield a big harvest, short-season cool-season plants bolt as the days get longer in spring. This means that the plants mature, bloom, and produce seeds. Newer cold-tolerant types, such as Space and Corvair, are less reliant on short days in the Johnny’s portfolio. Vesey’s also offers Space and Esalade as bolt-resistant, while William Dam lists Olympia as slow-bolting and reflect as heat-tolerant.. Try these newer varieties of spinach if your greenhouse spinach fails to impress.
Spray on Fertilizer:
Nitrogen is essential for the growth of green plants. Nitrogen-releasing microorganisms are unable to thrive in early spring greenhouse soils because of the chilly temperatures. To stimulate green plant growth, products like fish or seed meal require warm soil. This is why specialized fertilizers perform so well, such as ferticare. Because they may be sprayed on leaves for quicker uptake, cold soils are no longer a factor in their availability.
More than a decade of greenhouse gardening hasn’t taught me how to read the small print. New plant varieties are still being introduced, as far as I can tell. Reading the tiny print in your catalogs is a good idea if you’re new to greenhouse gardening. Discovering a new plant or plant type that is appropriate for your greenhouse will be a piece of cake with our guide.
The best time to plant your major onion crop is in January. Start your Spanish onions (also known as yellow onions) inside, on a heat mat, in an open tray. You can bring the tray outside in March and keep growing them in the same tray until it’s time to plant them in your garden in May, when they’ll be ready to transplant into the ground.
Visit www.donnabalzer.com for more wonderful advice from Donna.
You can also read Donna’s gardening books: No Guff Vegetable Gardening with Steven Biggs and her just released Gardener’s Gratitude Journal: Part Diary, Part Personal Growing Guide.
Conclusion
The No Guff Vegetable Gardening with Steven Biggs and Donna’s recently released Gardener’s Gratitude Journal: Part Diary, Part Personal Growing Guide are two of Donna’s gardening books you can read as well.
Nguồn: https://iatsabbioneta.org
Danh mục: Garden


