When it rains, RV owners have a frequent problem: their air conditioners leak.
- How Many Degrees Can An Air Conditioner Cool? Tips If You Are In Extreme Temperature
- How To Take Apart LG Portable Air Conditioner? Step-By-Step Guide
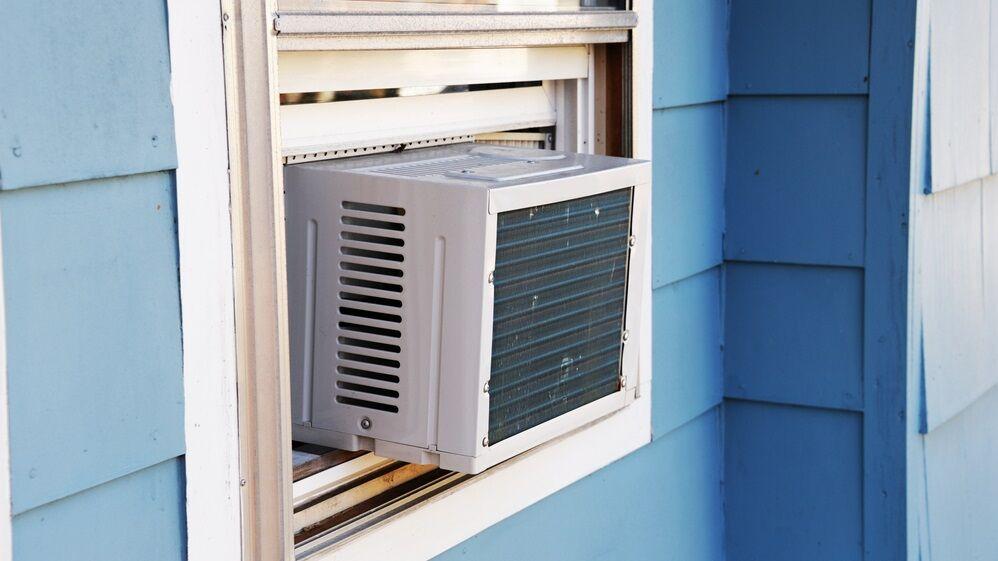
- How To Decorate Around A Window Air Conditioner? A Few Tips to Remember
- Why Is My Air Conditioner Not Blowing Cold Air? Helpful Information!
- Why Would Window Aircon Need Support? 3 Steps To Build An Air Conditioner Stand
Finding this matter in discussion on RV forums is a good indication of how serious a problem it is.
Bạn đang xem: RV Air Conditioner Leaks When It Rains? Troubleshooting and Repair Guide
An even worse scenario is when water seeps through the roof and inside your RV, resulting in thousands of dollars in damages.
If you’re having the same issue and aren’t sure what’s causing it or how to repair it, this article is for you.
Here, we’ll discuss the probable causes of your frustration and how to remedy it permanently.
Common Culprits Causing RV Air Conditioner Leaks When It Rains
RV air conditioner leaks are a huge concern, but the remedies are usually inexpensive and simple to perform yourself.
Our recommendation is to hire a trained technician if you have any doubts about completing the RV air conditioner repair correctly.

Mounting Bolts And Rubber Gasket
In order to secure an air conditioner on the RV’s roof, you’ll need a rubber gasket and mounting bolts. When one or both of these components shifts or is broken, leaks begin to appear.
Between your RV and the air conditioning unit, a rubber gasket is slid between the two pieces. Seals and connections are protected from water intrusion. Rubber, on the other hand, degrades over time when exposed to the environment.
To determine if your rubber gasket is brittle or rigid, inspect it. To prevent water from getting inside your camper, you need a sealant that is as flexible as possible. It should be replaced if it starts to show signs of wear.
The rubber gasket is secured by the mounting bolts. These can be loosened by uneven roadways, which can lead to leakage. Keep an eye on them and make sure they’re secure.
As a bonus, tightening the nuts and freshening the seals on your RV’s air conditioner will help keep it quieter when it rains!
Roof Damage
The form and position of an RV’s roof can make it difficult to determine the source of water dripping from the ceiling. Water frequently seeps through the roof and makes its way to the lowest place on the structure where it can drain.
Ensure that your entire roof is free of cracks and broken caulking. An AC unit that is leaking water because of roof components such as marker lights or plumbing vents is a common problem.
If your camper’s rubber roof is showing signs of wear and tear, it may be time for a new one! To learn how to put a new rubber roof on your camper, check out our instructions.
Xem thêm : How Many Amps Does A 5000 BTU Air Conditioner Use?
Exposure to the outdoors can also cause RV roofs to degrade. When a roof is failing, the weight of an air conditioner will cause it to weaken and droop further in the region around it.
Find out if the roof on your home is level. Pulling a string tight across the roof of the camper is an alternative to using a level. If this is the source of your roof’s leaks, you’ll notice a significant amount of sag in the structure.
Reinforce the area around your air conditioner’s vents to prevent more leaks and damage. Strengthening the area and keeping water from gathering around the entrance can be achieved by using shims, gaskets, or custom trim rings.
Instructions: How to Fix Air Conditioner Leaks When It Rains
The place where water enters your RV may not be where you observe a leak, making it difficult to pinpoint the source. This is because water travels until it reaches its lowest point of entry, which may be a considerable distance from the source of the water.
Water coming in around your AC unit is a sign that something is amiss with that area of your system. To discover what it could be, you must be meticulous in your inspection of all potential entry points for water.
Warning! Before lifting large equipment like an air conditioner, always enlist the support of a second person when climbing onto the top of your RV.
Confirm the AC Shroud is Intact
In order to keep your RV air conditioner safe from the elements, you’ll need a shroud. This cover prevents leaves, dirt, and water from getting into your air conditioner and causing it to malfunction.
Climbing onto the roof of your RV is the best way to verify that the AC shroud is intact. Take a look at the cover from every angle. Check your user’s handbook to determine your AC’s model number so you can buy a new cover if it’s missing, decaying, cracked, or broken. These flaws may be the cause of the water intrusion into your RV.
Check for Loose Mounting Bolts and Bad Rubber Gaskets
Mounting bolts secure your air conditioner to your RV’s roof, and rubber gaskets seal against the roof when the bolts are tightened. When you travel, the road vibrations may cause these nuts to loosen, opening your RV up to water damage.
It may be as simple as tightening or replacing the rubber gaskets to fix this problem.
- The mounting bolts and rubber gaskets for the RV’s air conditioner are most easily accessed from the inside of the vehicle. Locate the mounting bolts and remove the AC grill. There are usually four of these in an RV.
- Head up to the RV’s roof with tools to remove and replace the gaskets.
- Removing the AC unit is as simple as taking out the mounting nuts and pulling the AC unit out.
- Replace any damaged or worn-out rubber gaskets with new ones.
- Tighten the screws that hold the AC unit in place. If necessary, tamp down the bolts a little more after tightening them all the way. Rubber gaskets should be about half-compressed after the work is finished. To ensure a watertight seal, it is important not to overtighten the bolts. This can damage the gaskets.
- The mounting bolts should be checked for tightness if the gaskets are in good condition or if you’ve changed them recently.
- Slowly turn the bolt with a wrench to see if it’s loose. Move on to the next bolt if you can’t get it to move even with light pressure.
- A loose bolt should be tightened until the gasket is crushed by 50%.
- Each bolt requires the same procedure to be followed.
Ensure Adequate AC Clearance
It’s important to leave a little space between the bottom of your RV air conditioner and the top of your RV. This opening allows water that has accumulated due to rain or condensation to be channeled away. If your air conditioner is on the roof or the gap between the roof and the RV is caulked, water will pool and eventually find its way into your RV.
This gap will be present if your AC was installed by a professional. Remove any dirt or caulk that may have been added later to make sure it’s clear.
Locate Other Points of Entry
Because of the drop or water damage, you might conclude that your RV’s air conditioner is leaking when it rains, but this isn’t always the case. If you’ve already checked your AC’s mounting nuts and gaskets, the next most likely culprit is a hole in your roof.
Do you currently have solar panels installed? Is your antenna connection shaky? Check the whole roof of your RV for plumbing vents, ladder mounts, lighting fixtures, skylights, and other openings that may not be entirely sealed. Caulk that has cracked, crumbled, or is missing should be shaved off, the surface cleaned properly, and new sealer applied.
Look for Roof Damage
If you have water dripping into your RV, the worst that can happen is that your roof is destroyed. Damage to a roof might be as little as a missing sealant at a seam, or it can be as significant as extensive deterioration due to the environment. The damaged section or possibly the entire roof might be sealed with a sealant or rubber covering, which may be sufficient to halt leaks. However, rather than attempting such a large project on your own, it’s usually in your best interest to consult with an expert.
Xem thêm : How Many Decibels Is A Quiet Air Conditioner? All Questions Answered!
The RV air conditioner leaks when it rains, so there is no need to panic. Because of this, it is possible to go back on the road without risk of water damage as long as one moves quickly and cautiously. The most common causes of water leakage are corroded or broken gaskets or seals around other fixtures. When this happens, it’s best to call in a professional to handle the repairs.
What if you want to prevent problems from arising? Your RV can be protected from water leaks and other problems if you inspect your camper periodically and properly winterize it each year.
Prevent Leaks From Returning
Make sure your roof and AC unit are properly maintained to avoid leaks in your RV air conditioner when it rains. As part of your camper’s winterization and de-winterization plans, it’s absolutely essential. When you clean your car’s air conditioner filter or wash your vehicle. You’ll catch caulk cracks, ponding water on the roof, and worn gaskets with these routine inspections.
Take care of these issues before they turn into more serious issues. In spite of the inconvenience, we recommend examining your RV’s roof at least once a month or two.
Other Things To Keep in Mind
Roofing inspections are offered by most RV repair businesses. Your air conditioning unit will also be checked during these checks to make sure it is working properly.
You should have a professional inspect your RV roof every year, in addition to your routine maintenance. The spring and fall are ideal times to have your rig serviced because these are when temperatures are cooler and your rig is ready for storage for the winter.
Professional inspection of your RV’s roof might help you catch problems before they become serious.
RV Air Conditioner Leak FAQs
There are numerous variables to consider when it comes to repairing a leak in your roof. We understand how hard it can be to deal with this circumstance on your own. We’ve addressed some of the most common problems and questions customers have concerning their leaky rooftop camper units in an attempt to reduce the amount of uncertainty you may be experiencing.
Is An RV Air Conditioner Leak Dangerous?
At first, a trickle of condensation from your air conditioner appears to be nothing more than a small irritation. In the case that water seeps into your RV, you’ll want to have it cleaned up and prevent it from happening again as soon as possible.
The softening of the floor, walls, and ceiling in an RV due to water damage is not uncommon. As a result, your adventure vehicle may be out of service for longer than you’d like to repair such damage.
Mold and mildew can thrive in the presence of excess moisture from a leak. Neglecting these problems may result in health problems or structural damage to the RV.
Could The Water Falling Inside My RV Be The Result of Condensation Inside The Air Conditioning Unit?
Caulking surrounding your rooftop air conditioner may be too high, preventing any condensation that naturally forms during the cooling process from draining away. Your rig will be the only place it can go.
When you see water dripping from your RV’s air conditioning unit, you need to pay attention. If it happens frequently, regardless of the weather, you may have an issue with condensate runoff and caulking. If the water only appears when it rains, one of the aforementioned problems is most likely to blame.
Final Verdict
If your RV’s air conditioner has ever leaked during a downpour, you understand the frustration this can cause. Adding insult to injury, moisture seeping into the interior of your RV can cause costly damage.
We’re confident that after reading this tutorial, you’ll be able to identify and fix the primary causes of water leaks in your RV air conditioner so that you may continue living comfortably and stress-free in your RV.
Nguồn: https://iatsabbioneta.org
Danh mục: Conditioner