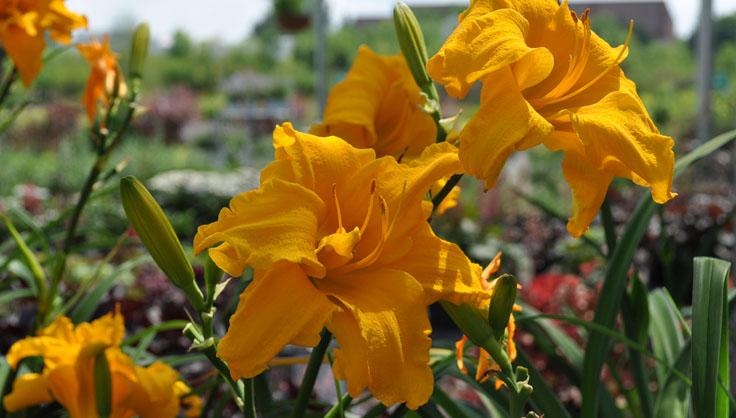
The bright daylily is one of the most reliable perennials for sunny gardens. Daylilies are hardy plants that can withstand a wide range of pests and illnesses. Some cultivars, like the well-known ‘Stella D’Oro,’ can bloom for up to four months straight.
Daylily clumps grow larger each year, allowing gardeners to divide them and plant them elsewhere or give them away to friends and family. The daylily is a great plant to try out transplanting and dividing if you’ve never done it before.
Bạn đang xem: How To Transplant Daylilies? Comprehensive Guide
Why Divide and Transplant Daylilies?
It’s quite gratifying to watch a daylily patch expand and flourish year after year. A fresh bloom or two appears each morning as the plants continue to produce new flower scapes for weeks at a time. But as daylilies age, their root systems become overcrowded, contending for light, nutrients and moisture. Flower clusters in the middle of massive leaf fans are obscured as the foliage gets densely packed above ground.
When you dig and divide a daylily, you are not only creating more plants to add to your collection, but you are also rejuvenating each plant so that it can produce more flowers the following season when you divide an overcrowded clump.
Even if the original planting site was not perfect, daylilies can be relocated to a better area by transplanting them. Plants that are particularly special to you can be given away or relocated to another part of your yard. For a gardener on a budget, sharing your daylily plants to establish a new flowerbed is a smart choice.
When to Transplant Daylilies
To transplant daylily roots, the best time to do so is when they’ve finished blooming. The good news is that they may be divided until the end of autumn, giving you plenty of time to plant them and enjoy their beautiful blossoms the following year. But there’s more to come. Even in the spring, daylilies can be transplanted. That year, the separated clump will continue to bloom as if nothing had occurred. Daylilies can be moved at any time of the year, and they’ll always return to their original location.
How to Dig and Divide
Prepare the new planting place before you begin digging up and splitting your plants. In order to bloom, daylilies demand six to eight hours of direct sunlight each day. A little midday shade is ideal for red or purple kinds to prevent fading and scorching of the blossoms. Loosen the soil to a depth of 12 inches with compost mixed in.
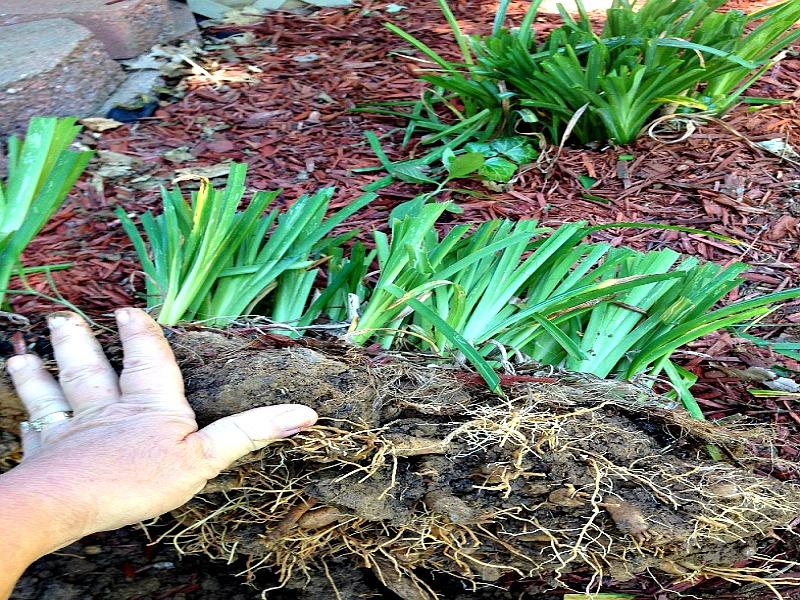
Remove the established daylily clump by carefully digging around it. Use your eyes to see how many divisions you should make.
You can use your hands or a hose to remove excess soil from the daylily clump until you can clearly see where to break it apart. It is best to cut through the thick root system with a clean, sharp garden knife (such as Japanese hori hori). Even if you accidentally cut a fleshy root in half with a knife, the plant will still live. Allow the knife wounds to air dry while you work on your divisions in a shady area.
How to Divide and Transplant Daylilies
Daylilies can be divided and transplanted for a fresh look in your landscape. You’ll have to divide them at the correct moment and choose a suitable location for the new transplants to thrive. Taking them out of the ground needs basic gardening tools and some manual exertion, and you’ll have to be careful about spacing when replanting them. Sunlight and adequate hydration will enable them to flourish once they’ve settled into their new dirt habitat.
Dividing Daylilies
Plan to divide your daylilies in the late summer if you live in a region that gets snow in the late fall or early winter. This is because the daylilies require 6-8 weeks to settle before the first freeze.
Early spring divisions may not necessitate trimming, as the plants are likely already short.
As there are many leaves, crowns, and roots in each clump, it is critical that the fork be inserted away from the real leaves in order to avoid puncturing the crown or central root center.
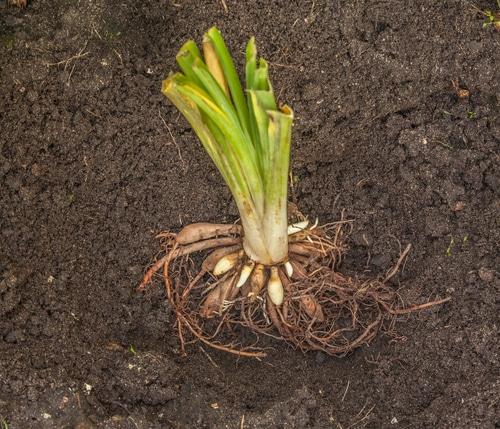
It’s likely that the plant will fall over, displaying all of its roots, which is exactly what you want.
It’s okay if you accidentally pull off some of the root strings. You don’t want to end up with too many strands that you can’t use.
The roots can be more easily separated if they are washed with water.
Look around the plant’s perimeter to see if there are any areas where natural divisions have occurred.
While you remove the smaller fans with your free hand, hold the main clump steady with your other hand.
Xem thêm : How To Start An Avocado Farm? A Few Tips to Remember
The roots may be wiggled apart using your fingertips.
Because daylilies can withstand severe treatment, pulling them apart shouldn’t cause any harm. Try to maintain the crowns of the fans in tact. ‘
The crown region between the fans can be vertically sliced with a small knife to separate them if some fans refuse to separate.
Transplanting Daylilies
- Buy a pH tester from any gardening store if you’re concerned about extremely acidic or alkaline soil. The optimal pH value is 7.
- Even if you don’t have any compost on hand, you can use it to enrich your daylily’s soil.
- A 15-inch-to-18-inch gap should be left in between each hole to allow for the growth of individual chunks.
- The dirt should just cover the crown of the leaves, not reach all the way to the base of the leaves.
- For each additional transplant, follow these steps.
- When the daylilies are at their warmest, avoid watering the surface of the plants, as this might result in spots or wilting of the open blooms of the plants.
- Try to stay at least 18 inches (46 cm) away from your plants when performing a soil test.
- Even if you don’t water your daylilies every week, they can withstand some dry spells because to their large roots, so don’t panic.
Time to Replant the Daylily
The daylily division root ball should fit in a hole that is little larger than that. Create a mound in the center of the planting hole by mixing native soil and compost together. Then place the roots on top of this mound. Keep the crown of a tree at a depth that is consistent with its surroundings; don’t plant it too deep. Fill in the hole with soil, being careful to remove any air pockets that may have formed. To ensure a successful transplant, make sure to give it enough of water in the beginning.
Caring for Daylilies After Transplanting
Digging and replanting your daylily divisions are now complete; treat them as though they were fresh plants. When a plant is uprooted, exposed to drying winds, and suffers root damage, it will need some TLC to return to full health.
The most crucial factor in growing a healthy daylily is maintaining a regular watering schedule. If you want robust roots for transplanting, you need to give daylilies plenty of water in the springtime. A deep soak in the soil of eight to ten inches is ideal. To prevent diseases like daylily rust from spreading, water plants from the ground rather than from the top.
Fertilize the plants about two weeks after transplanting with a balanced liquid or granular fertilizer.
During the growth season, eradicate weeds that compete with your plants for sunshine, soil nutrients, and water by hand pulling, hoeing, and mulching. Insect pests like slugs and thrips can’t hide and proliferate in weed-free daylily beds.
Your new daylily plants will be lush and green in no time, with new scapes and flower buds forming on their stems and leaves.
Nguồn: https://iatsabbioneta.org
Danh mục: Garden


