In order to transplant black-eyed susans, all you need to do is follow these three simple steps. Regardless of whether you plan to propagate black-eyed susans or transfer ones you started indoors, this is a skill that will always be useful. When it comes to some places, it’s better to cultivate plants in a greenhouse and then transplant them into the ground.
Transplanting black-eyed susans appropriately is critical due to their short lifespan as perennials. You may easily avoid transplant shock and ensure that your plants will thrive after replanting them by following the advice below. Additionally, you’ll learn how to properly care for and preserve black-eyed susans with the help of this article.
Bạn đang xem: How To Transplant Black Eyed Susans? Step by Step Instructions
Transplanting Black-Eyed Susans For Beginners
Step #1. Preparation
Black-eyed susans need to be prepared before they may be transplanted. Transplant shock is less likely if you do it this way. These plants are ideally suited for transplantation in the spring, just before new growth begins.
This time of year is ideal for transplanting because you’ll have time to establish roots before the sweltering heat of summer. Transplanting in the fall is an option for some gardeners, but this is only feasible in a greenhouse. In the winter, you don’t want to risk injuring the roots.
Pick a day with a cool, overcast sky to minimize stress on the plants, and then get the area ready. Before planting, prepare the soil by loosening it up and adding some compost. It’s a relief to know that black-eyed susans aren’t fussy about how much sun they get, so the location isn’t an issue.
Step #2. Digging and replanting
Digging out the plant for transplanting is an option once the spot and plant are suitable. Lifting the black-eyed susan will be easier if you start digging around it. To avoid damaging the plant’s roots, set aside a gap of 10 inches.
You should be able to obtain the root mass and a little dirt intact if you gently take the plant out of the soil. Ideally, you should have excavated a hole on the new site before you begin lifting the plant. You won’t have to worry about the roots drying up while you’re waiting.
Xem thêm : What Is The Best Soil To Use For Growing Marijuana In A Greenhouse
There should be enough room for the roots to spread out in the new location. In order to ensure that the plant’s crown is at ground level, dig a hole as deep as the root ball and place it in the center of it. Stabilize the transplant in place by filling up the opening and making certain there are no air pockets.
Step #3. Maintenance
Maintaining black-eyed susans after they have been transplanted is the last stage. The easiest technique to avoid transplant shock and ensure the plant’s establishment is to water it thoroughly. Saturate the soil to prevent the top two inches of the earth from drying out after planting and preserving soil moisture.
Overwatering your transplants, on the other hand, might promote root rot. Two months after replanting your black-eyed susans, you can feed them again in the spring. Liquid fertilizer can be used as long as the label recommendations are followed to avoid burning the roots or foliage.
If your climate is too harsh, greenhouse transplanting may be a better option. It’s important to keep in mind that a transplant’s recovery can be hampered by high temperatures. As a result, mulching your plants as part of regular care is also an option.
Planting Black-Eyed Susans
If you want to be certain that your newly transplanted black-eyed susans grow, you need confirm that they will be planted in appropriate settings and procedures. University of Florida recommends planting black-eyed susans in full light. If the site is fertile and well-drained, your transplants will be able to establish themselves more quickly.
Check the soil frequently to see if it needs watering and fertilize the plants at the start of spring. Deadheading your black-eyed susans will help them bloom for an extra week or two. After the first bloom, you can prune them back if you want another flowering by the end of the fall.
If you have the right growth conditions and management, most common black-eyed susan problems can be avoided. Powdery mildew, rust, and leaf spots can be avoided on your plants if you water them correctly and keep the climate constant. Keep your black-eyed susans free of aphid infestations by cleaning and monitoring your plants on a regular basis.
When to Move Black Eyed Susans
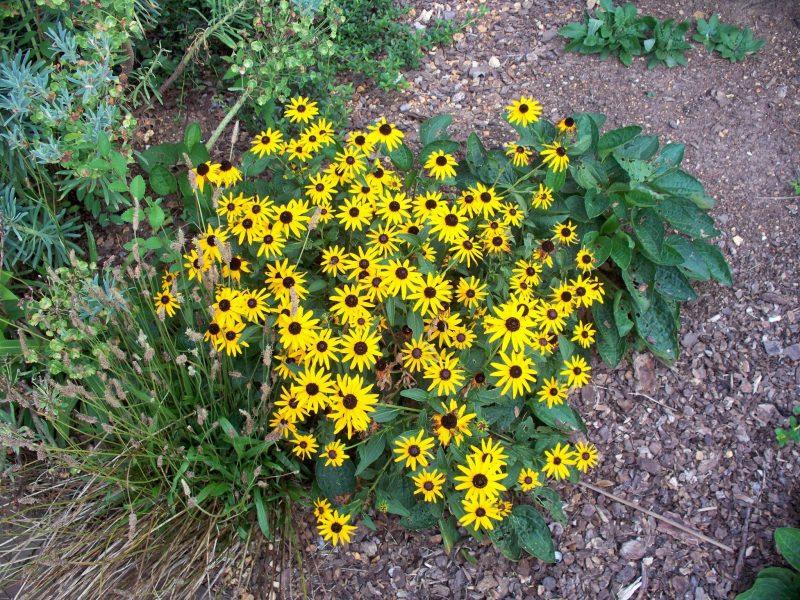
They can be found in flowerbeds, along highways, and open fields across the United States. Bright yellow petals encircle cone-shaped brown cores in these colorful wildflowers. It’s best to transplant black-eyed Susans at the correct time of year to give them a better shot of surviving.

Reasons for Transplanting
Every three to four years, divide and replant black-eyed Susans to keep them healthy. Do not wait until they are showing signs of distress before dividing them. The first symptoms that you need to divide them are smaller leaves in the middle of the plant, fewer blooms, and weaker stems. In order to keep them from spreading into surrounding plants, divide and transplant black-eyed Susans when they get too big for the space where they are planted.
Timing of Transplanting
When the black-eyed Susans are dormant, which is normally in the fall or early spring, you can divide and relocate them. Your black-eyed Susans’ roots should be established before winter arrives by transplanting them in the fall. Because of this, they can begin their growing season a little earlier next year. It is possible to transplant black-eyed Susans at any time because they are so hardy.
Dividing
For easier transport, trim back the plants before dividing your Black-eyed Susans. Then, beginning at the drip line of the plant, dig a trench around the cluster you wish to separate. To remove the plant from the ground, carefully cut down into the earth at an angle to sever the roots. In order to retain the healthiest sections of the plant, divide each clump into smaller plants roughly 20% to 25% of the original plant size. Do not put them out in direct sunlight, and cover them with moistened newspapers to keep the roots from drying out.
Transplanting
If the divisions dry out before you’re ready to move them, soak them in water for approximately an hour. Choose the hottest part of the day to transfer your black-eyed Susans so that they don’t have to deal with too much stress. They should be planted in holes that are wide enough to accommodate the roots without twisting or twisting the roots in order to fit. Make sure the roots of the divisions don’t overlap each other by leaving adequate space between them. Once the transplants are in the ground, water them and keep them moist for a few weeks until their roots are established.

Conclusion
Even with low-maintenance plants like black-eyed susans, transplanting is an essential skill for every gardener. Transplant shock is not a problem if you follow our three-step guide on how to transplant black eyed susans.
To avoid drying out the transplants, you should prepare the ground before planting. Dig up the plants in the spring to avoid having to deal with heat or cold in the winter. Your plants will be able to grow strong roots this way.
Place the plants in the new location after digging a trench around them to make lifting them simpler. As part of routine maintenance, make sure to keep the soil well-watered and avoid letting it dry out. Once you’ve given your black-eyed susans two months to establish, you may fertilize and call it a day.
Nguồn: https://iatsabbioneta.org
Danh mục: Garden


