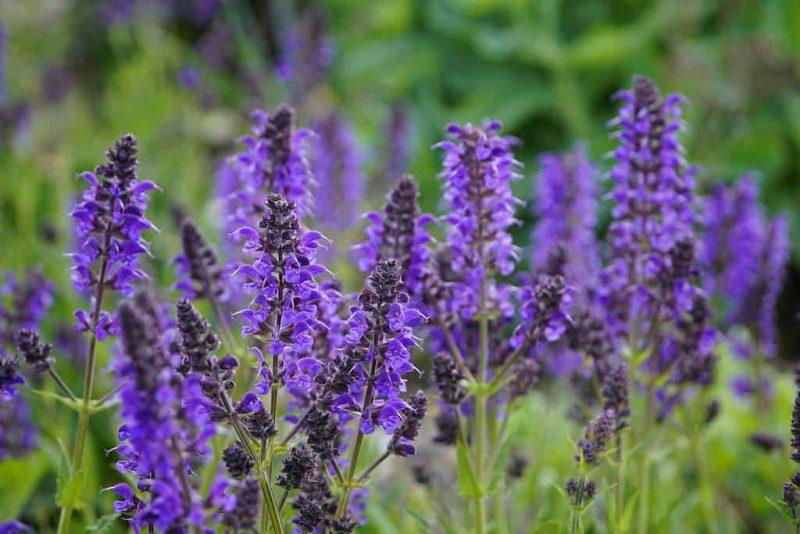
In the USDA plant hardiness zones 4 through 11, bees, butterflies, and hummingbirds are drawn to the white, pink, crimson, blue, purple or bi-colored salvias (Salvia spp.), sometimes known as sages. There are around 900 salvia species and almost 400 cultivars in the Labiatae family. In the spring, when new growth begins to appear, salvias can be propagated by stem cuttings or division, or by seeds collected in the fall.
Woodland or violet sage, scarlet sage, and mealycup sage (Salvia farinacea) are three well-known salvia species that can be found in USDA zones 4 through 8, 7 through 11, and 8 through 10, respectively. From ground covers to enormous bushes, there’s a salvia for every garden, whether it’s in full sun or full shade.
Bạn đang xem: How To Propagate Salvias? Things You Will Need
Propagating with Salvia Cuttings
Plants from species and hybrid salvias can be propagated by cutting stems from the parent plants. Seeds may be produced, although many hybrids are sterile or do not grow plants that resemble the parent plant.
Pruning shears’ cutting edges should be treated with isopropyl alcohol. To prevent the spread of disease to stem cuttings, this procedure disinfects the shears from previous cuttings. Pruning shears can be used to cut a stem between 2 and 8 inches long immediately below a node. A node is the point at which a stem’s leaves first appear.
Pruning shears can be used to remove any stem leaves from the bottom two inches of the plant. Add about 2 inches of water to a glass and place the stem cutting in it. Allow the cutting to develop roots by placing the glass in a room with filtered light.
Make sure that the 2-inch level is maintained in the glass by adding water as needed. It is time to plant salvia cuttings once the roots are 3/4 inch long.
Dividing Established Salvias
Plants can be rejuvenated by cutting back and propagating overgrown perennial salvias after a number of years of growth. Make a shallow hole in the ground, then cut the plants back to the stems.
A trowel should be inserted into the dirt around the salvia plant’s drip line. Dig down to the bottom of the dirt. Remove any remaining roots from the root ball by excavating a circular path around it.
To remove the entire plant from the dirt, place a trowel underneath the root ball and press down on the handle.
To see the roots, loosen the soil around the root ball with your hands. The salvia should be divided into portions with two or three shoots and several roots by loosening the roots from each other between the sections.
Before planting, wet newspaper should be wrapped around each part to keep the roots moist.
Gathering Seeds
For wildlife, seeds from native salvia species offer a nutritious source of food. After the blossoms have faded, collect the seeds. Natural reseeding or storing them in an airtight container for later use are two options.
During the fall, let the salvia flowers to dry on the plant. The flowers will fade and be replaced by seed pods. Remove the pods from the plant when they turn a grayish-brown color.
Allow the pods to dry out in a warm area for a few days before storing them in an airtight container. In order for the pod to open, the seeds must be dry.
Remove the seeds by opening the dried pods. Toss the seeds into a paper towel-lined plate. The seeds might be driest if they are wrapped in paper towels. To keep the seeds fresh, put them in a sandwich bag when the paper towels are no longer wet. Zip the bag shut to remove any remaining air. Refrigerate the seeds until you are ready to plant them in the spring.
Planting and Care of Salvias
Salvia species dictate the position of the plant in the garden, so choose wisely. If the soil is heavy clay or sandy, add a few inches of compost. Organic matter improves the water retention of sandy soils and reduces the weight of heavy soils.
Once the root system has been formed in water and the plants have been divided, transplant the stem cuttings into the garden. A trowel can be used to make a hole the same width and depth as the roots. Make a stem cutting or divide an existing plant by inserting it into the soil. The stem of the plant should be compacted. Make sure the transplants are well-watered.
After the last frost, sow seeds in the spring. One day before planting, remove the seeds from the refrigerator and allow them to come to room temperature. Each seed in your garden should be planted in a shallow hole at the same depth as the seed’s diameter. Lightly push down the earth around each seed before covering it. Seeds should be spaced about a foot apart. Until they germinate, make sure the seeds are well-watered and uniformly moistened.
Water established plants only when the soil seems dry to the touch. It takes little water for sage to blossom in the spring and summer because it is a reasonably drought-tolerant plant.
Things You Will Need
- Myrrh or Isomalt
- Shears for pruning
- Glass
- Trowel
- Newspaper
- Plate
- Cloth napkins
- baguette in a sandwich
Tip
Stem cuttings and division can be used to produce new plants that are genetically identical to the original.
Warning
Propagation yields its finest effects when healthy plants are divided. If the center of the plant is fading and becoming brown, remove it.
NOTES ON PROPAGATION :
Salvias are reasonably easy to propagate and by taking cuttings it is by far the best and quickest way to obtain multiple plants. It also assures that you get the species you want.
Can You Grow Salvia from Cuttings?
Salvias are reasonably easy to propagate and by taking cuttings it is by far the best and quickest way to obtain multiple plants. It also assures that you get the species you want.
Propagation of Salvias is rather straightforward, and cuttings are the most efficient and time-saving method. Also, it assures that the species you’re looking for is exactly what you want it to be.
These are the locations where the stems of the leaves sprout. Others recommend making a 2 to 8-inch (5 to 20-cm.) long cut. Use sharp, sterilized pruning shears in either scenario, and make the cut slightly below a node for best results.
How to Root Salvia Cuttings
Cut the ends of the cuttings and place them in a glass of water for propagation of salvia cuttings. That keeps them in good condition. The next step is to remove all of the leaves from the stem cutting’s lower few inches (8 cm). You should also remove the lower half of each leaf from the stalk if you are working with big-leaf salvia.
Cuttings of salvia can be propagated either by soaking them in water or by planting them in the ground. If you choose to propagate salvia cuttings in water, simply place the cuttings in a vase with a few inches of water (8 cm). A few weeks later, you’ll start to see roots.
Dip the cut end in rooting hormone and then put it in damp potting soil for rooting salvia cuttings A 70/30 mixture of perlite/vermiculite and potting soil is a suitable starting point. Again, roots should appear in 14 days or less.
When to take cuttings
a technique for propagating new plants by reusing existing plant parts, such as roots, stems, leaves, or buds. They can establish roots and eventually become self-sustaining plants if properly prepared and planted. Taking cuttings can be done in a variety of ways, depending on the plant and the time of year.
in the months of August or September. It’s possible that the growth is still pliable or has just begun to stiffen (semi-ripe).
Problems
Taking salvia has a low risk of side effects.
a technique for propagating new plants by reusing existing plant parts, such as roots, stems, leaves, or buds. They can establish roots and eventually become self-sustaining plants if properly prepared and planted. Taking cuttings can be done in a variety of ways, depending on the plant and the time of year.
blackleg can occur in cuttings, but if there is water present,
Pots are containers made of plastic, metal, ceramic (incl. terracotta), or biodegradable materials with drainage holes in the bottom. Plants and seeds are normally grown in pots with a diameter of 7.5-15cm (3-5in), however smaller pots, such as seed trays and seed pans (short pots), can also be used.
There are no sterilized pots, compost, or utensils.
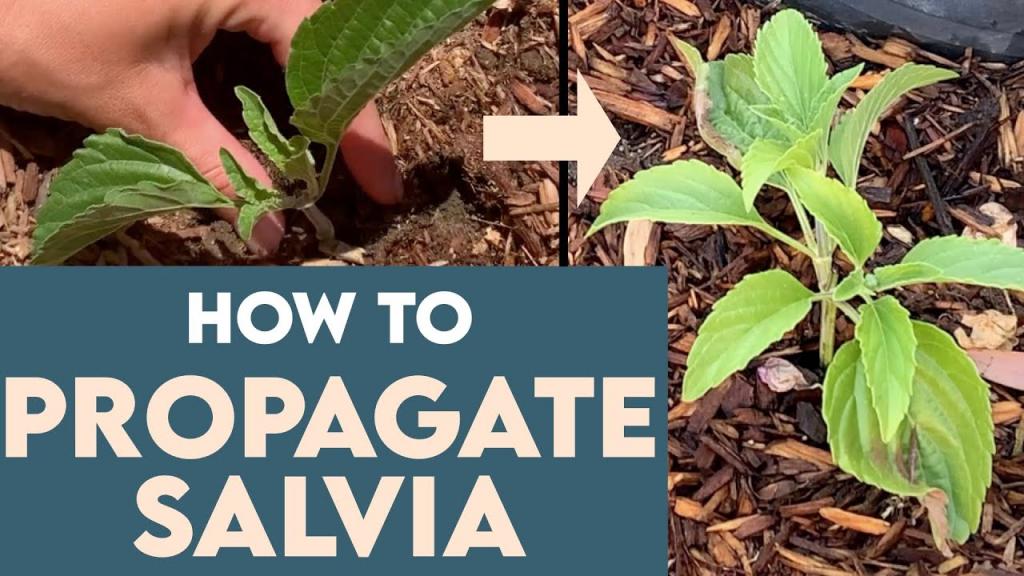
How to Propagate Salvia from Cuttings
There are many Salvia species, including forest sage, red sage, and mealycup sage (Salvia farinacea). A purple sage (woodland or scarlet) or both can simply be grown in your garden by taking cuttings from the main plant.
Xem thêm : How To Build A Marijuana Greenhouse? Where to Grow Marijuana?
Here’s how it’s done, step by step:
Step #1. Locate a Stem for Cutting
To ensure that your Salvia will flourish, you must first ensure that the stem you purchase is from the correct location. Look for a branch with three nodes when selecting the best one. Even though cutting from a stem with two nodes is sufficient, cutting from a stem with three nodes will result in a larger and more productive plant.
Step #2. Cut the Stem
Cut the main plant’s stem from the area right below the bottom node with sharp shears or pruners. Plant growth hormone auxin is found in these nodes, and it stimulates both leaf and root growth.
Step #3. Use a Rooting Hormone
The cuttings you’ve already taken can be kept fresh while you take more by putting them in a container with water. A rooting hormone should be applied to the salvia cutting in the next several days in order to speed up the growth of new roots. Root rot can occur if salvia cuttings are not dipped, which is especially true in the fall and winter months.
Step #4. Place in Soil or Water
You can either plant the cuttings in pots or broader planting boxes if you don’t have a lot of room in your garden. The cuttings should be placed in a well-drained soil. If possible, place the plants on a south-facing windowsill for maximum sunlight. To shield the cuttings from strong winds, use water and a clear plastic bag to cover the pot.
Alternatively, you can cultivate your cuttings in water. Simply put the cuttings into water, and within a few days, you’ll see roots forming from them. The salvias can be planted into the ground once their roots have begun to grow.
Until the roots are well developed, keep the plant at room temperature. Storage in a frost-free location is recommended in the event of a winter storm.
Caring for Salvia Plants
Salvias are low-maintenance plants. As a general rule of thumb, here are some things to keep in mind:
Tip #1. Water them on a regular basis
In order to avoid drying out, salvias need at least a half-inch of water in their pots. It’s hard to keep water cool when there’s less than an inch of rain a week. Make sure you don’t over-water your plants, as this might lead to root rot.
Tip #2: Deadhead them
Deadheading is a good way to keep pests and illnesses at bay. Take advantage of the season by routinely doing this.
Tip #3. Add mulch
If you want to retain water and control weeds, mulch around the plant.
Tip #4. Prune them
Pruning your salvia plants when you notice that their stems are becoming woody might help them thrive.
Tip #5. Add more mulch in the spring
This will guarantee that your Salvia receives all of the nutrients it needs and will encourage it to bloom when spring arrives.
Can You Grow Salvia Inside a Hobby Greenhouse?
Many gardeners enjoy the advantages of greenhouses. It is possible to assure healthy and prolific growth of Salvia plants in a hobby greenhouse if you are growing or propagating them. Growing Salvia in your very own hobby greenhouse has a number of advantages:
It offers protection from harsh weather conditions
Your salvias can easily be blown over by strong winds. A hobby greenhouse can be used to protect these plants from bad weather, such as strong winds, heavy rains, snow, sleet and hail as well as blizzards by providing them with the protection they need.
To avoid the stress of preparing for an outdoor party, you may rest easy knowing that your hobby greenhouse works as a protective barrier between your plants and the harsh weather conditions.
Extended growing season
If you have a hobby greenhouse, you can extend the blooming season of salvias, which are best grown in spring and summer. When you grow plants in a greenhouse, you can control the amount of light and temperature that they require to thrive.
Better pest control
Infestations of pests such as mealybugs, powdery mildew, aphids, and botrytis bugs are extremely rare in Salvia, although they can nevertheless occur. You can keep them safe from rots, leaf damage, and root rot by putting them in a greenhouse away from sick plants.
How to Propagate Salvias: Final Tips
When it comes to cultivating salvia plants, cuttings rather than seedlings are preferable because you can mimic the parent plant’s characteristics. The first step to having a spring and summer garden full of vibrantly colored blooms is to learn how to cultivate salvias.
Nguồn: https://iatsabbioneta.org
Danh mục: Garden


