Why are home gardeners using Rockwool to start their seeds?
Aside from the fact that it’s a substrate commonly used in commercial hydroponic growing systems, not much was known to me about Rockwool. However, now that I’ve used Rockwell, I’m eager to share everything I’ve learned about the advantages of this novel seed starting medium with the rest of you.
Bạn đang xem: How To Start Seeds In Rockwool? Comprehensive Guide
Rockwool’s history and advantages over soil are the focus of this essay. In addition, I go over how to take care of Rockwool seedlings and transfer them, as well as how to clone plants in Rockwool.
Keep reading to see why many gardeners prefer to use Rockwool for seed starting purposes after a little practice.
What Is Rockwool
Molten basalt rock and limestone are the primary elements of rockwool. The mixture of liquid rock and limestone is spun into extremely fine fibers that are both sterile and inert in a machine. Rockwool may be made from 37 cubic feet of rock.
During the construction of homes and companies in Europe in the 1930s, the usage of rockwool, also known as mineral wool or stone wool, became widespread.
Editor’s Choice: 1.5′′ Rockwool Plug Starters
Highlights
- Molten rock is used to create this product.
- Contains a chart of the Twin Canaries.
- For quick plant growth, absorbs nutritional solution while retaining oxygen.
Gardeners may now buy rockwool in convenient shapes like cubes and blocks that are great for starting seedlings.
Scientists in Denmark speculated in the late 1960s that seedlings in hydroponic systems could benefit from Rockwool’s consistent moisture and aeration levels. Plants grown on Rockwool were subjected to a series of tests.
The results of these testing have led to the development of a Rockwool formulation specifically designed for hydroponic growing systems.
Rockwool VS Soil
For millennia, soil has been the go-to medium for bringing seeds to life. Rockwool possesses qualities that can help seedlings succeed, whereas dirt does. Let’s examine the advantages and disadvantages of Rockwool and dirt.
pros of rockwool
- Maintaining a steady supply of air or water
- Suitable for a variety of crops.
- Compostable and sterilized material
- It’s easy to use
- Hydroponics growers will love this product.
- Nutrient levels can be easily monitored and controlled.
Professionals in the field of soil:
- Simple and secure to use
- Affordable
- Can be used to mitigate excessive fertilizer consumption.
- Texture, moisture, and nutrition can all be altered.
Cons of Rockwool:
- Fibers may cause eye, lung, and skin irritation.
- Perfecting the art of seed germination takes time and effort.
- Inherently high pH values require correction.
- the cost of the initial investment
Cons of soil:
- It is difficult to control the levels of nutrients, moisture, and aeration.
- Soil is a haven for pests, diseases, and mold.
- Unwieldy to deal with
The primary advantage of Rockwool over potting soil is the capacity to grow more in a smaller area. A plant’s roots must grow long enough to get to the nutrients it needs to thrive in soil.
Water and nutrients are readily available to plants’ roots in Rockwool. As a result, the plant’s energy is diverted away from root development and toward increasing its height and strength.
How To Care For Seedlings In Rockwool
There are no natural nutrients in rockwool that can help your seedlings grow. Gardeners will appreciate this function since it allows them to precisely feed their plants with the specific nutrients they require for optimal plant growth. This feature is fantastic.
When I’m taking care of my seedlings in Rockwool, I spray them with fertilizer. I find that I don’t need to apply as much fertilizer as I would if I planted my seedlings in soil because the plants are able to absorb the nutrients efficiently.
Keeping an eye on the moisture level in the Rockwool may seem daunting at first, but it’s essential to keep your seedlings alive.
Rockwool’s humidity and temperature can be controlled via the plastic tray dome. In order to improve air circulation, remove the lid while watering or for a brief period of time throughout the daytime hours.
Xem thêm : How To Use Greenhouse In Georgia? Comprehensive Guide
You’ll have a better sense of how the material responds to the atmosphere of your house over time. Some people may only need to water their trays once a day, while others may need to mist them twice a day.
Once my seedlings reach a height where they can push against the lid, I take the dome off.
PROS AND CONS OF USING ROCKWOOL CUBES AS A GROWING MEDIUM
advantages of growing in cubes of Rockwool
- Cloning medium that is safe to use
- Drainage is good.
- This is an excellent seed starter.
- Any nutritional solution can be used.
- Simple to move from one location to another
- Easy for roots to penetrate
- Easy for roots to penetrate
Easy for roots to penetrate
- Roots can easily penetrate the soil
- Not a viable long-term strategy
- Degradable in any way
- This substance has the potential to be harmful to human health.
- Algae blooms on the water’s surface
WHAT IS A ROCKWOOL CUBE MADE OF?
They are manufactured by heating chalk and the basalt rock formed by volcanoes at high temperatures (3000°F) and then spinning them into cubes. To complete the process, a binder is applied and the substrate is flattened to create a sheet. Hydroponic rockwool comes in granulate small blocks, beginning plugs, cubes, and slabs, among other forms. Hydroponic seed starting is made possible by the thick structure of these media, which encourages rapid root development. However, even though Rockwool is derived from natural elements, the manufacturing method is not natural, making the substrate unsustainable and energy-intensive.
Skin, eye, and lung irritation have been connected to long-term health issues caused by Rockwool’s physical qualities and toxic chemical compounds. “Group 2B” substance by the Environmental Protection Agency
ARE ROCKWOOL CUBES GOOD FOR CLONING?
It is a popular alternative for cloning plants in a sterile environment since it is a sterile, produced substrate that has no pests, weed seeds, or illnesses. There are no beneficial fungi or nutrients in this product. This is a great option for those who wish to maintain full control over their nutrient solution and diet.
It is critical to use a humidity dome while cloning in a soilless medium to keep the roots moist during the rooting process. Our 6″ tall humidity domes are perfect for seedlings and stem cuttings because they give ample growing room and optimal conditions.
HYDROPONIC GARDENING WITH ROCKWOOL
SEED STARTING USING ROCKWOOL CUBES
The 2 inch Rockwool cubes, which fit within the Bootstrap Farmer 32-cell insert tray, make it simple to plant seeds. These typically have an indentation in the center for the seed or seeds. For smaller seeds, dip a moistened toothpick into your seeds to pick up one or two. Insert the toothpick into the indentation and twist it against the side of the hole to release the seeds.
PLANTING CLONES IN ROCKWOOL CUBES
When seeds are planted in the 32-cell insert tray’s 2 inch Rockwool cubes, it’s a cinch. These often have a depression in the center for the seed or seeds. For tiny seeds, dip a moistened toothpick into your seeds to pick up one or two. Insert the toothpick into the indentation and twist it against the side of the hole to release the seeds.
HOW OFTEN SHOULD YOU WATER SEEDLINGS IN ROCKWOOL?
Using the 2 inch Rockwool cubes that fit into the 32-cell insert tray of the Bootstrap Farmer, it is simple to plant seeds. These usually have a central depression for the seed or seeds. Pick up one or two seeds by dipping a moistened toothpick into your seed jar. A toothpick should be inserted into the indentation and then twisted to release the seeds.
WHAT IS THE PH OF ROCKWOOL?
Most plants like acidic soil conditions, and rockwool tends to be too basic for them. Rockwool must be pre-soaked for at least one hour in a mildly acidic solution (pH 5.5 to 6.5) before use with a pH range of 7 to 8. To achieve the correct acidity, add a few drops of lemon juice or pH test strips to the water. Once in use, be on the lookout for sudden changes in pH. Some prefer Coco Coir to Rockwool because of this.
CAN I PUT ROCKWOOL IN MY COMPOST?
Mineral wool, such as Rockwool, is not biodegradable, although it can be mixed with compost to improve the soil’s drainage and mineral content. Shredding your used Rockwool cubes before adding them to your compost bin is a must if you plan on using them. The lack of organic substance in mineral wools allows them to remain in the soil indefinitely if left complete.
REUSING ROCKWOOL
The cubes of Rockwool can become a breeding ground for mold, fungus, and harmful bacteria if they are overloaded with roots. Allow the roots inside your cubes to dry completely before sterilizing them in boiling water for at least 10 minutes if you decide to reuse them. Check out this post on Seedling Tray Washing and Care for more information on correct equipment and cleaning.
It’s possible to use Rockwool as a hydroponic, cloning, or seed starting medium. Although it has several drawbacks, it can be ideal for particular applications. See Seed Starting: 101 Ways to Start Seeds Inside for Your Garden for more information on how growers and gardeners alike can start their seeds indoors.
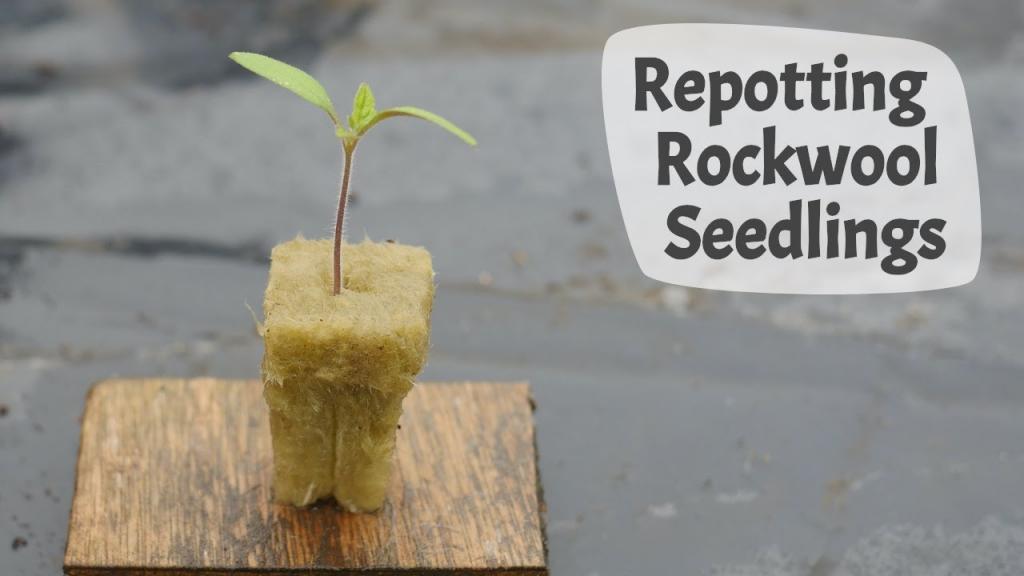
When To Transplant Rockwool Seedlings
After the initial set of leaves has fully opened, split the seeds apart while planting them in Rockwool. While the seedlings are still in the Rockwool medium, you can transplant them into individual pots filled with regular potting soil.
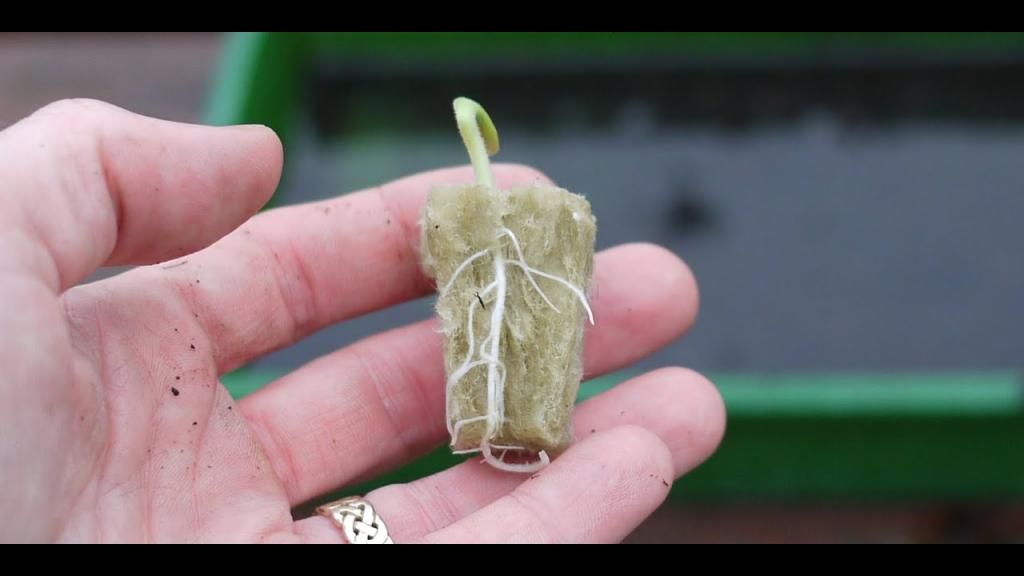
When the roots of Rockwool seedlings begin to emerge from the starter block, you know it’s time to transplant them.
If the weather permits, you can plant these blocks immediately into your garden, or you can keep them in a container of soil until the season is ripe.
The plant can also be grown hydroponically using a larger block of Rockwool and the seedling. Cut a hole in a four-inch Rockwool block the size of the seedling block and insert the seedling inside. Simple as that!
To get the best results, I re-pot my seedlings in a four-inch Rockwool block. I next transfer the seeds into my garden immediately. ‘
Rockwool Cloning Tips
Plant cloning in Rockwool is a breeze. The cloning process can be improved by following these guidelines.
Preparation
The environment should be kept at 75 degrees with 50% humidity so that your tray can be cleaned and disinfected. To prevent the clone rooting process from being harmed by a chilly table surface, place a piece of cardboard between the tray and the table.
Set a 24-watt T5 grow light about an inch or two above your tray for optimal results (with the dome on).
As you would for normal seed germination, soak your Rockwool cubes, remove any excess water, and place them in the tray.
Gather clone cuttings
Cultivate your own clones. Suckers from the base of the plant, or stems at the top of the plant, are examples. Snip the clone at a 45° angle at the stalk. Remove everything except the top two leaves from the plant, which encourages the creation of new roots.
Xem thêm : How To Test Soil pH Cannabis? Complete Guide for Beginners
Rooting hormone powder is applied to the cut end.
Condensation and venting
Afterwards, place the dome on the tray and insert the clone stems. Condensation will form inside the tray if the vents are kept closed, allowing the Rockwool to gently absorb moisture. In order to find water, the clone goes through this process of producing roots.
Remove the cover once a day to shake out any remaining moisture and allow for better air flow. It’s possible that your tray is too chilly or situated in direct sunlight, which will cause the liquid to evaporate. Before the clones die, move the tray to a more convenient spot..
As roots begin to sprout through the Rockwool’s base, gradually increase the size of the vents on the dome. Remove the cover for a few hours each day after the vents are fully open. Extend the time until the lid is removed until it is constantly open.
The clones should be healthy and actively developing roots at this stage, so you can transplant them.
In Summary
Rockwool is a forgiving substrate once you get the hang of it as a growing media. I enjoy how the material delivers water and nutrients directly to plant roots without a lot of bother, allowing plants to develop stronger and faster.
As an excellent seed starting medium, Rockwool is especially useful for those of us who utilize our indoor gardens as a springboard for outdoor plants.
I hope this Rockwool seed starting tutorial is beneficial to you. The next time you plant seedlings, you may want to experiment with Rockwool instead of soil.
How To Start Seeds In Rockwool. Best 3-Step Guide
To get started with seed germination in Rockwool, there are three stages to follow. As a growing media for hydroponics, rockwool is an excellent choice. That someone would be interested in learning how to make use of it in the germination of seeds is understandable.
When beginning seedlings in the greenhouse, utilizing Rockwool as a medium can be beneficial because of its ability to retain moisture. Remember that providing moisture without overwatering, which can dampen and destroy the seeds, is one of the aspects that must be nailed to ensure sprouting. Rockwool will keep the seeds from being soggy, but it will also keep them from drying out.
How To Start Seeds In Rockwool Successfully
Step #1. Preparation
Because Rockwool cubes are a soilless growing medium, they will need to be prepared prior to seeding. For example, this media’s pH ranges from 7 to 8, which is higher than recommended for seeds. Soaking the cubes in water will allow you to raise the pH to a range of 5.5 to 6.5, which is more conducive to seed germination.
Lemon juice or a mixture of water and lemon juice might be used for this purpose. You can use a pH test strip to get a solution with a pH of 5.5 to 6.5. Soak the cubes in the slightly acidic water for at least an hour after preparing it.
Step #2. Planting
Using the cubes, plant the seeds on top and shut the hole after an hour. To get the seeds all the way to the bottom of the hole, look for a small opening in the soil and insert two seeds into it. Once you’ve planted your seeds, use a hydroponic fertilizer solution to help them germinate. Once your seedlings are 3 inches tall, you can transplant them.
Step #3. Maintenance
When beginning seeds in Rockwool, the primary benefit is that it offers the proper amount of moisture. When the seed is wet, the seed’s enzymatic process is activated, which aids in germination. However, to be sure of your accomplishment, you must follow through with the essential upkeep.
Encourage germination
Hydroponic systems, for example, can thrive in a greenhouse because the temperature and humidity can be controlled. This is especially important for plants that haven’t yet established themselves, making it easier to start them. Seeds can be sprouted in Rockwall cubes at temperatures between 70 and 80 degrees Fahrenheit and in a humidity dome.
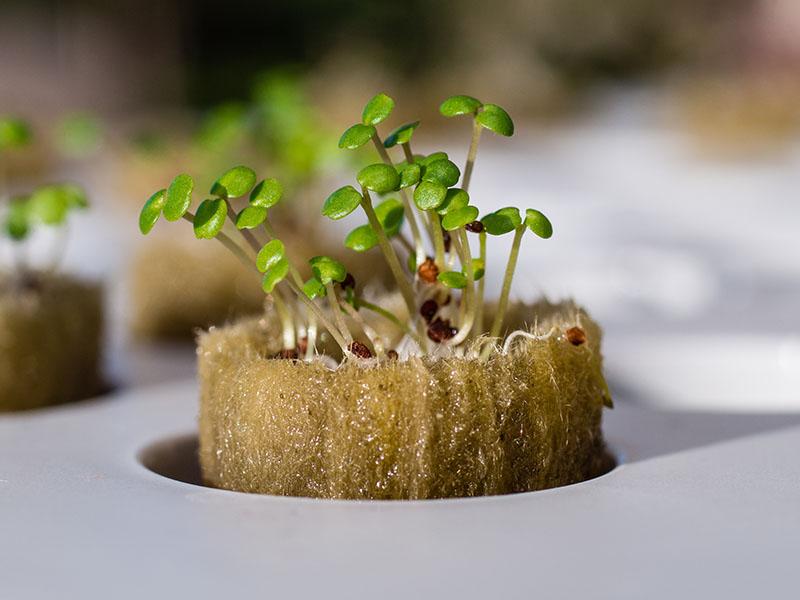
Encourage seedling development
At this time, misting is used to keep the cubes from drying out. Make sure you don’t over- or under-water the ice cubes. Remove the dome and place the cubes under grow lights as soon as you see sprouting, depending on the plants you’re growing.
In a similar way as beginning seeds in pots, you want to remove all except the strongest plants from each cube. If this is the taller plant, you can remove the shorter one and use it as a reference. You don’t want to disturb the chosen plant in the cube by removing the unwanted one.
How To Transplant From Hydroponics To Soil
Growers commonly start seeds in a soilless medium and then transplant the plants to the ground. To avoid transplant shock and other complications, you must be aware of this technique. As an illustration, where should the transplants be placed?
Transplant preparation before soil planting
To prepare for the roots of the transplants, a large pot might be used. Give them about a 4-inch buffer to allow for root development. Planting media like a soilless peat mixture should be used.
Preceding their immediate placement in the soil, the plants will have a place to call home here. To assist the plants acclimate to their new environment, a nutrition solution must be added after planting. It’s also critical to rehydrate them as soon as possible to avoid shock.
Reduce watering after a week and see if you can move the transplant outside.
Hardening and transplant shock
In addition, don’t forget to give the seedlings a gentle hardening period before putting them in the ground. Transplant shock can cause plants to lose their leaves and stems. You can help the plants by watering them and trimming them to at least one-third of their height.
Conclusion
Growing plants from seeds isn’t difficult if you have experience with a variety of media. A greenhouse and knowledge of how to start seeds in Rockwool eliminates the normal germination difficulties of low moisture and unstable conditions. Once the cubes have been prepared, they should be placed in the greenhouse to further enhance sprouting.
Using a humidity dome and sprinkling the soil will keep it moist, just as you would if you were growing seeds in another media. Seedlings can also be grown in a greenhouse that has been heated or cooled to your liking. At this point, wait until the plants have grown to an optimal height for transplantation, and you’ll have healthy plants from Rockwool.
Nguồn: https://iatsabbioneta.org
Danh mục: Garden


