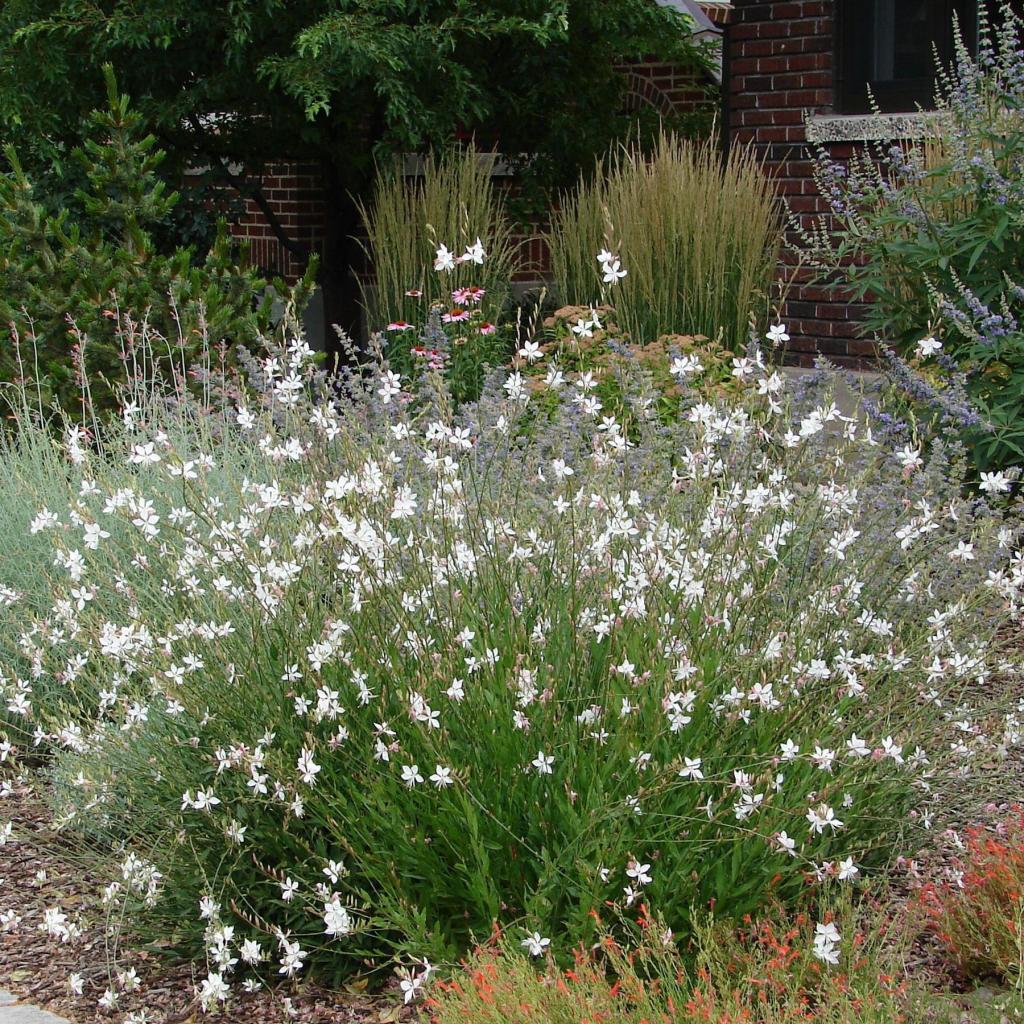
There are three ways to propagate gaura if you’re interested in doing so. All three of these methods of propagation can be used to propagate this herbaceous perennial. Gaura, on the other hand, can be used in a variety of ways, such as an airy accent, a container plant, a trailing plant, or as a color contrast to grasses.
- How To Grow Fuchsias In A Greenhouse? Comprehensive Guide
- How Do I Best Use My Mini Greenhouse in a Cold Climate? Helpful Information! Update %Current_Month_Custom% / %currentyear%
- How To Revive Dying Petunias? Comprehensive Guide
- How To Fix Stunted Growth In Plants? Comprehensive Guide
- How Much Food Can A Small Greenhouse Produce? Ultimate Guide
Gaura is generally low maintenance, but you can have a stress-free propagation if you start in the greenhouse. Remember that whatever the plant is, rooting them from any method can be challenging if the conditions are fluctuating and unstable. The greenhouse provides many benefits for propagation to guarantee success, whether you start from seeds or cuttings.
Bạn đang xem: How To Propagate Gaura? All You Need To Know
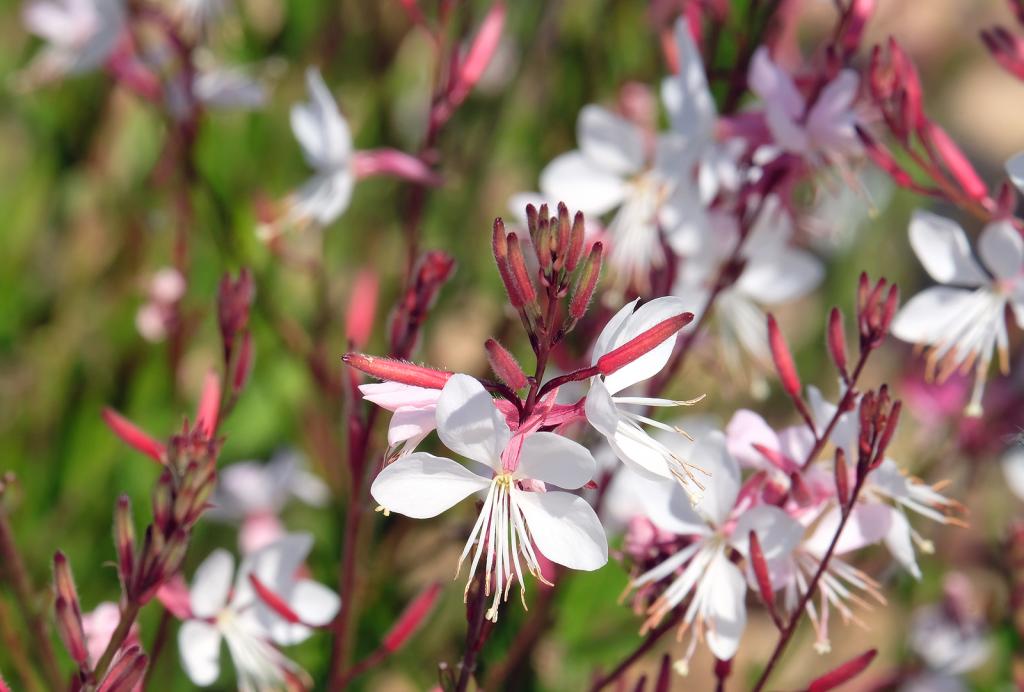
About Gaura
A stress-free propagation of Gaura can be achieved by starting in a greenhouse. Regardless of what type of plant it is, rooting it from any method can be difficult if the environment is constantly changing. If you’re propagating plants from seed or cuttings, the greenhouse is a great place to do it.
How to plant Gaura
A stress-free propagation is possible if you begin in the greenhouse with Gaura, which is normally easy to care for. It is important to remember that rooted any type of plant might be difficult in unstable settings. Starting from seeds or cuttings, the greenhouse offers several advantages for propagation. It is a sure bet for success.
How to care for Gaura
During seasons of drought, it’s a good idea to water your plants on a regular basis. In order to avoid damage or failure of growth, it is critical that gaura be placed where they are meant to be from the start.
Select a plant
Gaura lindheimeri is currently available in a variety of forms. Select the kind that best fits your preferences and area, as this procedure will work on all of them.
When taking a cutting, make sure to choose a healthy plant that is free of pests and illnesses. Also keep in mind that some gaura’s don’t hold their color well, so choose cuttings from a plant that has been proven to be a success.
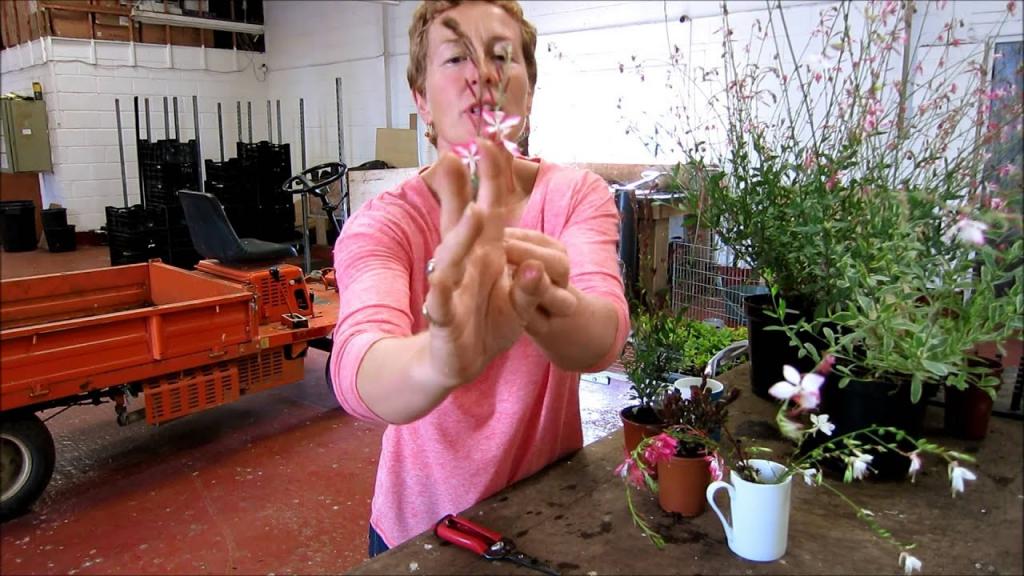
When cutting the plant, we prefer slicing it close to its base in the middle of the stem. Using foundation cuttings for gaura is the best way to get started. Make sure to use stems that are still green, but that are also rather solid. Avoid snipping off the tip of the stems, as each one is a blossom stalk.
If you’re looking for a fast and easy way to grow a bushier plant, you may want to take cuttings from the top of the plant.
To make a cutting, cut the stem just below a leaf junction (also known as a node). Finally, snip off the stem just above the next leaf. Leave a scar where the leaf used to be, and the roots will emerge from there. The top leaf should be cut in half (as shown in the picture below).
Striking the roots
We utilize a perlite peat moss mix to strike (develop roots) the cuttings. Moisture retention and sterility are strong points for both materials. Peat moss makes up 10% of our mixture, which is 90% perlite.
Cuttings from the base of the stem can be pushed into the mix without having to make a hole or draw a line if you are utilizing them. To make the mixture more rigid, sprinkle some water over it first. The cuts don’t stay in place as well when the mixture is dried.
After you’ve added all of your cuttings to the mixture, give it a good rinse. At this point, the cuttings do not have roots, thus it is necessary to keep them moist.
Xem thêm : How To Fix Stunted Growth In Plants? Comprehensive Guide
The perlite peat moss mix should be checked daily for moisture; if it is, you’re good. Give it a light watering if you notice it getting a touch dry on top.
In addition, the cuttings must be kept in an area that is not exposed to direct sunshine or wind. They will soon dry out the cuttings if exposed to these elements.
They will begin to grow roots in around two months.. Only a few months at most.
Potting the cuttings
Potting up our cuttings will be possible once they have developed roots. Our cuttings are potted in 2′′ (50 mm) pots. We can save room in the nursery by using these smaller pots, but our new plants will still have a strong root system thanks to their reduced size.
I always recommend using a high-quality potting mix when planting any kind of plant in any kind of container. Trace elements, vitamins and minerals are essential for a healthy start for your seedlings.
Pests and diseases are less likely to attack plants that are well-nourished and well-watered.
A seaweed-based fertilizer is generally always applied to newly potted plants. The root system and the entire plant will develop faster as a result of this. After the plants have been potted up, we use this solution to water them in again two weeks later.
Always water your newly potted plants until the water drains freely out of their drainage holes, no matter which method you use.
The plants must be kept in a protected location until the roots can fully develop and the plant can fully mature. Another benefit of using smaller pots in our greenhouse is that they take up less space.
The plants can be transplanted outside and into larger pots or the garden once they have formed a root system that reaches the pot’s edges and emerges from the drainage holes.
Thanks for reading and we hope you now have the confidence to grow and propagate gaura lindheimeri at home! (butterfly bush). These processes are shown in a video below.
How To Propagate Gaura Successfully
Option #1. Seeds
Self-seeding, although you can gather and store the seeds for future plantings of Gaura. Other than that, finding gaura seeds isn’t difficult; just be sure to choose a kind that’ll do well in your region. Gaura seeds can be started indoors or outdoors, depending on the climate where you live.
Where to sow
For those who want to minimize the risk of frost, starting gaura seeds indoors is the best option. In order to be more prolific, you can sow gaura seeds indoors in a greenhouse until the weather warms up. Use light, fertile soil that has a lot of sand, no matter where you decide to plant.
Xem thêm : How Is Grass Pollinated? Perfect Information For You
Gaura prefers a well-draining space or container, and if you’re planting it in the ground, be prepared for its root growth. As a result of the shrub’s lengthy taproot, it is difficult to propagate it through division. Gaura, on the other hand, is unable to survive in soils that are too wet.
It takes two to three weeks for the seeds of gaura to germinate. Gaura, on the other hand, is one of those plants that should not be moved between locations. As previously stated, it has a deep taproot, so it’s best to leave it alone after it’s established.
Option #2. Stem cuttings
Stem cuttings can also be used to propagate other varieties of gaura. The Belleza dark pink gaura is a cultivar that can be grown from stem cuttings. Consider this kind of gaura if you want to attract more butterflies to your yard.
Collecting cuttings
Growing new Gaura plants from a parent plant is simple when you use stem cuttings as a propagation method. It’s also a simple way to guarantee that you’ll have plenty of your favorite flavor. Gaura stem cuttings can be taken from a healthy plant in spring or summer.
Sterilized knife for 5-inch cutting below bud or leaf. You’ll also want to remove all except the topmost leaves. Stem cuttings can be rooted in the greenhouse in the same way as seeds are.
Rooting and transplanting
Stem cuttings can be started in a planting tray with a mixture of peat and coarse sand. Insert the end of a piece dipped in rooting hormone powder into the cell. Make sure the leaves are not in contact with the medium when stabilizing the cutting.
Place this container in an area that is both warm and bright, but not directly in the sun. You can also use clear plastic to keep the moisture in. Once the cutting has developed roots, which should take around two weeks, you may pot it up and store it there until the following spring, after the last frost has passed.
Option #3. Root cuttings
Due of its long and delicate taproot, dividing gaura can be a challenge. Consider using this strategy when necessary and begin in the greenhouse for your own protection. As a result, the divisions are ready to be relocated to their permanent site.
Digging out gaura is best done in the spring because of its deep roots. Make four portions by pulling apart the roots once they have been dug out of the earth. Plant these divisions in a healthy and well-draining area, ensuring that the roots are happy.
Gaura is not a shallow-rooting plant, therefore division may not be the best technique of propagation. It’s possible, though, that your plant will outgrow its space and necessitate the purchase of additional clusters. As with prior approaches, be sure that the setting is ideal and your divisions will thrive.
Conclusion
The pollinator-attractive gaura is a good choice if you’re looking for a multipurpose plant. It’s best if you’re reassured that propagating gaura isn’t difficult. Furthermore, if you grow gaura in a greenhouse, you won’t have to worry about the weather.
Gaura can be propagated from seeds as a first step. Your plants can self-seed, or they can be sown indoors or out. You can also grow mature gaura bushes from stem cuttings or root cuttings if you have them.
However, the plant’s deep taproot is essential. Therefore, if the plant has outgrown its borders, division is the best method of propagation. There are no precise prerequisites for establishing gaura, regardless of the method you use.
Take advantage of an area that is rich in nutrients while being free of harsh weather.
Nguồn: http://iatsabbioneta.org
Danh mục: Garden


