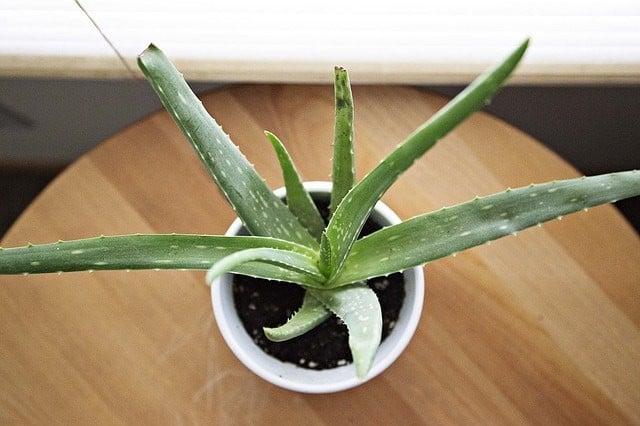
In the desert, aloe vera is a true king. South Africa, the South American continents, and parts of the American Southwest are all home to this species. Since ancient times, aloe Vera has been used as a herbal cure for a variety of ailments, including burns, inflammation, bee stings, acne, spider bites, and other skin irritations. A rotting aloe Vera plant has a different set of problems.
Gigiicon-facebook Gigiicon-twitter Gigiicon-pinterest-circled Gigiicon-instagram
Bạn đang xem: How To Save An Aloe Plant With Root Rot? Comprehensive Guide
Because of rot, which has been connected to fungus growth, an Aloe vera is likely to perish. A variety of root rots are caused by neglect, incorrect soil type, and the inappropriate environment, as well as a combination of all three. Take the time to save your garden when the eternal plant gets brown, has mushy root tips, and lower leaves.
A rotting aloe vera needs to be salvaged, but how? As soon as possible, remove the aloe vera from its pot, relocate it to a new pot, and prepare the soil for it. Always use the correct replanting method and watering schedule when replanting.
Maintaining loose soil is the best way to save a rotting aloe plant, regardless of whether it is planted indoors or outside.. Take good care of your plant and inspect it periodically to show your affection for it.
How to save a rotting aloe vera will be described in detail in this essay. To save the plant, continue reading to acquire one or more vital lessons.
How Do You Realize The Aloe Plant Is Rotting?
If you notice brown, water-soaked areas on the leaves or soft, oozy leaves that are drying out, you may have plant rot. The roots must have been severely damaged for leaf rot to be visible. You must move quickly to save the situation, which necessitates immediate action.
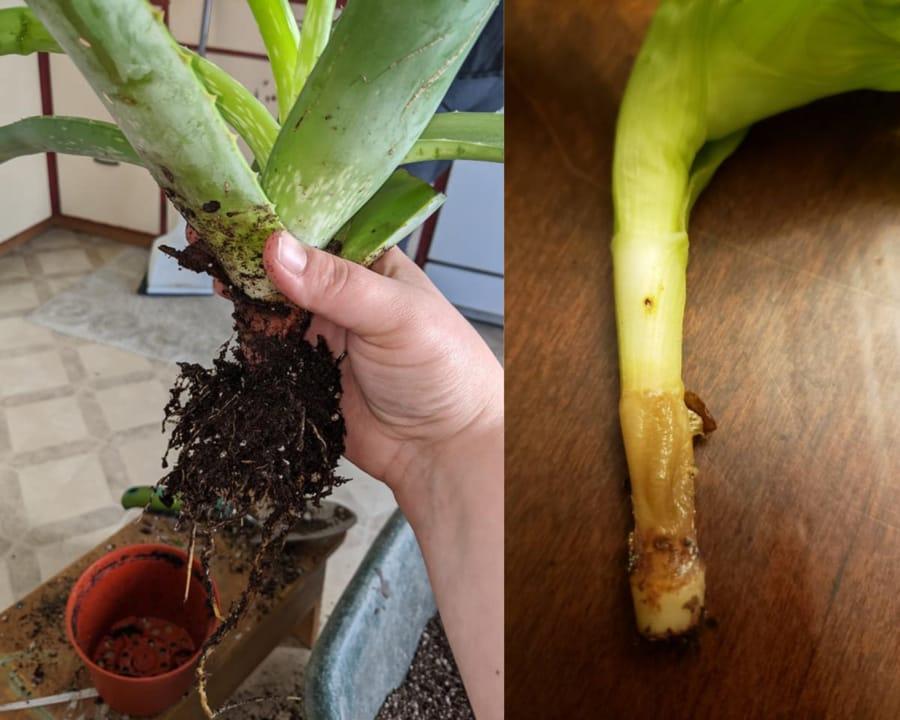
Removing The Aloe From Its Pot Is Critical
Affected roots should be removed as soon as possible and the plant should be taken out of its pot with a brush to remove any remaining dust.
The plant’s core should be the focus of your attention. Remove all of the black or brown sections on the bottom if it is still healthy. As soon as the crown has been harmed beyond repair, it’s time to start a new plant utilizing any remaining green or swollen sections.
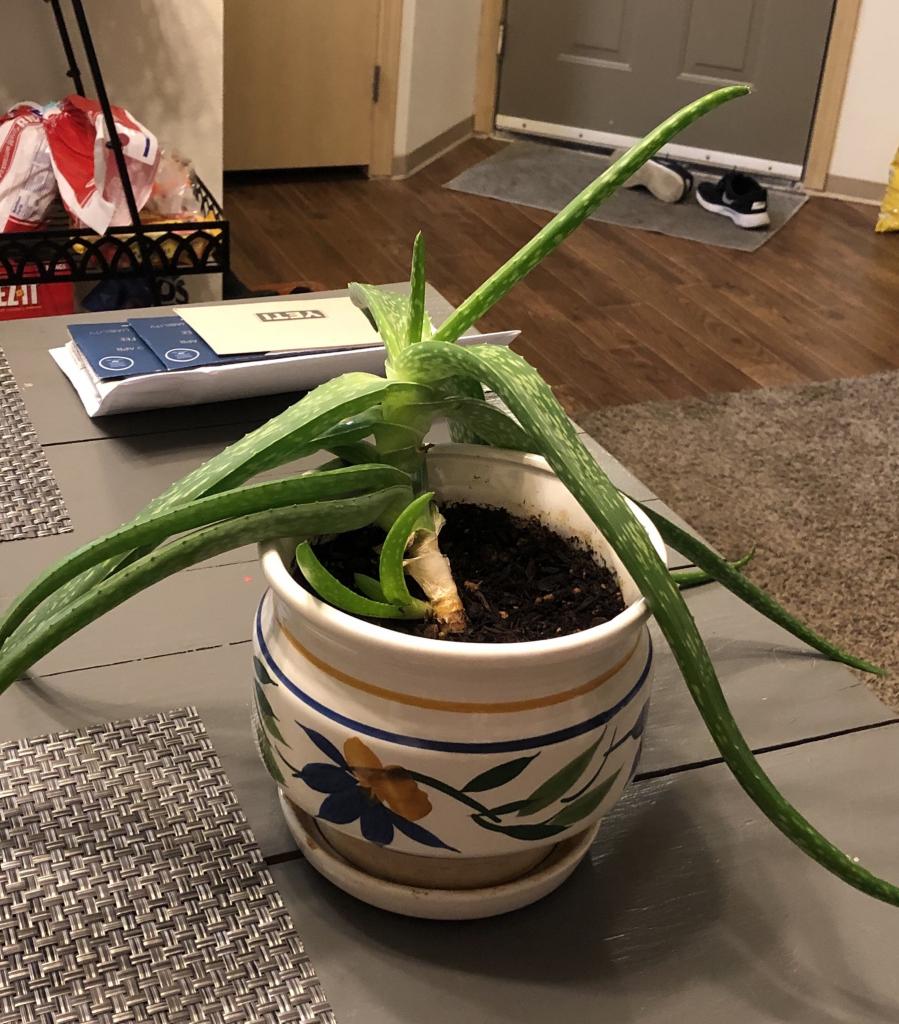
Repotting Will Offer A New Lease Of Life To The Aloe Vera
After you’ve made all of the necessary adjustments to the plant, it needs a fresh start. Cleaning the old pot and planting it there is certainly an option, but you don’t want to take any chances. Fungus may form if aloes are grown in the same container. You know exactly what I mean.
Plants should be placed in a pot that fits all requirements. The pot should be large enough to keep the aloe in place while allowing the roots to spread freely.. Excess water may need to drain more rapidly if you choose a permeable pot.
If you have a large aloe plant, you’ll need a larger pot. One-third of the aloe plant’s importance should be attributed to the pot. The soil will soak up more water than necessary if the pot is too large. Ensure that the container you choose has good drainage. It shouldn’t be able to hold that much water without wetting the roots.
Consider The Soil You Want To Use
Consider the type of soil you want to use when transplanting your aloe before you begin. A well-drained soil with moderate moisture retention is ideal for aloe, although a fast-draining soil is preferable. To get the most out of an aloe plant, you’ll want to use a mix of sand and dirt.
Changing the soil before replanting an aloe plant when it is dying is recommended. However, it holds very little water for your plant to absorb before the container drains fully in sandy soil, making it an excellent drainage soil. Some inorganic elements can be added to promote drainage and provide the plant with the nutrients it needs to thrive.
A good rule of thumb is to avoid potting soils containing fertilizer. The low nutritional needs of succulent plants, like aloe vera, make them particularly sensitive to excess fertilizer. Sterilized dirt and sand can be mixed together and some stones can be thrown in for good measure.
Know How To Replant Your Aloe
One approach to keep the aloe plant from rotting is to properly replant it. In order to prevent additional infection, immediately remove the decaying roots and disinfect the remaining roots with charcoal, fungicide solution, or potassium. Allow the roots to dry down for a day before handling the plant again.
Keep in mind the plant’s original depth while planting it. To prevent root rot and moisture problems, bury it at the same depth as in the previous container. The crown of a healthy aloe vera plant can be immediately replanted in a new container with fresh soil.
Taking a green portion and starting a new plant is all you can do if the crown has already been harmed. One-half inch from the last rotted section is the minimum distance for the section to be used. Before transplanting, let the desired portion of the plant scrub for a night. Cuttings should be planted at least an inch below the soil’s top so that they can root and draw water from the ground.
Set A Better Watering Schedule
Avoid repeating the same mistake that could lead to root rot in this situation. To avoid overwatering, make sure the aforementioned conditions are met. Moisture levels should be 1 to 2 inches below the topsoil before watering.
The plant’s watering needs are influenced by the weather. In the winter, you may have to water the plant more frequently, but it may take you longer to do so. More water is required by younger plants than by older plants that have become accustomed to dry conditions.
Unless the soil is completely dry, aloe plants should not be watered. Water thoroughly until the holes at the bottom of the pot begin to drain some water. The reason for this is that succulent plants are known for their ability to absorb large amounts of water at once.
Understand The Surrounding Of The Plant
Make sure you know what your plant’s surroundings look like, indoors or out. Ensure that your replanted aloe has the right lighting and proper temperature to grow. Avoid direct sunlight, even if they need it for growth.
During the summer, you can allow your plant to soak up some sunlight, but only for a few hours at a time. Rotate the plant so that it receives light from all sides when it is in a windowpane.
Always Ensure The Soil Is Loose.
Maintaining the aloe plant’s soil structure is important. It is critical to water the plants. However, before watering the plant, be sure to check the soil’s density as well. Compressed soil retains more water than loose soil even in well-draining containers.
In order to support the plant’s growth, the soil density should be robust enough, but not so dense as to hinder drainage. Adding loose dirt and removing some of the soil from the pot may be the solution to this issue. It is also possible to loosen the soil by adding a few tiny stones to the mix.
To avoid overwatering, it’s best to repot the plant to a fresh pot every few weeks or months. Soil density is important because it keeps water from building up in the container and allows air to flow freely through the roots of the plant.
Inspect The Plant Regularly
It is critical to pay special attention to the plant. Regularly inspect the plant’s leaves to see if any spots are appearing or if the root system appears to be healthy. Treat any minor symptoms of the plant as soon as possible.
Check the aloe’s health after replanting to make sure it’s flourishing in a better environment. You should also keep an eye out for any insects or pests that may harm the leaves of your aloe plant.
Smelling the roots is one of the simplest ways to examine them. Healthy roots provide a distinct aroma. When roots are decaying, they will emit a harsh and substantial odor. Roots that have been harmed are mushy and appear to have been drenched with water.
Bottom Line
Better to be safe than sorry. If you can prevent the plant from rotting before it does, you can assure that it matures into a healthy plant. Check out aloe plant growing conditions before purchasing the plant or bringing it home to plant.
Using gloves when making adjustments to your plant, such as cutting a few branches, is a good idea due to the possibility of skin irritation from the sap. If all goes well, and the plant reaches maturity, you’ll need to know how to get it to bloom during the appropriate time of year.
Can Aloe Vera Survive Root Rot?
It is extremely difficult to diagnose root rot early on, making it extremely harmful. It does not display any signs as it grows.
Yes, aloe vera is able to withstand root rot if it is properly cared for. However, if you suspect that it has the condition, you must act quickly.
Causes of Aloe Root Rot
This rot on plant roots is mainly caused by fungi. Keep in mind that aloe is a succulent plant.
Aloe thrives in arid and hot conditions in its natural habitat. It loves sandy, well-aerated, light soils.
Frequent Watering
An arid and hot climate is the native habitat of aloe. It prefers light, sandy soils with good air circulation.
There will be issues if you water your aloe too frequently. Which, fortunately, is a simple matter of avoiding.
Root rot thrives in moist soil, which is what happens when you overwater your plants.
Roots are suffocated by constant watering and wet conditions. Root rot can be accelerated if the zoot zone is submerged for more than 15 minutes.
To understand more about root rot’s symptoms and causes. Find out how to save an aloe plant that has been overwatered in this post (Step-by-Step Instructions).
Small Container
Xem thêm : How To Prune A Poinsettia? Everything You Need To Know
You may not have considered it, but if the container is too tiny, the roots form a tight ring around the plant.
After watering, the potting soil will remain moist for some time. The water drainage is hindered by the soil’s compacted nature. It doesn’t matter if it appears dry from above.
As a result, the root system will be deprived of oxygen. Roots can’t get enough oxygen when the soil is wet. Additionally, water that is stagnant promotes the growth of fungi. Plants are under more stress and begin to decay within as a result.
Hypothermia
Hypothermia can affect plants, too! If you leave your aloe vera plant in the refrigerator or water it excessively, the problem gets even worse.
In the fall and winter, I’ve noticed that succulents are more susceptible to rot. Because of the strong wind and the cooling soil in the pots. Root rot fungus thrives in cold, wet conditions.
Using cold water to water a plant in the summer can kill it. Even if the plant is watered moderately, a fungal infection might lead to disease.
Pathogenic Infections
Another significant point that you may not have previously considered! Even if you’ve done all the necessary measures, your aloe can still become infected. However, I forgot to sterilize the previous container before replanting.
Aloe vera can spread disease if it is kept in the same container as a previously sick plant. It’s not out of the question that some of the pathogens are still lurking around.
Because they can survive for a long time on the ancient pot’s walls. They become active when the earth is damp and squishy, for example.
It’s easy for them to go into the new host as soon as the circumstances are favorable.
Organic Fertilizer Application
Indoor gardeners frequently attempt to resuscitate damaged plants by applying fertilizer to them. You should avoid doing that.
Root rot is caused by fungi that grow rapidly in the presence of excess fertilizer. If you’ve overwatered your aloe vera and it’s displaying signs of root rot, don’t use any organic fertilizer or any other fertilizer at all.
Important!
Stop fertilizing your aloe vera if the roots have been affected with root rot.
How To Know If Aloe Has Root Rot
Overwatering and fungus infection are the most common causes of root rot. Aloe vera and other succulents are both susceptible to this illness, which is always fatal. Root rot may be the end of your aloe plant.
A disease infection may go undetected in a potted plant, making early detection difficult. What are the signs that your aloe vera is suffering from root rot?
You’ll have to check your aloe vera frequently to find out. So that you can quickly identify and address any potentially dangerous symptoms.
Let’s examine the differences between unhealthy and diseased aloe roots.
Gardeners are notorious for removing plants from pots at the eleventh hour. They may try to improve the situation by fertilizing it or in some other way. But this only makes the situation worse.
Now, I’m sure you understand why it’s so critical to catch the sickness early on. So, what does it look like when aloe roots have rotted?
Root rot can be spotted early if you follow these steps:
- You’ll notice that the aloe vera’s development has slowed or ceased if you inspect it frequently. The plant does not respond to watering at this phase.
- To notice the decay of older leaves, look out your window.
- The bottom of the aloe stem is beginning to show.
- The stem will wither and die.
- Aloe vera’s root neck thins out to the point of breakdown.
- The stem’s appearance is good. In contrast, the lower leaves become limp and loose as if they have been saturated with water.
- There is a noxious smell emanating from the aloe plant.
- Roots turn brown or black and become mushy and water-soaked when they’re done growing
How to Save Aloe Vera If The Root System Is Rotted?
Aloe vera’s root system has been infected with root rot! At this point, what should I do? It’s time for an emergency repotting of the plants.
If you’d like to grow aloe vera at home, here’s how you can do it. and take you through each step of the procedure step-by-step:
You need to take into mind the following factors when preparing for this. In order for the entire process to be successful, these factors must be taken into account.
- Your aloe vera should be stored in the correct container.
- Potting mix should be used with care.
- Properly repotting a plant
- After transplantation, watering
The following are the actions necessary to save an aloe vera plant from root rot:
Inspect the Aloe Vera Root System
Root rot signs should be addressed as soon as you discover them. Because if you don’t do this, your aloe vera will succumb to this deadly disease.
Allow the pot to dry out for a few hours before moving it to a brighter location. When you remove the plant and inspect the root system, it will be easy for you to do so.
You’ll search for dark or black roots, as well as water-soaked and mushy roots that are infected.
The scent of the roots is the best method to tell if you have root rot. If your aloe vera has root rot then it will have a strong foul and pungent odor.
Cut off The Infected Roots
The scent of the roots is the best method to tell if you have root rot. If your aloe vera has root rot then it will have a strong foul and pungent odor.
Detecting root rot is as simple as smelling the roots. Your aloe vera will smell strongly of rotting roots if you have root rot.
In this manner, old fungi will be eliminated as a source of infection. The roots should now be dried off by covering them in a thin soft cloth or a kitchen tissue.
A rooting hormone can hasten the rooting process after diseased and dead components have been removed.
To cure fungal infections. Those are the fungicides that I use:
Pot Preparation
When you plant aloe vera in a pot, it’s not just for decoration. It also helps control moisture, which is a vital part of its job.
Make sure that the drainage holes at the bottom of your aloe plant pot are large enough to allow water to drain out easily.
Drainage holes will aid in the removal of surplus water from the surface of the concrete. I’m specifically referring to the excess. Aloe, like many other succulents, is commonly misunderstood by novice gardeners as being water-shy. It’s as if nothing could be further from the truth!
Aloe can tolerate a lot of water for a short period of time. It simply indicates that aloe does not enjoy being submerged.
When the aloe’s roots are submerged in water for an extended period of time, they are more susceptible to root rot disease.
So you should be wary about using these aloe vera tools.
Make sure the drainage pores in your pot are large enough to accomplish their job properly.
Xem thêm : How To Deadhead African Violets? Step-by-Step Tutorial
Aloe vera thrives in a well-prepared soil or in the suitable potting mix, of course.
Remember that aloe vera prefers to spread out its roots when selecting a pot for it to grow in. This means that the ideal planting container should have a base that is large enough to accommodate the expanding root system.
Now that you know which pot to use for your aloe vera, let’s get started on the soil preparation.
What Is Causing My Aloe Plant to Turn White? (And How to Fix It)
Prepare Soil Mix for Aloe Vera
There are ready-made soil combinations for aloe vera transplantation on the market. No problem if you choose to mix your own soil.
If you want to grow aloe, you need to add inorganic materials to your soil. For this purpose, aquarium stones are ideal because they are already equipped to support living organisms.
To put it another way, they’re devoid of fungus and bacteria. If you’re still unsure, fill a pot halfway with boiling water and test it.
Pour hot water over it and let it sit for a few minutes. You can eliminate any fungi that may be on their surface by brewing them in this manner.
Keep in mind that too large a stone will not work with a tiny aloe vera.
A variety of colored stones in varying sizes can be be used to add interest to your design.
Using this information, we’ll discover how to blend the soil materials in the most ideal proportions possible.
Best soil mix for aloe is:
- Three quarters of potting soil.
- Pebbles and tiny stones
- Particles of perlite:
The proportion can be measured using a cup or a spoon. Make sure to clean the soil if you plan to use it in the old pot. The dirt can be sterilized using a microwave oven.
When repotting aloe vera, you should make sure to do so. There is a risk of contaminating a new plant with bacteria from the prior one.
Your soil will be free of fungus and bacteria after 30 minutes of heating it to 302°F/150 °C.
Aloe vera transplantation is next on the list.
Remove Aloe From The Pot
Aloe vera should be removed from the pot before anything else is done. When the earth is dry, it will be easier for you to complete your task.
Remove the pot from the aloe with your right hand while keeping the aloe in your left.
Loosen The Roots
Gently loosen the soil around the roots to avoid damaging them.
Soil removal is necessary once you’ve removed your aloe plant’s pot and loosened any surrounding soil. Make a thorough examination of the root system. Calculate the extent of the damage to your vehicle.
Under running water, wash it off. Then Remove rotten roots with a sharp, clean knife. It’s best to let the aloe root dry out for two or three days, according to my experience.
This is something I’ve never done with my own aloe, and I’m ashamed to confess it. The root rot of aloe has given me the opportunity to help others.
How to Repot Aloe Vera (Step by Step)
- To prevent infection, apply charcoal/fungicide solution/potassium permanganate to the roots.
- If you leave the aloe for a day to let the roots to dry out, it will do no harm.
- It’s best to use a fresh pot. If a new one cannot be found, try washing the old one.
- thoroughly clean the old container with soap and hot water.
- Drain any extra water from the bottom of the container.
- Repot the aloe vera in the prepared soil mixture.
- Substantially moistening the ground.
- Keep the plant in a well-ventilated area that is both warm and well-shaded.
- After you’ve repotted your aloe vera, don’t give it any water for at least two weeks.
See also: Why Are My Agave Leaves Turning Yellow? for more information. There is a problem (and how to fix it),”
How to Care for Aloe Plant After Repotting
Moderate soil moistening can be resumed once the aloe has established itself.
Using water that is too hot, too cold, or room temperature will all do damage to the plant.
If you live in a hot climate, you should water your aloe twice a month. Water it once a month in the fall and winter. Until spring, you can let the plant go without watering it.
Make that the plant is not exposed to extreme cold or a draft. When it comes to aloe, the golden rule is that dryness is preferable than flooding. You’ll be able to appreciate Aloe’s healthy appearance for a long time thereafter.
How to Prevent Aloe Root Rot
Root rot can be prevented and controlled by following these simple guidelines:
Tip 1: Avoid Waterlogging
Aloe root rot can be avoided in most cases by taking steps to manage the surrounding environment. It is well-known that fungi thrive in moist and humid conditions.
So keep the soil or substrate loose and thoroughly aerated to avoid waterlogging. Root rot is more likely in soil that is both dense and waterlogged.
Tip 2: Regular Water Schedule
An aloe plant cannot be watered from top to bottom at the same time. Regular watering is necessary for the health of aloe vera plants, depending on the time of year, growth stage and environmental conditions.
As a result, watering aloe vera should be done on a regular basis. Your plant will be free of root rot if you keep to the schedule.

Tip 3: Consider Plant Rotation
To avoid root rot in your garden next year, pay attention to your planting schedule. Sometimes a certain pathogen exclusively thrives on a specific plant or family of plants.
As a result, make sure that your interior garden has a wide range of plants and flowers. The next year, if your aloe root rots, don’t grow aloe in the same container.
When you’re planting a new plant, you should experiment with different soil and containers. Aloe root rot can be avoided in this way.
Tip 4: Loosen The Soil
Adding sand or compost to your soil will make it more aerated and loose. A fantastic approach to loosen the soil is by adding perlite and sand into the mix of the soil.
Humus and water storage capacity can be boosted by the addition of organic material. As a result, you won’t have to water it as often.
Consequently, your aloe will not become overwatered. It’s impossible for the root to grow if the soil isn’t wet.
Tip 5: Prevention
Pesticides don’t always do what they’re supposed to. Because fungicides’ active components do not reach the soil.
Aloe root rot can be prevented by following the best practices outlined above.
Last but not least, make certain that the soil conditions for aloe cultivation are suited to the plant. Controlling a disease after it has already taken hold is preferable to prevention.
My curiosity is piqued regarding your plans for prevention now that you have learned how to save your aloe from root rot. Leave a comment below if you have any questions.
Nguồn: http://iatsabbioneta.org
Danh mục: Garden


