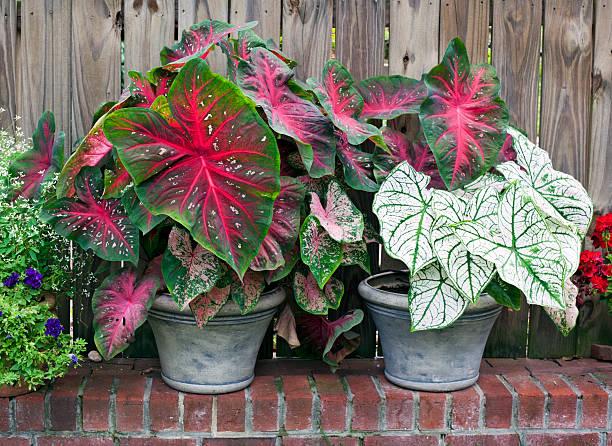
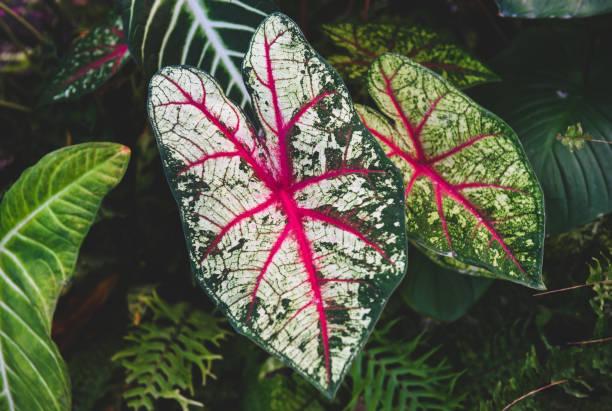
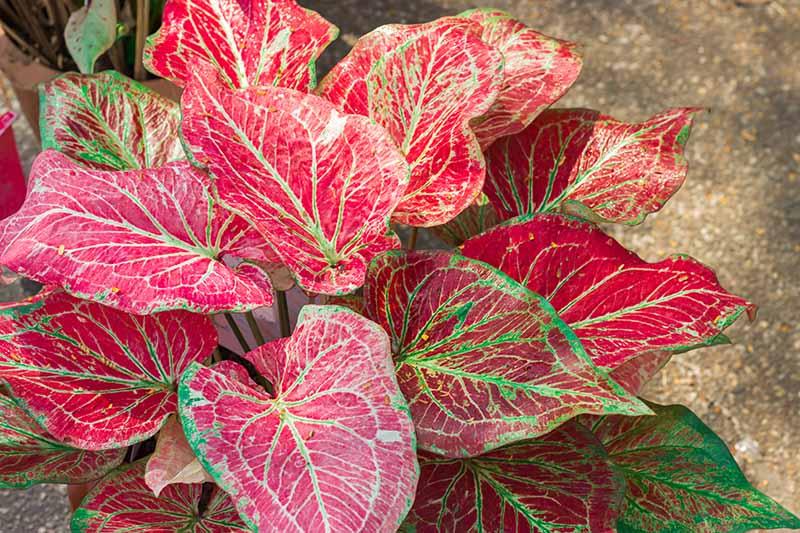
Caladiums are one of the most popular houseplants among collectors today. Its heart-shaped and vibrantly colored leaves have made it a popular houseplant. There are over a thousand different kinds of this plant, each with a unique pattern or coloration. Caladiums may be propagated so that you have more than one pot of each kind in your home. We’ll go through how to do that today.
Divide and re-pot Caladiums for easy multiplication. Division is the process of separating plants from one another. Repotting, on the other hand, is the process of moving a plant to a new pot, usually a larger one, in order to allow it more room to grow. We’ll begin by introducing ourselves:
Bạn đang xem: How To Propagate Caladium? Comprehensive Guide
1. Remove the plant from the pot
To begin the process of caladium propagation, we must first remove the entire plant from its container. Because the roots are enclosed within the pot, it is much easier to divide a potted plant. The dirt should be compacted before watering your plant if you wish to propagate it so that all of its root systems come out simultaneously.
Tap or press the outside of the pot in an effort to loosen the dirt from its adhesion to the surface. After that, invert the container to reunite the plant with the dirt. Take a look at this quick video to see how I unpotted my caladium plant.
The plant can be propagated without having to take the pot out of the ground. However, I prefer to take the plant out of the pot because digging with a shovel or any other equipment can damage the roots of the plants.
2. Separate the stems
The stems of caladiums are grouped together. Each group develops independently, making it simpler to determine how to divide them. The stems are shown in the video below.
Separating the stem groups is the next phase in our caladium propagation process. Remove the soil by slicing it with your thumb and gently pulling the stems apart. Check to see if each stem group has its own set of roots. Even if the group only has one stem, separating it will stimulate it to grow. Because it lacks its own root, a stem belonging to a group is doomed to extinction.
The bulbs of mature caladium plants can be found in the ground. Bulb appearance is similar to that of a potato. These bulbs produce stems. Bulb appearance can be seen below.
When I spotted one of these bulbs in my pile of garden dirt, I was completely unaware of its existence. My initial impression was that the plant was a ZZ plant, but I couldn’t be sure for sure. So far, the only thing I can say with certainty is that it is not a rock. That there is a life that is going to come out of the ashes. This led me to just set it on top of the dirt and wait for the plant to grow naturally. A picture of the first bulb that I discovered is shown in the gallery below. The stem was about to emerge from the pointed end.
Another lovely leaf appeared soon after, and so on and so on. This finding taught me how to grow caladiums in a unique way. Here’s a look at her in real life.
3. Place the stems in separate pots
Separate your stems into new groups and put them in separate containers. You’ll be able to spread them around your house and use them in different rooms, or you may give them as gifts.
4. Fill your pots with soil
The soil for your caladium plants is ready. To make them stand upright, use a pole and some twine or ribbon tied around the stems. The stems of caladiums are pliable and bend easily, especially when they are trying to find the sun.
5. Place your collected bulbs on top of a pot of soil
To propagate caladiums, gathering the “bulbs” is the most distinctive and entertaining aspect of the process. Plants can be propagated by dividing or separating their branches or stems. The bulbs of caladiums, however, can be retrieved from the ground.
To expedite the growth of your bulb collection, place it on top of some dirt in a pot. Place the flat portion on the ground and the pointed portion on top of it. Bulbs needn’t be buried in the ground. It will grow if you place it on top of the soil with half of the surface showing.
6. Water your new plants
The final step in learning how to reproduce caladiums and other plants has arrived. My newly propagated plants are always watered by me. Propagation can cause stress to the plants’ roots. After a long day, water is the first thing they need. It’s what they eat. They rely on it for the fuel they need to keep growing.
How to Propagate a Caladium?
In order to reproduce caladiums, which are tuberous plants, you must remove the root system and separate the smaller tubers from the larger ones by hand. These can either be treated as whole or chopped into pieces with a growth point. It is best to sow the tubers in moist soil. At a depth of 4-6 inches (10-15 cm) and a distance of 9-12 inches (20-30 cm), they should be perfectly safe.
How to Plant a Caladium Tuber
Make sure the soil is well-loosened and enriched by adding compost and fertilizing as needed.
Xem thêm : How To Trim Verbena? Special Tips and Tricks
4-6 inch (10-15 cm) deep holes, spaced 9-12 inch (20-30 cm) apart, should be used for this project. Fill each hole with a tuber.
Tamp down the earth a bit once you’ve covered the tubers. Keep the soil loose and well-drained by not compacting it or making it too hard.
Water the tubers thoroughly, but then leave them for a few days for the water to drain away before watering again. Tubers might rot if the soil is too moist or too dry.
What Caladiums are
Plants with appealing leaves, such as caladiums, can be paired with almost any other type of plant. Many people use them in bouquets or other decorations.
If you’re lucky, you’ll get an arum-like flower from your Caladiums at the right time. However, it is the foliage that provides the season’s color.
A tuberous plant is one that grows from a single, fleshy, bulging root. Tuberous plants include caladiums. The core portion of each tuber is surrounded by a cluster of smaller, swelling buds.
By eliminating the smaller buds, a tuber can be split in two. It is possible to grow each of these.
Tubers
The roots of some plants, like the Caladium, are not particularly complex, consisting of thick main roots and thinner branching roots. These creatures have a large central organ that can have one or many growth patches inside.
Thin roots or shoots emerge from these nodes and eventually breach the surface to become stems.
As far as I know, a tuber that has been kept in a dark place can sprout from the eyes. Even if you aren’t planning to grow Caladium, this could be intriguing to play with.
Many tubers are produced as food because they contain a lot of stored energy (such as potatoes and yams). Dahlias and other flowers are grown for their beauty, while other plants are grown for their foliage (such as daffodils) (such as Caladiums).
The Caladium’s growth is supported by the tuber’s energy.
Splitting the Tubers
Because the tuber is essential to the plant’s growth, it is rare for a cutting of such a plant to flourish.
Taking a cutting is the act of removing a portion of the plant’s stem. To grow a Caladium, you must cut off a piece of the tuber and cultivate it separately.
You can accomplish this by’splitting’ the larger piece into smaller ones. Except for the section that was linked to the main tuber, these will be nearly complete.
Alternatively, you can cut the little tubers into smaller pieces. There must be a point of growth or an eye on each item.
Caladiums cannot be propagated via cuttings, however if a leaf is submerged in water for a period of time, it will sprout roots.
This is the only way to get it to operate. Having a portion of the tuber linked to a leaf’s base helps it grow more quickly and effectively.
When to Plant the Bulbs or Cuttings
Caladium tubers can rot if the soil isn’t well-drained and maintained damp, but not soggy. Cold soil is also a problem for them.
Xem thêm : How To Plant Peacock Orchid Bulbs? Complete Guide for Beginners
They should not be planted until the ground has thawed out, as the frozen soil includes a significant amount of ice. It is inevitable that the tubers will begin to decay when the weather warms and the ground begins to thaw.
Places to Grow Caladiums
In addition to pots, borders and beds can also be used to grow caladiums. Even in close proximity, they can be cultivated. Avoid planting them too close together since they are tubers, which grow as they mature.
These plants do not fare well in lower temperatures and need bright light or only semi-shade. Find an area of your garden that gets a lot of sunlight but is also a little bit secluded.
Planting the Caladium in a shaded area will result in poor growth.
Necessary soil
Plants known as ‘foliage plants’ thrive in specific soil conditions. Therefore, it’s critical that your garden’s soil is both healthy and well-drained.
Be aware of what kind of soil is used if you plan to grow your tubers or cuttings in pots. It is recommended to cultivate these and other foliage plants in soil that is exceptionally rich, rather than ordinary dirt, which may be infested with insects and even illness.
Your local nursery or garden center should be able to supply you with potting soil mixes. To ensure that the plant has adequate drainage, keep the mix in the container as loose as possible.
Dividing Caladium Bulbs
Tubers, not bulbs, are what Caladiums are. Caladium tubers can be divided in the spring for easy caladium propagation, according to Fine Gardening. Dig out and divide the tubers and store them over the winter to replant in the spring in colder locations where the caladium isn’t hardy. The North Carolina State University Cooperative Extension recommends keeping them in a dry, warm area at a temperature of 70 to 75 degrees Fahrenheit.
Dave’s Garden recommends using a pitchfork or spade to loosen the soil around the plant. Make sure to remove the tubers from the soil and remove any dirt that is still attached to them. Using a pair of scissors, remove any dead or damaged foliage, inspect the tubers, and remove any rotting or damaged buds. A fungicide should be sprayed on the tubers to keep them healthy.
Replant only healthy tubers. A center bud is surrounded by smaller ones on each tuber. Using a sharp knife, gently cut and pluck out the central bud, Clemson Cooperative Extension recommends. This increases the number of new shoots from the tuber’s tiny buds, resulting in a bushier, more leafy plant.
Caladium Planting and Care
It is best to plant in a spot that receives two to six hours of sunlight each day. Moisture-loving plants do best in acidic, well-draining soils. Although spring is the most frequent period to plant caladiums in warmer climates, you may plant them any time of year. The University of Florida IFAS Gardening Solutions recommends waiting until soil temps are between 60 and 70 degrees before digging.
The puckered side of the tubers should face up when they are planted. Each tube should be spaced between eight and a half and twelve inches apart. Keep the soil moist by watering it frequently. Keep the soil from completely drying out. To avoid fungal growth, avoid overwatering and keeping the tuber submerged in water.
A soil test can help you figure out what nutrients your caladium might require. Clemson Cooperative Extension recommends using a 12-6-6 fertilizer every six weeks if you are unable to conduct a soil test. Slow release 15-9-12 fertilizer can also be used at the start of the growth season.
Considerations for Growing Caladium
When propagating and planting caladiums, make sure all of your gardening tools are clean and free of pathogens. Tubers will not be affected by any fungal, bacterial or viral illnesses that may be present on your instruments. It’s recommended by University of Florida IFAS Gardening Solutions that you wipe the instruments with alcohol or a disinfectant cleaner like Lysol after cleaning them to eliminate grime. Alternatively, you can soak the tools for 30 minutes in a weak bleach solution before rinsing them.
Keep in mind that caladium is poisonous if eaten and can cause skin contact dermatitis, as noted by the North Carolina State University Cooperative Extension while choosing a planting place. If you have children, dogs, or animals, this might be a problem. Diarrhea, nausea, and vomiting are all symptoms of poisoning. There may also be a burning sensation in the mouth, as well as swelling. Caladium can be fatal to pets if they consume it.
Conclusion
Caladium propagation is a never-ending process. Smaller tubers produced by the tuberous roots will continue to grow as long as the plant is healthy.
In fact, they’re the kind of plant that’s all about giving its all.
Frequently Asked Questions about How to Propagate a Caladium
Can I grow a Caladium from a cutting?
In contrast to plants that may easily develop roots from a cutting in water, caladiums do not have the same root system. There is a fat underground root called a tuberous root, which is the source of all growth in these plants. A cutting or leaf that has some of the tuber attached can be grown in water and later in the ground, much like a cutting.
When should I plant my Caladium tuber?
Because of their sensitivity to cold, caladium tubers should only be planted in the early spring. If the earth is still frozen when you plant them, the water will rot them and they will die.
Nguồn: https://iatsabbioneta.org
Danh mục: Garden


