There are ways to get a beautiful boxwood hedge without spending a lot of money. You’re right. The solution is to root boxwood cuttings. The process of propagating boxwood plants is simple, and I show you how to do it!
Cuttings can be used to propagate boxwood, but the process does take some time. Boxwood plants may take three years or more to grow large enough to make a garden hedge, but the savings are significant.
Bạn đang xem: How To Propagate Boxwood From Cuttings? Comprehensive Guide
There are affiliate links in this post. A modest commission may be earned if you make a purchase after clicking on one of my links.
It’s May, and I’m trying to get my garden in better shape. For those of you who have been following this blog for a while, you know that I prefer a less-than-formal approach to gardening. My personal preference is for a more ramshackle cottage garden.
Even still, I can’t help but yearn for a bit more structure. I believe I can pull it off with some winter-proof greenery to keep things interesting even when nothing else is blooming. As far as I’m concerned, I’m not going to use any stiff straight lines.
Boxwood (Buxus) is one of my favorite trees because of its many uses. Many kinds may be sculpted into topiary and preserve their green hue over the winter.
Not only does a boxwood hedge bring a touch of order to the garden without being too fussy but it has the added benefit of also being deer resistant.
Deer-resistant boxwoods are not only visually pleasing but also provide a sense of order to the garden without being overbearing or invasive.
Take cuttings from an existing boxwood and grow a ton of them for future use.
Please only use non-patented boxwoods. Utilize varieties of boxwood that are free of the offensive aroma of cat pee. (Usually English boxwoods are the source of the foul odor)
When to Take Boxwood Cuttings
The best time to take boxwood cuttings is in the Spring, when you’re trimming your boxwoods. Cuttings from your trimmings will provide at least a dozen (if not more). Pruning is done in the spring and again in the fall (usually in mid-September)
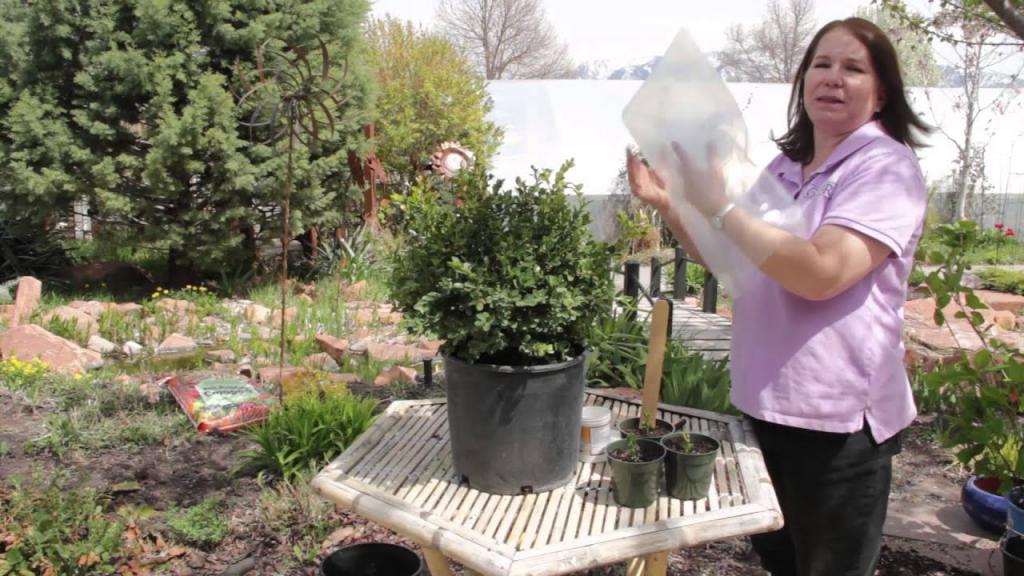
Start with a healthy boxwood in a container, like this one.
Look at how healthy this Winter Gem Boxwood looks with its new growth. The new growth is a darker shade of green than the preceding one.
The new growth is ideal for making cuttings from.
How to take Box Cuttings to propagate
As a beginner, you can just take cuttings from a potted plant like mine.
Xem thêm : How To Fertilize Geraniums? Comprehensive Guide
Sharp pruners or a knife can be used to trim the boxwood’s new growth stems. However, some suggest that pinching the stem with a pair of pruners prevents the plant from roots. After removing the cutting from the plant, you have the option of re-slicing with a sharp knife.
There is no better choice than boxwoods, which may be used as a stand-alone shrub or packed together to form an attractive border in the garden. If you’re looking for year-round interest and structure in your garden, these gorgeous shrubs are a great choice.
As an alternative to spending money on new boxes, attempt to propagate your own boxwoods if you already have any growing in your yard. It’s a cinch!
Boxwoods can be grown from cuttings by following these guidelines:
It’s best to start propagating boxwood cuttings in the late summer or early fall, when the spring growth has been hardened.
Preparing a pot for cuttings can be done in a number of different ways. Others utilize a 50/50 mixture of well-drained soil and various soil amendments, such as sand, peat moss, or compost. Make sure that the pot you choose has drainage holes and is at least 4 inches in diameter before you buy it. Some gardeners immerse the mixture in water, then let it drain for about 10 minutes before preparing the pot for planting. It should be wet but not soggy.
Cuttings from strong, healthy branches, free of illness or injury, are what you’re looking for when starting a tree. 4 to 6 inches is the ideal length for the cuts. Using your thumb and forefinger, a sterile knife, or a pair of gardening shears, carefully snap off the required portion. The cutting’s lower half should be stripped of its leaves.
After you’ve chosen your desired cuttings, transfer them to the containers you’ve prepared. If you choose, you can dip the bottom of the cutting into a rooting hormone, although it’s not a need. Cut them into small pieces and add them to the pot with the rest of the ingredients. To keep the plant in place, you can use a stick or a pencil as a support. The idea is to build a personal greenhouse by inserting sticks or pencils around the cutting and then covering it with plastic. It is, however, not essential to the success of cuttings. Be sure to inspect the soil and open the cover at least twice a week to allow fresh air in.
Gently tugging on the little plants will reveal if your cuttings have taken root in as little as four weeks. Roots are forming if they stay put; if they’re easily movable, they haven’t yet established themselves. After two weeks, if you like, you can transplant your cuttings into larger containers. Your cuttings should begin rooting within three months, and they should be ready to be transplanted outside in the spring. For the time being, keep them in a cool, well-ventilated area and keep an eye on them to make sure they don’t dry out.
Using cuttings, you can enhance your yard without having to spend more money on new plants. Ken Druse’s Horticulture’s More Free Plants Online Workshop with Ken Druse- Episode 1: Softwood cuttings teaches you how to do so.
Bypass live material with Premier Bypass Pruners, which are strong and comfortable to use.
A step-by-step method on propagating perennials from root cuttings may be found in the Smart Gardening Guide: Propagating from Root Cuttings.
With The Perennial Care Manual, you can keep your perennial beds looking their best.
Prepare boxwood cutting to root
By removing the leaves, I create a new area for the roots to grow in. As a result, I believe that using pruners instead of a sharp knife is easier because the stem is opened up a little more.
It’s better to remove leaves by pinching them off rather than yanking them off, which might cause damage to the stem. The truth is that I’m not always as careful as I should be, but I thought you’d like to know that for your own benefit.
Xem thêm : How To Grow Petunias From Cuttings For Success?
Trimmings are ready for roots now that the leaves have been removed (this is optional)
Place boxwood slips into potting medium
You can prevent the rooting hormone from being withdrawn from the soil as you slip in the stem by making a hole in the dirt with a dauber (I used a sharpie back end for this step).
Several cuttings are placed in the pot. There are around 4 or 5 of these in a 3.5-inch container. Tighten the soil around the stems.
Make sure the cuttings are well-watered. As I demonstrate in this piece, you can keep the pots moist by covering them.
Rooting Boxwood Bushes
Boxwood roots should be rooted in a clean, low-fertility medium that is well-drained. Potting soil contains a lot of nutrients that might lead to rot, so avoid using it. A mixture of 1 part clean building sand, 1 part peat moss, and a small amount of vermiculite can be used to produce your own medium if you plan to grow a lot of shrubs. If you’re only planning to grow a few plants, buying a little bag of commercial rooting medium will save you money.
The lower two inches (5 cm) of each cutting should be stripped of their leaves, and the exposed stem should have the bark scraped off of one side. Rooting hormone can be applied to the lower end of the cutting and then tapped out of the stem. Rooting media should be inserted around two inches (5 cm) into the bottom end of the cutting where the leaves were removed.
Just enough medium should be applied to the stem to help it stand upright. A 6-inch (15-cm) pot will hold three cuttings. To provide the plant with a moist environment, place the pot in a plastic bag and seal the top. Every day, open the bag to spritz the stem and check the soil for water. Give it a small tug every week for the first three weeks to see if it has roots.
It’s time to take the pot out of the bag once it’s started to sprout roots. Use a high-quality potting soil to transplant rooted plants into their own pots. In order to ensure that the plant’s roots don’t become tangled, it is vital to repot the plants as soon as they begin to grow.
Good potting soil provides the plant with the nutrients it needs to thrive until you’re ready to transplant it outside. Continue to cultivate the new seedlings in a sunny window until the spring planting season.. The joy and satisfaction that come from successfully growing boxwood from cuttings cannot be overstated. Gardening becomes more enjoyable when you understand how to propagate some of the more challenging plants.
Boxwood Propagation success
For whatever reason, I’ve been told that rooting boxwood cuttings should be completed within three or four weeks, but mine take longer.
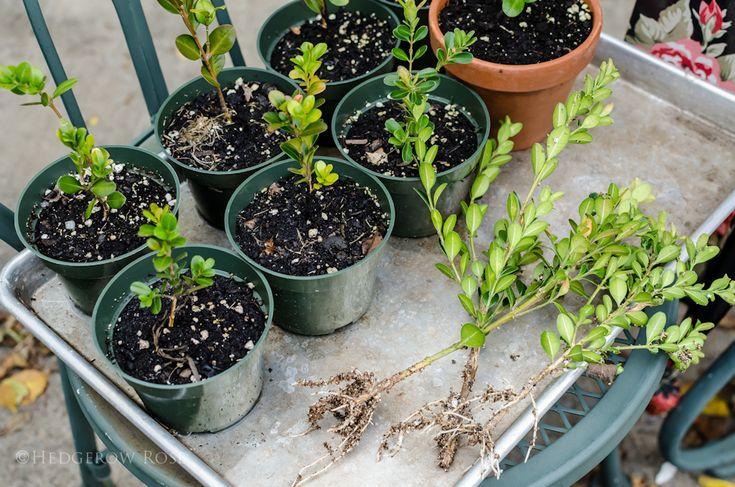
However, there is a sizable contingent that supports the cause. The roots are in great shape!
When it comes to potting up this rooted boxwood cutting, I show you exactly how I do it in my video.
I’m also attempting to start a large number of boxwood cuttings in my garden. I’ll make sure to let you know how it goes.
If so, have you ever attempted to propagate boxwood from a cutting. Do you have any ideas for improvement?
Gardening is a wonderful way to spend time with family and friends,
Nguồn: https://iatsabbioneta.org
Danh mục: Garden


