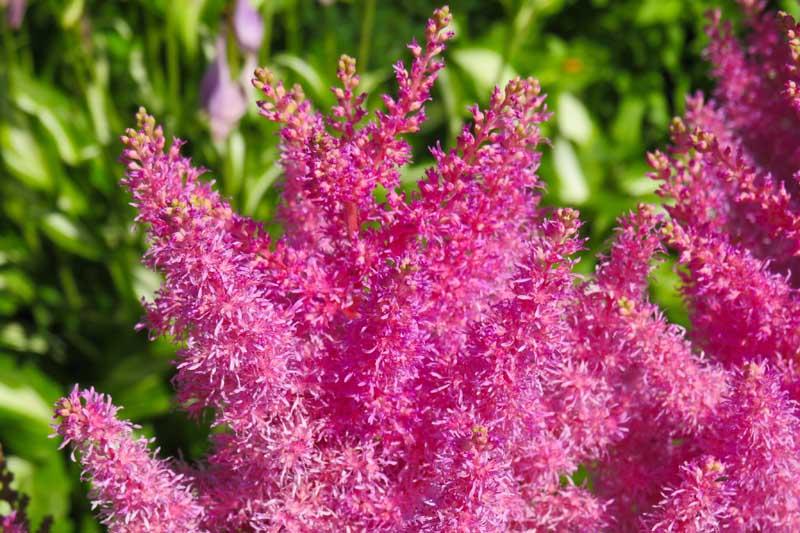
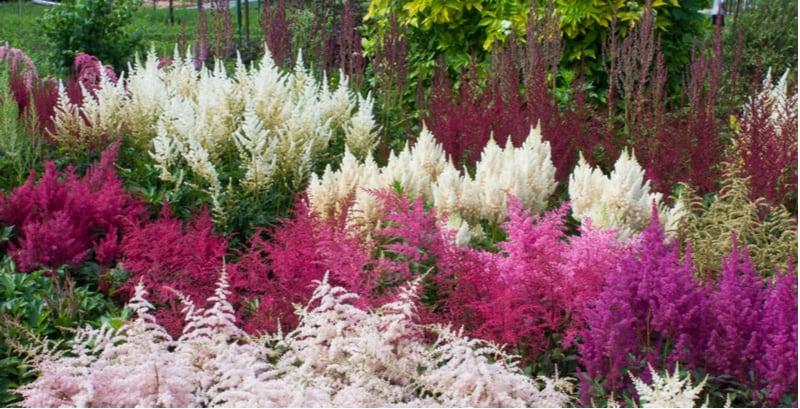
Astilbe propagation is simple, and you can either start them from seeds or divisions, depending on your preference. There are different cultivars to choose from, and with the proper propagation technique, you can easily create more of your favorite plants and have more of this perennial that will give you a show from late spring to early summer. Even astilbes that bloom in the fall might be selected if you desire fall flowers.
- How To Remove Ink From A Leather Recliner? Complete Guide
- How To Fix Water Damaged Swollen Wood Furniture?
- What Is The Size Of A Split Queen Adjustable Bed? Helpful Information!
- How To Get Rid Of Old Bed Frame? A Step-by Step Learning Guide
- How Do I Know If My Compressor Needs To Be Replaced? How Much Does It Cost?
Astilbes can be grown from seeds or divisions, and the process is rather straightforward. With the right propagation method, you can easily grow more of your favorite plants and have more of this perennial that will give you a show from late spring to early summer. In order to have fall flowers, you can even choose astilbes that bloom at this time.
Bạn đang xem: How To Propagate Astilbe? The Simple Secrets To Success
Comprehensive Guide On How To Propagate Astilbe
Method #1. Seeds
Astilbe seeds are the first way for propagating the plant. This method does not ensure the creation of a clone of your favorite astlebe variety, so keep that in mind. The traits of the new plant that emerges from a seed are unlikely to be identical to those of the parent plant.
For those who want to start astilbes from seed, you can either buy them or harvest them from your own plants. You can speed up the process of germination by using older seeds rather than fresh ones. Furthermore, planting astilbe seeds inside is the ideal technique to grow them.
Sowing
A seed-starting mix can be used in a tray. At 14-inch below the medium, you can plant one seed per cell but make sure each cell contains one seed. Be careful not to oversaturate the mixture when misting it to protect it from drying out.
Cover the tray with plastic and keep it in a bright, warm environment to help with germination. A temperature of roughly 70°F in the daytime and 50°F at night is ideal for a greenhouse, as is the humidity. You can check the medium every week to see whether it needs to be misted.
Transplanting
Remove the cover once the seeds have germinated and grown to a height of 4 inches or more. After the risk of frost has passed, transplant the astilbe seedlings into the garden. Look for a spot with shady overhangs and well-draining soil that is also fertile and loose.
Method #2. Division
Gardeners prefer to propagate astilbe through division. You can, in fact, buy and grow bare roots. Astilbe plants should be divided every three years as part of their regular care to ensure their long-term viability.
Digging
You should divide astilbes in early spring or late fall while they are dormant and before they begin to grow. If you dig around the base of the astilbe plant, you’ll be able to lift more easily. As a bonus, you’re less likely to mistakenly harm the plant’s rhizomes this way.
Sectioning and transplanting
Astilbe can also be easily divided by lifting the entire plant while the root ball is still in place, according to some gardeners. Using a shovel, you can next split the roots into approximately four portions. In addition, be sure to remove all of the damaged roots before planting, and do so immediately so that they don’t dry out.
A depth of six inches is appropriate for the rhizomes in the new place. Composted soil and partial shade are also helpful in preventing damage from sunshine. In addition, wet soil is essential for the creation of divisions in the ground.
Maintaining Astilbe
Learn about the perfect circumstances and requirements for your astilbe plants in order to help them develop and thrive even more. Astilbe, for example, can burn in direct sunshine, thus their ideal position should be bright and provide some shade. It is also necessary to use a medium that is both well-draining and effective at preserving moisture.
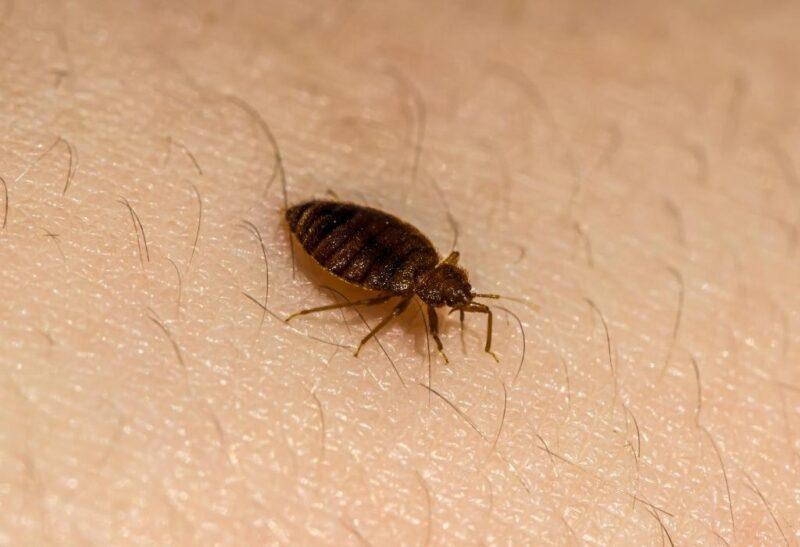
Xem thêm : How Do You Know If You Have Bed Bugs Or Dust Mites? A Must Read!
Keep in mind that astilbes need more water than other plants, so it is standard practice to water them deeply. As long as you don’t leave them in a pool of water, they’ll be fine. However, feeding in the spring with a well-balanced fertilizer is a good idea.
Is it possible to prolong the astilbe’s foliage and blooming period? Removing the fading and dead blooms will prolong the astilbe’s blooming period. After the plant has completed blooming, some gardeners even clip the spent stems to keep the plant’s foliage.
9 Steps for Dividing your Astilbe
To help loosen the soil, water the area around the plant you wish to divide. Allow some time for the water to settle.
Dig holes for the new transplants. The holes should be between 12 and 24 inches apart and 8 inches deep. Before you plant, dig a hole 12 inches deep and add some rich compost to improve the soil.
Use your hands to remove any old or damaged plant material from the top of the parent plant.
In order to get an accurate measurement, you can use a 5-gallon bucket to achieve an approximate diameter of 12-16 inches.
A shovel can be used to remove roughly 10-12 inches of the primary root network. In order to prevent injuring the root structure, imagine removing the roots in the shape of a large salad bowl.
Gently pluck off roots from 3-5 of the identified “eyes” on the rhizomes, holding the parent Astilbe with both hands. After a few weeks, the eyeballs will begin to sprout small shoots, like a forgotten potato. One parent plant will typically render 4-5 new transplants.
Pinch off roots with 3 to 5 eyes from the parent Astilbe plant while holding it in your hands. 7. Gently divide the rhizomes. It will look like a potato that has been forgotten for a few weeks has sprouted a few sprouts. It is typical for a single parent plant to produce 4-5 offspring.
Give the transplants a good bath before watering them in. Choose a spring fertilizer mix that is lower in nitrogen (N) while being higher in phosphorus (P) and potassium than the usual combination (K).
If you choose, you can use mulch to keep weeds out by spreading it in a circle around the plant. Mulch over the fresh transplants should be kept to a minimum. Create a “donut” shape around the plant.
Wow, that’s impressive!
Additional Notes for Division in the Fall
Instead of replanting the rhizomes straight into your garden beds in the fall, you can plant each fresh transplant in a medium-sized pot with well-draining potting soil. Wait until spring to determine what to do with them before storing them in a dark and cool place in your garage or cellar.
When the plants are dormant, you don’t want to water them too much, but you don’t want them to dry out so much that the roots shrivel up. Every two to three weeks, a cup of water should be plenty.
Xem thêm : Where Is The Fuse In A Window Air Conditioner? How to Remove Fuses?
Make sure you complete steps 2-4 and 7-9 as mentioned above the next spring, when the earth is warming up and you are ready to plant, if you decide to go this path. To avoid contamination, destroy any rhizomes that exhibit indications of mold, rot, or decay
Finally, if you decide to begin the process in the fall, you’ll need a lot of patience. It’s unlikely that your newly transplanted Astilbe will flower in its first year. However, in the second year and beyond, you can expect to see flowers!
I can guarantee you that the Astilbe plume fireworks will be well worth the wait.
Some Final Thoughts While You Wait…
Making our gardens more beautiful is one of life’s greatest pleasures. Taking the time to divide and replant Astilbe in your garden beds is a worthwhile investment of time and effort. With greater area to grow, the parent plant will be healthier and the quantity of flowers in your beds will increase.
If you want happy plants, follow these simple rules: rich, well-drained soil; frequent but gentle watering; 2-3 hours of direct sunlight each day, and annual fertilization with a high-phosphorus, high-potassium combination.
You can also take the transplants to your neighbor’s house in a bucket, print off this guide, and plant them there. Unexpected gifts are the best!
Is it the first time you’ve split your Astilbe? What did you think? If you have any ideas or tricks to share, please do so in the comments section.
Care of Newly Divided Astilbe Rhizomes
To successfully propagate an aster plant, proper care and maintenance are essential. When replanting, be sure to go back to the same depth as you harvested the divisions from. Rhizomes should be spaced at least 16 to 30 inches (41 to 76 centimeters) apart and well packed with soil.
Fertilizer with a high phosphorus and potassium content should be used instead of nitrogen-based fertilizer. It’s important to keep the new plants moist, but not waterlogged. During the summer, add more moisture to the air to keep plants healthy. The use of organic mulch around the planting zone helps to keep weeds at bay, conserves moisture, and improves the soil’s overall quality.
Preventing rot and allowing fragile shoots to readily break free are two reasons why mulch should never be used around sprouts. In the first year, you may see blossoms or just the delicate foliage. Good-sized plants will be produced by year two, when the plumes will have matured. Astilbe rhizomes can be easily propagated from the rhizomes and can even be stored indoors throughout the winter for spring planting.
Conclusion
An wonderful option for a plant that will bloom throughout the year is astilbes. It’s easy to grow extra astilbes in your garden if you know how to propagate the flowering plant. Rooting your plants indoors for faster transplanting outside may be more comfortable if you have a greenhouse.
Astilbes can be started from seeds or divisions, according on your preference. Because of the potential for slower germination, it is preferable to use older seeds rather than new ones. To help your seeds sprout, you can sow them inside in the right conditions.
To avoid overcrowding and maintain good health, dividing aster has the advantage of producing precise replicas of the original plant. It can also be used as a maintenance activity. Astilbe thrives in partial shade, so find a spot with fertile, wet, and well-draining soil when transplanting.
Nguồn: https://iatsabbioneta.org
Danh mục: Home