Preparing daylilies for the winter can be summed up in two easy stages. This essay will also cover various techniques for hardening off these perennials before winter. Although daylilies are hardy, it is to your benefit to learn how to keep them alive over the winter.
- How To Make A Firm Bed Softer? A Must Read Guide
- How To Know If Bed Bugs Are Gone? A Few Tips to Remember
- How To Put On A Bed Skirt By Yourself? Complete Step-by-Step Guide
- How To Hide Window Air Conditioner Outside? A Few Tips to Remember
- How To Get Rid Of Thrips On Houseplants? Comprehensive Guide
Those who keep their daylilies in containers may find the change to cooler temperatures less of a shock. If you live in an area with harsh winters, you can protect your plants with a greenhouse. It’s also important to make sure the types you’re producing are well-suited to your climate.
Bạn đang xem: How To Prepare Daylilies For Winter? Step-by-Step Tutorial
How To Prepare Daylilies For Winter Successfully
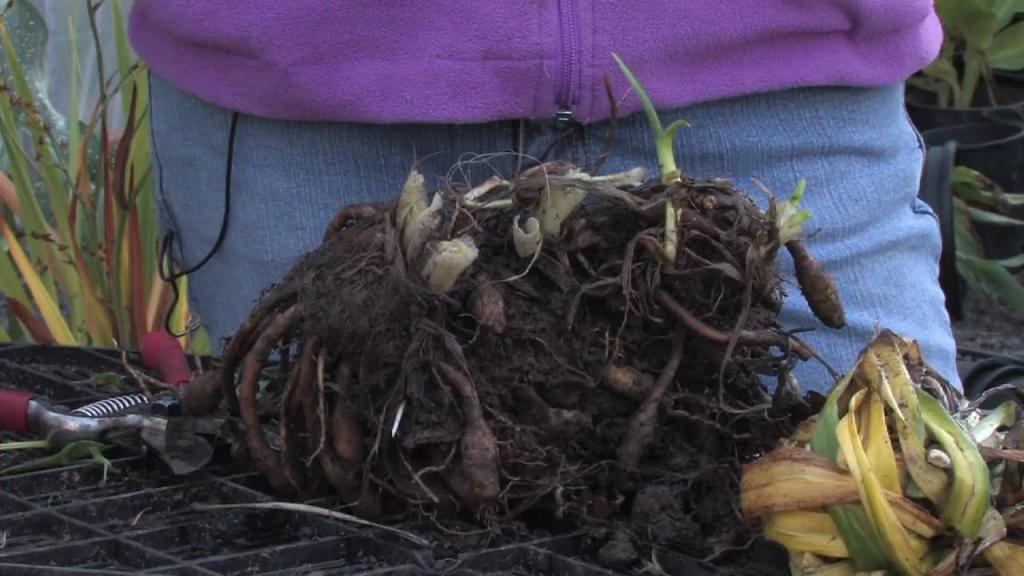
There is a widespread misunderstanding about the terminology around daylilies that must first be addressed. You may have read that their bulbs must be dug for the winter, but the accurate phrase is actually “tuberous roots” of the daylilies. When storing daylilies for the winter, these tubers are what you’ll be digging up.
Step #1. Digging
Cutting back daylily plants at the end of autumn is the first step in getting them ready for the winter. When the daylilies’ foliage goes brown, usually after flowering, you should cut it back severely, almost to the ground. In this method, the plant’s energy source will be protected from the decaying leaves.
You can then dig out the tubers by loosening the soil around the perimeter of the daylily plant. Remember to allocate some space away from the clump to prevent hitting and damaging the tubers. You can then pull the tubers from the soil by gently loosening them with a trowel.
Step #2. Tuber preparation
You can then dig out the tubers by loosening the soil around the perimeter of the daylily plant. Keep a safe distance from the clump to avoid accidentally harming the tubers. You can then pull the tubers from the soil by gently loosening them with a trowel.
If you loosen the dirt around the daylily plant, you may easily dig up the tubers. Always leave yourself some distance from the mass of tubers to ensure you don’t accidentally step on them. Once you’ve loosened the tubers with a trowel, you may remove them out of the ground.
The tubers should be layered in the peat moss and the entire box should be covered with additional peat moss. To avoid mold and mildew, store the box in a cool, dry, well-ventilated area. The greenhouse can be used for this purpose, but it is imperative that you regularly inspect the tubers and throw out any that are damaged.
Pruning Daylilies For Winter
Winter care for daylilies includes not only protecting the tubers through the winter but also cutting back the plants in early spring. By autumn, you should have trimmed the plants down to the ground and removed any dead or dying foliage. However, in other regions, you can simply leave the brown foliage in your plants until spring, when you can then remove them.
Take care to use only clean, sharp tools on your daylilies when you prune them. Keep in mind that trimming can introduce new diseases and pests to plants. Tools should be cleaned in a bleach solution for at least an hour before being used again.
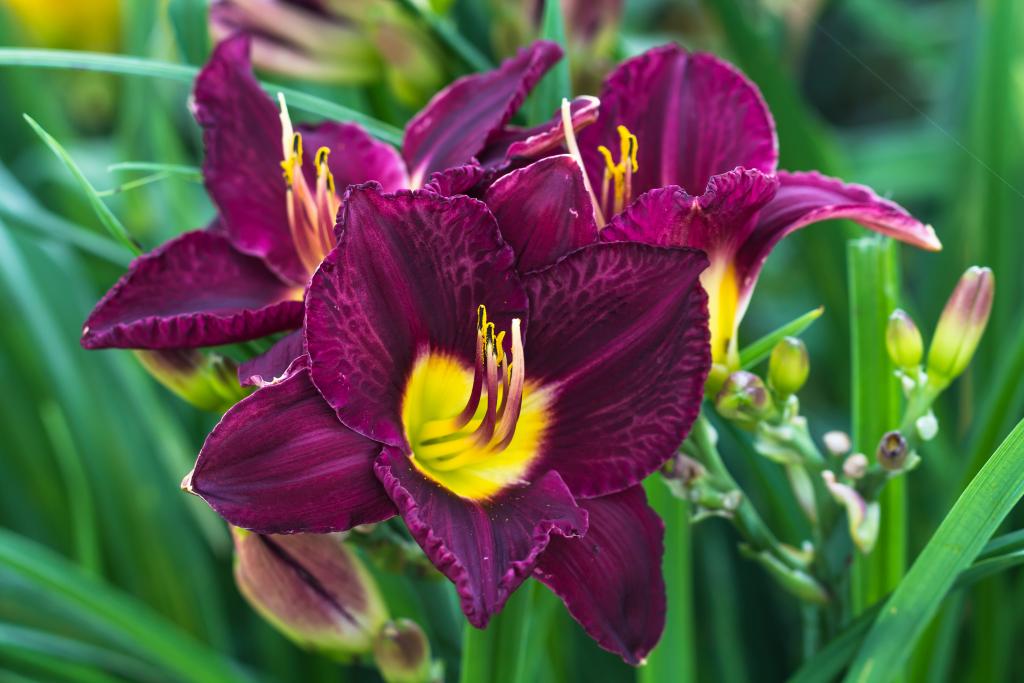
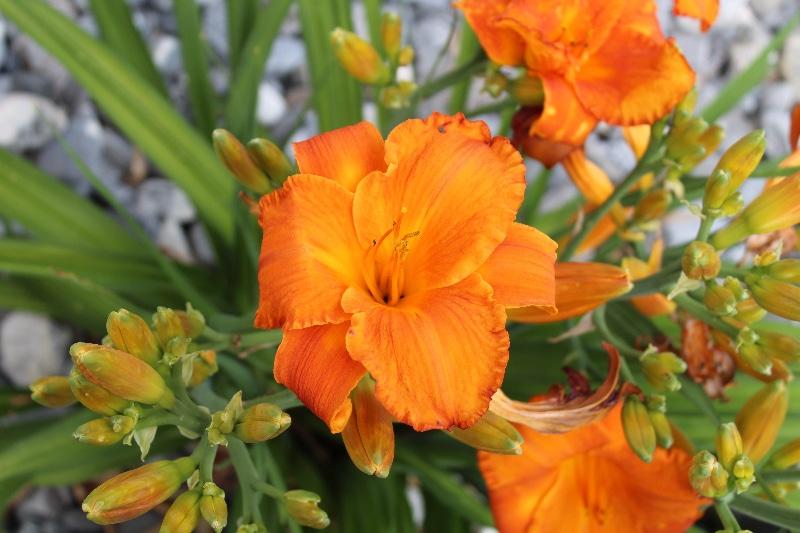
Semi-evergreen vs evergreen daylilies
Daylilies need special care during the winter, and it’s important to think about the kind you’re working with. Separate your daylilies, for instance, into evergreen and semi-evergreen varieties, as each has a unique set of winter care procedures. Evergreen daylilies, as the name implies, retain their green coloration throughout the winter months, while semi-evergreen daylilies lose their leaves.
Your semi-evergreen daylilies may also see a drop during the fall’s chilly periods before falling dormant for the winter. These plants will appear as small shoots during their winter hibernation and will flourish once again in the spring. Dead leaves around the new growth should be removed as part of your daylily maintenance routine.
Even if their development slows down in the winter, the evergreen daylily’s leaves will still be a vibrant green throughout the season. Freezing temperatures will turn daylilies to mush, so it’s best to keep them in the greenhouse if that’s the case where you live. Like semi-evergreen daylilies, evergreen varieties require winter pruning to remove dead or diseased leaves.
Choosing Daylily Varieties
Local nurseries will usually carry daylily cultivars that will grow well your area, but you have to be alert if you order them online. The winter chores vary for dormant, semi-evergreen and evergreen varieties.
Daylily cultivars ideally suited to your region can be found at most local nurseries, but online purchases require extra vigilance. Winter maintenance responsibilities shift depending on whether a plant is deciduous, semi-deciduous, or evergreen.
Dormant Daylily Winter Care
The first fall chill causes rapid loss of leaves on dormant daylilies. They can’t thrive without a cold winter, and they tend to dwindle in strength if they spend the season somewhere warm.
Xem thêm : Companion Plants For Kale
They hibernate with their bullet-shaped buds close below the surface, where they are protected from drying out and the icy grip of winter. Until the spring growing season, when spear-like shoots emerge from the earth, they have no leaves above ground.
When the leaves of your dormant daylilies turn brown in the fall, it’s time to prune them down to the ground. As an alternative, you can wait until spring and then just peel the leaf away from the plant crown. Pruning shears can be sterilized by soaking them in a solution of one part household bleach to three parts water for five minutes before being allowed to air dry.
Semi-evergreen and Evergreen Winter Care
Warmer conditions don’t kill the foliage of semi-evergreen daylilies. Semi-evergreen cultivars in colder regions may become progressively less leafy over the course of several fall freezes or completely lose their foliage by the beginning of winter. The short sprouts they keep throughout the winter allow for quick growth once the weather warms up again. Dead or rotting leaves can be removed from around dormant semi-evergreen daylilies, but the sprouts should be left in situ.
Evergreen daylilies maintain their green coloration throughout the winter, though their rate of development slows. Their leaves will turn to mush if the temperature drops below freezing. Winter is the best time to prune evergreen lilies and get rid of any dead or rotting leaves.
Mulching
Putting a 2-inch layer of leaf mulch, wood chips, or straw** around your daylilies will help keep weeds at bay and reduce damage from the freezing and thawing of winter. Refresh the mulch annually because it decomposes.
Foliage of dormant and semi-evergreen cultivars may seem twisted in the spring after a cold winter. The injured foliage will heal and grow normally as the temperature warms up.
How To Mulch Daylilies For Winter
During the winter, mulching daylily beds is just as important as cutting them back in the spring. Leaves can be used as mulch, but you’ll need to refill it every year because they decompose. Also, before winter hits, cut off your daylilies’ food and water supply to help them hibernate.
Conclusion
If you know what you’re doing with regards to winter maintenance, you should have no trouble keeping plants alive and well all year long. Whether you grow evergreen or semi-evergreen daylilies, you need to know how to get them ready for the winter months. To induce dormancy in your plants, you’ll need to understand how to store tubers, cut in the fall, and mulch daylilies before winter sets in.
The tubers can be dug out and stored in the same way as other tuberous plants. It can be stored in a greenhouse or any other dry, cool environment. More importantly, before winter arrives, you should clean up your garden by raking off any dead leaves and covering the area with mulch.
Nguồn: https://iatsabbioneta.org
Danh mục: Home