Is the thought of making a blanket from your Crown Royal bags crossing your mind?
- How To Keep Cats Off Your Bed? A Few Tips to Remember
- What Is The Biggest 110v Air Conditioner?
- Who Makes Arctic King Air Conditioner? What Makes Arctic King Air Conditioners Stand Out From the Competition?
- How To Install Portable Air Conditioner Without Window? Comprehensive Guide
- How To Know If Bed Bugs Are Gone? A Few Tips to Remember
If you’re looking for information on how to build a quilt out of Crown Royal bags, you’ve come to the right place!
Bạn đang xem: How To Make A Crown Royal Blanket? Complete Step-by-Step Guide
Things You’ll Need
- Scissors
- Iron
- Mat for cutting on
- Ruler
- Blade that rotates at a high speed
- Camera
- Pins
- Machine for sewing
- Backing flannel
- A suffocating blanket of a rule
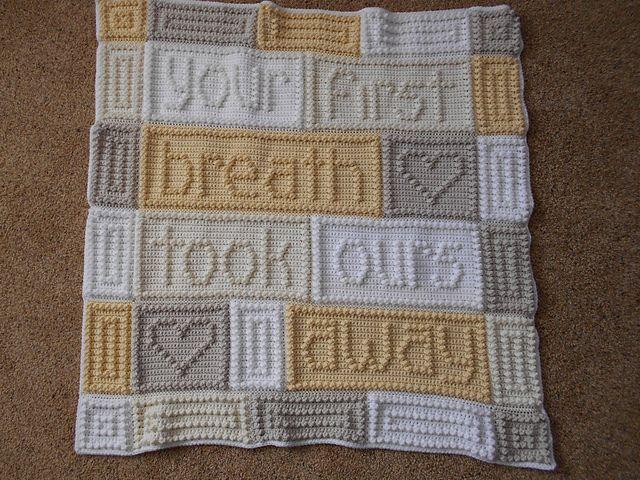
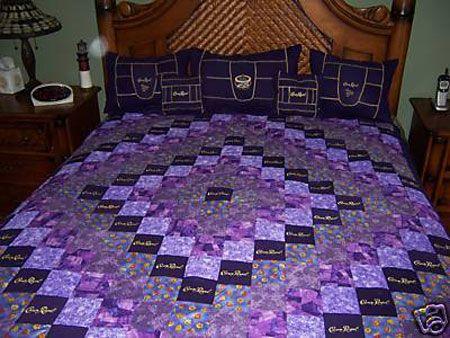
What Is A Crown Royal Blanket?
The cloth bag that comes with a bottle of Crown Royal whiskey is the material used to make the blankets.
Crown Royal’s name is prominently displayed on these drawstring totes.
Although purple is the most common color, Crown Royal bags also come in black, blue, and red.
They are widely utilized in the quilting industry.
If you have a large enough collection of Crown Royal bags, you can have someone else knit you a blanket.
But you can also do it on your own if you want to. Trying something new is like a workout for your brain.
Basic Guide On How To Make A Crown Royal Blanket
Step #1. Prepare the materials
You should start by gathering the necessary components.
For this project you will need the Crown Royal bags, an iron, a cutting mat, a ruler, some pins, a fabric pencil, a sewing machine, some backing fabric, and a sewing machine needle.
The bags’ drawstrings must be undone first. The bags are then cleaned, dried, and sliced.
Press them from the wrong side after cutting. Pressing is preferable to ironing.
Step #2. Cut the crown royal bags
To proceed, cut the bags into 4 14 by 4 14 squares from the plain Crown Royal side.
Then, use a 3-3/4″ square cutter to make squares out of the ones with logos.
Step #3 Prepare and cut another fabric
So, get the airy fabric ready.
Xem thêm : Running Air Conditioner When It’s Cold Outside? A Few Tips to Remember
Contrasting nicely with the purple of Crown Royal bags, this is what you utilize to establish your quilt pattern.
About 80 4-inch-by-4-inch squares should be cut out.
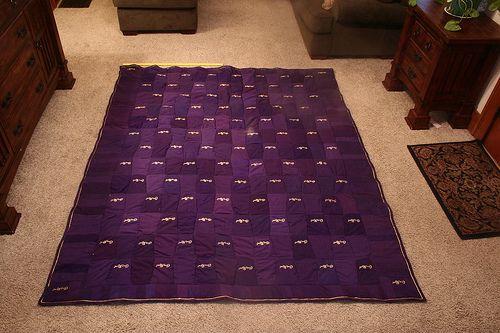
Step #4. Pattern
Now comes the fun part: arranging the squares into your desired pleating pattern! It’s important to remember to account for seam allowances.
The next step is to photograph your finished design. In other words, print out the image and use it as a guide.
Step #5. Draw a diagonal line
Here, you’ll need to take out your fabric pencil and draw a diagonal line from corner to corner of the squares.
A straight line can be achieved with the aid of a ruler.
Following that, pin the lighter fabrics and the Crown Royal materials (both patterned and plain) together in the desired design.
Step #6. Start stitching
For this step, you will chain stitch just inside the marked quarter-inch margins.
When you’re done sewing, cut the middle down to a smaller size.
Press in the direction of the Crown Royal fabric, and cut each square to 3 3/4 inches.
Refer to the pattern first before stitching the pieces together.
Make sure you have the right order of pieces before you start sewing.
Step #7. In rows of three
First, starting in the upper left corner, machine sew the first square.
Each row should be sewn into a continuous strip with seams no wider than 1/4 inch.
We recommend that you form three-by-three work rows so that you can easily keep tabs on your productivity.
Xem thêm : Diy Project How To Build A Swivel Seat? Choosing a Rotating Swivel Seat for a Van
Afterwards, cut each square into a 10 14 inch square. It is important to press the blanket and the seams before using it.
Step #8. Borders
The border fabric can be anything you choose. The extra squares can be put to good use.
Make sure they fit well. You may use the bobby pins to keep them in place while you sew, which is a helpful hint from us.
Do not press the fabric with the bobby pins in place as you prepare to stitch.
The fabric or the pins can melt if you do it.
Step #9. Backing fabric
Backing fabric can be any kind of cloth. Guarantee a perfect fit by measuring against your quilt.
Using flannel as the backing cloth will provide a nice contrast to the purple.
Spread out the backing fabric with the wrong side up.
Then, place the quilt on the floor with the wrong side facing the wrong side of the backing fabric.
Check that the raw ends of both materials are flush with one another. Keep them in place by pinning them.
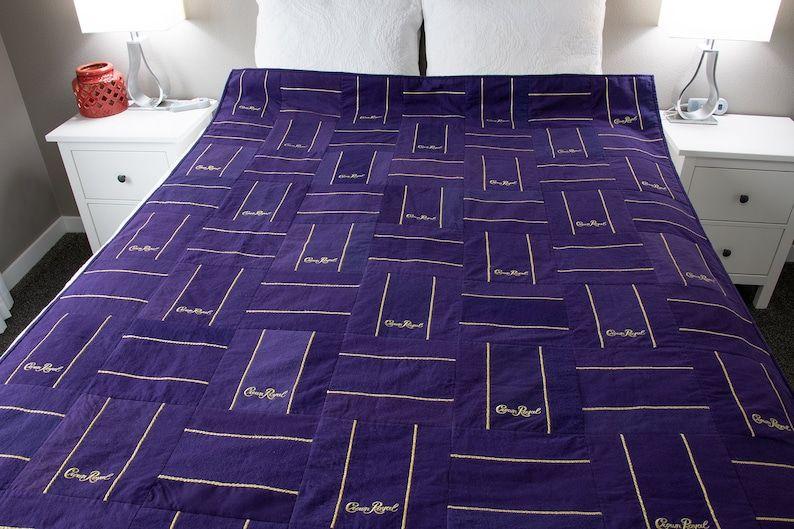
Step #10. Sewing the backing fabric
Make a quilt by piecing together the top and backing fabrics in a way that creates a random pattern around the Crown Royal emblem squares.
For a seamless look, use purple thread throughout the quilt’s construction.
Wrap the blanket in binding, too. Color choice is up to you; you can go with contrast or harmony.
Next, begin by sewing the binding to one end of the quilt. The reverse side requires pressing and sewing.
Tip
Between the backing and the top layer, you can insert a thin layer of batting. Your work is now officially a Crown Royal quilt.
Conclusion
Making use of your hoard of Crown Royal bags won’t go to waste now that you know how to quilt a blanket out of them.
Nguồn: https://iatsabbioneta.org
Danh mục: Home