If you want to know how to overwinter annuals, you’ll need to know which ones are ideal and how to overwinter them. Gardeners detest the cold season, especially if they live in an area with a particularly harsh winter. The good news is that using a greenhouse for winter-sensitive plants can help you get through this season.
Annuals, by definition, only live and bloom for a single year, so the end of the growing season should mark the end of their existence. Here are some helpful hints and methods for overwintering annuals and selecting ones that should survive the cold season before you give up on this prospect every winter.
Bạn đang xem: How To Keep Annuals Alive Through Winter? Best Guide
Best Guide For How To Keep Annuals Alive Through Winter
Overwintering annuals
Overwintering annuals is the greatest way to keep them alive over the winter. As previously said, the greenhouse is the answer to the cold season. Overwintering refers to the practice of putting plants in a protected location for the duration of the winter.
During the winter months, the plants can continue to develop indoors, or it can be used as a safe site for dormancy and the preservation of bulbs. Although a greenhouse is the perfect place to grow annuals, any room in your house will do. However, a greenhouse provides the necessary space and conditions for annuals.
Compared to other shelters, you have more control over the temperature and other aspects of your environment inside. Remember that some plants require a change in indoor circumstances during the winter months, so it’s important to keep this in mind.
Step #1. Preparation
Overwintering annuals can be done in two ways, according to the University of Nebraska-Lincoln. You can either remove the entire plant and start over, or you can take cuttings and grow new ones. When it comes to the former, you’ll want to begin digging before the fall frost arrives.
Gardeners must reduce the plant’s crown by at least a third to make it easier to handle and to speed up the recovery process. To ensure proper drainage, remove all of the garden soil while keeping as much of the root system as possible. Repot the entire plant in a container with new organic potting soil that can accommodate the roots after they have been properly prepared.
Annuals can also be overwintered by taking 3 to 4-inch cuttings with a sharp and sterile knife in the middle of summer instead of the full plant. In the event that you are unable to collect from flowering shoots, pinch all of the buds and blossoms. If you are familiar with cutting propagation, then you should also expect that you must remove all of the lower half of the stem’s leaves prior to planting.
Rooting hormone can be applied to the end of the stem before planting it in moist potting soil or other medium, such as damp perlite. After that, keep the cuttings out of direct sunlight and keep them moist in a greenhouse area. After six weeks, you should be able to tell if the cuttings have taken root and are ready to be transplanted.
Step #2. Maintenance and transplanting
Starting with the pots, you wrap each one in a plastic bag to keep the plastic away from the plants. Pinching the growing tips will help stimulate branching even more once they begin to grow. Add cold and warm-white bulbs 12 inches above the annuals for 12 to 16 hours a day to take advantage of the greenhouse lights.
You can begin fertilizing in the late winter or early spring if you keep the soil moist but not soggy. You must also keep an eye out for indicators of pests and diseases when working in the greenhouse. After the risk of frost has gone, you can replant your annuals outside.
It is essential that you allow your annuals to harden off by gradually exposing them to the elements. To ensure that they are robust enough to endure the ever-changing weather conditions outside, do this.
Choosing annuals for overwintering
Another consideration is the annuals that you’ll be able to keep for the winter. It’s not a good idea to bring in ill or injured annuals because they are unlikely to survive the stress of moving indoors. You also need to give the plants time to adjust to the new conditions indoors before relocating them to their new home.
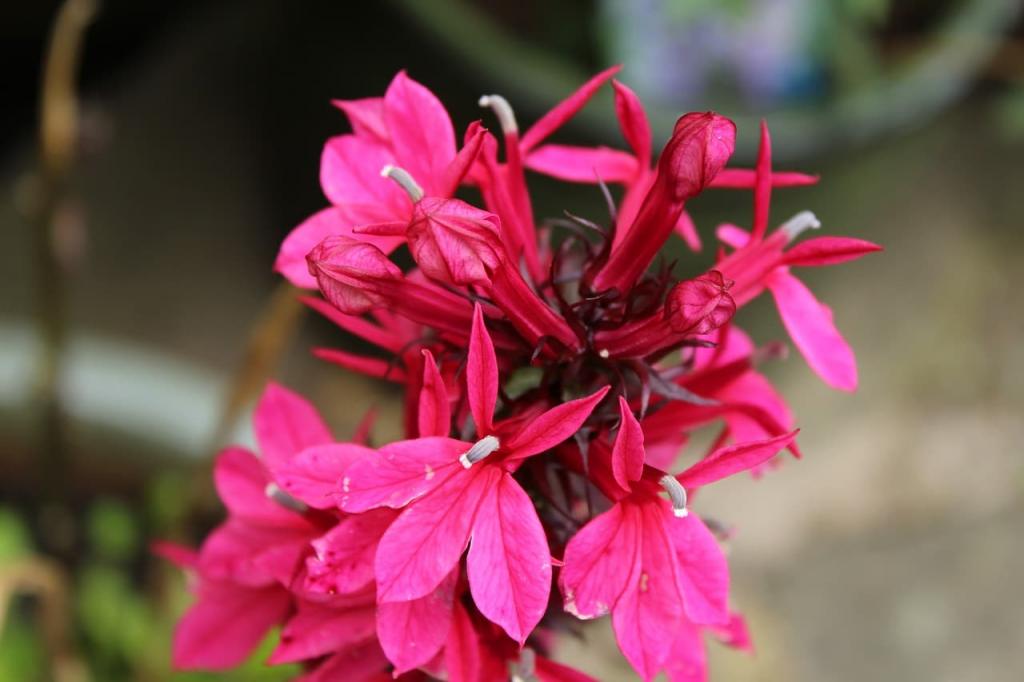
Always do your study on your plants to avoid problems, as some annuals will be easier to overwinter. Begonias, browallias, coleus, fuchsias, geraniums, impatiens, lantanas, and verbenas are some easy annuals to overwinter. However, your ability to successfully overwinter any annual depends on the methods you choose and the environment you maintain in your home.
When to Overwinter Annuals
If you wish to protect or propagate annual plants, you should bring them indoors as the growth season ends and the weather gets colder. For some plants, it’s best to wait until the first light frosts before bringing them within, while for others, the overnight temperatures must fall below 50 degrees Fahrenheit before they can be left outside. You can find out what temperatures your plants can withstand with a little investigation.
Xem thêm : How To Maintain And Care For An Avocado Tree In The Desert?
Rooting stem clippings is most successful when done while the plants are still actively developing, but not at their most flowery.
Tools and Supplies You Will Need
Overwintering annual plants requires a variety of things, but some or all of the following may be required:
- Pruners
- potting mix for a variety of purposes
- Pots for growing plants
- Lights for the growth of plants (as needed)
- Fertilizer for plants (as needed)
- Hormone that promotes root growth (optional)
- Plastic sacks
- Carry-on bags made from paper.
Gardening Tip
Regardless of the method you use to overwinter plants, be cautious not to introduce any difficulties to your plants. Avoid bringing indoors any plants that exhibit signs of pests or illnesses by thoroughly inspecting them. Discolored blotches on the plant, wilting foliage, and tiny crawling insects are some of the most typical symptoms. 1 In order to ensure that a diseased or pest-infested plant doesn’t overwinter, isolate it far away from your other plants until the problem has been resolved.
How to Overwinter Annuals in Pots
In many cases, container-grown annuals can be transported indoors as is. This procedure can also be used to transfer garden specimens to pots for indoor use:
Cut Back the Plant
Plants should have their foliage trimmed by about a third before being moved, regardless of whether they are currently in containers or are being transplanted from the garden. As a result, the plant will use less energy and be less stressed when it is moved indoors.
Transplant into a Pot
Dig up the plant’s roots and transplant them to a new container filled with commercial potting soil. In order to prevent the spread of infections and ensure proper drainage, don’t use too much common garden soil while transplanting plants.
Acclimate the Plant
Bringing an outdoor annual indoors can be a stressful experience, so help the plant adjust by gradually increasing the amount of time it spends in the indoor environment. To get the plant used to the interior temperature and air quality, try bringing it in at night and bringing it back out during the day.
Find a Suitable Indoor Location
An outdoor plant that is brought within often has difficulty adapting to the dimmer light. As a result, the brightest possible position is usually the best choice. Many plants may thrive in windows or patio doors that get a lot of sunlight, as long as they don’t get cold drafts.
Artificial grow lights can be used to augment natural light when it is not possible to offer enough of it. Remember that if your plants are getting most of their light from artificial sources, they’ll need more time in the sun. An artificially lit plant may require as many as 12 to 14 hours of sunlight every day, for example.
Indoor winter habitats, with their typically dry conditions, can be challenging for some plants. When necessary, use a humidifier or other means to provide additional humidity to the air.
Care for the Plant
Potted outdoor annuals brought indoors are just as vulnerable to pests and illnesses as any other indoor houseplant. They require the same care as any other indoor plant. All but a few plants that are brought into the house for the winter are in a semi-dormant state that necessitate minimal watering and feeding. Spider mites and scale insects, two prevalent indoor pests, should be checked for on a regular basis. As soon as yellow or withered leaves begin to show, remove them.
How to Overwinter Annuals by Taking Cuttings
Taking cuttings from your existing plants is another option for overwintering annuals—and the only viable method for true annuals. Tender perennials, such as coleus and begonia, that don’t grow well transplanted, may benefit the most from this technique.
Take a Cutting
At some point between the middle and end of the summer, harvest aggressively growing plants and cut 3- to 5-inch-long cuttings. As late as mid-October, some plants can be trimmed.. Take cuttings from non-flowering shoots if at all possible. Cuttings taken from flowering shoots should have any blooms or buds removed from each one. Taking this step will allow the cutting to focus its energy on forming roots rather than wasting it.
Root the Cutting
A wet potting soil container should be used for the bottom part of each cutting. Most cuttings will root without rooting hormone, but if you like, you can dip the cut end in it.
Gardening Tip
Cuttings from some plants will root effectively if left in a glass of water until a strong root system has formed. Among the plants that readily root this technique are coleus, impatiens, and begonia. However, roots grown in this manner occasionally may not do well when transplanted into potting soil. A lot of individuals prefer to start a plant in potting soil from the beginning rather than transplanting it from a cutting.
Cover the Cutting
Assist the bag with skewers, twigs or poles so that it does not touch the plant when it is placed over the pot. Set the pot in an area that receives bright indirect light, but avoid direct sunlight.
Wait for Roots
Keep an eye on the covered pot. Maintain a moist but not saturated state for the potting soil. If you notice condensation on the plastic, open it for a few minutes to let the extra moisture to evaporate. The cuttings should root in around three to four weeks. The root system is well developed if you can pull on the cutting and it doesn’t fall apart. The pot can then be placed in a bright window or under grow lights after the plastic bag has been removed. If you want to keep growing the rooted cutting, you can put it in a larger pot and transplant it there.
Care for the Plant
Overwintering plants should be treated the same as any other houseplant. If you see any insect or disease concerns, make sure they have adequate of light, and hydrate them in accordance with their species’ needs. During the winter, they won’t require any more nutrition. However, if you want, you can begin giving them a liquid meal, such as vermicompost tea, in the late winter or early spring.
Move the Plant Back Outdoors
Xem thêm : How To Clean Greenhouse Glass? Step-By-Step Guide
It’s important that you allow your newly-rooted plants time to get used to being outside before relocating them there permanently. After the risk of frost has passed, progressively increase the time the pot spends outside each day. For at least a week, do this. Afterwards, you can either keep your plants in their pots outside or plant them in the garden.
Gardening Tip
You can also take seeds from your garden annuals and start them indoors over the winter months as another method of “overwintering.” Some hybrid plants don’t “come true” when their seeds are planted; their seeds are genetically different from the parent plant. This procedure has varying degrees of success. Tender perennials, on the other hand, may not be suitable for starting from seed collected because of their slow growth. True annuals like zinnias and snapdragons, on the other hand, can be propagated rather easily this way. It’s easy to sow seeds indoors approximately two months before the last winter or spring frost by simply saving the tiny seeds from mature flower heads. Planting seedlings of any of these species outside in the spring is a snap thanks to their rapid growth.
How Overwinter Dormant Bare-Root Plants
It is possible to store bare roots of some tender perennials with tough fibrous or tuberous roots and replant them the following spring. These include geraniums (Pelargonium), dahlias (Dahlia), and tuberous begonias.
Dig Up the Roots
As soon as fall/winter begins, dig up your plant and shake off any remaining soil from its roots.
Before the first frost, geraniums should be picked up; dahlia roots, on the other hand, are best left in the ground for a week or two after the leaf dies off. To preserve the root structure of tuberous begonias, the plants must be allowed to die back entirely.
Store the Roots
Temperatures of 45 to 50 degrees Fahrenheit are ideal for most plants stored this way, but this might vary depending on the species.
- When it comes to geraniums, you may either hang them from a rafter or put them on a shelf wrapped in newspaper.
- Keep dahlia tubers in a paper bag filled with peat moss, sawdust, or vermiculite that is slightly wet (not sopping) to keep the roots from rotting. The roots of dahlias might die if they are allowed to totally dry out.
- Tuberous begonia roots can be stored in a dry environment in a paper bag. Gardeners who store tuberous begonia roots prefer a slightly warmer environment (no less than 50 degrees Fahrenheit), and many of them like to spray the bag with fungicide powder. Begonia roots are quite sensitive to moisture, so be careful to keep them dry at all times.
Gardening Tip
Container-grown sensitive perennials, such as geraniums, can often be overwintered in their containers. The pot should be placed in an unheated basement or adjoining garage and the leaves should be trimmed to a few inches. Once a month, check on the pot to see if the soil is dry enough to water lightly. When the weather warms up in the spring, bring the pot back outside and gradually increase the amount of water and fertilizer it receives until it begins to sprout new growth.
Monitor the Dormant Roots
Check the dormant roots every month and take care of them in any way that is acceptable for the type of plant you’re working with.
If the peat moss or vermiculite you’re using to store your dahlia roots gets too dry, wet it with a spray bottle of water.
Once a month, bathe the roots of geraniums in water for an hour or so, then dry them and hang them back up to keep them fresh and ready to plant. Make sure to remove any unhealthy or rotting parts of the plant’s foliage or roots.
Inspect and discard any soft or mushy tubers from tuberous begonias on a regular basis. Don’t keep begonia roots wet, as they are extremely vulnerable to rot.
Resurrect the Roots
Plant the roots in a potting mix-filled container six weeks before the last date of frost. First two nodes of the stem of geraniums should be buried; these will grow into new roots. At the typical planting depth, tuberous begonia and dahlia roots should be put
Give the newly planted plants lots of water and place them in a bright window to encourage new development. An abundance of green growth means that feeding can begin at any time.
Transplant Outdoors
Overwintering plants can be moved into the garden or into outdoor pots when spring circumstances are ideal for the plant variety. In order to properly “harden off” these fragile perennials before transplanting them permanently outside, you should gradually increase the length of time spent outside each time until they are comfortable in their new surroundings.
For most plants, nighttime temperatures of at least 50 degrees Fahrenheit are ideal, however this varies depending on the species.
Conclusion
Annuals add color and life to the garden, but they must often be said farewell once winter arrives. Using a greenhouse, you may learn to overwinter annuals and keep them alive throughout winter. Overwintering annuals is a two-step process: preparation and upkeep until the plants can be transplanted.
With a greenhouse, you have the option to overwinter whole plants or cuttings, and you should be able to do it with ease. It’s important to keep in mind, though, that not all annuals will survive the winter. In addition, you should prepare your plants for the inside circumstances by acclimating them and avoid using annuals that are sick or damaged.
Nguồn: https://iatsabbioneta.org
Danh mục: Garden


