After all that hard work, your interior decorator shows you how to place blankets on the wall for deco, a century-old art form in the art of decorating. Framed photographs and artwork are typically used to create a traditional wall hanging. Aside from hats and plants, many other inventive homeowners have opted to hang a variety of other items from their ceilings. As a result of their size, throw blankets are the most typically used blankets in this endeavor.
- How To Install Portable Air Conditioner In Sliding Window? Tips and Safety Considerations
- How To Cover A Window Without Curtains? Ultimate Guide
- How To Build A Smoker Out Of A Fridge? Step-by-Step Tutorial
- How To Arm Knit A Blanket With Thin Yarn? A Must Read
- How To Tighten The Swivel Bolt-On Underside Of Seat?
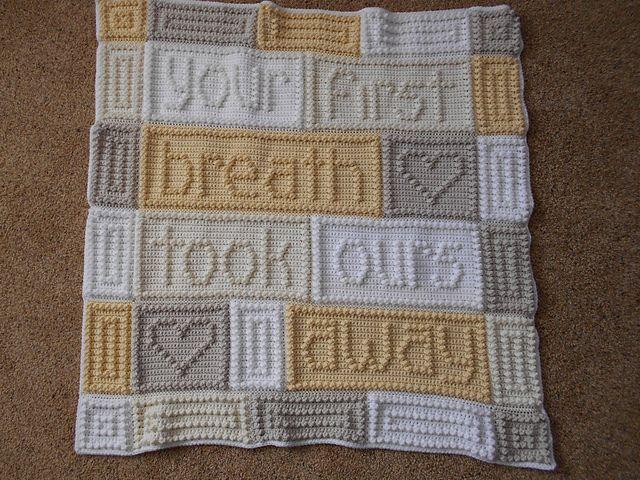
Even though they’re not tapestries, these throws are so stunning that you could say they were intended for show rather than to be put away during the summer. This isn’t to be confused with tapestries, of course.
Bạn đang xem: How To Hang Blanket On Wall? Complete Step-by-Step Guide
Inspiring ideas may have come from Pinterest or your friend’s home improvement. With that in mind, we’ve compiled a list of ways you, too, may incorporate a blanket into your home’s decor. Both permanent and temporary methods will be discussed.
Self–adhesive Velcro Tape
You may avoid drilling holes in your walls or blankets by using adhesive tape. Some options for wall art include Velcro strips and other adhesive strips. Because there will be no nails or screws visible, your tapestry will appear cleaner and more seamless when it is hung.
Materials
- 3 to 4 strips of velcro
- A swaddling blanket
Here are the next few steps:
- Step 1: Decide where you want to hang the fabric and the blanket on the wall.
- Using the adhesive strip, adhere the blanket to the wall..
- Step 3: Let them rest for a few minutes before hanging them.
- Step 4: Remove the other end of the adhesive strip you just prepared and stick it to the wall. Start at the corners and work your way around the blanket’s perimeter.
Clothespins

Using clothespins and command hooks to hang a blanket on the wall gives it a more contemporary appeal. A rug-like or thick tapestry may require a heavier-duty hanging option than a simple adhesive. Lightweight tapestries work well with hanging adhesives.
Material
- Hooks with 3 to 4 Commands
- three or four tin-tacks
- A swaddling blanket
Here are the next few steps:
- Step 1: Mark the wall with a pen where you intend to hang your blanket.
- Clothespins can be either standard-sized or smaller, depending on the weight of the fabric.
- Clothespins are used to secure one side of the liner to the strip.
- A few seconds later, check to see if the clothespins are securely fastened to the wall.
- For this step, use clothespins or clips that can withstand the blanket’s weight and are strong enough to hold it in place.
To give your clothespins a personal touch, you can paint or decorate them however you desire. Clips are another option. Hanging a blanket on the wall this way allows you to express your personal style through the blanket and the clothespins.
Curtain Rod
Xem thêm : How To Decorate Around A Window Air Conditioner? A Few Tips to Remember
For blankets that have a dedicated rod hole, this method is ideal. There is no risk of injury and it is easy to shift if necessary. It is also possible to hang large blankets or drapes on the wall without drilling any holes thanks to this piece of equipment. It is also typical to use a tension rod to hang a blanket as a window curtain. You may not be able to hang your blankets where you wish because a tension rod requires two surfaces facing each other.
Materials
- Tension strut
- Screwdriver
- Screws
- clothes pegs
- Curtain ties
- A swaddling blanket
Here are the next few steps:
- A curtain rod can be easily installed by following the manufacturer’s directions for measuring, marking the wall, and adding screws and hangers if your blanket has a rod pocket. It is now time to put your blanket on top.
- The rod pocket can either be made manually or with a sewing machine, depending on your quilt’s design. There is nothing more complicated than folding the blanket’s top edge and stitching it together from the back. If at all feasible, add some curtain tabs so that you may hang a large blanket from the rod.
- If you have a large or rectangular piece, you may hang it over the rod to create a headboard for your bed or an eye-catching display for your couch. For increased protection, you may even add some curtain taps.
Wood with Hooks
A two-inch-wide by a bit more than your blanket’s width wood frame is required. Using a hammer, pound nails into the wood to make holes for the hooks to be drilled. To calculate how many hooks you’ll need, consider the blanket’s size and weight. With a thicker blanket, there are more hooks. Put the wood up against the wall. Use a ruler and a pencil to draw a line to make sure it’s straight. Drill holes on the wall and attach the hooks to the blanket’s sleeves.
Clip-on Creations
![]()
Curtain ring clips allow you to hang a blanket without the need for sewing, and the blanket remains intact, allowing for easy washing and reusing. Every 1 to 2 feet, depending on the weight of the blanket and the strength of the clips, attach curtain ring clips to the blanket’s top edge. For maximum results, use clips made for heavy drapes instead of cafe curtains. A curtain rod can be fitted with the rings. At the correct height, use curtain rod holders attached to wall studs to hang the rod.
Nails
You may create art in your home in the most straightforward and accessible way by nailing a blanket in place. Choose the right fastener and secure it properly if you want them to stay where they are. You can hang tapestries using a nail or extensible plastic screw. However, a heavy blanket should be supported by supplementary equipment that either attaches to the wall studs or firmly adheres to the surface from the rear.
Materials
- In the form of a hammer
- A total of six nails were used.
- Six anchors in the form of plastic
- A swaddling blanket
Here are the next few steps:
- Purchase wall anchors intended to suit the nails you have, and read the label to discover what size screwdriver is needed for the hole.
- Step 2: Mark the wall where you want to hang your blanket with little pencil marks.
- 3. Drill holes in the wall large enough to accommodate the plastic anchor.
- In this step, tap the anchor in with a hammer.
- Nails should be tightened into the anchor after they’ve been inserted into the quilt. In order for the anchor to get a grip on the hole’s sidewalls, it will expand as the screw gets tighter.
- Step 6: If your blanket is particularly heavy, you may want to attach it with an additional screw in the center.
Time for Tab-Tops
![]()
Create a tab-top treatment similar to some curtain panels by attaching the tabs to the blanket somewhat lower than the top of the blanket, unless you wish them to be visible. Each tab should be at least 6 inches long and at least 2 inches wide, so that it can be folded over to make a tab pocket when it’s finished. For the optimum stability, sew tabs into the blanket’s back about every two feet. To get the best results, use a heavy-duty blanket that can withstand the weight. Create an eye-catching window treatment by threading a dowel through the tabs of each panel and fastening it in place with rod holders attached to the wall. For heavier blankets, the use of a sleeve stitched all the way around the back top edge of the blanket provides additional support.
Invisible Wooden Piece
Consider this alternative if you don’t want the wood you’re using to hang to be visible. A little piece of wood that is about 2 inches broad should be attached to both sides with eyelet screws. Because this wood will be tucked into a hanging sleeve at the back of the blanket, its length will be governed by the blanket’s dimensions. Unless you’re willing to do it yourself, you’ll have to contact the retailer where you purchased this sleeve if they can do it for you. Finally, hang it up on the nails that have been pre-drilled into the wall. Since the materials used to hang the art are hidden, this approach is ideal for creating the atmosphere of an art gallery in your home.
Command Strips
If you reside in a dorm or a rental property where nails or paper clips are not permitted, you may want to try this method. To hang a blanket on the wall without destroying your paint, use command strips. The weight of your blanket should dictate the size of the command strips. Heavy and big weaves cannot be supported by a thin strip.
Materials
- Command strips of 3 to 4
- Strips of Velcro
- A swaddling blanket
Here are the next few steps:
- Step 1: Decide where to hang the blanket.
- Make a mark on the wall where the two upper corners of the blanket will be.
- Place the fabric face down on a clean, flat surface.
- Take out the command strips from their packaging and place them on the counter, out of the way. Bringing two velcro strips together and pressing them together.
- Removing one-liners from your command strips is step five.
- Step 6: Begin by attaching the strips to the blanket’s top edge, beginning at the top corner.
- It’s time to hang the quilt on the wall. To apply pressure to the command strips and blanket, exert as much force on them as possible.
Canopy beds are trendy right now because of its opulent design and ability to make a space cozy and private while doing so. Hang your fabrics from the ceiling to make a beautiful canopy bed or a nice sitting area. These mattresses have fabric wrapped over the tops and sides from head to toe. Hanging a blanket on a ceiling is a simple matter of following the same instructions as if you were putting it on a wall.
Canvas Stretcher
You can use a stretcher to hang your blanket in a resemblance to how art is framed. You can attach the fabric to this stretcher, stretch it out evenly, and confirm that there are no bends before stapling it to the board.. However, if your blanket includes an extra two inches on the sides that you will use to secure onto the board, this is possible. To avoid harming the blanket, you may not want to use this method.
Frame It

If you’re up for decorating outside the box, you can do this even if you don’t like the idea of hanging a blanket in the first place. This is a better option for light and compact blankets. ” Especially if it’s a family heirloom, you’re probably reluctant to hang a blanket that’s been passed down through the centuries. Framing the blanket is the perfect solution to this problem since it provides both a stunning aesthetic and a sense of security.
Material
- A chunk of wood made of plywood
- Ironing clothes
- Staple gun for clothing
- Hooks
- A swaddling blanket
Here are the next few steps:
- Place the quilt face down on a dry, level surface. Use the appropriate fabrics setting on your iron to press the blanket.
- 2: Cover the wooden board with cloth and fasten it in place. Make sure that its width is more than the canvas stretchers because it needs to wrap over the wooden frame.
- Staple the blanket in place by stretching and folding its inside edge over the frame.
- To hang the photographs, you’ll need picture hooks, clips, or holders to do so after the blanket has been framed.
- Canvas can be stretched over 2 or 3 inches thick, so long as you have a sturdy cloth. To prevent the wood from showing through, you may wish to pin another piece of cloth to the frame before sewing your fabric onto it.
Where Can You Hang Your Blanket?
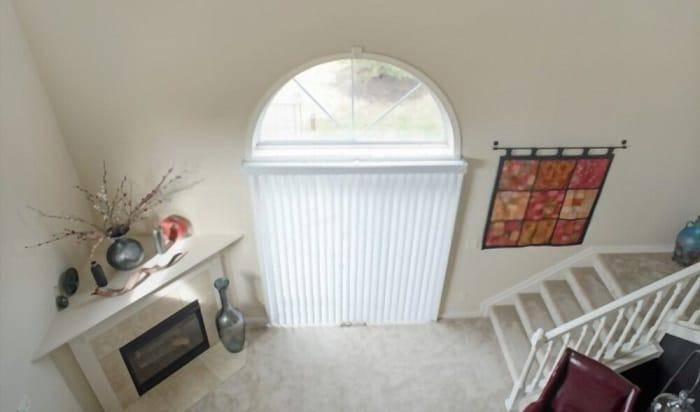
Entryway
To begin with, the doorway is the best spot to hang a show-stopping blanket you picked up on vacation or at a local antique shop. Make it the first thing your guests notice when they walk in the door. Place it near your stairwell or the area where you keep your outerwear and keys. Choose a spot near the front door where you know visitors will see it.
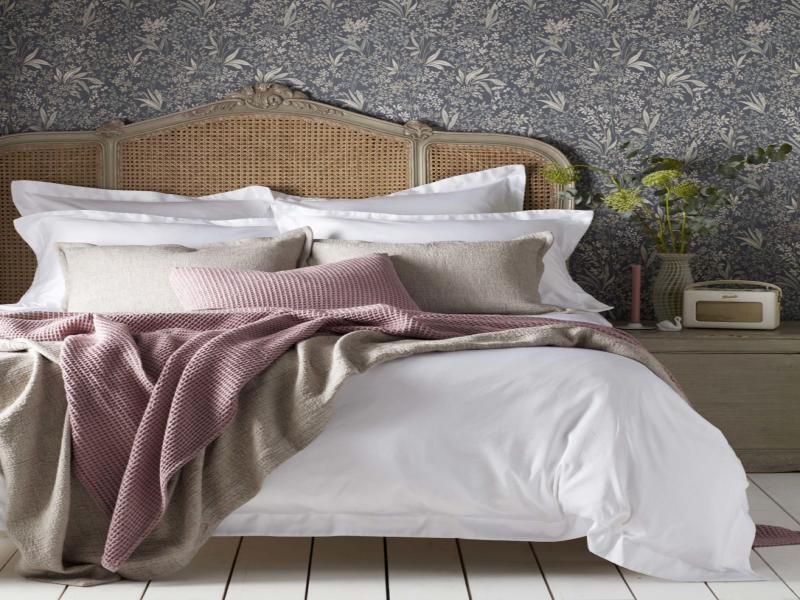
Bedroom
If you see a blanket hanging on a wall, chances are it’s in a bedroom. In addition to making up for the lack of a headboard, a multicolored and multi-patterned blanket placed over your bed will brighten up your home. If your bedroom is decorated in spotless white paint and furniture, this simple touch to the decor will undoubtedly set the tone. Adding a splash of color and pattern to the space will make it more lively.
Living Room
If you want to make a statement in your living room, hang your magnificent blanket above a couch that is against the wall, even if it isn’t the most obvious choice. Because it incorporates minimalist intricate bohemian design choices into your entire home decor, it will catch people’s attention.
Precautions
Keep your blankets out of direct sunshine and on a clean surface while hanging them up. Direct sunlight will fade and destroy your blankets. Because nails and clips are used in these sessions, you need also be aware of the equipment you’re using to attach the blankets to the wall. For example, if you’re putting pins or nails straight into your blanket to secure it to the wall, then that blanket will be damaged over time. To ensure that the blanket is level, have a friend or family member in the room to help. The last thing you want after putting in the time and effort to make your own blanket is for it to come out looking wonky.
If you’re looking for a solution that won’t damage your blanket but is also within your DIY capabilities, this list of possibilities should help. If you’re not confident in your ability to hang it, you may always hire a carpenter or other construction expert to do it for you.
Nguồn: https://iatsabbioneta.org
Danh mục: Home