Colorful rose-like hellebore blossoms provide a pop of color to any yard, and they’re a great choice for containers or hanging baskets. If you plant the seeds of these flowers, the new hellebore plants will give even more color variants. There are a few easy things you can do to ensure that hellebore seed production is a successful endeavor. Read on for instructions on how to start a hellebore seedling from scratch.
Hellebore Seed Propagation
It’s not uncommon for hellebores to yield seeds in the springtime. After the blooms have faded, seed pods develop in the late spring or early summer. You may be tempted to wait until fall or perhaps spring to plant hellebore seeds. Hellebore seed propagation can be prevented if planting is delayed.
Bạn đang xem: How To Grow Hellebores From Seed? 7 Tips For Planting Hellebore Seeds
Planting Hellebore Seeds
You must plant seed grown hellebores as soon as possible if you want to ensure their success. As soon as a seed falls to the ground in the wild, it is planted. You may even be able to find an example of this at home. There is a good chance that seed-grown hellebores will proliferate around the “mother” plant. Seeds kept for spring planting in terracotta pots may or may not bear fruit. As Mother Nature would have it, the trick is to begin sowing hellebore seeds in the late spring or early summer. Hellebore seed-growing success may hinge on it.
7 Tips For Planting Hellebore Seeds
From late winter until early spring, Hellebores (Heleborus) are a hardy perennial flowering plant.
Helleborus x orientalis, also known as the Lenten rose, is the parent species of most variations available to the amateur gardener. They are generally referred to as Helleborus x hybridus.
If you haven’t already, you can find articles on seed gathering, propagation, and division right here.
To assist you locate what you’re looking for, we provide links to sellers. Our links may earn us a profit if you make a purchase through them.
Here are seven pointers for successfully planting hellebore seeds that we’ve compiled in one place.
Planting Seeds: Surprises Await
Hybrid seeds don’t produce “genuine” crops. Because they are not clones of their parent plant, this means that they are unique in their own right.
When it comes to color, they produce plants with a wide range of characteristics, from white and cream to yellow and green as well as burgundy and pink.
“Singles,” with a single row of sepals around the nectary, or “doubles,” with multiple rows of petals within the outer sepals, are the most common varieties.
To top it all off, the petals can be ruffled or have eye-catching characteristics like as contrasting speckling, streaking, veining, or an edge often referred to as “picotee.”
As a home gardener, you’ll need to divide or grow your favorite plant in a lab if you want to get an exact replica.
It’s possible to produce hellebores from seed if you’re not concerned about color, but I like to start with purchased seeds and then harvest the seed from my plants to grow my own hellebores in any location I choose.
Here are seven seed-planting recommendations to help you get started!
How to Grow Hellebores from Seed
Hellebores are a low-maintenance, low-cost option to brighten up your late-winter landscape. Here are seven ways to succeed.
1. Label Planting Sites
Hellebore seeds, on the other hand, are usually sown at the end of summer, when other plants have finished blooming and the garden is being cleaned up.
Xem thêm : How To Prune St. John’s Wort? Comprehensive Guide
Make a note of where you’ve sown seeds and refer back to it later. Ink a plastic spoon or popsicle stick with the word “hellebore” and firmly push it into the ground.
It will be clear to you even after the leaves fall and the snow flies that this nursery area should not be disturbed even in the winter.
2. Work the Soil Deeply
Provide at least 18 inches of soil depth for the hellebore root system to thrive.
To get a crumbly texture, break up the dirt using a garden fork. Compost and/or sand can be added to the mixture to make it more loamy and rich in organic matter.
Plants thrive in soil that is both loose and airy, which provides ample room for root development and nutrition absorption. Oversaturation, which can lead to rotting, is less common.
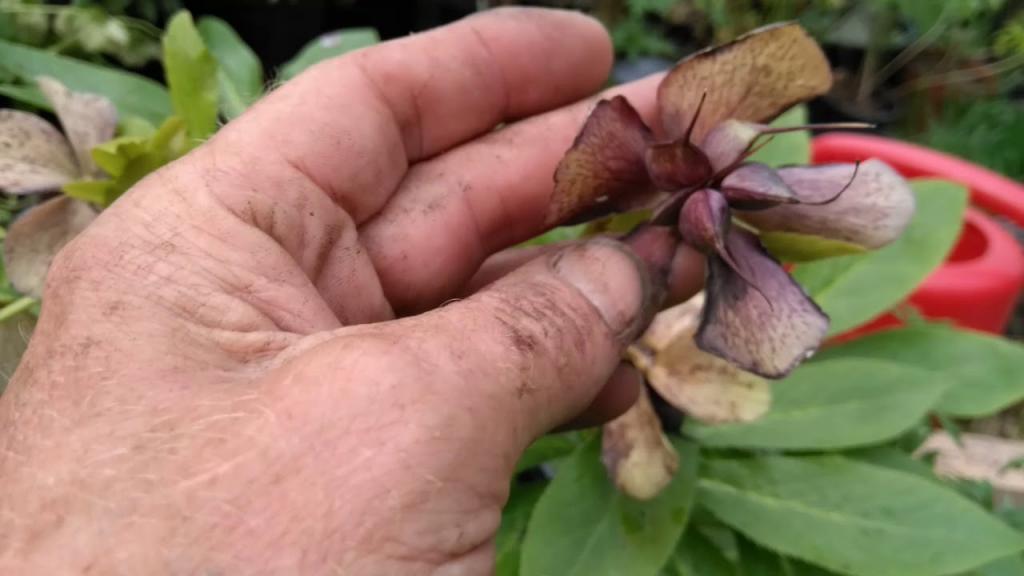
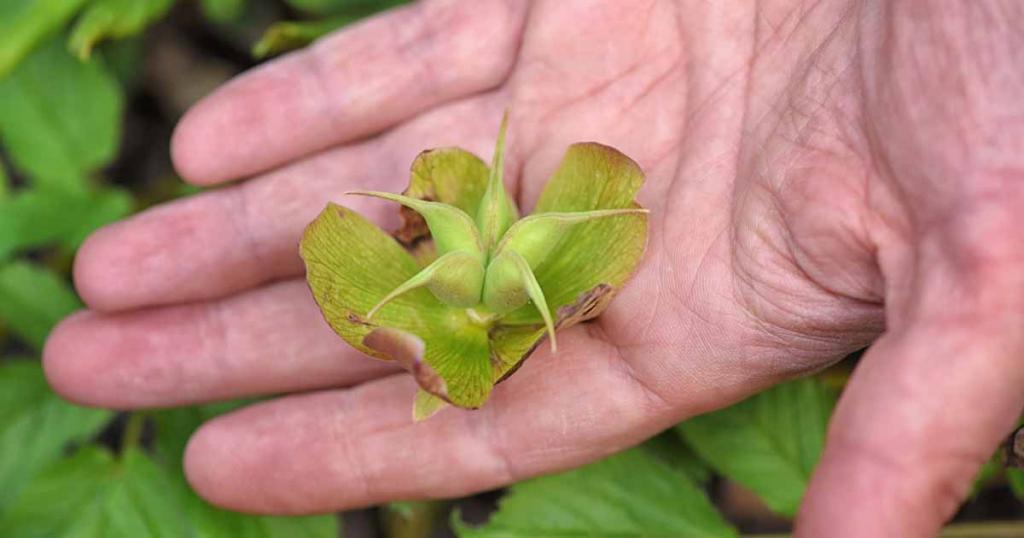
3. Sow Freshly Harvested Seeds
Even though there are some hellebores that do not produce seeds, most of them do and can be harvested in mid- to late summer.
Uncollected seeds mature and fall, resulting in tiny seedlings that effectively spread the plant’s presence in the garden if they are not collected. Sow your own seeds if you don’t want to do it all yourself.
Lenten rose seeds, in contrast to certain other seeds, often do not remain viable for years. Germination can take several years for some types of seeds that are known to be long-lived.
Sow seeds as soon as they’ve been picked for optimal results.
If you don’t yet have your own plants, you can buy seeds from a trusted supplier of the most recent crop. Take a peek at these hellebore cultivars and pick your favorites for a genuine pleasure.
Between early spring and late summer is the ideal time to plant hellebores, both seeds and seedlings.
Prepared garden beds can be directly sown. Late winter germination requires only a few weeks of warm soil followed by a cold chill.
If you can’t get your hands on seeds before then, you can start them indoors or in a greenhouse and then transplant them to the garden in the early spring.
If a seed is more than a year old, it may benefit from moist cold stratification, a technique that mimics the cold, rainy days of winter.
4. Don’t Bury the Seeds
In general, while planting seeds, it’s a good idea to measure their breadth and plant them no deeper than twice this distance.
If seeds are sown too deeply, they may not germinate properly and become more susceptible to rotting in the field.
You can plant in the following three ways:
Seeds need to be sprinkled on top of moist soil and gently pressed down to make sure they are firmly anchored down.
Using a light mist, lightly wet the seeds before scattering them over the soil’s surface.
Xem thêm : How To Grow Herbs In A Mini Greenhouse? Comprehensive Guide
Sprinkle the seeds, cover them with sand or fine gravel, and lightly water them. ”
Additional benefits include reducing fungal development and deterring wildlife from foraging.
5. Manage Moisture Well
Hellebores have a difficult time keeping their moisture balance. Consistency is essential.
A lack of moisture can prevent germination and subsequent seedling growth. It is possible for plants to succumb to damping off (a lethal fungal ailment) if the soil is excessively wet.
Make sure you pick a spot with well-drained loamy soil. If required, add some sand to the mix to prevent the ground from becoming too wet.
Seeds and seedlings should never be allowed to dry out completely.
6. Provide Optimal Airflow
When it comes to planting hellebores, you can’t go wrong with sprinkling a few of these tiny seeds all over the ground.
At the beginning, this is fine. Seedlings, on the other hand, should be thinned once they have three genuine leaves.
For seedlings to grow into mature plants, they need at least 18 inches between them.
Fungal infections that can lead to damping off can be caused by overcrowding, which is another factor.
7. Mulch With a Wide Berth
When the Lenten roses make their annual appearance, mulching them is a good idea. Mulch can help retain even the tiniest amount of moisture.
Apply a one-inch layer of mulch around the fledgling plants, but don’t let it touch them, once the seedlings have developed genuine leaves and been spaced at least 18 inches apart from one another.
The finest mulches, such as coconut coir or shredded leaves, can be used for such a small-scale application.
Mulch is less likely to come into contact with the plant’s tissue, which could cause damage and serve as a breeding ground for fungus if damp.
Spring’s Herald
From late winter to early spring, planting Lenten roses from seed is a low-cost way to add variety to a landscape.
As soon as you get your hands on a packet of seeds, everything will take off from there.
Soil preparation, using new seeds and barely covering the soil, labeling your locations, managing moisture and airflow, and mulching with care are all things to keep in mind.
Hellebores are one of my favorite flowers. Sweet nodding heads and whispers of spring’s return liven up the final days of winter in the Northeast.
Today is the best day to begin! What kind of seeds are you going to plant? Among the snowdrops in the front yard, or in a drift down the roadside
Hellebore sowing instructions
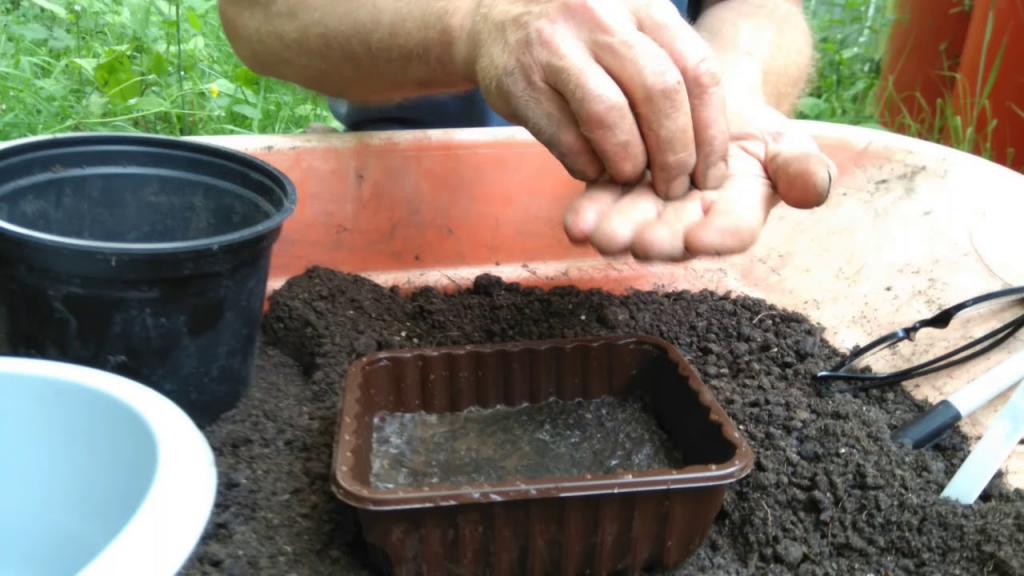
- After harvesting, Hellebore seed should be sown as soon as possible, as it can fall dormant and not germinate for several years. In small seed trays or pots, plant your seeds as soon as they come in a peat or soil-based compost. Do not keep in the refrigerator. Sow as soon as possible, or store them in a cool place if you can’t.
- After spreading the seed on top of the compost, add a layer of grit or perlite to finish the process.
- It’s preferable to leave them out in the open, but you should cover them with wire netting or something similar to keep wildlife from scratching them. A pot or seed tray the same size can also be used to provide protection. Watch out for mice, as they’re really fond of the seed. Attempt to keep them from drying out.
- It can take a long time for Hellebore seed even if sown fresh to sprout. They must be subjected to heat, followed by cold. Temperatures in Brittany often begin to dip around November, however this can vary widely depending on the local climate. Remove the netting or pot as soon as the seeds begin to sprout.
- Prick out into little pots only when there are two completely opened leaves. A chilly greenhouse or cold frame is preferable. There is no need to keep the pots in a frost-free location if you don’t want to.
- The following spring, or earlier if they are big enough, plant them in the garden. Add some organic matter while you’re planting them because they prefer rich, moist soil and will thrive in partial shade.
- Hellebores often bloom for only two or three years after being sown.
Nguồn: https://iatsabbioneta.org
Danh mục: Garden


