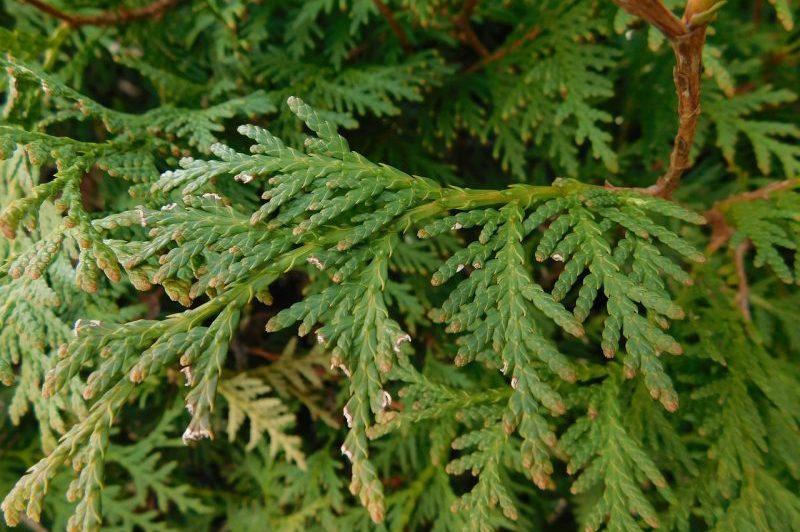
There are five evergreen Thuja species known as arborvitaes that are commonly used in landscaping, and the common word arborvitae refers to these trees. Cuttings of arborvitae are easily propagated. According to the Missouri Botanical Garden, arborvitae can be found in USDA hardiness zones 2–7.
- How To Store Unplanted Tulip Bulbs? Comprehensive Guide
- What Is The Hardiness Zone In Greenhouse Growing? Helpful Information!
- What To Watch For When Growing Cannabis In A Greenhouse? Comprehensive Guide
- How To Grow Celosia From Seed? Complete Guide for Beginners
- How To Get Rid Of Thrips On Roses? Complete Step-by-Step Guide
Growing Arborvitae Trees
There are various common names for this tree: “Northern white cedar,” “American arborvitae,” “Eastern arborvitae,” and “White Cedar.” Because of their rapid growth in the first few years, arborvitae are an excellent choice for new landscape plots.
Bạn đang xem: How To Grow Arborvitae From Cuttings? Comprehensive Guide
Cuttings can be used to propagate arborvitaes. If you’re a novice gardener, the University of Florida recommends that you use semi-hardwood cuttings since they root more easily and have a much higher success rate than hardwood cuttings do. Summer is the best time to prune your trees.
Prepare a nursery pot
Fill a 6-inch nursery container with horticultural sand. Fill a bucket halfway with sand. Mix the sand by hand as you drizzle it with water. To achieve a medium moist texture, continue to add water until it is. Fill the 6-inch nursery container with moistened horticultural sand. It is time to level and smooth the sand. While you collect an arborvitae cutting, place the pot somewhere shady.
Take the cutting
Look for an arborvitae twig that is between six and nine inches long. Find one with soft, green growth on the tip and mature bark at the base. Pruning shears are the best tool for the job. Using a 45-degree saw, make the cut.
Apply rooting hormone
Xem thêm : How To Get Rid Of Tent Caterpillars? Comprehensive Guide
Trim the arborvitae cutting’s bottom half of foliage to expose the stem. Rooting powder containing 0.2 percent IBA (indolebutyric acid) should be applied to the defoliated stem. A little paintbrush or a cotton swab can be used to apply the powder.
Insert the cutting into the pot
Make a small hole in the moistened sand in the nursery pot with a needle or other sharp object. Half the length of the arborvitae cutting should be the depth of the hole. Cut into the hole with the powder-coated end of the cutter. The cutting should be held erect by pressing the sand around the stem.
Protect the new cutting from direct sun and wind
Put the potted arborvitae cutting in a greenhouse or an area that is shielded from the sun and strong winds if you’re going to leave it outside. Provide salt spray protection in coastal locations.
Maintain proper moisture
Spray the potted cuttings with a spray bottle or an automated misting system, according on your preference. Maintain consistent hydration on the foliage and in the top inch of sand by misting every two hours for 60 seconds or manually spraying the foliage.
Check for the cutting’s roots
In six weeks, examine the cutting of arborvitae for roots. Try to lift the cutting by gripping the base of the stem. A sign that the movement has established fresh roots is the presence of opposition.
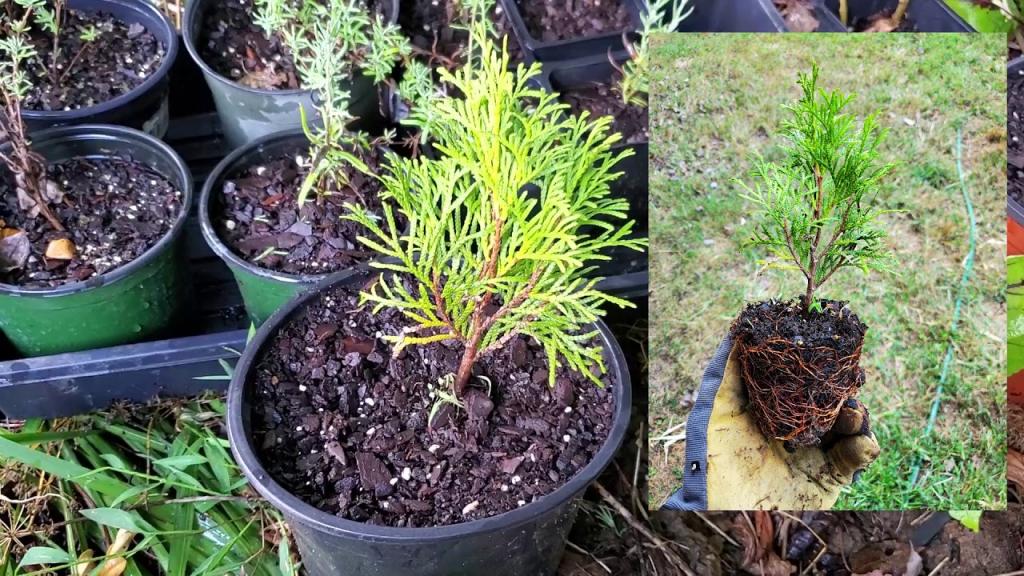
Transplant the rooted cutting
Xem thêm : Northern Nevada Gardening Guide
A 1-gallon nursery container filled with potting soil should be used to transplant the rooted arborvitae cutting after it has rooted for four weeks. As soon as spring comes around again, transplant your seedling into the garden.
How to Root Arborvitae Cuttings
Arborvitae (Thuja spp. or Platycladus spp.) is an evergreen common as a specimen plant, a privacy hedge, or as a border in USDA plant hardiness zones 6 through 11, depending on the species. Purchase a young plant or try your hand at starting your own from seed. Arborvitae cutting propagation, on the other hand, is “sinfully easy,” according to researchers at North Dakota State University. You may save money and time by chopping a few trees in the fall or early winter, so do so. Your arborvitae will sprout roots of its own in about a month or two.
The cutting should be taken from a long, less than one-year-old side stem of a healthy arborvitae. Cut the stem tip to a length of six to ten inches with a pair of hand clippers.
The moist sand can be poured into an about 4- to 6-inch-diameter container. Make a new cut at the base of the stem after removing the needle-like leaves at the bottom of the stem. Place the arborvitae stem’s naked bottom in the sand.
The arborvitae cutting should be surrounded by three or four sticks, pencils, or other similar things. 1 to 2 inches taller than their cuttings are ideal. Spray the cuttings with a spray bottle and cover them with a plastic bag to keep them moist.
A temperature of 60 degrees Fahrenheit or lower is ideal for placing the cutting. Keep the cutting wet by misting it with water once or twice a day. After four weeks, you can start lightly tugging on the cutting. Roots should begin to appear within six weeks of planting.
Nguồn: https://iatsabbioneta.org
Danh mục: Garden


