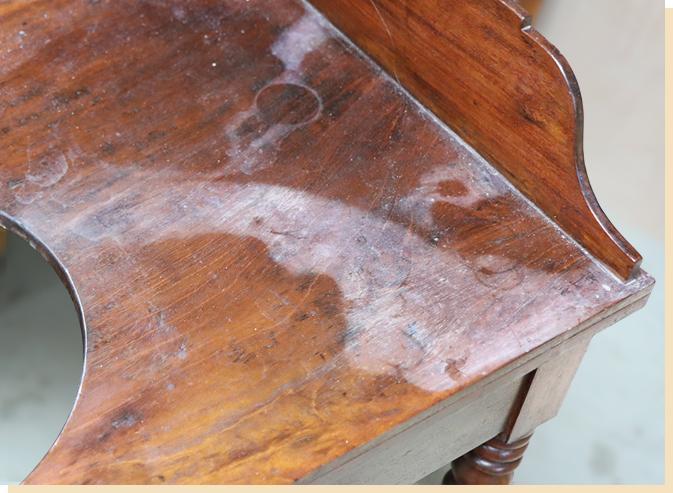
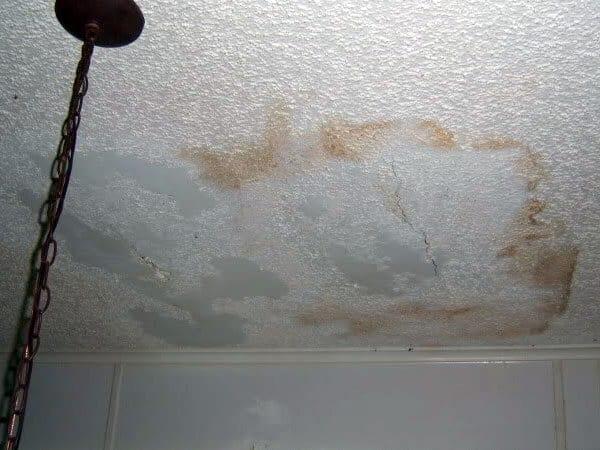
Many people have asked how to repair a mobile home ceiling that has been damaged by water. Replacing them with brand-new units is the most practical answer to the issue.
It is the roof of your house that protects you from the elements. There is no upper limit on the effectiveness of water immunizations, regardless of the materials used or the price tag.
Bạn đang xem: How To Fix Water Damaged Ceiling In Mobile Home? Step-By-Step Process
It’s a pain to deal with leaks and drips while it’s raining outside. Check the ceilings often to ensure the stability of your mobile home. Water everywhere is something no one wants.
Water can cause unsightly damage to your ceilings over time. Roofing woes? This article has you covered with solutions in the form of helpful hints and instructions.
THINGS YOU WILL NEED
- Safety glasses
- Eye protection
- Drill
- Screws
- Sharp blade
- mesh seam tape with an adhesive backing
- Compound joint
- a putty knife
- Paper or a chunk of sandstone for sanding
- Paintable drywall primer
- Paint
- Combination of a roller and a brush
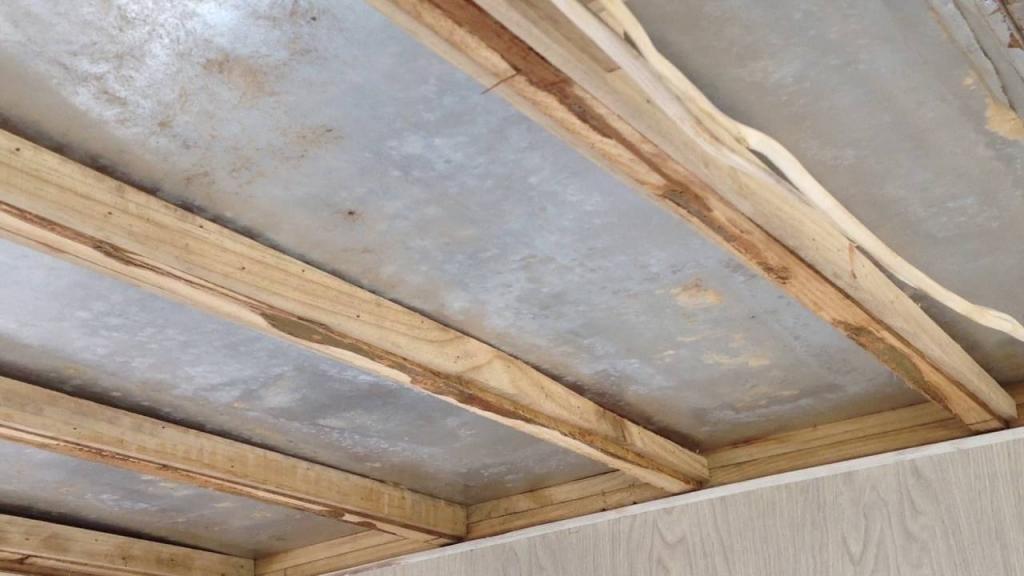
Take down the sagging ceiling or remove the damaged ceiling tiles. If the ceiling is suspended, the damaged tiles can be removed by lifting them a few inches off the metal grid and twisting them. If you have a ceiling made of drywall or wood panels, you can easily remove the offending panel by unscrewing it.

Take down the ceiling and replace it. When mounting drywall on a ceiling, a thinner thickness, such as 1/2 inch, is preferable due to the reduced load. You can support the weight of the sheetrock by screwing it to the joists every 16 inches. If you have a suspended ceiling, you may change the tiles by sliding them through the metal grid and setting them in position. Wooden panels can be easily replaced by attaching screws every 16 inches to the joists.
Use self-adhesive mesh seam tape and a razor knife to apply the tape to the sheetrock joints. Using a putty knife, apply mesh seam tape to the drywall joints, and then cover them with joint compound. After the compound has dried completely, sand the surface lightly. Second, spread the joint compound out a little broader than the first. After the compound has dried completely, a light sanding may be performed. A third, slightly wider than the second, coat of compound should be applied. After the compound has dried completely, sand the surface lightly.
Put on a coat of drywall primer and wait for it to dry.
If you need to add texture to your ceiling so that it looks consistent throughout, you may either spray it on the sheetrock or include it into the paint. When the texture is totally dried, you can paint the drywall.
TIP
Sagging ceilings can be fixed by soaking the tile with a spray bottle full of water and then pulling the ceiling board back into place. Until the ceiling tile is totally dry, prop it up with a board that you’ve bolted into the ceiling. Once the ceiling boards or tiles have been taken down, you may look for glaring signs of water damage that may necessitate further work. Check the roof for any signs of leaking. Fixing the leaks is necessary before installing a new ceiling. Fixing the roof could be as simple as patching a crack or as involved as replacing the shingles.
WARNING
Xem thêm : How To Clean Water Damaged Carpet?
Protect your eyes from potential harm by using safety glasses before beginning work on a ceiling. Repairing a leaky ceiling means replacing the insulation above it.
The Drip Cap
- Sheetrock, panels, and suspended ceiling tiles are all common materials for mobile home ceilings.
- If the ceiling is suspended, the damaged tiles can be removed by lifting them a few inches off the metal grid and twisting them.
- Wooden panels can be easily replaced by attaching screws every 16 inches to the joists.
- After the compound has dried completely, sand the surface lightly.
- Second, spread the joint compound out a little broader than the first.
Steps To Repair A Ceiling Of A Mobile Home
When a ceiling needs fixing, it can be difficult to get “up there.” In the first place, you should determine how badly or mildly your ceilings are damaged. In many cases, it is possible to make repairs instead of buying brand new ones.
However, you may want to replace your ceilings just to be sure. You probably don’t want to keep fixing them every week when you know you can just replace them.
Don’t fret; you’re more than capable of handling the finishing touches on your own. It is still your option to consult a professional, but doing so is entirely voluntary.
Step #1. Remove the damaged ceiling
For this stage, you’ll need to know exactly what kind of mobile home ceiling you have. Take off the top and throw away the shattered piece.
If the walls are made of wood or drywall, you can unscrew them. It may be necessary to lift and rotate the damaged ceiling if it is hanging or drooping. They are released from the metal grid as a result of this motion.
Step #2. Replace ceiling
Your leaky ceiling needs to be fixed immediately. Tiles for suspended ceilings are installed by pushing them onto a metal grid.
Screws are required for the installation and stability of wood or drywall panels. You can use half-inch sheetrock because it’s lighter and easier to handle when installing it on the ceiling.
Step #3. Secure with tape and compound
It’s time to secure your new ceiling now that you’ve installed it. New roofing or wallboard has vulnerable seams that must be reinforced.
Cover them with joint compound once you’ve taped them with self-adhesive tape. In order to spread the joint compound evenly, a putty knife is suggested. Wait for it to dry, then apply another coat.
About three times, you should apply the compound, wait for it to dry, and then sand it. Remember to lightly sand the area to make sure no additional damage will occur. After the joint compound has dry, prime the area.
Step #4. Apply finishing touches
Xem thêm : How To Fix Water Damaged Hardwood Floors? Step-By-Step Guide
The ceiling has been repaired, so now it’s time to put the finishing touches on the room. The ceiling is finished once texturing is applied. The ceiling is not only finished and ready for usage but also looks great.
Following the aforementioned procedures, we advise that you enroll in a suitable insurance plan. A constructed or mobile home does not often require insurance. If your neighborhood or lender doesn’t demand one, then you probably don’t need one.
When it comes to physical damage, mobile homes are covered by insurance in the event of an accident. This implies that if rain causes damage to your roof or ceiling, your claim will be paid. You can apply for additional types of insurance in addition to liability protection.
Consult a legal professional about your specific insurance needs. Until then, there are many of internet tools to learn more about insurance.
How Much It Costs In Replacing A Water Damaged Ceiling
When will you get around to fixing your sagging ceiling? Have no fear; we’ve got this! If you hire a pro, you can rest assured that you will receive excellent assistance.
If you plan on having someone put in a ceiling for you, you should set out $150-$900. Of course, if you shop at a hardware store in your area, you can save money on the materials you need. However, in some cases, only trained experts should be trusted with the job.
What Material Should You Replace A Mobile Home Ceiling?
After having rain fall inside your home due to a broken ceiling, you’ll want to get a better one, right? It’s only natural to look for alternatives when bad things start happening.
Thankfully, there is a wide selection of choices for mobile home roofs. There is a wide selection of materials to choose from, each with its own advantages and disadvantages. You can use the scales to check off some of the items on your shopping list.
It is important to know how a material will be installed before making a purchase. Think it over, and may the finest of both worlds come your way!
Conclusion
Fortunately, learning how to repair a mobile home’s ceiling after water damage has occurred is not difficult. However, you should be concerned about things like labor and your personal preference for the inside.
Check the tops of your mobile homes to see if it works! If they aren’t holding up, make sure to replace them when the time comes.
Nguồn: https://iatsabbioneta.org
Danh mục: Damaged