It’s finally here! Slipcover & Upholstery Series: Final Submission is here! You can make your own recliner slipcovers with this tutorial.
Those of you who’ve been following this series know that I’ve been upgrading the slipcovers on my living room armchairs with a thorough examination of slipcovers and upholstery.
Bạn đang xem: Diy Recliner Cover
Please see the summary below in case you’re a first-time visitor.
With slipcovers, you can easily update your living room furniture, your bedroom, or even your headboard. They are quick and easy to make, and they will completely change the look of your home. They’re ideal if you’re looking to redecorate on a tight budget. That old couch and chair can be given a new lease of life for less money than it would cost to buy new ones. Because these DIY slipcovers are less expensive than the ones you can buy in stores, they’re also a lot easier to install on your furniture. You can see from these 25 paint-based furniture makeovers that I adore refinishing my own furniture.
Then let’s have a look at some quick and easy slipcovers you may sew to hide that dingy piece of furniture. In addition to the rustic farmhouse appearance, a ruffled sofa cover is also available. Check out these 55 DIY farmhouse furniture décor ideas for your home’s desired rustic appeal if you haven’t already. These easy DIY slipcovers will be a hit with you, I simply know it. Your home will look brand new for pennies on the dollar thanks to these easy and quick DIY projects!
POSTS IN THE SLIPCOVER & UPHOLSTERY SERIES:
- It’s a skill that can be utilized for everything from slipcovers to cushions and more!
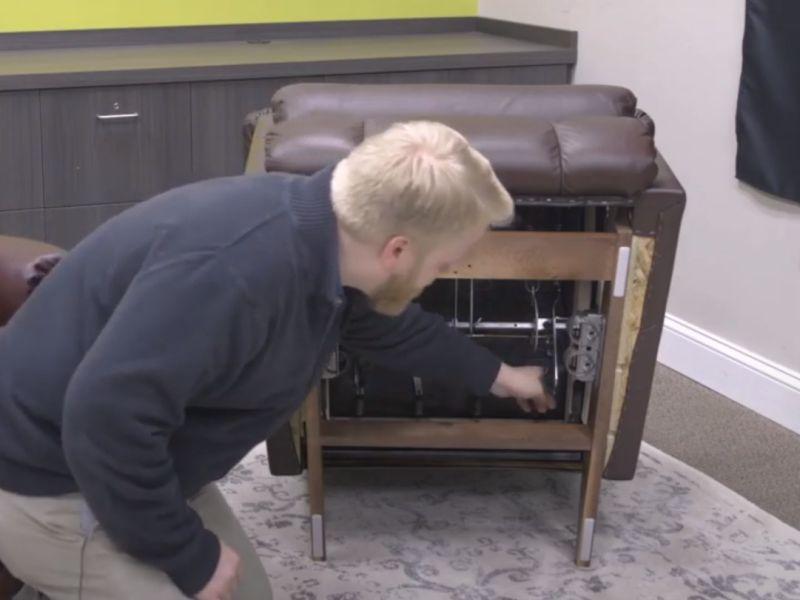
- The Best Way to Replace Recliner Foam | Getting the most out of any piece of furniture you possess might be as simple as knowing how to repair a single broken or worn part.
- 201: Upholstery of Recliner Foot Rests This is a terrific place to start when it comes to reupholstering everything from benches to dining room chairs.
- A DIY slipcover isn’t much more work once you’ve learned how to manufacture your own piping! However, the end product is more refined and well-structured. Worth every penny! Whether you’re building a couch or a sectional, this tutorial will get you started.
I’m eager to wrap up this series with the final piece of the jigsaw now that you’ve had a chance to get up to speed.
It’s the back and seat of my chairs in this situation!
*This post contains affiliate links to things I’ve tried and really like.
SUPPLIES FOR YOUR DIY RECLINER SLIPCOVER
- a linen-like cloth What you need to recover determines how much yardage you need! “Papyrus” is the color of my heart.
- Snipers for sewing
- Ball-headed straight pins
- Machines for sewing
- Iron
- Board for ironing
- Tape for Measuring the Fabric
How to Prevent Stains on Recliner Covers
Recliner covers should be cleaned after each use to prevent stains from building up.
A stain that sits for too long can become nearly hard to remove, so it’s critical to check your chair before you sit down, not just as often as possible but also as habitually as feasible.
Dish soap or laundry detergent can be used to remove the majority of a stain, and the area should then be soaked in water for at least thirty minutes.
Adding white vinegar to the cleaning solution might help break down any protein-based contaminants that are still present.
How to Care for Recliner Cover
As a first step, wash the cover in cold water and a light detergent every two weeks.
Make sure you drain any excess water from your recliner cover before hanging it out or using an outdoor clothesline, but don’t stress about it too much.
Step three: When not in use, store your recliner cover.
Notes: If you see that the foam is exposed, simply rotate the fabric to a different side and use it normally until it’s time for another wash. If you don’t have time to sew a new recliner cover, you can always buy one.
As a first step, wash the cover in cold water and a light detergent every two weeks. Make sure you drain any excess water from your recliner cover before hanging it out or using an outdoor clothesline, but don’t stress about it too much.

AND HERE’S THE TUTORIAL:
Step One |Make the chair wing patterns and sew them together.
In the DIY Slipcovers with Piping Post, we covered the arm chair portion of the same chair using the exact same procedure.
Because your piping (if you want to use it) goes down the middle of the wing, you will need to use two separate pieces of material for this step, as opposed to one for the arm chair.
Begin at one end of your cloth and cut it down until it’s the right size for both your inner and outer wings, but not so large that it’s obstructing your movement or causing you any issues.
Xem thêm : How Do Hotels Prevent Bed Bugs? A Few Tips to Remember
Finally, pin the edges of the fabric together to serve as a guide when you’re ready to sew.
Pin and sew piping between the inner and outer wing parts if you’re using it.
Pin the material snugly, but not too tightly, following the chair’s natural curves.
Assuming you’re not already familiar with how to put together arm slipcovers, I’d recommend watching the video of me doing so.
For those of you who haven’t read my previous piping piece, piping is a terrific way to add structure to your sewn goods.
To save time, you could definitely get away with using just one piece of piping and wrapping it around the interior and outside of the wing. Adding some darts to the rounded edge will help keep the material from bunching up. |
Trim away any excess material, leaving a seam allowance of 1/2-1′′ after all of your components have been placed in place.
On both the inside and outside of the wing parts, leave a seam allowance. Both the inside and outer sections will be sewed to the back closing flaps of the chair seat back component.
Pattern and stitch the seat and cushion components in the second step.
A long rectangular piece that covers the top of the chair (plus seam allowance) down to where you’ll need to hem (plus seam allowance) should be cut from your material.
There is a “pouch” between the seat and back of my chairs that I have found works best to assist hold everything in place, at least for my chairs.
Depending on your chair, you may be able to separate these two parts, but it’s up to you!
Make sure that the seam allowances on the back and top of the wings match up when you pin this piece right side out to your wing pieces. When we’re ready to attach the back panels, this joint will come into play.
The structure that “huggs” the seat cushion and can be tucked in between the arm and cushion can be made by cutting two smaller rectangle pieces and attaching them to the large rectangle piece for the seat.
These two rectangles should be pinned and sewn to the end of your long back and seat piece, matching up the ends with the end of the fabric that will be hemmed at the seat’s front.
Make sure to pin the two front corners of the chair so that you’re sewing a straight stitch down the two front corners of the chair.
An unattached “pouch” section in the middle of a long rectangular piece, with two wings sewed together on either side of the top, and two smaller rectangles sewn together to form a seat, will be the final product.
So that you don’t have any concerns with fraying or raw edges once it’s tucked away, I’d gently turn and sew the “pouch “‘s” sides together.
As a side note, this would be an excellent time to finish the front of your chair.
Rather than making my own, I simply used a 3′′ measurement and hemmed it such that it would fit snugly below the beginning of my foot rest parts.
Step 3: Cut out your back panel pieces and stitch them together.
A simple two-rectangle rear panel is the simplest part of the puzzle. I’d go with a 1-2″ overlap.
Make careful to include your seam/hem allowances and overlap measurements when calculating the distance from the chair’s two sides to the center.
Xem thêm : How To Get Bed Bugs Out Of The Carpet? Comprehensive Guide
Include your seam or hem allowance when taking this measurement from top to bottom.
Make your rectangle panels by hemming the “open” sides that meet in the middle and the bottom edges of each panel.
Your chair back piece’s wings and the two hemmed sides should be sewed together at this point, overlapping each other by the desired amount.
Finish by sewing down both sides of each unfinished wing piece with pins.
This is the time to flip your piece over and see if it looks good on your chair!
For the rear closure of my two overlapped pieces, I used heavy-duty snaps and then added buttons for interest.
There is nothing else to do but decorate and enjoy your chairs! I discovered these gorgeous Velvet pom pom pillows and believe they look great on mine.
CARE & KEEPING OF SLIPCOVERS
As we near the end of this series, as promised, I’ll provide some advice on how to properly care for your slipcovers!
Oxiclean and Mrs. Meyers Laundry Soap are what I use to clean mine once a month.
It isn’t uncommon for me, if I have guests or need to stretch the time between washes, to cover any less than ideal places with an additional pillow or throw blanket. Another time, adolescents and pets! )
When it comes to slipcovers, my best laundry advice is to put them back on your furniture while they’re still damp.
When they’re dried in their natural shape, with the support of the furniture beneath them, they’re more likely to dry without creases and form to the object much more neatly!
I hope you’ve enjoyed and learned from this series. If you have any additional questions about upholstery, please post them in the comments section.
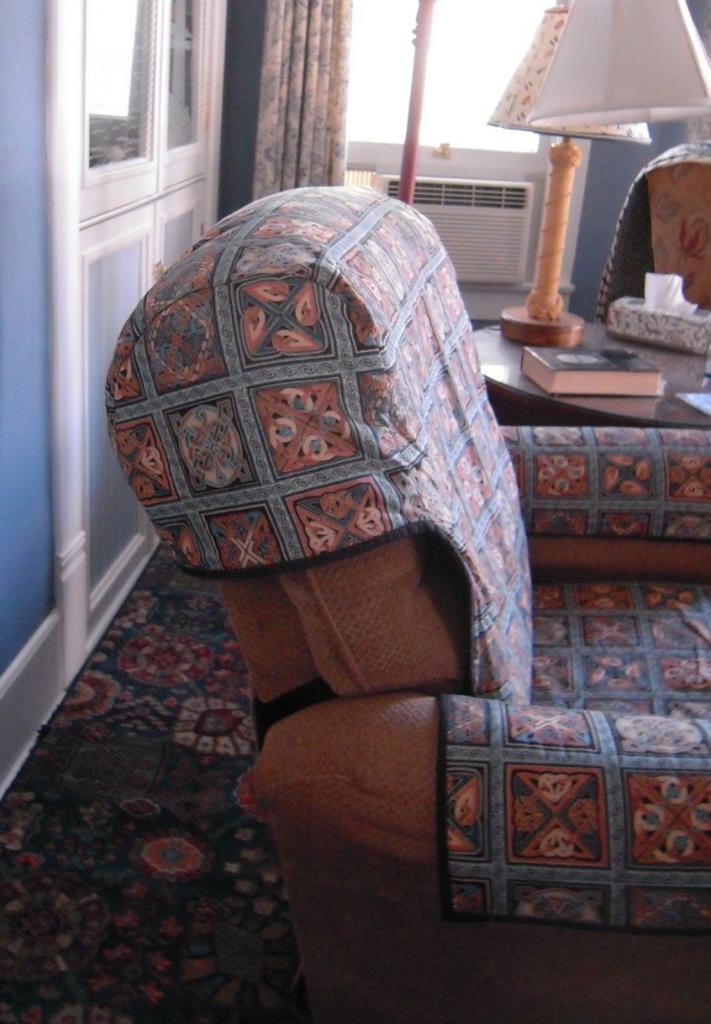
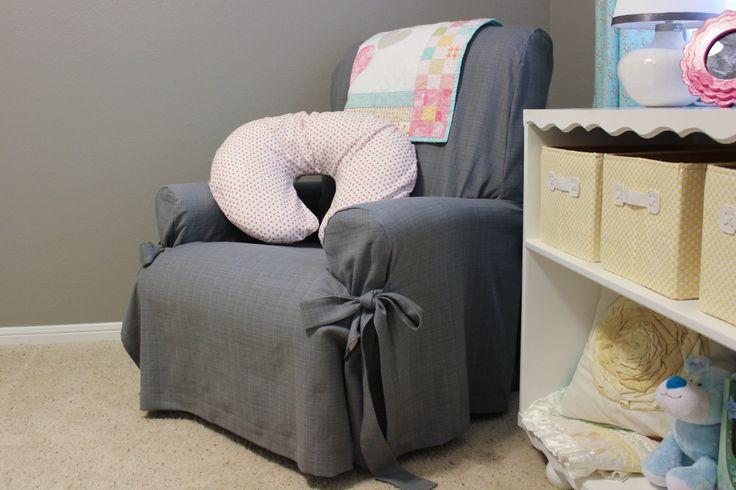
Easy to Make Tie-On Slipcovers for a Recliner
A tie-on slipcover is a great way to spruce up an old or outdated recliner or to keep a new chair looking new. A cotton-Lycra or cotton-Spandex blend or a jersey-knit king-size flat sheet in a color that matches the chair or complements your decor will work well. You don’t need to know how to sew to use a bed sheet because the hems are already done. Add some color-coordinated ribbon to the chair’s cover so that it is both functional as well as visually appealing.
Start with the floor in front of the footrest and work your way up the chair’s back and seat, laying the sheet out in a long, equal line. Excessive length can be left hanging down towards the back.
Pile up the stray material from the floor around the chair so that it covers the entire seat.
In the crevices at both ends of the seat, tuck the additional material that you lay down on the seat.
To keep the seat cover in place, stuff it into the seat’s side and back crevices with anything rubbery and cylinder-shaped, from cut-to-size pool noodles to magazines or doweling wrapped in rubber bands.
All four corners of the chair should have equal amounts of draped material hanging down the outside of the chair. Accordion-style folds that hang uniformly can be achieved by arranging or stacking the material vertically at each corner. Use a safety pin in each corner to hold the folds in place. In order to secure the gathers, pin them at the front of the chair directly below each arm. As with the front gathers, the back gathers should be pinned at an equal distance from the floor.
It is best to use white or a color that complements the sheet and the room’s decor to thread the needle’s extra-large eye with a two-foot length of 1-inch broad white ribbon. To begin threading the ribbon through the eye, fold the end of the ribbon. Just below one of the corner pins, thread the needle through the stacked folds. Using an awl, a leather hole punch, or a scissors’ tip, cut a small slit in the folds of the fabric to accommodate the ribbon’s thickness.
Take out the needle and the safety pin and discard them. Make a neat bow with the ribbon to bind the folds in the corner. If desired, you can remove any extra ribbon by trimming it.
At each corner, repeat the gathering process. The collected corners aid in the chair’s ability to recline and the footrest’s ability to function freely.
Nguồn: https://iatsabbioneta.org
Danh mục: Blog